
Related Manuals for Outdoor Gourmet FSOGBG4201


Summary of Contents for Outdoor Gourmet FSOGBG4201
-
Page 1: Assembly Instructions
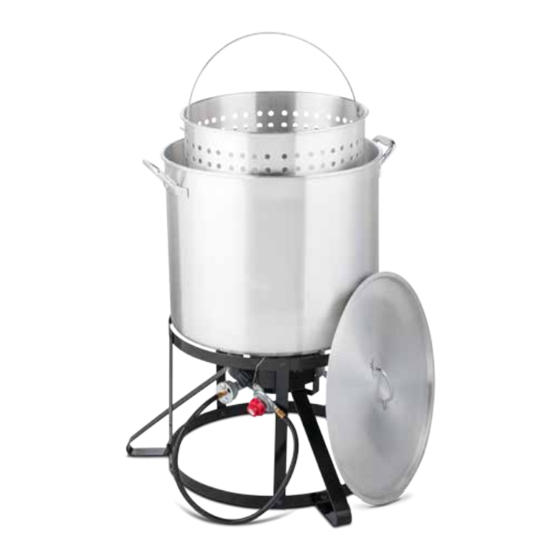
Assembly Instructions 100 Qt. Crawfish Kit FSOGBG4201 Please keep this instruction manual for future reference Customer Service:(888)815-4252, 9:00 am to 4:00 pm, Monday thru Friday Central Standard Time (Made in China) -
Page 2: Table Of Contents
TABLE OF CONTENTS Warnings......................3 Parts List....................10 Hardware....................10 Assembly Instructions................12 Care and Maintenance................15 Warranty Information..................16 Page 2 of 17... -
Page 3: Warnings
WARNINGS THIS APPLIANCE IS NOT FOR FRYING TURKEYS DO NOT USE WITH OIL Safety Symbols: When using this appliance basic safety precautions should always be observed. Read and understand the meaning of these symbols before assembling and using this appliance. DANGER Indicates a hazardous situation, which if not avoided, will result in death or serious injury. - Page 4 CO2 extinguisher or preferably a Class “K” extinguisher. Special care must be taken to understand the manufacturers instructions and be prepared to operate the appropriate extinguisher prior to using this appliance.) Never attempt to extinguish an oil or grease fire with water. If you continue to smell gas, immediately contact the fire department (e.g. 911) and do not go near the appliance. Model No. FSOGBG4201 Serial Number: 131216 Equipped for use on: Propane. Main Max. Input Rating: 90,000 BTU/H Certified under ANSI 21.89 - CSA 1.18 -2013 Outdoor Cooking Specialty Gas Appliance WARNING: For Outdoor Use Only.
- Page 5 WARNINGS • NEVER operate this appliance within 25 feet (7.5 meters) of any flammable liquids. • NEVER overfill cooking container above maximum fill line. Follow the proper instructions to ensure proper cooking liquid fill levels. • Hot cooking liquids can remain dangerously hot long after cooking. NEVER handle the cooking appliance until the cooking liquid has cooled to less than 115˚F (45˚C). • Do not move the appliance when in use. Allow the cooking vessel to cool to 115˚F (45˚C) before moving or storing. • Use insulated oven mitts or gloves to protect from hot surfaces or splatter from cooking liquids. Closed toed shoes should always be worn during operation of this appliance. • Keep children and pets away from the cooking appliance at all times. • The use of alcohol, prescription drugs or non-prescription drugs can impair the consumer’s ability to accurately assemble or safely operate the appliance.
- Page 6 WARNINGS or leaves, vinyl or plastic. • Keep the cooking area adjacent to the gas fryer clear of debris and free of anything flammable or combustible. • Keep fuel supply hose away from hot gas appliance when in operation. • NEVER place an empty cooking vessel on the appliance while in operation. • NEVER use a cooking vessel that does not safely fit within the burner ring and support brackets. Using too large a vessel may result in tipping and can cause severe burns, serious injury or death. • Use caution when placing food in the cooking vessel while application is in operation to prevent splashing or overflow. Use caution when removing food from the appliance to avoid burns or serious injury.
- Page 7 WARNINGS: LP TANK DANGER Indicates a hazardous situation, which if not avoided, will result in death or serious injury. • The safety release valve on the LP tank could activate the leaking of gas and cause a severe fire and increase the risk of serious injury or death. If the steps below are not followed exactly, a fire causing personal injury or death can occur. • NEVER store a spare LP gas cylinder under or near this appliance. • NEVER fill the cylinder over 80 percent full.
- Page 8 WARNINGS: LP TANK given an odor (similar to rotten eggs) so you can smell if there is any leaking. • LP gas is highly flammable and can unexpectedly ignite when combined with the air. Connecting Regulator to LP Tank: 1. Place LP tank on a secure, level and stable surface. 2. Turn control knob to the “OFF” position. 3.
- Page 9 WARNINGS: LP TANK WARNING If growing bubbles begin to appear there is a leak, IMMEDIATELY turn off LP tank valve. If bubbles continue, IMMEDIATELY get away from the LP tank and contact your FIRE DEPARTMENT (e.g. 911) Regulator Hose Assembly Check: WARNING Before each use, check to see if there is evidence of abrasion, wear, cuts or leaks on the hose. If damage is evident, the hose must be replaced prior to appliance use.
-
Page 10: Parts List
PARTS LIST Required Tools: 1. ⅜ in. wrench 2. Phillips screwdriver Part # Description Image Burner Assembly Burner Ring Leg Stabilizer Ring Heat Shield Legs Page 10 of 17... - Page 11 PARTS LIST Part # Description Image Ring Support Brackets Regulator & Hose Airflow Dampener & Screen Spring M6 Locking Nuts (⅜ in. drive) M6 Phillips Head Bolts Page 11 of 17...
-
Page 12: Assembly Instructions
ASSEMBLY INSTRUCTIONS Step: 1 Invert Burner Ring (2) on stable flat surface. Install Burner Assembly (1) as shown. Then attach Heat Shield (4) with single bolt as shown. Step: 2 There are seven holes on Leg Stabilizer (3). Three Legs (5) must be assembled exactly as shown, to Leg Stabilizer (3) using Fig.1 included Nuts (9) and Bolts (10) (Fig.1). - Page 13 ASSEMBLY INSTRUCTIONS Step: 4 Install the four Ring Support Brackets (6) to Burner Ring (2) and Leg Stabilizer Ring (3) as shown. Hint: Line up the bolt holes and insert bolt into the front and tighten the bolt on the back using the phillips head screwdriver and ⅜...
- Page 14 HOW TO USE YOUR NEW CRAWFISH KIT CRAWFISH/CRAB/SHRIMP BOIL • For our 100 quart pot, fill 1/2 full of water. Add approximately five, 16 ounce crab boil ingredient packs (complete, ready-to-use) available from a variety of manufacturers. • Bring water to a rolling boil. Add seafood. • Gently stir. Cover the pot and return to boil. • Boiling times: Shrimp - 2 minutes; Crawfish - 5 minutes; Crabs - 5 minutes. (per pound) • Turn off the burner. • Gently stir the seafood again and let it soak. • Soaking time: Shrimp - 5 to 10 minutes; Crawfish and Crabs - 15 to 30 minutes.
-
Page 15: Care And Maintenance
HOW TO CLEAN YOUR NEW CRAWFISH KIT How to Clean: CAUTION Allow unit to fully cool (115˚F or 46˚C) before performing any cleaning. Proper care and appliance maintenance will keep your product operating smoothly. Clean thoroughly after every use. Note: Clean the entire appliance each year and tighten all hardware on a regular basis (1-2 times a year or more depending on amount of use). 1. -
Page 16: Warranty Information
WARRANTY INFORMATION ONE-YEAR LIMITED WARRANTY Your product is warrantied for one year from date of purchase against all defects in material and workmanship. Should your product prove defective within one year from date of purchase or receipt, return the unit, freight prepaid, along with an explanation of the claim. Please package your product carefully in its original box and packing material to avoid damage in transit. - Page 17 NOTES Page 17 of 17...
Need help?
Do you have a question about the FSOGBG4201 and is the answer not in the manual?
Questions and answers