Table of Contents
Advertisement
Quick Links
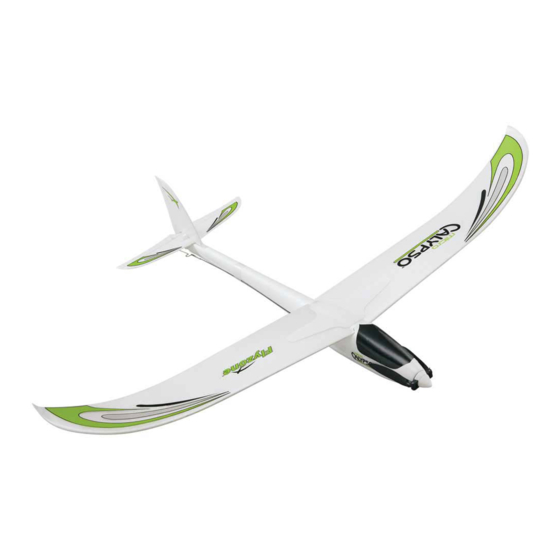
SPECIFICATIONS
Wingspan:
24.8 in [630 mm]
Total Length:
19.1 in [485 mm]
Weight:
1.90 oz [54 g]
WARRANTY
Flyzone
®
guarantees this kit to be free from defects in both
material and workmanship at the date of purchase. This warranty
does not cover any component parts damaged by use or
modification. In no case shall Flyzone's liability exceed the
original cost of the purchased kit. Further, Flyzone reserves
the right to change or modify this warranty without notice.
In that Flyzone has no control over the final assembly or material
used for final assembly, no liability shall be assumed nor
accepted for any damage resulting from the use by the user of
the final user-assembled product. By the act of using the
user-assembled product, the user accepts all resulting liability.
READ THROUGH THIS MANUAL BEFORE STARTING CONSTRUCTION. IT CONTAINS IMPORTANT
INSTRUCTIONS AND WARNINGS CONCERNING THE ASSEMBLY AND USE OF THIS MODEL.
®
© 2016 Flyzone,
a Hobbico company.
I N S T R U C T I O N
M A N U A L
IMPORTANT
•
This radio controlled model is not a toy!
•
This model must be assembled and operated according to the instructions.
•
It may cause serious injury to persons or property if not used responsibly.
Not suitable for children under 14 years old.
For more info, go to the YouTube Hobbico how-to channel.
If the buyer is not prepared to accept the liability associated
with the use of this product, the buyer is advised to return
this kit immediately in new and unused condition to the
place of purchase.
For warranty claims contact Hobbico Product Support:
Hobbico Product Support
3002 N. Apollo Drive Suite 1
Champaign IL 61822 USA
Telephone: (217) 398-8970 ext. 6
Fax: (217) 398-7721
E-mail: airsupport@hobbico.com
®
™
FLZA3050 RTF / FLZA3052 TxR
Advertisement
Table of Contents

Summary of Contents for Flyzone micro calypso
- Page 1 Hobbico Product Support 3002 N. Apollo Drive Suite 1 In that Flyzone has no control over the final assembly or material Champaign IL 61822 USA used for final assembly, no liability shall be assumed nor accepted for any damage resulting from the use by the user of Telephone: (217) 398-8970 ext.
-
Page 2: General Warnings
Do not store this model in a high-temperature/humidity area or in direct sunlight. ATTENTION: The Micro Calypso is powered by a rechargeable battery. At the end of the battery’s useful life, under various The wing is designed to pop off in a crash to minimize state and local laws, it may be illegal to dispose of the battery damage. - Page 3 (RTF Only) Tx-R ADDITIONAL ITEMS REQUIRED 4-channel SLT Protocol Transmitter The Micro Calypso can be flown with Tactic transmitters (SLT protocol). When doing this please refer to the Tactic radio 1 Mode Change Switch instructions and be aware some channels may need to be 2 Power Switch reversed or re-assigned for proper operation.
-
Page 4: Before Operating
(less responsive). Once you become familiar with how the gently press it down until it locks into place. Micro Calypso flies, you can install the rudder pushrod in the inner hole for higher control throws (more responsive). Center and adjust wire bends. -
Page 5: Wing Assembly
USB Charger Instructions (Tx-R Version Only) Approximate charge time is 1 hour. 1. Plug the Micro Calypso USB charger into a USB charge port on your computer or USB adapter (like the one used for cell phones). 2. Plug the Micro Calypso battery into the charger. The red LED on the charger should illuminate. -
Page 6: Led Display
Before your first flight or after a crash you will need to check the centering of the rudder and elevator control surfaces. CAUTION: Do not run the Micro Calypso motor for more To prevent excessive transmitter trim you should first make than 15 seconds when not in flight. -
Page 7: Choosing Your Flying Field
surfaces when the transmitter trims are centered. Be careful TAKEOFF to only make slight adjustments. Once you get the mechanical trim close you can use the transmitter trim to fine tune the 1. Before takeoff, check again rudder and elevator trim. to see if the plane responds properly to control signals. -
Page 8: After Landing
ADJUSTING TRIMS LVC (Low Voltage Cutoff) The Micro Calypso has a built in LVC to protect your LiPo battery from discharging too low while flying. Once the battery reaches LVC, the power to the motor will shut off and you need to land the Micro Calypso. -
Page 9: Transmitter Mode Selection
Mode 1 Transmitter Information TRANSMITTER MODE SELECTION As supplied, the transmitter is in Mode 2. NOTE: The transmitter can be used in Mode 1 or Mode 2 with the mode change switch. After the Mode has been changed, the throttle stick spring is cancelled. Neutral Position 1. -
Page 10: Troubleshooting Guide
REPAIR If your Micro Calypso becomes damaged you can use white glue, foam safe CA glue or clear tape to make repairs. You can also order replacement parts (found on page 3 of this manual) if your parts are beyond repair. - Page 11 NOTES...
- Page 12 ™...


Need help?
Do you have a question about the micro calypso and is the answer not in the manual?
Questions and answers