Table of Contents
Advertisement
Quick Links
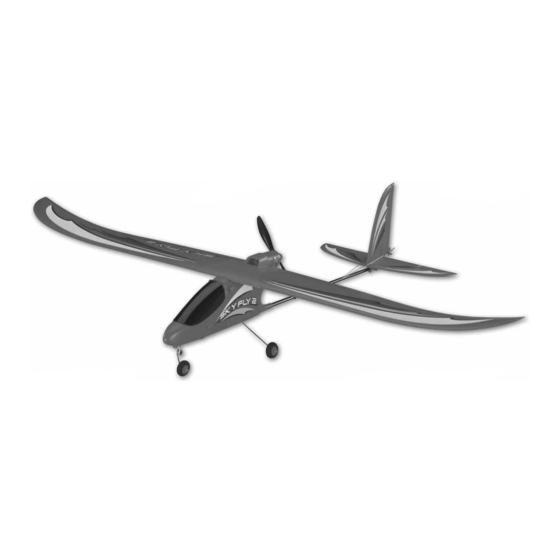
COMPLETE RTF AIRPLANE
™
™
REQUIRES:
8 "AA" Alkaline Batteries
Please retain this information for future reference.
ASSEMBLE ONLY WITH ADULT SUPERVISION
Please read through this instruction booklet to THOROUGHLY familiarize yourself with the assembly and fl ight characteristics of this
airplane before beginning to assemble the kit.
Please inspect all parts carefully before starting assembly! If any parts are missing, broken or defective, or if you have any questions
about the assembly or fl ying of this airplane, please call us at (217) 398-8970 and we'll be glad to help.
WARRANTY
®
Hobbico
guarantees this kit to be free from defects in both material and workmanship at the date of purchase. This warranty does
not cover any component parts damaged by use or modifi cation. In no case shall Hobbico's liability exceed the original cost of
the purchased kit. Further, Hobbico reserves the right to change or modify this warranty without notice.
In that Hobbico has no control over the fi nal assembly, no liability shall be assumed nor accepted for any damage resulting from the use
by the user of the fi nal user-assembled product. By the act of using the user-assembled product, the user accepts all resulting liability.
If the buyers are not prepared to accept the liability associated with the use of this product, they are advised to return this
kit immediately in new and unused condition to the place of purchase.
To make a warranty claim send the defective part or item to Hobby Services at the address below:
Hobby Services
3002 N. Apollo Dr., Suite 1
Champaign IL 61822 USA
Include a letter stating your name, return shipping address, as much contact information as possible (daytime telephone number,
fax number, e-mail address), a detailed description of the problem and a photocopy of the purchase receipt. Upon receipt of the
package the problem will be evaluated as quickly as possible.
Entire Contents © Copyright 2008
Printed in China
HCAA41xxMnl01
Advertisement
Table of Contents

Related Manuals for Flyzone Sky Fly 2


Summary of Contents for Flyzone Sky Fly 2
- Page 1 COMPLETE RTF AIRPLANE ™ ™ REQUIRES: 8 “AA” Alkaline Batteries Please retain this information for future reference. ASSEMBLE ONLY WITH ADULT SUPERVISION Please read through this instruction booklet to THOROUGHLY familiarize yourself with the assembly and fl ight characteristics of this airplane before beginning to assemble the kit.
-
Page 2: Important Safety Precautions
instructions to end up with a well-built model PROTECT YOUR MODEL, YOURSELF that is durable and easy to fl y. The R/C model AND OTHERS; FOLLOW THESE hobby becomes more and more enjoyable as your IMPORTANT SAFETY PRECAUTIONS experience grows. Your chances for success and graduation to higher levels are very good if you Your SkyFly 2 should not be considered a toy, but take your time and follow the assembly and fl... -
Page 3: Fcc Requirement
AIRFRAME PARTS AND HARDWARE Before starting to build, take an inventory of this kit to make sure it is complete and inspect the parts to make sure they are of acceptable quality. If you need assistance with assembly, contact Product Support. When reporting defective or missing parts, please use the part names exactly as they are written in the parts list. -
Page 4: Assemble The Tail
ASSEMBLE THE TAIL Remove the fuselage from the packaging. Lay the parts out on a table. You will notice the receiver antenna wire extends from the back of the fuselage. DO NOT CUT OFF THE EXCESS WIRE! Slide the threaded wire rods into the holes in the tail brace support. -
Page 5: Install The Landing Gear
INSTALL THE LANDING GEAR Insert the pushrod wire through the hole in the metal connector that is pre-installed to the rudder. Screw one of the red nylon screw connectors into the metal connector, securing the wire to the connector. Locate the main landing gear. Slide the landing gear into the slot in the bottom of the fuselage as shown. -
Page 6: Charging The Battery Pack
way to recharge the SkyFly 2 battery when a 12V source is unavailable. NEVER PLUG THE BATTERY DIRECTLY INTO THE AC WALL ADAPTER! • To begin charging the battery pack, plug the 12V peak charger into your automobile or 120V AC outlet (using the AC adapter). -
Page 7: Connect The Battery
IMPORTANT! NEVER LEAVE A CHARGING CONNECT THE BATTERY BATTERY UNATTENDED! Although the 12V DC Peak Charger automatically detects when the battery is full and terminates peak charge, the battery pack must not be left unattended during charging. It is normal for the battery pack and charger to become warm during peak charge. -
Page 8: Attach The Wing
ATTACH THE WING With the battery in place, lift the model with your fi ngertips between the lines under the wing. Position Place the wing onto the top of the fuselage. Secure your fi ngertips where necessary to get the model to the wing with two rubber bands, straight from the front sit level, or “balance”. -
Page 9: Prepare The Transmitter
PREPARE THE TRANSMITTER CHECK THE CONTROL DIRECTIONS Be sure your transmitter has fresh “AA” batteries installed (not included). Turn on the transmitter and center the trims tabs. Staying clear of the propeller, open the canopy from the SkyFly 2 and connect the battery to the receiver/ESC. -
Page 10: Radio Setup
RADIO SETUP PREPARE FOR TAKEOFF Find an open area free of buildings, trees, power lines and people. For your fi rst few fl ights, fl y only when the wind is calm. After you are comfortable with the airplane, you can fl y in winds that are no more than 5 miles per hour. - Page 11 Perform a range check your radio before each Now that you have gained some altitude, it is time to fl ight. Switch on the airplane and then switch on trim the plane for straight, level fl ight. If the airplane the transmitter.
-
Page 12: Replacement Parts
REPLACEMENT PARTS Caution: If, during a rough landing, the propeller on the SkyFly 2 should become jammed and To order replacement parts for your SkyFly 2, use cannot rotate with the throttle in the run position, the order numbers in the parts list. Replacement the battery and speed control will become very parts are available only as listed.
Need help?
Do you have a question about the Sky Fly 2 and is the answer not in the manual?
Questions and answers