Table of Contents
Advertisement
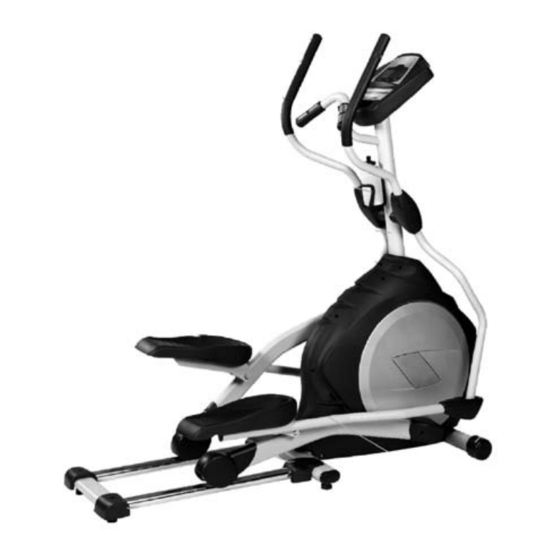
TROJAN
®
MY SPACE MY TIME
DUAL 510
ELLIPTICAL
ELLIPTICAL CARE
INSTRUCTIONS AND ASSEMBLY MANUAL
WINNER, SHARON HAARHOFF,
USES TROJAN HOME FITNESS
EQUIPMENT AS PART OF
HER DAILY FITNESS
PROGRAM
SHARON HAARHOFF
CAUTION
READ ALL PRECAUTIONS AND
INSTRUCTIONS IN THIS MANUAL
BEFORE USING THIS EQUIPMENT
KEEP THIS MANUAL FOR
1 YEAR
CALL
FUTURE REFERENCE
Advertisement
Table of Contents

Subscribe to Our Youtube Channel
Related Manuals for Trojan DUAL 510


Summary of Contents for Trojan DUAL 510
- Page 1 ® MY SPACE MY TIME DUAL 510 ELLIPTICAL ELLIPTICAL CARE INSTRUCTIONS AND ASSEMBLY MANUAL WINNER, SHARON HAARHOFF, USES TROJAN HOME FITNESS EQUIPMENT AS PART OF HER DAILY FITNESS PROGRAM SHARON HAARHOFF CAUTION READ ALL PRECAUTIONS AND INSTRUCTIONS IN THIS MANUAL...
-
Page 2: Table Of Contents
PRE ASSEMBLY CHECK LIST HARDWARE LIST ASSEMBLY STEPS LUBRICATION AND TRANSPORT COMPUTER FUNCTIONS FITNESS TIPS & TECHNIQUES CONDITIONING GUIDELINES WARM -UP AND COOL-DOWN 10. FREQUENTLY ASKED QUESTIONS 11. PARTS LIST 12. EXPLODED DRAWING 13. TROJAN 1 YEAR LIMITED WARRANTY 14. TROJAN REPAIRS PROCEDURE... -
Page 3: Safety Instructions
11. Never operate the TROJAN DUAL 510 ELLIPTICAL if it has a damaged cord or plug, if it is not working properly, if it has been dropped and damaged, or exposed to water. -
Page 4: Pre Assembly Check List
2. PRE ASSEMBLY CHECK LIST Thank you for choosing the TROJAN DUAL 510 ELLIPTICAL. We take great pride in producing this quality product and hope it will provide many hours of quality exercise to make you feel better, look better and enjoy life to its fullest. -
Page 5: Hardware List
3. HARDWARE LIST STEP 01 #94. 3/8”x 19 x1.5T #114. 3/8”x 23 x2T #120. 3/8” x2T Flat Washer (2pcs) Curved Washer (1pc) Split Washer (3pcs) #94. 3/8”x 19 x1.5T Flat Washer #78. M5 x 10mm #119. 3/8” x 3” Phillips Head Screw (4pcs) Hex Head Screw STEP 02 #75. - Page 6 HARDWARE LISTS STEP 03 #71. 5/16 x 32mm #105. 5/16” x 7T #89. 3/8” x 7T Hex Head Bolt (2 pcs) Nyloc Nut (2 pcs) Nyloc Nut (2 pcs) #98. 5/16” x 20 x 1.5T #94. 3/8” x 19 x 1.5T #114.
-
Page 7: Assembly Steps
4. ASSEMBLY STEPS Unpacking the unit 1. Using a razor knife (Box Cutter) cut the outside bottom edge of the box along the dotted Line. Lift Box over the unit and unpack. 2. Carefully remove all parts from carton and inspect for any damage or missing parts. If damaged parts are found, or parts are missing, contact your dealer immediately. - Page 8 STEP 02 Step 2: Handle Bar assembly 1. Attach two Wave Washers (101) onto the Left and Right sides of the Handle Bar axle. 2. Slide the Lower Left and Right Handle Bars (4&5) onto the appropriate side of the axle. There is a small sticker on each lower handlebar that shows “L”...
- Page 9 STEP 03 STEP 3: Connecting Arm & Rear Rail assembly 1. Align the hole in the Rod End bearings, at the end of the Connecting Arms (7,8) with the hole in the bracket of the Lower Handle Bars (4,5). There is a sleeve spacer already installed in the Rod End and held in place with a twist tie. Make sure these spacers do not fall out during assembly.
- Page 10 STEP 04 STEP 4: Cosmetic Covers assembly 1. Install the Connecting Arm Covers (59 & 60) over the connection of the Rod End and Lower Handle Bars (4 & 5) with four M5 x 15mm Phillips Head Screws (79) and two 3.5x12mm Self Tapping Screws (84), using the Combination M5 Allen Wrench &...
-
Page 11: Lubrication And Transport
5. LUBRICATION AND TRANSPORT LUBRICATION 1. Pour 2ml of the lubricant under the middle of Rail. You must lubricate every three months. 2. If the user feels the exercise is not smooth or there is noise during exercising, please pour 2ml of the lubricant on the middle of Rails. -
Page 12: Computer Functions
6. COMPUTER FUNCTIONS Power up The Elliptical is supplied with an external power supply. When power is connected to the Elliptical, the consol will automatically power up. If there is no input to the consol for 20 minutes the consol will go to stand-by mode. In stand-by mode the consol display will turn off. -
Page 13: Quick Start Mode
6. COMPUTER FUNCTIONS Consol Operation Quick Start mode This is the quickest way to start a workout. After the consol powers up you just press the Start key to begin, this will initiate the Quick Start mode. In Quick Start, the Time will count up from zero and the workload may be adjusted manually by pressing the Up or Down button. -
Page 14: Preset Programs
6. COMPUTER FUNCTIONS NOTE: Age and Weight default settings will change when you enter a new number. So the last Age and Weight entered will be saved as the new default settings. If you enter your Age and Weight the first time you use the Elliptical you will not have to enter it every time you work out unless either your Age or Weight changes or someone else enters a different Age and Weight. - Page 15 6. COMPUTER FUNCTIONS Interval The Interval program takes you through high levels of workout intensity followed by periods of low workout intensity. This program increases your endurance by depleting your oxygen level followed by periods of recovery to replenish oxygen. Your cardio vascular system gets programmed to use oxygen more efficiently this way. Programming Preset Programs: 1.
- Page 16 6. COMPUTER FUNCTIONS Maintenance: 1. Wipe down all areas in the sweat path with a damp cloth after each workout. 2. If a squeak, thump, clicking or rough feeling develops the main cause is most likely one of two reasons: i.
-
Page 17: Fitness Tips & Techniques
7. FITNESS TIPS AND TECHNIQUES AEROBIC EXERCISE Aerobic exercise is any sustained activity that sends oxygen to your muscles via your heart and lungs. Aerobic exercise improves the fitness of your lungs and heart - your body’s most important muscle. Aerobic exercise fitness is promoted by any activity that uses your large muscles (arms, legs, or buttock, for example). -
Page 18: Conditioning Guidelines
8. CONDITIONING GUIDELINES How you begin your exercise program depends on your physical condition. If you have been inactive for several years, or are severely overweight, you must start slowly and increase your time on the equipment; a few minutes per workout. Initially, you may be able to exercise only for a few minutes in your target zone, however, your aerobic fitness will improve over the next six to eight weeks. -
Page 19: Warm-Up And Cool-Down
9. WARM-UP AND COOL-DOWN WORKOUT GUIDELINES Each workout should include the following three parts: A warm-up, consisting of 5 to 10 minutes of stretching and light exercise. A proper warm-up increases your body tem- perature, heart rate, and circulation in preparation for exercise. Training zone exercise, consisting of 20 to 30 minutes of exercising with your heart rate in your training zone. -
Page 20: Frequently Asked Questions
10. FREQUENTLY ASKED QUESTIONS Q1. My elliptical does not move as easily as indicated in manual 1. Ensure that you have placed the stabiliser with the wheels in front of the unit. Q2. My consol does not work 1. Make sure you have connected it correctly Q3. -
Page 21: Parts List
9. PARTS LIST DESCRIPTION Q’ty DESCRIPTION Q’ty Main Frame 1PCS DC Power Cable Pedal Arm (L) 4PCS Gear Motor Pedal Arm (R) 1PCS Sensor W/Cable Lower Handle Bar (L) 4PCS Sensor Rack Lower Handle Bar (R) 4PCS Handpulse W/Cable Assembly Bushing Housing, Pedal Arm 4PCS 37.1... - Page 22 11. PARTS LIST DESCRIPTION Q’ty DESCRIPTION Q’ty 68~3 M5 x 12mm Phillips Head Screw Lubricant Bushing 3/8" 23 2T Curved Washer 5/16" x 15mm Hex Head Screw 3/8" 3" Hex Head Screw 5/16" x 32mm Hex Head Screw 3/8" 2T Split Washer 1/4"...
-
Page 23: Exploded Drawing
12. EXPLODED DRAWING 1064M-23... -
Page 24: Trojan 1 Year Limited Warranty
13. TROJAN 1 YEAR LIMITED WARRANTY Masstores (Pty)Ltd (“the Supplier”) hereby provides a limited warranty to the original purchaser of this product (“the Consumer”) that this product will be free of manufacturing defects in materials and workmanship which under normal,... - Page 25 The Consumer does not need to return the product to the store. The Consumer shall phone the Trojan hotline on 0861 Trojan (0861 876 526) and the Supplier’s authorized agent will at its discretion either repair the item at the Consumer’s residence or collect and repair the item at their premises.
-
Page 26: Trojan Repairs Procedure
14. TROJAN REPAIRS PROCEDURE 1. Procedure for repairs Should you experience any faults or breakdowns on your Trojan equipment, please adhere to the following procedure to have the fault rectified speedily and professionally. • Do not return the product to the store* •...
Need help?
Do you have a question about the DUAL 510 and is the answer not in the manual?
Questions and answers