
Related Manuals for Baumatic BWMI1216


Summary of Contents for Baumatic BWMI1216
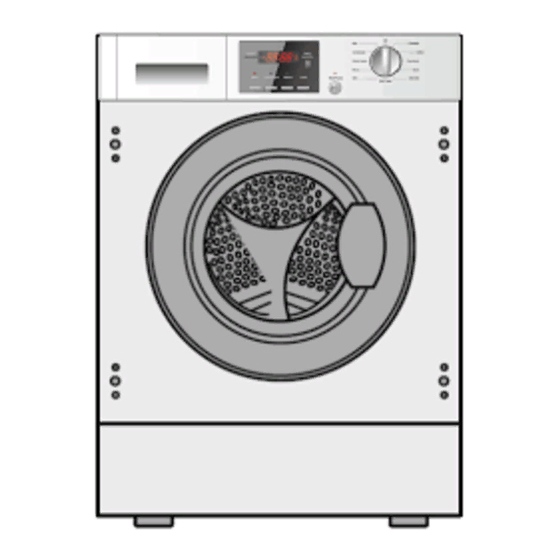
- Page 1 BWMI1216 6kg Fully integrated BYWMI1216 washing machine Fully integrated washing machine...
- Page 2 USER MANUAL FOR YOUR BAUMATIC BWMI1216 Fully integrated washing machine NOTE : This User Instruction Manual contains important information, including safety & installation points, which will enable you to get the most out of your appliance. Please keep it in a safe place so that it is easily available for future reference.
-
Page 3: Table Of Contents
Contents Environmental note Important safety information 5 - 6 Specifications 7 – 11 Product and aperture dimensions Product specifications 7 - 8 Description of the appliance Control panel 9 - 10 Detergent drawer Preparing the wash cycle 12 - 17 Preparing your garments for washing A selection of wash care symbols Detergents and conditioners... -
Page 4: Environmental Note
This should be undertaken by a competent person. Disable the door lock to make sure that children cannot get stuck inside the appliance. o The packaging materials that Baumatic uses are environmentally friendly and can be recycled. o Please discard all packaging material with due regard for the... -
Page 5: Important Safety Information
Important safety information Your safety is of the utmost importance to us. Please make sure that read this instruction booklet before attempting to install or use the appliance. If you are unsure of any of the information contained in this booklet, please contact Customer Services. - Page 6 o Before the first use of the appliance, we advise that a 90°C wash programme is completed, using the ‘self clean’ function. No garments should be placed inside the machine; however a small amount of detergent must be used. During Use o It is recommended that the appliance is unplugged and the water supply is turned off after the machine is used.
-
Page 7: Specifications
Specifications Appliance dimensions Aperture dimensions Height: 825 – 870 mm 841 - 886 mm Width : 595 mm 600 mm Depth: 535 mm 580 mm Product specifications o 11 wash programmes o 6 kg wash load o 1200 rpm maximum spin speed o LED display o Delay start timer o Digital countdown indicator... -
Page 8: Description Of The Appliance
Electrical details Rated voltage: 220 - 240 Vac 50 Hz Supply connection: Description of the appliance Accessories... -
Page 9: Control Panel
Control panel Wash programme selection knob LED display Spin speed selection button Temperature selection button Intense wash selection button Detergent drawer Delay wash button Extra rinse button Rinse hold button Start/pause button NOTE: Buttons E, G, H, I & J have LED neon lights above them to indicate if they are activated. - Page 10 LED display o The LED display will show how much time a wash cycle has until it completes. If the delay start button has been pressed, then the LED display will show the remaining time until the wash cycle will commence.
-
Page 11: Detergent Drawer
Detergent drawer 1) Pre-wash section This compartment should have detergent placed in it only if you are going to select a wash programme that has a pre wash cycle as part of 2) Main wash section This compartment should have detergent placed in it (you should also put a water softening agent in this section, if you use one). -
Page 12: Preparing The Wash Cycle
Preparing the wash cycle Preparing your garments for washing o Your washing should be sorted out, according to the fabric type and the wash care symbol that is printed on the garment’s wash care label. (see separate section on wash care symbols). o Your washing should also be sorted out according to the degree of soiling. -
Page 13: A Selection Of Wash Care Symbols
A selection of wash care symbols Washing Normal Normal Boiling Do not Wool Do not Bleachable temp temp temp bleach! seal wash! in cold 60°C 40°C 95°C water cleaning Hand Benzine All but TRI Do not Delicate Delicate wash only clean! temp temp... - Page 14 Low temperatures o The enzymes in biological washing detergents work best at low temperatures to provide excellent cleaning and stain removal results but not as low as 20°C. o Liquid or gel detergents are particularly suitable for low temperature washing as they dissolve easier and quicker than powders or tablets.
-
Page 15: Programme Table
Wash programme table The standard 40° and 60° cotton programmes (indicated above) are suitable to clean normally soiled cotton laundry and they are the most efficient programmes in terms of combined energy and water consumption. NOTE: The wash cycle times that are quoted and shown by the LED display, are intended as a guide only. -
Page 17: Wash Programme Guidance
Wash programme guidance o The default setting column shows the wash temperature and spin speed that the appliance will automatically select for a particular wash programme. It is possible to override these settings, using the spin speed selection button and temperature selection button. o IMPORTANT: You should make sure that the spin speed and temperature that you select are appropriate for the garments that you are washing. -
Page 18: At The End Of A Wash Cycle
Select any programme options that you require (Rinse Hold, Extra Rinse, Delay start and Intense) by using the relevant buttons. For more information, please refer to pages 20 - 21. o Any programme option that you select, will affect the length of time that the wash cycle will take to complete. -
Page 19: Spin Selection Button
Cancelling a wash programme Press the Start/pause button whilst a wash programme is in progress and the appliance will go into pause status. o Turn the wash programme selection knob until it is at the ‘off’ position. Before opening the porthole door, you MUST drain the appliance;... -
Page 20: Extra Rinse Option Button
Rinse Hold option button o If you press the Rinse Hold option button, the indicator neon above it will light. o When the wash cycle reaches the final rinse, instead of draining the water away, it will suspend the wash load in water. o When you want to spin the wash load, press the Rinse Hold option button again. -
Page 21: Intense Wash Button
Intense wash button o Press this button to select the “intense” wash programme option. o The appliance will then increase the washing time of the main wash. o The increased time will depend on the wash cycle and the temperature, or any other selected options, however the time remaining will be displayed. -
Page 22: Maintenance And Cleaning
Maintenance and cleaning In daily use Once a wash cycle has completed, you should pull out the detergent drawer slightly, so it can dry out. Leave the porthole door ajar for a short while after a wash cycle has completed. -
Page 23: The Washing Machine Drum
The washing machine drum The drum of your washing machine is constructed from stainless steel. However if there are objects that can rust placed inside the drum, then it is possible for the drum to become stained. IMPORTANT: Do not use a descaling agent, iron/steel wool or scouring agents to clean the drum of your appliance. - Page 24 Err4 o Heater error (appears at the end of a cycle). Contact the Customer Care Department. Err5 o Machine does not fill to the specified level within 8 minutes. Check that the inlet hose is not kinked or blocked and that the water tap is connected the machine and is fully open.
- Page 25 - like plinths, or any installation other than the one specified by Baumatic has been completed. Please refer to the conditions of guarantee that appear on the warranty card that you receive with the appliance.
-
Page 26: General Troubleshooting
General troubleshooting Water under the washing machine o Tighten the drain pump filter. o Check the drain and inlet hose and make sure that they are fully tightened. Washing machine vibrates during the spin cycle o Check that the transit bolts have been removed (see installation instructions). - Page 27 Further troubleshooting: The following circumstances do not constitute a fault with the appliance. Do not contact Customer Services until the problem has been confirmed.
-
Page 28: Poor Wash Results
Poor wash results My garments are looking grey and there are limescale deposits present in the drum of my washing machine. o There is not enough detergent being added. o The incorrect detergent is being used. o Stains are not being pre-treated. o The correct wash programme or wash temperature was not selected. -
Page 29: Removing Stains
Removing stains Garments that are covered in stains, grease or are heavily soiled may need to be pre-washed or soaked before being placed inside of the washer dryer. o Soaking helps to remove protein-type stains, like blood, milk or grass. o Pre-washing helps to loosen soil before the main wash. - Page 30 Tomato Scrape the dried pieces without ruining the material, then paste leave in cold water for about 30 minutes and wash by rubbing with detergent. Meat broth/ Eliminate the dried stain residues and wipe with a sponge or soft cloth wetted in cold water. Rub with detergent and wash with diluted lye.
-
Page 31: Cleaning The Drain Pump Filter
Cleaning the drain pump filter IMPORTANT: Switch your washing machine disconnect the plug from your mains supply. You should clean out the filter approximately once every month. If the drain pump filter is not cleaned regularly, then your appliance may find it difficult to pump out water efficiently. -
Page 32: Cleaning The Water Inlet Filter
7) Wash the filter with running water and ensure that all debris has been removed. 8) Refit the clean filter and tighten clockwise. 9) Replace the service panel. o IMPORTANT: perform this operation appliance has stuck on a cycle, until the water inside of the machine has cooled sufficiently. -
Page 33: Installation
Installation IMPORTANT: THIS INSTALLATION MUST COMPLETED BY A SUITABLY QUALIFIED PERSON. MANUFACTURER ONLY SANCTIONS INSTALLATION GIVEN THIS INSTRUCTION MANUAL. SHOULD KEEP TRANSIT PACKAGING, IN CASE YOU NEED TO TRANSPORT THE MACHINE IN THE FUTURE. Unpacking the machine and preparing for use. IMPORTANT: The bottom cover MUST be installed before your washing machine is used for the first time, AND before removing the transit bolts. - Page 34 Removing the transit bolts IMPORTANT: The transit bolts MUST be removed before your washing machine is used for the first time. o Remove the four transit bolts from the back of the appliance. The transit bolts stop the drum from rotating and reduce vibrations during transit.
-
Page 35: Positioning And Levelling The Appliance
Positioning and levelling the appliance The washing machine requires an aperture of the size given in the diagram opposite. Place the washing machine on a solid and level floor surface. DO NOT PLACE THE WASHING MACHINE ON A CARPET. ... -
Page 36: Connecting To The Mains Water Supply
IMPORTANT: When the washing machine is positioned in the location where it will be used. Mak e sure that all four feet are resting firmly on e floor, by pressing down on each corner and checking that the ppliance stands still. Connecting to the mains water supply IMPORTANT: The washing machine shou ld never be connected to the... -
Page 37: Water Outlet
Water outlet Secure the drain hose, so that it cannot move whilst the washing machine is in use. Place the end of the drain hose on your drain pipe. Push it a short way down int o your drain pipe. The correct position of the drain hose bracket (elbow) is one which ill prevent any water leaking... -
Page 38: Fitting The Furniture Door
itting the furniture door o Mount the furniture door to the cabinet of the washing machine, using the hinges supplied. o Fix the magnet assembly to the front of the washing machine and the furniture door. -
Page 39: Power Supply
Power supply IMPORTANT: As your appliance is a built in product, the electrical socket must still accessible once appliance is installed. Consult the rating plate, located on the back of the appliance BEFOR E making the electrical connections. Ensure that the voltage reaching the plug, is the same as that on the rating plate. -
Page 40: Technical Data
Technica l Data Manufacturer BAUMATIC Model Number BWMI1216 Rated Capacity of Standard Cotton 6 kg Programme Energy Efficiency Class Annual Energy Consumption (1) 166 kWh Energy Consumption of the Standard 0.808 kWh 60°C Cotton Programme at Full Load Energy Consumption of the Standard 0.811 kWh... -
Page 43: Contact Details
Advice Line Telephone (0118) 933 6933 Deutschland 0049(0)180-5888975 E-mail: Oesterreich +43 (0) 820 / 420423 sales@baumatic.co.uk customercare@baumatic.co.uk www.baumatic.de spares@baumatic.co.uk technical@baumatic.co.uk Italy Baumatic Italia S.R.L. Website: Via Galvani N.3 www.baumatic.co.uk 35011 Campodarsego (PD) Facebook: +3904 9920 2297 www.facebook.com/baumatic.uk www.baumatic.it Republic of Ireland Holland Baumatic Benelux B.V. - Page 44 www.baumatic.com...
Need help?
Do you have a question about the BWMI1216 and is the answer not in the manual?
Questions and answers