Table of Contents
Advertisement
Advertisement
Table of Contents

Subscribe to Our Youtube Channel
Related Manuals for Baumatic BWM5001


Summary of Contents for Baumatic BWM5001
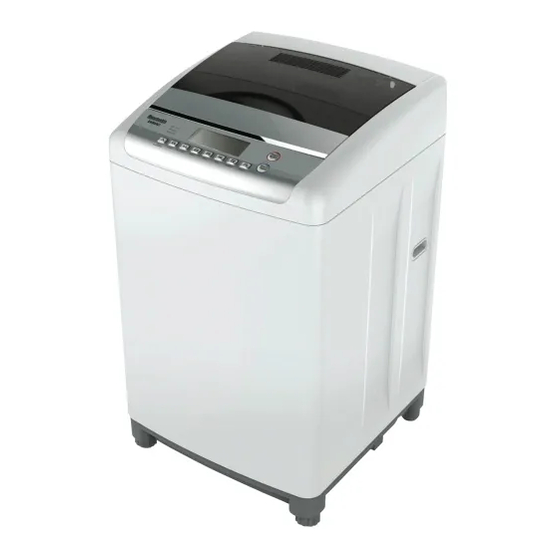
- Page 1 BWM5001, 5 kg BWM7001, 7 kg Top Loading Washing Machine...
- Page 3 USER MANUAL FOR YOUR BAUMATIC BWM5001, 5 kg BWM7001, 7 kg Top loading washing machine NOTE : This User Instruction Manual contains important information, including safety & installation points, which will enable you to get the most out of your appliance. Please keep it in a safe place so that it is easily available for future reference;...
-
Page 4: Table Of Contents
Contents Environmental note Important safety information 6 – 7 Specifications 8 – 12 Dimensions Control panel 10 - 11 Detergent drawer Bleaching agents Softener Preparing the wash cycle 13 - 14 Preparing your garments for washing A selection of wash care symbols Selecting a wash program 15 –... -
Page 5: Environmental Note
Environmental note... -
Page 6: Important Safety Information
General Safety o Repairs to your appliance must only be carried out by a Baumatic engineer or one of its authorised service agents. Any attempt by an inexperienced person to repair the appliance, could result in injury or damage to your washing machine. - Page 7 Baumatic cannot be held responsible for any damage that may result. o The lid should not be opened when the machine is spinning. The machine will stop spinning when the lid is opened but the tub will not stop turning immediately.
-
Page 8: Specifications
14) Base o 8 programs o 5 kg wash load (BWM5001) o 7 kg wash load (BWM7001) o 660 rpm maximum spin speed (BWM5001) o 720 rpm maximum spin speed (BWM7001) o LED display o Delay start o Wash temperature control... -
Page 9: Dimensions
BWM7001 Appliance dimensions Height: 959 mm Width : 560 mm Depth: 565 mm BWM5001 Appliance dimensions Height: 930 mm Width: 540 mm Depth: 545 mm Energy efficiency class (Wash): 1.5 Stars For future reference please record the following information which can be found on the rating plate and the date of purchase which can be found on your sales invoice. -
Page 10: Control Panel
Control panel 1) Power ON / OFF button: Use this button to turn the washing machine on and off. If a program is not set within 5 minutes of turning the machine on, it will switch off automatically. 2) Start / pause button: Press this button to begin a wash program, or to pause / resume a program that is currently in progress. -
Page 11: Detergent Drawer
10) Process button: Press this button to set the features of the wash program. Each press of the button will scroll through the following choices. 11) Water temperature button: Press this button repeatedly to choose the required washing temperature. You can select COLD, WARM or HOT. -
Page 12: Bleaching Agents
Bleaching agents o A bleaching agent can be used if it first diluted with plenty of water before pouring it into the drum. o You should always follow the manufacturer’s directions when using a bleaching agent to avoid damage to clothing. o You should always wash the laundry as soon as possible after the bleaching agent has been added. -
Page 13: Preparing The Wash Cycle
Preparing the wash cycle Preparing your garments for washing o Your washing should be sorted out, according to the fabric type and the wash care symbol that is printed on the garment’s wash care label (see separate section on wash care symbols). o Your washing should also be sorted out according to the degree of soiling. -
Page 14: A Selection Of Wash Care Symbols
A selection of wash care symbols Washing Normal Normal Boiling Do not Wool Do not Bleachable temp temp temp bleach! seal wash! in cold 60°C 40°C 95°C water cleaning Hand Benzine All but TRI Do not Delicate Delicate wash only clean! temp temp... -
Page 15: Selecting A Wash Program
Selecting a wash program Detergent o If you are placing detergent directly into the drum, you should dilute it first (See ‘Detergent Drawer’ section). o Alternatively, put detergent powder into the detergent drawer. Please see the table below for recommended amounts according to the water level and weight of laundry. -
Page 16: Choosing A Wash Program
Choosing a wash program o Place the laundry into the washing machine and close the lid. o Use the program button (4) to select the most appropriate wash program for your laundry. Please see the table below for a general guide: Wash Recommended laundry program... -
Page 17: Wash Time
Manually adjusting the washing cycle times o After you have selected your desired wash program, the cycle times will be displayed. If desired, you can then adjust the Wash, Rinse, and Spin times. Wash time adjustment o Adjust the amount of time the appliance washes the laundry by pressing the Wash button (8). -
Page 18: Spin Speed
Spin time adjustment o Adjust the amount of time the appliance spins the laundry by pressing the Spin button (5). o The available spin times are indicated below, you can scroll through the times by repeatedly pressing the Spin button. IMPORTANT: You cannot adjust the rinse times for “Quick”... -
Page 19: Selecting A Water Level
However, should you want to select your own water level then please see the table below for a guide to the appropriate water level for different load sizes and the required amount of detergent. BWM5001 Water Laundry Water... -
Page 20: Delay Start
Delay start You are able to delay the start of a wash cycle so the laundry is finished at a time that is most convenient to you. o You should introduce the detergent into the detergent drawer or drum and then add the laundry as normal. You can then select your required wash program following the instructions outlined in the previous section. -
Page 21: Imbalance Control
This way you can ‘recycle’ the water. Please ensure you have an adequate container ready for the water. (BWM5001 = 51L+, BWM7001 = 61L+) Changing a wash cycle o If you want to change your wash program after it has started you can do so by pausing the current washing cycle by pressing the start/pause button (2). -
Page 22: Maintenance And Cleaning
Maintenance and cleaning In daily use o Once a wash cycle has completed, you should pull out the detergent drawer slightly, so it can dry out. o Leave the lid open for a short while after a wash cycle has completed. -
Page 23: The Washing Machine Drum
The washing machine drum The drum of your washing machine is constructed from stainless steel. However if there are objects that can rust placed inside the drum, then it is possible for the drum to become stained. IMPORTANT: Do not use a descaling agent, iron/steel wool or scouring agents to clean the drum of your appliance. -
Page 24: Removing Stains
o Reattach the filter bag and then clip the filter back into position on the drum wall. Removing stains Garments that are covered in stains, grease or are heavily soiled may need to be pre-washed or soaked before being placed inside of the washing machine. -
Page 25: Stain Removal Guide
Stain removal guide Stain Removal Method Alcoholic The stain should be first washed with cold water, then beverages wiped with glycerine and water and rinsed with water mixed with vinegar. Shoe polish The stain should be softly scratched without ruining the material, then rubbed with detergent and rinsed. - Page 26 Grass stain Rub the stained part with detergent. If the type of fabric is suitable for use of caustic soda, wash it with caustic soda. Rub your woollen clothes with alcohol (for coloured one, a mixture of 1 unit pure alcohol and 2 units of water).
-
Page 27: Poor Wash Results
Poor wash results My garments are looking grey and there are limescale deposits present in the drum of my washing machine. o There is not enough detergent being added. o The incorrect detergent is being used. o Stains are not being pre-treated. o The correct wash program or wash temperature was not selected. -
Page 28: Installation
Installation IMPORTANT: THIS INSTALLATION MUST COMPLETED BY A SUITABLY QUALIFIED PERSON. BAUMATIC ONLY SANCTION INSTALLATION GIVEN THIS INSTRUCTION MANUAL. SHOULD KEEP THE TRANSIT PACKAGING, IN CASE YOU NEED TO TRANSPORT THE MACHINE IN THE FUTURE. Locating your washing machine o Before commencing installation, check the location where you intend to install the appliance. -
Page 29: Adjusting The Height Of The Appliance
Adjusting the height of the appliance o Place the machine on a solid and level floor surface. o If the floor is uneven, the appliance should be adjusted otherwise the washing machine will not function properly. The uneven surface also vibrates the machine and causes it to move from its original position while in use and will create more noise. -
Page 30: Installing The Spacers
Installing the spacers o Remove the spacers from the accessories provided with the appliance. o Each spacer has two clasps as shown in the drawing below. Ensure that clasp A is secured to the right hand slot of hole 1. Clasp B should be secured to the left hand slot of hole 1. -
Page 31: Connecting To The Mains Water Supply
Connecting to the mains water supply IMPORTANT: The washing machine should never be connected to the water mains using an existing inlet hose, YOU MUST utilise the inlet hose that is provided with the appliance. Your appliance should be connected to a cold and hot water supply. o Ensure that a washer is placed inside the inlet pipe joint, as shown in the... -
Page 32: Connecting To The Water Outlet
Connecting to the water outlet o Remove the accessories which will include a drainage pipe, clamp and sealing ring. o Position the clamp over the drainage pipe. o Fix the sealing ring onto the water outlet port. o Attach the drainage pipe over the sealing ring onto the water outlet port. -
Page 33: Power Supply
o The drain hose should not be positioned any higher than 90 cm as this will cause drainage problems. o You can place the end of the drain hose in your drain pipe. Push it a short way down into your drain pipe (max 100mm). IMPORTANT: Do not insert the drain hose too deeply into the water pipe, as this may cause siphoning. -
Page 34: Before First Use Maintenance Wash
o The moulded plug that is supplied with the appliance must be placed into an earthed and insulated socket. o Broken or damaged power leads must only be replaced by a suitably qualified person. A power lead of a similar type must be used in replacement. -
Page 35: Customer Care
You should turn the washing machine off using the POWER button. Disconnect the appliance from your mains supply. Then arrange for an engineer to attend the appliance. You should contact Baumatic Customer Care Department on 1800 444 357. ENGINEER ATTENDS... -
Page 36: General Troubleshooting
General troubleshooting Problem Possible solution o When the machine o The washing machine will start from starts from the the SPIN process in order to spin RINSE function, the out the water and detergent from washing machine the clothes, then input the water (if does not add water. - Page 37 - like plinths, or any installation other than the one specified by Baumatic Ltd. has been completed. Please refer to the conditions of guarantee that appear on the warranty card that you receive with the appliance.
-
Page 39: Contact Details
Service Telephone 1800 444 357 Website www.thinkappliances.com Applico Ltd. P.O. 92900 Onehunga, Auckland, New Zealand 1061 Website www.baumatic.co.nz United Kingdom Baumatic Ltd., Baumatic Buildings, 6 Bennet Road, Reading, Berkshire RG2 0QX United Kingdom Sales Telephone (0118) 933 6900 Website: www.baumatic.co.uk...
Need help?
Do you have a question about the BWM5001 and is the answer not in the manual?
Questions and answers