Table of Contents
Advertisement
Quick Links
Advertisement
Table of Contents

Subscribe to Our Youtube Channel
Related Manuals for Baumatic BWM1409W


Summary of Contents for Baumatic BWM1409W
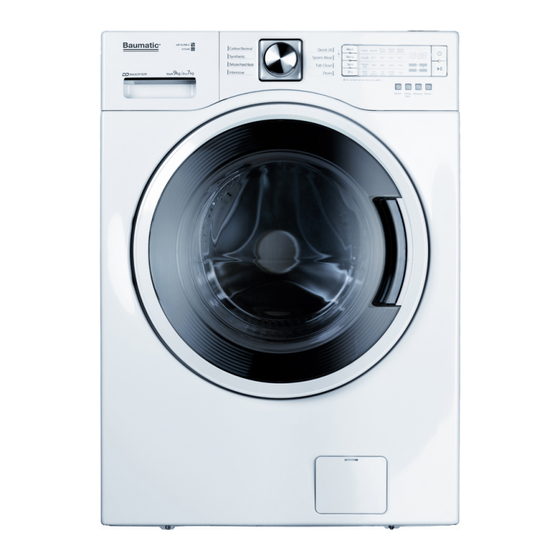
- Page 1 BWM1409W 60 cm 9 kg Freestanding washing Machine...
- Page 2 USER MANUAL FOR YOUR BAUMATIC BWM1409W 60 cm 9 kg Freestanding washing machine NOTE : This User Instruction Manual contains important information, including safety & installation points, which will enable you to get the most out of your appliance. Please keep it in a safe place so that it is easily available for future reference;...
-
Page 3: Table Of Contents
Contents Environmental note Important safety information 5 – 6 Specifications Description of the appliance Control panel 9 - 10 LCD display 10-11 Detergent drawer 11-12 Preparing the wash cycle 12-14 Preparing your garments for washing 12-13 A selection of wash care symbols Detergents and conditioners Wash program table Wash program guidance... -
Page 4: Environmental Note
Environmental note... -
Page 5: Important Safety Information
General Safety o Repairs to your appliance must only be carried out by a Baumatic engineer or one of its authorised service agents. Any attempt by an inexperienced person to repair the appliance, could result in injury or damage to your washing machine. - Page 6 This appliance is only designed to wash normal domestic washloads. If you use your washing machine in any other way or it is incorrectly used, then Baumatic accepts no liability for any damage that might be caused and any guarantee will be void.
-
Page 7: Specifications
Specifications o 18 wash programs o 9 kg wash load o 1400 rpm maximum spin speed o LED display o Delay start o Digital countdown indicator o Open door indicator o Water supply indicator o Wash phase indicator o Tilted drum o Air bubble washing system o 488 mm porthole and 180°... -
Page 8: Description Of The Appliance
Description of the appliance Accessories... -
Page 9: Control Panel
Control panel 1) Power button. Press this button to turn the power on or off. 2) Start/pause button. Operation and temporary stop is repeated as it is pressed. When you want to change a program while it is in use, press this button, then select the program you want to change to, and then press this button again. -
Page 10: Lcd Display
6) Wash button. You can select the cycle you want by using this button. The light of the chosen cycle will glow after selection. As the button is pressed, the wash cycle is chosen through the following options: Wash Soak Pre-wash 7) Rinse + Spin button. -
Page 11: Detergent Drawer
Spin speeds This light indicates whether a spin speed has been selected. Child lock This light indicates that the Child Lock has been switched on. Door lock This light indicates that the automatic door lock has been activated as the cycle is in progress. Timer display This indicates how long is left of the wash cycle that is in progress. -
Page 12: Preparing The Wash Cycle
Conditioner section This compartment should be used for liquid conditioners (fabric softener, starch). They will be added to the wash load during the final rinse. Pre wash section This compartment should have detergent placed in it, if you are going to select a pre-wash before the main wash cycle. -
Page 13: A Selection Of Wash Care Symbols
o New garments often contain an excess of dye, therefore it is advisable to wash them separately for their first wash. o Garments should be unfolded and shook out before being placed inside the machine. A selection of wash care symbols o The wash care symbols should be used to help you to select the most suitable wash program. -
Page 14: Detergents And Conditioners
Detergents and conditioners The amount of detergent that you need to use in your appliance, will depend on o The degree of soiling. Lightly soiled garments in general require less detergent. o The size of the wash load. A smaller wash load will require a reduction in the amount of detergent. -
Page 15: Wash Program Table
Wash program table Program Fabric type Proper Option Maximum temp. Load Cotton/ First check if laundry is 60°C Pre-wash Normal machine washable (white (Cold, 30°C, + rinse cotton, linen towel and 40°C, sheets). 95°C). Colourfast garments (shirts, night dresses, pyjamas, and lightly soiled white cottons, underwear). -
Page 16: Selecting A Wash Program
o The washing machine automatically selects a spin speed for a particular wash program. However it is possible to alter the spin speed by using the spin button. All spin speeds will not be available on certain wash cycles. o Important: You should make sure that the selected spin speed is appropriate for the garments that you are washing. - Page 17 A wash temperature of 40°C, with an 800 rpm spin will be • selected automatically by the appliance. You can use the temp button (4) to adjust the wash • temperature, ‘cold’, 30°C, 40°C, 60°C 95°C wash temperatures are available. You can use the spin button (5) to adjust the spin speed.
- Page 18 You can use the spin button (5) to adjust the spin speed. A 1400 • rpm spin speed is not available with the synthetic wash program. You can use the wash button (6) to select a pre-wash or soak • and the rinse button (11) can be pressed to program a rinse.
- Page 19 Intensive program o Put the laundry into the drum and then close the door. o Put detergent into the main wash and pre-wash compartments in the detergent drawer. Softener should be below the ‘MAX’ level. o Put detergent into the pre-wash compartment only if you want to add pre-wash.
- Page 20 A wash temperature of ‘cold’, with an 800 rpm spin will be • selected automatically by the appliance. * Press the start/pause button (2), the door will lock and after a few seconds you will hear the machine start to fill with water. Sports wear program o Put the laundry into the drum.
- Page 21 Wash only o Put the laundry into the drum and put detergent and softener into the detergent drawer. Then close the door. o Press the power button (1) and the LED will show only “---“. o Select the wash course you want by pressing the wash button (6).
-
Page 22: End Of Cycle
o Press the start/pause button (2) and the washer begin operating after the door is locked. End of cycle o At the end of a wash cycle, the door lock light will remain lit for a couple of minutes. o IMPORTANT: You should not attempt to open the porthole door until the door lock light has gone out. -
Page 23: Child Lock
o When you want to use bleach put this in the main wash compartment with the detergent. o Press the power button (1) and the LED display will show “---“. o Press the delay start button (9). If you press the start/pause button (2) next without selecting a program, the cotton wash is selected as a default wash cycle. -
Page 24: Control Panel And Washing Machine Cabinet
o Close the water tap. o We suggest that you disconnect the appliance from your mains supply, when it is not in use. Control panel and washing machine cabinet. IMPORTANT: Do not use any abrasive cleaner or household polish on either the control panel or operating parts. -
Page 25: Door
IMPORTANT: Do not use a descaling agent, iron/steel wool or scouring agents to clean the drum of your appliance. o Remove any rust stains on the drum with an appropriate stainless steel cleaning agent. Door o You should regularly check to see if any deposits have formed, or there are any foreign bodies inside or underneath the rubber door gasket. -
Page 26: Cleaning The Water Inlet Filter
o Pull out the bail tube that is to the left of the drain pump filter. Place the end of the tube into an adequately sized bowl and then remove the cap from the end of it. o When water no longer runs out of the bail tube, you can turn the drain pump filter cover anti-clockwise. -
Page 27: Removing Stains
To winterize the washer To use the washer again • Turn off the water supply. • Flush the water pies • Disconnect and drain the water and hoses. inlet hoses. • Reconnect the water • Run the washer on a drain and inlet hoses. -
Page 28: Stain Removal Guide
Stain removal guide STAIN TO REMOVE Blood Rinse immediately in COLD water. If the stain remains, soak in cold water with an enzyme pre- wash. Chewing gum Use ice in a plastic bag to harden the gum. Scrape off what you can and then sponge with white spirit. Chocolate/ Sponge with COLD water and then soak in an enzyme pre- Cocoa... -
Page 29: Poor Wash Results
Poor wash results My garments are looking grey and there are limescale deposits present in the drum of my washing machine. o There is not enough detergent being added. o The incorrect detergent is being used. o Stains are not being pre-treated. o The correct wash program or wash temperature was not selected. -
Page 30: Installation
Installation IMPORTANT: THIS INSTALLATION MUST COMPLETED BY A SUITABLY QUALIFIED PERSON. BAUMATIC ONLY SANCTION INSTALLATION GIVEN THIS INSTRUCTION MANUAL. SHOULD KEEP THE TRANSIT PACKAGING, IN CASE YOU NEED TO TRANSPORT THE MACHINE IN THE FUTURE. -
Page 31: Locating Your Washing Machine
o Cover the holes that you removed the transit bolts from, using the 4 transit covers supplied. Locating your washing machine o Before commencing installation, check the location where you intend to install the appliance. You should make sure that you have everything in place that is necessary for the correct installation. -
Page 32: Connecting To The Mains Water Supply
Connecting to the mains water supply IMPORTANT: The washing machine should never be connected to the water mains using an existing inlet hose, YOU MUST utilise the inlet hose that is provided with the appliance. Your appliance should only be connected to a cold water supply. For an ordinary tap For a screw-shaped tap... -
Page 33: Connecting To The Water Outlet
Connecting to the water outlet Secure the drain hose, so that it cannot move whilst the washing machine is in use. Place the end of the drain hose on your drain pipe. Push it a short way down into your drain pipe. IMPORTANT: Do not insert the drain hose too deeply into the water pipe, as this may cause siphoning. -
Page 34: Levelling The Appliance
Levelling the appliance Place the washing machine on a solid and level floor surface. DO NOT PLACE THE WASHING MACHINE ON A CARPET OR A SUSPENDED FLOOR. IMPORTANT: There should be no instability of the machine when the adjustable legs have been set to the correct level. -
Page 35: Power Supply
Power supply IMPORTANT:The electrical socket must still accessible once the appliance is installed. Consult the rating plate, located on the inner rim of the porthole door or the right hand side of the cabinet BEFORE making electrical connections. Ensure that the voltage reaching the plug, is the same as that on the rating plate. -
Page 36: Error Code Failure System
Error code failure system If your appliance senses that it is not operating correctly, then an error code may appear on the LCD display. The following error codes can possibly be remedied by the customer and the steps outlined below should be followed. BEFORE COMPLETING MAINTAINEANCE... -
Page 37: General Troubleshooting
You should turn the washing machine off using the POWER button. Disconnect the appliance from your mains supply. Then arrange for an engineer to attend the appliance. You should contact Baumatic Customer Care Department on (0118) 933 6911. ENGINEER ATTENDS... - Page 38 Or any installation other than the one specified by Baumatic Ltd. has been completed. Please refer to the conditions of guarantee that appear on the warranty card that you receive with the appliance.
-
Page 39: Contact Details
United Kingdom Czech Republic Baumatic Ltd., Baumatic CR spol s.r.o. Baumatic Buildings, Průmyslová zóna Sever 696 6 Bennet Road, 460 11 Liberec 11 Reading, Berkshire Czech Republic RG2 0QX United Kingdom +420 483 577 200 Sales Telephone www.baumatic.cz (0118) 933 6900...
Need help?
Do you have a question about the BWM1409W and is the answer not in the manual?
Questions and answers