Table of Contents
Advertisement
Quick Links
Advertisement
Table of Contents

Related Manuals for Baumatic BWM1417W


Summary of Contents for Baumatic BWM1417W
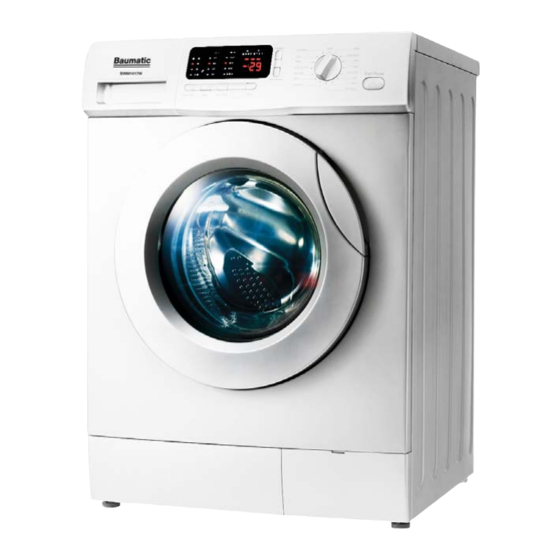
- Page 1 BWM1417W 60 cm 7 kg Washing Machine...
- Page 2 USER MANUAL FOR YOUR BAUMATIC BWM1417W 60 cm 7 kg Washing machine NOTE : This User Instruction Manual contains important information, including safety & installation points, which will enable you to get the most out of your appliance. Please keep it in a safe place so that it is easily available for future reference;...
-
Page 3: Table Of Contents
Adjusting the height of the appliance Connecting to the mains water supply Connecting to the water outlet 30 - 31 Power supply Before first use maintenance wash Error code failure system General troubleshooting 34 – 35 Baumatic consumables Technical data Contact details... -
Page 4: Environmental Note
Environmental note... -
Page 5: Important Safety Information
General Safety o Repairs to your appliance must only be carried out by a Baumatic engineer or one of its authorised service agents. Any attempt by an inexperienced person to repair the appliance, could result in injury or damage to your washing machine. - Page 6 If you use either dyes or bleaching agents inside this machine, then you should consult with the manufacturer of these products to make sure they are suitable for use in your washing machine. Baumatic cannot be held responsible for any damage that may result. Child Safety o Your washing machine should only be used by adults.
-
Page 7: Specifications
Specifications o 15 program options o 7 kg wash load o 1400 rpm maximum spin speed o Variable spin speed o LED display o Digital countdown indicator o Delay start o Wash temperature control o Anti-crease function o Safety lock o Failure detection system o Imbalance control system o Overflow protection... -
Page 8: Description Of The Appliance
Ratings Energy efficiency class Wash performance class Water extraction performance class For future reference please record the following information which can be found on the rating plate and the date of purchase which can be found on your sales invoice. The rating plate for your washing machine will either be located on the right hand side of the cabinet or behind the porthole door. -
Page 9: Control Panel
Control panel 1) Program selection dial. This dial can be rotated to select the appropriate wash program for your wash load. 2) Start/pause button. This button can be pressed to start a wash program and again to temporarily pause the cycle. 3) Extra function button. -
Page 10: Lcd Display
5) Water level selection button. You can adjust the water level for the washing and rinsing programs according to the amount of laundry. Press the button repeatedly to choose from the following options: Tiny High 6) Water temperature selection button. This button can be used to adjust the washing temperature. -
Page 11: Detergent Drawer
E) Pre-wash LED. This light will come on when a pre-wash is set for a wash program. F) Delay start light. This light will flash to indicate that a delayed start has been programmed. The LED display will also show the time left until the cycle begins. -
Page 12: Preparing The Wash Cycle
Pre wash section This compartment should have detergent placed in it, if you are going to select a pre-wash before the main wash cycle. Preparing the wash cycle Preparing your garments for washing o Your washing should be sorted out, according to the fabric type and the wash care symbol that is printed on the garment’s wash care label (see separate section on wash care symbols). -
Page 13: A Selection Of Wash Care Symbols
A selection of wash care symbols Washing Normal Normal Boiling Do not Wool Do not Bleachable temp temp temp bleach! seal wash! in cold 60°C 40°C 95°C water cleaning Hand Benzine All but TRI Do not Delicate Delicate wash only clean! temp temp... -
Page 14: Wash Program Table
Liquid detergent If you are using liquid detergent, then in the majority of cases the liquid should be placed inside the dosing device supplied by the detergent manufacturer and placed inside the drum. All instructions on the detergent packaging should be followed. Low temperatures o The enzymes in biological washing detergents work best at low temperatures to provide excellent cleaning and stain removal... - Page 15 clothes. Silk Optional 0:42 Silk clothes. Kids Underwear wear 1000/1400 Optional Optional 1:52 Children’s underwear. Colour 1000/1400 Optional Optional 1:07 Ordinary children’s wear. Comparatively Heavy 1000/1400 Optional 1:38 dirty children’s wear. Active enzyme 60 (Default) 1000/1400 Optional 2:16 Comparatively dirty clothes. Self-clean 95 (Default) 1:12...
-
Page 16: Wash Program Guidance
Wash If needed Rinse + Spin If needed Drain + Spin Drain Pre Wash: If the laundry is heavily soiled, the pre-wash option is recommended. This option is available for cotton, jeans, synthetics, kids wear and wash programs. You should place detergent in the pre- wash compartment of the detergent drawer, as well as in the main wash compartment. -
Page 17: Selecting A Wash Program
o The LED display shows an approximate time for the selected wash cycle. Please note that factors external to the machine, e.g. the temperature of your water supply, your water pressure etc. can affect the time it takes for a wash cycle to complete. Selecting a wash program o Put the laundry into the drum and then close the door. -
Page 18: Adding A Garment
o When the door lock light has gone out you can open the porthole door and remove the laundry. Adding a garment o To add an additional item of clothing, press the add garment button (4). Wait until the machine stops and the door lock releases. -
Page 19: Child Lock
o Press the delay start button (8) repeatedly to select the required delay time, as shown on the LED display. o Press the start/pause button (2). The time delay LED should light. o After the set delay time has elapsed, the machine will begin automatically. -
Page 20: Control Panel And Washing Machine Cabinet
Control panel and washing machine cabinet. IMPORTANT: Do not use any abrasive cleaner or household polish on either the control panel or operating parts. o Wipe over the control panel and the external surface of the machine using a brand new damp cloth with warm water. o If you ever spill any liquid detergent or conditioner from the detergent drawer onto the washing machine cabinet, then these should be cleaned up immediately as they could be corrosive. -
Page 21: Door
o Remove any rust stains on the drum with an appropriate stainless steel cleaning agent. Door o You should regularly check to see if any deposits have formed, or there are any foreign bodies inside or underneath the rubber door gasket. This sits inside the opening of the porthole door. Cleaning the drain pump filter IMPORTANT: Switch off your washing machine and disconnect the plug from your mains supply. -
Page 22: Cleaning The Water Inlet Filter
Cleaning the water inlet filter o Clean the filter when water leaks from the water inlet. o Always pull the power plug out before cleaning. o Turn off the water supply to the washer and separate the inlet hose. o Rotate the inlet water pipe anticlockwise to release. -
Page 23: Removing Stains
Removing stains Garments that are covered in stains, grease or are heavily soiled may need to be pre-washed or soaked before being placed inside of the washing machine. o Soaking helps to remove protein-type stains, like blood, milk or grass. o Pre-washing helps to loosen soil before the main wash. - Page 24 Tomato Scrape the dried pieces without ruining the material, then paste leave in cold water for about 30 minutes and wash by rubbing with detergent. Meat broth/ Eliminate the dried stain residues and wipe with a sponge or soft cloth wetted in cold water. Rub with detergent and wash with diluted lye.
-
Page 25: Poor Wash Results
Poor wash results My garments are looking grey and there are limescale deposits present in the drum of my washing machine. o There is not enough detergent being added. o The incorrect detergent is being used. o Stains are not being pre-treated. o The correct wash program or wash temperature was not selected. -
Page 26: Installation
Installation IMPORTANT: THIS INSTALLATION MUST COMPLETED BY A SUITABLY QUALIFIED PERSON. BAUMATIC ONLY SANCTION INSTALLATION GIVEN THIS INSTRUCTION MANUAL. SHOULD KEEP THE TRANSIT PACKAGING, IN CASE YOU NEED TO TRANSPORT THE MACHINE IN THE FUTURE. Washing machine accessories Removing the transit bolts... -
Page 27: Locating Your Washing Machine
Locating your washing machine o Before commencing installation, check the location where you intend to install the appliance. You should make sure that you have everything in place that is necessary for the correct installation. o Do not place or store your washing machine in a location where the ambient temperature could fall below 0°C, otherwise the water in it could freeze up. -
Page 28: Adjusting The Height Of The Appliance
Adjusting the height of the appliance o Place the machine on a solid and level floor surface. o If the floor is uneven, the appliance should be adjusted otherwise the washing machine will not function properly. The uneven surface also vibrates the machine and causes it to move from its original position while in use. -
Page 29: Connecting To The Mains Water Supply
Connecting to the mains water supply IMPORTANT: The washing machine should never be connected to the water mains using an existing inlet hose, YOU MUST utilise the inlet hose that is provided with the appliance. Your appliance should only be connected to a cold water supply. o Take out the supplied inlet hose. -
Page 30: Connecting To The Water Outlet
Connecting to the water outlet o Secure the drain hose, so that it cannot move whilst the washing machine is in use. o Place the end of the drain hose on your drain pipe. Push it a short way down into your drain pipe. o IMPORTANT: Do not insert the drain hose too deeply into the water pipe, as this may cause siphoning. - Page 31 o NEVER EXTEND THE DRAINAGE HOSE FROM ITS ORIGINAL LENGTH.
-
Page 32: Power Supply
Power supply o IMPORTANT: The electrical socket must still accessible once the appliance is installed. o Consult rating plate BEFORE making electrical connections. Ensure that the voltage reaching the plug, is the same as that on the rating plate. o DO REMOVE RATING PLATE... -
Page 33: Error Code Failure System
You should turn the washing machine off using the POWER button. Disconnect the appliance from your mains supply. Then arrange for an engineer to attend the appliance. You should contact Baumatic Customer Care Department on (0118) 933 6911. ENGINEER ATTENDS... -
Page 34: General Troubleshooting
General troubleshooting Problem Possible Solution The washing machine does Close the washing machine’s door. not work. Confirm the wash cycle and press the start / pause button. Water leakage. Correctly connect the inlet water pipe. The spin of the clothes is Reload and distribute the laundry evenly in the abnormal. - Page 35 Or any installation other than the one specified by Baumatic Ltd. has been completed. Please refer to the conditions of guarantee that appear on the warranty card that you receive with the appliance.
-
Page 36: Baumatic Consumables
BC005 Stainless Steel Cleaner and Protector (250 ml) o BC007 E-Cloth – General Purpose Cloth o BC008 Microwave Cover To order a Baumatic consumable product please call 0123 5437 244 and quote the product code. You can also order online from eshop.baumatic.co.uk... -
Page 37: Technical Data
Technical Data Manufacturer BAUMATIC LTD Model Number BWM1417W Rated Capacity of Standard Cotton 7 kg Program Energy Efficiency Class Annual Energy Consumption (1) 208.10 kWh Energy Consumption of the Standard 0.98 kWh 60°C Cotton Program at Full Load Energy Consumption of the Standard 0.98 kWh... -
Page 38: Contact Details
United Kingdom Baumatic Ltd., Czech Republic Baumatic Buildings, Baumatic CR s.r.o. 6 Bennet Road, Lípová 665 Reading, Berkshire 460 01 Liberec 4 RG2 0QX Czech Republic United Kingdom +420 483 577 200 Sales Telephone (0118) 933 6900 www.baumatic.cz Sales Fax...
Need help?
Do you have a question about the BWM1417W and is the answer not in the manual?
Questions and answers