Table of Contents
Advertisement
Quick Links
Owner's Manual
VIQUA Arros™ Models:
Arros 9-IHS10, Arros 9-IHS12,
Arros 15-IHS10, Arros 15-IHS12,
Arros 15-IHS22, Arros 22-IHS22
425 Clair Rd. W, Guelph, Ontario, Canada N1L 1R1
t. (+1) 519.763.1032 • tf. (+1) 800.265.7246 (US and Canada only)
t. (+31) 73 747 0144 (Europe only) • f. (+1) 519.763.5069
e-mail: info@viqua.com
www.viqua.com
520520-R_RevB
Advertisement
Table of Contents

Subscribe to Our Youtube Channel
Related Manuals for Viqua Arros 9-IHS10


Summary of Contents for Viqua Arros 9-IHS10
- Page 1 Owner’s Manual VIQUA Arros™ Models: Arros 9-IHS10, Arros 9-IHS12, Arros 15-IHS10, Arros 15-IHS12, Arros 15-IHS22, Arros 22-IHS22 425 Clair Rd. W, Guelph, Ontario, Canada N1L 1R1 t. (+1) 519.763.1032 • tf. (+1) 800.265.7246 (US and Canada only) t. (+31) 73 747 0144 (Europe only) • f. (+1) 519.763.5069 e-mail: info@viqua.com...
- Page 2 • VIQUA replacement lamps undergo rigorous performance testing and strict quality control processes to ensure that the safety and performance certifications of the original equipment are not compromised. So, you can see that it's simply not worth the risk! Insist on genuine VIQUA replacement lamps.
-
Page 3: Safety Information
Safety Information Section 1 Safety Information These are the original instructions. Please read this entire manual before operating this equipment. Pay attention to all danger, warning, and caution statements in this manual. Failure to do so could result in serious personal injury or damage to the equipment. -
Page 4: Safety Precautions
Safety Information 1.2 Safety Precautions: D A N G E R Failure to follow these instructions will result in serious injury or death. • Electric Shock: To avoid possible electric shock, special care should be taken since water is present near the electrical equipment. Unless a situation is encountered that is explicitly addressed by the provided maintenance and troubleshooting sections, DO NOT attempt repairs yourself, refer to an authorized service facility. -
Page 5: Water Chemistry
N O T I C E • The Arros 9-IHS10, Arros 9-IHS12, Arros 15-IHS10, Arros 15-IHS12, Arros 15-IHS22 and Arros 22-IHS22 UV Systems have been validated through microbial testing. Through this testing, performance data has been generated for UV dose delivery to inactivate Cryptosporidium, Giardia, Escherichia coli (E. -
Page 6: General Information
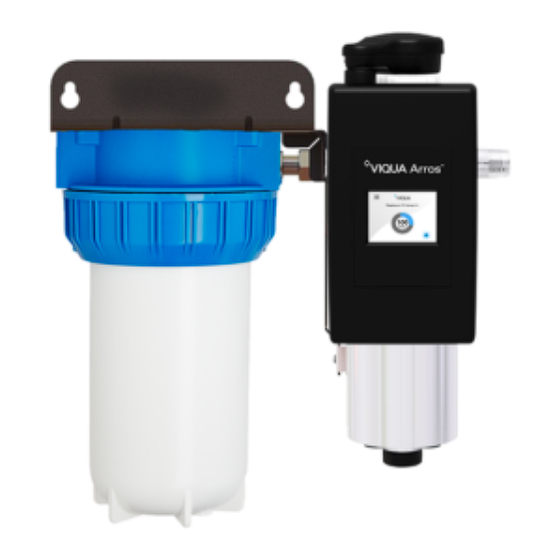
Figure 1 UV System Components Item Description Part Number UV Systems Arros 9-IHS10 VA09LU Arros 9-IHS12 Arros 15-IHS10 UV Lamp Unit- Hard glass coated UV lamp for long consistent life (9000 hours) sealed within a GE 214 fused quartz sleeve... - Page 7 Installation of UV System Item Description Part Number UV Systems Drain Plug 411111-R All Models Arros 9-IHS10 Arros 9-IHS12 CMB-510-HF Arros 15-IHS10 Sediment filter Arros 15-IHS12 Arros 15-IHS22 CMB-520-HF Arros 22-IHS22 Arros 9-IHS12 Arros 15-IHS12 Carbon filter C2-02PB Arros 15-IHS22...
- Page 8 Installation of UV System Prerequisites: • Determine appropriate indoor location for the UV System. Refer to Figure • Ensure adequate clearance above UV Chamber to allow for removal of the UV Lamp Unit. • Make sure to turn off the main water supply and depressurize the line. •...
- Page 9 Installation of UV System 4. Reversing the inlet and outlet ports. Note: If reversal of UV System ports is not required, skip this step and proceed to Step 5. The factory configuration of the UV System is with the inlet port on the left side of the unit. If required due to plumbing installations then this can be reversed as follows: •...
-
Page 10: Cleaning Procedure
Installation of UV System 6. When all plumbing connections are complete, slowly turn on the water supply and check for leaks. The most likely cause of leaks is from the O-ring seals in either the UV Lamp Unit or the drain plug. To resolve, shut water off and drain the UV Chamber. -
Page 11: Maintenance
Maintenance • Remove cartridge(s) and pour • Loosen the drain plug at the • Remove the sump housings • Reinstall the housings. 2 cups of household bleach using sump wrench. bottom of the UV Chamber and solution into the filter place a pail to catch the water. - Page 12 Maintenance 4.1 Replacing UV Lamp Unit Assembly N O T I C E • Refer to Section 5.1. Refer to www.lamprecycle.org for lamp disposal. • DO NOT use water during replacement of UV Lamp Unit. UV Lamp Unit replacement is a quick and simple procedure requiring no special tools. The UV Lamp Unit must be replaced after 9000 hours of continuous operation (approximately one year) in order to ensure adequate performance.
- Page 13 Maintenance 4.2 Cleaning UV Lamp Unit Assembly Quartz Envelope Minerals in the water slowly form a coating on the quartz envelope. This coating must be removed because it reduces the amount of UV light reaching the water, thereby reducing performance. If the envelope cannot be cleaned the UV Lamp Unit assembly must be replaced.
-
Page 14: Replacing Cartridges
Maintenance 4.3 Replacing Cartridges C A U T I O N The sump housings will be heavy. It is recommended to change the filter cartridges regularly, approximately 3-4 times per year depending on water quality and usage. A gradual drop in water pressure after the filtration device is an indication that the pre-filter cartridges are nearing the end of their useful life. - Page 15 Operations Section 5 Operations WA R N I N G The advanced warning system has been installed to provide the optimum protection against microbiological contamination in water. DO NOT disregard the warning signals. The best way to ensure optimum UV performance is to have the water microbiologically tested by a recognized testing agency on a regular basis.
-
Page 16: Home Screen
Operations c. Screen Orientation Setup: Press No to skip this step. Figure 6 Startup Sequence d. Warranty Registration (Recommended): Follow the QR code to www.trojantechnologies.com/register to complete the online registration. Once completed (or if skipping this step), press Done to complete the Startup Sequence. Figure 7 Warranty Registration 5.2 Home Screen 1. - Page 17 Notes: 1) The UV System Wi-Fi capability is for firmware updates only (Section 5.5) and is not capable of system status or control. 2) Use of a non-VIQUA UV Lamp Unit will result in an ongoing fault mode (major lamp alarm) and will impair accurate lamp-life tracking. Lamp On Minor Alarms...
- Page 18 Operations 5.3 Menu Screen 1. From the Home Screen, press the top left icon to access the main menu screen. 2. The Menu Screen provides access to four main user screens: Figure 9 Menu Screen a. A spare parts menu screen for finding replacement part numbers. Figure 10 Spare Parts Menu b.
- Page 19 Operations c. Information menu which provides system information such as firmware version, Model number and serial number. Figure 12 Information Menu d. Contact dealer information menu provides information on finding a dealer in your area. Figure 13 Contact Dealer Information Menu 5.4 Lamp Head Status Lights The white top cap (Halo) of the lamp assembly will illuminate when the lamp is operating.
-
Page 20: Firmware Updates
Firmware updates are released periodically to enhance the performance or add features to the controller. New firmware can be uploaded to the controller using the VIQUA app from a smart phone or tablet. Scan the QR code or click the link below to download the VIQUA app:... - Page 21 Manufacturer’s Dose Flow Chart Symptom Possible Cause Possible Solution Ensure system has been installed on its own circuit as other equipment may be drawing power away from UV (ie pump or System shutting down fridge) Interrupted Controller intermittently UV System should not be installed on a circuit which is incorporated into a light switch Disconnect lamp from connector and reconnect, ensuring that Loose connection between lamp and lamp connector...
-
Page 22: Specifications
29 gpm (109.8 lpm) 42 gpm (159 lpm) 16mJ/cm (3.86 m /hr) (6.59 m /hr) (9.54 m /hr) 95%UVT VIQUA Standard 9 gpm (34.1 lpm) 15 gpm (56.8 lpm) 22 gpm (83.3 lpm) 30mJ/cm (2.0 m /hr) (3.41 m /hr) (5.0 m... -
Page 23: Section 9 Manufacturer's Warranty
VIQUA warrants the electrical (controller) and hardware components to be free from defects in material and workmanship for a period of five (5) years from the date of purchase. During this time, VIQUA will repair or replace, at its option, any defective parts covered by the warranty. - Page 24 425 Clair Rd. W, Guelph, Ontario, Canada N1L 1R1 t. (+1) 519.763.1032 • tf. (+1) 800.265.7246 (US and Canada only) t. (+31) 73 747 0144 (Europe only) • f. (+1) 519.763.5069 e-mail: info@viqua.com www.viqua.com À DÉPOSER À DÉPOSER EN MAGASIN EN DÉCHÈTERIE...
Need help?
Do you have a question about the Arros 9-IHS10 and is the answer not in the manual?
Questions and answers