Table of Contents
Advertisement
Quick Links
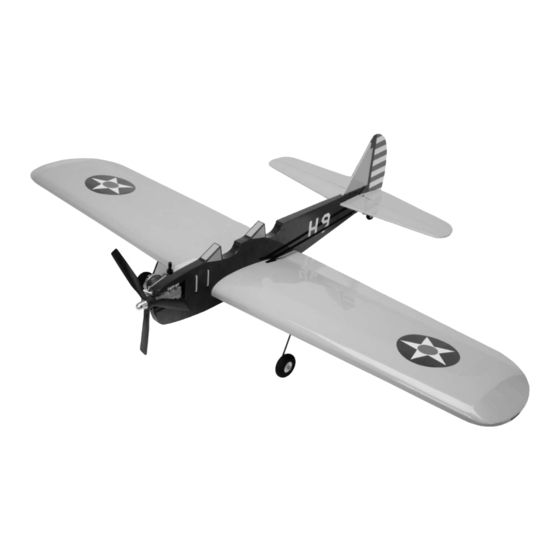
PT-19 CL
Specifications
Wingspan: .............................................................. 54 in (1372mm)
Length: ................................................................ 28.25 in (718mm)
Assembly Manual
Wing Area: ................................................519 sq in (33.48 sq dm)
Weight: ......................................................38–44 oz (1077–1247 g)
Engine: .................................................................................. .36 CL
Advertisement
Table of Contents

Subscribe to Our Youtube Channel
Related Manuals for Hangar 9 PT-19 CL


Summary of Contents for Hangar 9 PT-19 CL
- Page 1 PT-19 CL Specifications Wingspan: .............. 54 in (1372mm) Length: ..............28.25 in (718mm) Assembly Manual Wing Area: ..........519 sq in (33.48 sq dm) Weight: ............38–44 oz (1077–1247 g) Engine: .................. .36 CL...
-
Page 2: Table Of Contents
Control Line Handle • Blue HANU873 HAN0111 Control Line Connectors • White HANU870 Not Shown HAN0110 Control Lines (.015 x 60’) Note: Replacement fuselage does not come with engine. The above illustrates version with included engine. Hangar 9 PT-19 CL Assembly Manual... -
Page 3: Using The Manual
• Nut driver: 1/4-inch • Rubbing alcohol • Ruler • Square • Thin CA • Threadlock • Toothpicks • T-pins • Weight • Paper towels • Drill bit: 1/16-inch (1.5mm) • Phillips screwdriver: #0, #1 Hangar 9 PT-19 CL Assembly Manual... - Page 4 Mark the stabilizer on both the top Hint: Use a paper towel and rubbing alcohol to remove the lines drawn on the stabilizer before gluing the and bottom, left and right. stabilizer into the fuselage. Hangar 9 PT-19 CL Assembly Manual...
- Page 5 Go back to Step 8 and apply more epoxy as the stabilizer must be glued securely to the fuselage. Hangar 9 PT-19 CL Assembly Manual...
-
Page 6: Elevator Installation
Step 3 as well. Slide the hinges back into the elevator. Note: Only one elevator will have the notch that fits the elevator control horn in the joiner wire. Hangar 9 PT-19 CL Assembly Manual... - Page 7 Note: Do not use a CA accelerator on the hinges. The CA must be allowed to soak into the hinge naturally to provide the best bond between the hinge and surrounding wood. Hangar 9 PT-19 CL Assembly Manual...
-
Page 8: Vertical Fin Installation
1/16-inch (1.5mm) of covering on each side of the fuselage as shown in the second photo below. Hint: Use a paper towel and rubbing alcohol to remove any excess epoxy before continuing. Hangar 9 PT-19 CL Assembly Manual... -
Page 9: Wing Installation
(75mm) back from the leading edge. not square and may not fly properly. Step 5 Use a felt-tipped pen to transfer the outline of the fuselage onto the wing, both on the top and bottom. Hangar 9 PT-19 CL Assembly Manual... -
Page 10: Elevator Pushrod Installation
Go back and apply more epoxy as the wing must the lines drawn on the wing before gluing to the be glued securely to the fuselage. fuselage. Hint: Use a paper towel and rubbing alcohol to remove any excess epoxy before continuing. Hangar 9 PT-19 CL Assembly Manual... - Page 11 Step 3 Slide the wire pushrod end in the carbon pushrod. Use two 3mm setscrews and the included hex wrench to secure the end in the carbon pushrod. Hangar 9 PT-19 CL Assembly Manual...
-
Page 12: Tip Weight Installation
Insert a 1/2 ounce (14 g) weight into the tip weight box to start. You can adjust the amount of weight later depending on your particular flying style, but we have found this to be a very good starting point. Hangar 9 PT-19 CL Assembly Manual... -
Page 13: Landing Gear Installation
Hint: Use a covering trim iron to seal the edges of the covering down prior to installing the landing gear strut. Hangar 9 PT-19 CL Assembly Manual... - Page 14 Use a hobby knife and #11 blade to remove the covering a the rear of the fuselage for the tail wheel. Hangar 9 PT-19 CL Assembly Manual...
-
Page 15: Engine Installation
Hint: Before installing the screws, apply 2–3 drops of thin CA into each of the holes to harden the surrounding wood. Hangar 9 PT-19 CL Assembly Manual... - Page 16 If the engine stops in flight, this will greatly reduce the chances of breaking the propeller on landing. Note: The standard muffler supplied with the EVO 36CL engines provide the needed weight for proper balance. Hangar 9 PT-19 CL Assembly Manual...
-
Page 17: Connecting The Lines
Make sure the leadout guide is slid to the forward (towards the front of the wing) position and tightened in place. This is the proper starting point for the adjustable leadout guide. Hangar 9 PT-19 CL Assembly Manual... -
Page 18: Daily Flight Checks
(DUB404 or SUL425). your flying circle to warn others of the path of your aircraft When balancing your PT-19 CL, support the plane inverted at to prevent injury to spectators. the marks made on the top of the wing with your fingers or PRoPelleRS a commercially available balancing stand. -
Page 19: Safety Do's And Don'ts For Pilots
• Keep all chemicals, small parts and anything electrical out operation, maintenance, or attempted repair by anyone of the reach of children. other than Horizon. Return of any goods by Purchaser must be approved in writing by Horizon before shipment. Hangar 9 PT-19 CL Assembly Manual... -
Page 20: Instructions For Disposal Of Weee By Users In The European Union
Product will be repaired or replaced free of concerns regarding this product or warranty. charge. Repair or replacement decisions are at the sole discretion of Horizon Hobby. Hangar 9 PT-19 CL Assembly Manual... -
Page 21: 2008 Official Academy Of Model Aeronautics Safety Code
I will not fly a model aircraft closer than 50 feet to any above-ground electric utility lines. 3. I will ensure that my flying area is clear of all nonessential participants and spectators before permitting my engine to be started. Hangar 9 PT-19 CL Assembly Manual... -
Page 22: Building And Flying Notes
Building and Flying Notes Hangar 9 PT-19 CL Assembly Manual... - Page 23 Hangar 9 PT-19 CL Assembly Manual...
- Page 24 © 2008 Horizon Hobby, Inc. 4105 Fieldstone Road Champaign, Illinois 61822 (877) 504-0233 horizonhobby.com Hangar9.com 12851...
Need help?
Do you have a question about the PT-19 CL and is the answer not in the manual?
Questions and answers