
Related Manuals for ProBoat Miss GEICO 29 PRB4100B


Summary of Contents for ProBoat Miss GEICO 29 PRB4100B
- Page 1 Owners Manual • Bedienungsanleitung Manuel de l'utilisateur • Manuale dell'utente PRB4100B...
-
Page 2: Table Of Contents
NOTICE WARNING: Read the ENTIRE instruction All instructions, warranties and other collateral manual to become familiar with the features of the documents are subject to change at the sole product before operating. Failure to operate the discretion of Horizon Hobby, Inc. For up-to-date product correctly can result in damage to the product literature, visit www.horizonhobby.com product, personal property and cause serious injury. -
Page 3: Introduction
Introduction Pro Boat® RC models look as good as they perform. Our boats, which include everything from scale sailboats to fully licensed powerboats, exceed expectations and provide years of radio control fun and excitement. Whether your passion leads you towards the pure serenity of sailing or the all-out speed of a Deep-V, Pro Boat models fit your taste, budget and lifestyle. -
Page 4: Battery Safety Precautions
Battery Chemistry Switch This switch allows the ESC to detect voltage. When the At the factory, the ESC is programmed at High Cutoff. switch is in the OFF position, low voltage cutoff (LVC) High Cutoff: The Ni-MH cutoff voltage is .9 volts per is disabled. -
Page 5: Transmitter Battery Installation
Transmitter Battery Installation This transmitter requires 4 AA batteries. 1. Remove the battery cover from the transmitter. 2. Align the battery polarity with the markings in the compartment and install the batteries. 3. Install the battery cover. Transmitter Controls Reverse Switch Allows you to change the BIND... -
Page 6: Getting Started
Getting Started 1. Power on the transmitter. 6. After launching the boat in the water, start driving 4. Power on the ESC switch. slowly, and, if the boat does not go straight, adjust 2. Turn ON the Li-Po battery 5. Do a test of the transmitter’s the steering trim dial on the transmitter. -
Page 7: Binding
Binding 4. Release the bind button when the green LED flashes. Binding is the process of programming the receiver to Bind Button recognize the GUID (Globally Unique Identifier) code of a single specific transmitter. The DX2E and MR200 are bound at the factory. If you need to rebind, follow the BIND instructions below. -
Page 8: Motor Care
Center of Gravity 2. Move the batteries toward the front of the boat for Moving the batteries to the front or back of the faster initial acceleration to eliminate oscillation or compartment can significantly affect the boat's bouncing, and to increase stability. performance. -
Page 9: Maintenance
Maintenance 4. Carefully reinstall the flex shaft in the drive strut, Always replace the flex shaft when it is damaged or stuffing box and collet. If the flex shaft is difficult to shows visible wear or injury and property damage may remove or install in the collet, use a flat screwdriver to result. - Page 10 Brake: ON or OFF The included ESC programming card (DYNM3821) allows you to quickly program your Dynamite® Marine Brushless ON: The boat will stop immediately when the throttle is ESC control settings. returned to neutral. OFF: The boat will coast to a stop. Programmable Settings Timing: Low Timing or High Timing Throttle Reverse: ON or OFF...
-
Page 11: Checklists
Checklists Before Boating After Boating • Install fully charged batteries in your boat and • Always power off the receiver before powering off transmitter the transmitter to maintain control of the boat and to retain transmitter binding • Connect the boat’s battery to the ESC • Disconnect the battery from the receiver and remove • Make sure the boat is bound to the transmitter the batteries from the boat... - Page 12 Troubleshooting Guide Boat will not connect Transmitter is too near boat during Move powered transmitter a few feet from boat, (after binding) to connecting process disconnect and reconnect battery to boat transmitter Boat or transmitter is too close to large Move boat or transmitter away from large metal metal object, wireless source or an- object...
-
Page 13: Limited Warranty
Limited Warranty What this Warranty Covers as the purchaser or user are not prepared to accept the liability associated with the use of the Product, purchaser Horizon Hobby, Inc. (“Horizon”) warrants to the original is advised to return the Product immediately in new and purchaser that the product purchased (the "Product") will unused condition to the place of purchase. -
Page 14: Contact Information
Warranty Requirements You must include this request with your item submitted for service. Non-warranty service estimates will be billed For Warranty consideration, you must include a minimum of ½ hour of labor. In addition you will be your original sales receipt verifying the proof-of- billed for return freight. -
Page 15: Fcc Information
FCC Information Antenna Separation Distance When operating your Spektrum transmitter, please be This device complies with part 15 of the FCC rules. sure to maintain a separation distance of at least 5 cm Operation is subject to the following two conditions: between your body (excluding fingers, hands, wrists, (1) This device may not cause harmful interference, and ankles and feet) and the antenna to meet RF exposure... - Page 16 HINWEIS WARNUNG: Lesen Sie die GESAMTE Alle Anweisungen, Garantien und dazugehörigen Bedienungsanleitung, um sich vor dem Betrieb mit Dokumente können ohne Ankündigung von Horizon den Produktfunktionen vertraut zu machen. Wird Hobby Inc. geändert werden. Eine aktuelle das Produkt nicht korrekt betrieben, kann dies zu Version ersehen Sie bitte im Support Feld unter: http:// Schäden am Produkt oder persönlichem Eigentum www.horizonhobby.com.
-
Page 17: Einleitung
Hersteller RC Hobbyprodukte und Sie können sich immer darauf verlassen, dass wir für Sie da sind. Die Marke ProBoat hilft ihnen dabei ihre Passion für Boote in die Realität zu bringen ganz gleich ob sie Anfänger oder Profi sind. Bitte lesen Sie diese Anleitung für Anweisungen zum Betrieb und Wartung. -
Page 18: Einsetzen Des Akkupacks
Akkuwahlschalter es die Niederspannungsabschaltung und andere Einstellungen zu programmieren. Der Schalter dient zur Spannungserkennung des Reglers. Ab Werk ist die Abschaltung auf High Cutoff ((hohe Befindet sich der Schalter in der OFF Position ist die Abschaltspannung) programmiert. Niederspannungsabschaltung (LVC) deaktiviert. Sie erkennen die Abschaltung daran, dass das Boot während High Cutoff (hohe Abschaltspannung): Die NiMh der Fahrt Leistung verliert.. -
Page 19: Einsetzen Der Senderbatterien
Einsetzen der Senderbatterien Zum Betrieb des Senders sind 4 AA Batterien erforderlich. 1. Nehmen Sie den Batteriefachdeckel vom Sender ab. 2. Setzen Sie die Batterien polrichtig den Markierungen folgend ein. 3. Setzen Sie die Batteriefachabdeckung wieder auf. Senderkontrollen Reverseschalter Mit den Reverseschaltern BIND können Sie die... -
Page 20: Für Den Start
Für den Start 4. Testen Sie die Kontrollen mit 5. Nachdem Sie das Boot in das Wasser gesetzt 1. Schalten Sie den Sender ein. dem Boot auf dem Ständer. haben fahren Sie bitte langsam los. Sollte das 2. Schließen Sie den Akku an. Boot nicht geradeaus fahren justieren Sie die Trimmung. -
Page 21: Binden
Binden 4. Lassen Sie den Bindeknopf los wenn die grüne LED blinkt. Binden ist der Prozess der Programmierung des Bindeknopf Empfängers mit dem senderspezifischen Signals (GUID Globally Unique Identifier) Die DX2E und der MR200 sind ab Werk bereits gebunden. BIND Sollten Sie die Bindung erneut ausführen wollen, folgen Sie bitte den untenstehenden Anweisungen. -
Page 22: Motorpflege
Der Schwerpunkt Das nach vorne oder zurück bewegen der Akkus hat signifikanten Einfluss auf die Leistung des Bootes. 2. Bewegen Sie die Akkus weiter vorne, erhöhen Sie 1. Bewegen Sie die Akkus weiter nach hinten im Boot, die Beschleunigung, verringern Schwingungen und hebt sich für größere Geschwindigkeit der Bug höher erhöhen die Stabilität. -
Page 23: Wartung
Wartung 4. Schieben Sie vorsichtig die Welle wieder in das Ersetzen Sie immer die Flexwelle wenn diese beschädigt Stevenrohr, Halter und Spannzange ein. Sollte ist oder sichtbare Zeichen von Abnutzung zeigt, da sonst die Flexwelle zu schwierig in in die Spannzange Verletzungsgefahr oder die Gefahr von Sachbeschädigung einzuführen sein spreizen Sie mit einem besteht. - Page 24 Elektronischer Fahrtenregler Brake (Bremse) ON (Ein) oder OFF (Aus) Die im Lieferumfang enthaltene Programmierkarte (DYNM3821) erlaubt es ihnen schnell und bequem ihren ON (Ein): Das Boot stoppt unverzüglich wenn der Dynamite Marine Brushless Regler zu programmieren. Gashebel zurück auf Neutralstellung geht. OFF (Aus): Das Boot läuft aus bis zum Stop Programmierbare Einstellungen Timing: Low (Niedriges) Timing oder High (Hohes)
-
Page 25: Checkliste Vor Dem Fahren
Checkliste Vor dem Fahren Nach dem Fahren • Setzen Sie vollständig geladene Akkus und Batterien • Schalten Sie immer zuerst den Empfänger aus bevor in Boot und Sender. Sie den Sender ausschalten. Damit bleibt das Modell unter Senderkontrolle und Sie verhindern dass der • Schließen Sie den Akku an den Boots-Regler an. - Page 26 Hilfestellung zur Problemlösung Boot will sich nicht an Sender steht zu nah am Boot während Bringen Sie den eingeschalteten Sender ein paar den Sender verbinden des Verbindevorganges. Meter weg vom Boot und versuchen erneut eine (Nach dem Bindevor- Verbindung. gang). Boot oder Sender sind zu nah an met- Bringen Sie den Sender und das Boot an einen allischen Objekten, Funkquellen oder...
- Page 27 Garantie und Service Die Garantie schließt Schäden, die durch falschen Einbau, falsche Handhabung, Unfälle, Betrieb, Service Informationen oder Reparaturversuche, die nicht von Horizon ausgeführt wurden aus. Rücksendungen durch den Käufer direkt an Horizon oder eine seiner Landesvertretung Warnung bedürfen der Schriftform. Ein ferngesteuertes Modell ist kein Spielzeug.
-
Page 28: Garantie Und Service Kontaktinformationen
Wartung und Reparatur Kostenpflichtige Reparaturen Muss Ihr Produkt gewartet oder repariert werden, Liegt eine kostenpflichtige Reparatur vor, erstellen wenden Sie sich entweder an Ihren Fachhändler wir einen Kostenvoranschlag, den wir Ihrem Händler oder direkt an Horizon. Rücksendungen/Reparaturen übermitteln. Die Reparatur wird erst vorgenommen, werden nur mit einer von Horizon vergebenen RMA wenn wir die Freigabe des Händlers erhalten. -
Page 29: Entsorgung In Der Europäischen Union
Konformitätshinweise für die Europäische Union BE BG GR HU MT NL Konformitätserklärung laut Allgemeine Entsorgung in der Anforderungen (ISO/IEC 17050-1:2004, Europäischen Union korrigierte Fassung 2007-06-15); Deutsche und Dieses Produkt darf nicht über den Hausmüll Englische Fassung EN ISO/IEC 17050-1:2010 entsorgt werden. Es ist die Verantwortung des Declaration of conformity Benutzers, dass Produkt an einer registrierten (in accordance with ISO/IEC 17050-1) - Page 30 REMARQUE AVERTISSEMENT : Lisez la TOTALITE Toutes les instructions, garanties et autres du manuel d’utilisation afin de vous familiariser documents de garantie sont sujets à la seule discrétion avec les caractéristiques du produit avant de le faire de Horizon Hobby, Inc. Veuillez, pour fonctionner.
-
Page 31: Introduction
Introduction Les modèles Pro Boat RC sont aussi élégants que performants. Notre gamme de bateaux s'étend des voiliers maquette aux répliques sous licence de bateaux de vitesse de compétition qui dépasseront vos espérances et vous offriront des années d'amusement. Si votre passion vous guide vers le calme de navigation à voile ou l'excitation de la vitesse avec un bateau de course, vous trouverez toujours un modèle Pro Boat adapté... -
Page 32: Installation Du Tube D'antenne
Interrupteur de sélection du type de batteries Le contrôleur est programmé à l'usine en coupure haute. Cet interrupteur permet au contrôleur de détecter la tension. Quand l'interrupteur est sur la position OFF, la Coupure haute: La coupure basse tension intervient à coupure basse tension (LVC) est désactivée. -
Page 33: Installation Des Piles De L'émetteur
Installation des piles de l'émetteur Cet émetteur nécessite 4 piles AA. 1. Retirez le couvercle de l'émetteur. 2. Insérez les piles en suivant les polarités indiquées dans le compartiment. 3. Installez le couvercle. Commandes de l’émetteur Interrupteur inverseur Permet de changer le sens BIND des commandes... -
Page 34: Démarrage
Démarrage 3. Connectez les batteries. 6. Après avoir mis le bateau à l'eau, commencez 1. Mettez l'émetteur sous par avancer doucement et si le bateau ne file 4. Mettez le contrôleur sous tension pas droit, réglez la trajectoire en ajustant le tension. -
Page 35: Essai De Votre Bateau Sur L'eau
Affectation L’affectation est le processus qui programme le récepteur Bouton affectation pour qu’il reconnaisse le code (appelé GUID - Globally Unique Identifier) d’un émetteur spécifique. Le DX2E et le MR200 sont affectés en usine. Si vous devez procéder BIND à une réaffectation, suivez les instructions ci-après. 1. -
Page 36: Centre De Gravité
Centre de gravité 2. Déplacez les batteries vers l'avant du bateau pour Le déplacement des batteries vers l'avant ou l'arrière augmenter l'accélération initiale, pour éliminer les influence de façon significative les performances du oscillations ou le rebond et augmenter la stabilité. bateau. -
Page 37: Maintenance
Maintenance Toujours remplacer le flexible quand il est endommagé 4. Réinstallez le flexible délicatement dans la chaise d'hélice, dans le presse étoupe et dans ou qu'il présente des trace d'usure. Un non respect de l'accouplement. Si le flexible est difficile à sortir ou cette consigne vous expose à... -
Page 38: Contrôleur Brushless
Contrôleur Brushless Frein : ON ou OFF La carte de programmation (DYNM3821) incluse vous permet de programmer rapidement votre contrôleur ON : Le bateau freine quand les gaz sont placés au brushless Dynamite.. neutre. OFF : Le bateau s'arrêtera sur la berge. Paramètres réglables Avance : Basse ou Haute Inversion de la direction des gaz : ON ou OFF... -
Page 39: Listes De Contrôles Avant La Navigation
Listes de contrôles Avant la navigation Après la navigation • Installez des batteries entièrement chargées • Éteignez toujours le récepteur avant d’éteindre dans votre bateau et dans l’émetteur. l’émetteur pour garder le contrôle du bateau et conserver l’affectation. • Connectez la batterie du bateau au contrôleur électronique de vitesse. - Page 40 Guide de dépannage Il est impossible L ’émetteur est trop proche du bateau lors Éloignez un peu l’émetteur allumé du bateau, d’affecter le bateau du processus d’affectation. déconnectez la batterie de celui-ci, puis à l’émetteur (durant reconnectez-la. l’affectation). Le bateau ou l’émetteur sont trop près Déplacez le bateau et l’émetteur à...
-
Page 41: Garantie Limitée
Le gouvernail ne piv- Le gouvernail, la liaison ou le servo est Réparez ou remplacez les pièces endommagées et ote pas. endommagé. réglez les commandes. Le câble est endommagé ou les connex- Contrôlez les câbles et les connexions, et procédez ions sont lâches. - Page 42 Maintenance et réparation manière que ce soit au produit et ce, indépendamment du fait qu’un recours puisse être formulé en relation avec Si votre produit doit faire l’objet d’une maintenance ou un contrat, la garantie ou l’obligation de garantie. Par d‘une réparation, adressez-vous soit à...
- Page 43 Informations de conformité pour l’Union européenne BE BG GR HU MT NL Elimination dans l’Union Européenne Ce produit ne doit pas être éliminé avec les ordures Déclaration de conformité ménagères. Il est de la responsabilité de l‘utilisateur (conformément à la norme ISO/IEC 17050-1) de remettre le produit à...
- Page 44 AVVISO AVVERTENZA: leggere TUTTO il manuale Tutte le istruzioni, le garanzie e gli altri documenti di istruzioni e familiarizzare con le caratteristiche del pertinenti sono soggetti a cambiamenti a totale discrezione prodotto prima di farlo funzionare. Un uso improprio di Horizon Hobby, Inc. Per una documentazione aggiornata del prodotto puo` causare danni al prodotto stesso sul prodotto, visitare il sito horizonhobby.com e fare clic e alle altre cose e gravi lesioni alle persone.
-
Page 45: Introduzione
Introduzione I modelli Pro Boat® RC sono belli e vanno bene. I nostri scafi, che includono barche a vela e motoscafi con licenza, vanno oltre le aspettative e danno anni di puro divertimento. Sia che la vostra passione si rivolga alla serenità della barca a vela o alla velocità... -
Page 46: Installazione Della Batteria Di Bordo
Interruttore per la scelta della Consiglio: la scheda di programmazione ESC (DYNM3821, venduta separatamente) permette batteria di regolare direttamente la tensione minima di spegnimento ed altri parametri dell’ESC. In fabbrica Questo interruttore permette all’ESC di rilevare la viene regolato con lo spegnimento “High Cutoff”. tensione. -
Page 47: Installazione Della Batteria Trasmettitore
Installazione della batteria trasmettitore Questo trasmettitore richiede 4 pile AA. Togliere il coperchio dal vano batteria del trasmettitore. Inserire le pile come si vede dalla figura, facendo attenzione a rispettare le polarità indicate nel portapile. Rimettere il coperchio del vano batteria. -
Page 48: Come Iniziare
Come iniziare 4. Accendere l’interruttore 6. Dopo aver messo la barca in acqua, procedere 1. Accendere il trasmettitore. dell’ESC. lentamente e, se si nota che la barca non 2. Se si usano le batterie va diritto, regolare il trim del timone sul 5. -
Page 49: Collegamento (Binding)
Collegamento (binding) 4. Rilasciare il pulsante di collegamento quando il Il collegamento è il processo di programmazione del LED verde lampeggia. ricevitore dell'unità di controllo per il riconoscimento Pulsante di collegamento del codice univoco di identificazione (GUID, Globally Unique Identifier) di un trasmettitore specifico. -
Page 50: Manutenzione Del Motore
Centro di gravità Spostando avanti o indietro la batteria si possono 2. Spostare la batteria in avanti verso la prua per avere cambiare in modo significativo le prestazioni dello scafo. una maggiore accelerazione iniziale, per eliminare le 1. Spostare la batteria indietro verso la poppa per oscillazioni o i rimbalzi e aumentare la stabilità.. -
Page 51: Manutenzione
Manutenzione 4. Rimontare accuratamente l’albero flessibile nel Sostituire sempre l’albero flessibile quando è danneggiato montante, premistoppa e pinza. Se ci fossero difficoltà o mostra evidenti segni di usura, altrimenti si potrebbero a togliere o inserire l’albero nella pinza, si può usare fare danni maggiori. - Page 52 Freno: ON oppure OFF La card di programmazione inclusa con il regolatore (ESC) Dynamite® marino (DYNM3821) permette di ON: La barca si ferma immediatamente quando il programmarlo velocemente. comando motore viene portato al punto neutro. OFF: La barca si ferma gradualmente. Programmazione Anticipo (timing): basso (low) o alto (high) Inversione del motore (Reverse): ON oppure OFF...
-
Page 53: Prima Della Navigazione
Liste di controllo Prima della navigazione Dopo la navigazione • Installare batterie completamente cariche • Spegnere sempre il ricevitore prima di spegnere nell'imbarcazione e nel trasmettitore il trasmettitore per mantenere il controllo • Connettere la batteria dell'imbarcazione all'ESC. dell'imbarcazione e conservare il collegamento del trasmettitore • Verificare che sia stato eseguito il collegamento • Scollegare la batteria dal ricevitore e rimuovere... - Page 54 Guida alla soluzione dei problemi La barca non si con- Il trasmettitore è troppo vicino alla Allontanare il trasmettitore dalla barca e rifare la nette (bind) al trasmetti- barca procedura di connessione tore (dopo il "binding") La barca o il trasmettitore sono troppo Spostare trasmettitore e barca in un'altra po- vicini ad oggetti metallici o ad altre fonti sizione...
-
Page 55: Durata Della Garanzia
Durata della Garanzia non accetta nessuna responsabilità per danni o lesioni derivanti da tali circostanze. Con l’utilizzo e il montaggio del prodotto l’utente acconsente a tutte le condizioni, Periodo di garanzia limitazioni e riserve di garanzia citate in questa sede. Garanzia esclusiva - Horizon Hobby, Inc., (Horizon) Qualora l’utente non fosse pronto ad assumersi garantisce che i prodotti acquistati (il “Prodotto”) sono... -
Page 56: Informazioni Sulla Conformità Per L'unione Europea
Riparazioni a pagamento Se bisogna effettuare una riparazione a pagamento, effettueremo un preventivo che verrà inoltrato al ATTENZIONE: Le riparazioni a pagamento vostro rivenditore. La riparazione verrà effettuata dopo sono disponibili solo sull’elettronica e sui motori. l’autorizzazione da parte del vostro rivenditore. La Le riparazioni a livello meccanico, soprattutto per somma per la riparazione dovrà... -
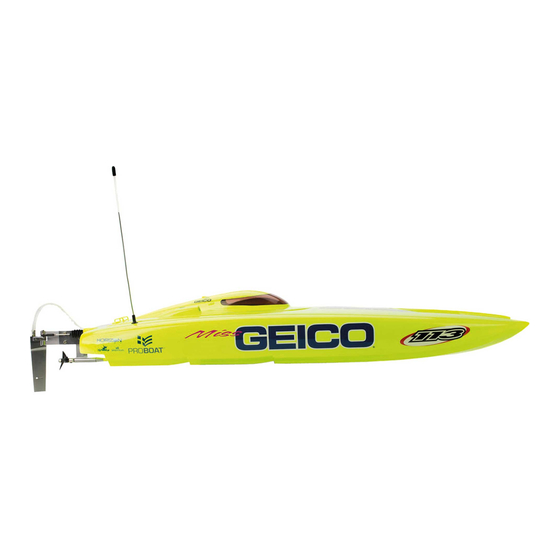
Page 58: Identificazione Dei Componenti
Identification of Components / Identifizierung der Komponenten Identification des composants / Identificazione dei componenti Miss Geico 29... - Page 59 Replacement Parts / Ersatzteile / Pièces de rechange / Pezzi di ricambio PRB3835 1500Kv BL Motor 1500 Kv BL Motor Moteur brushless 1500Kv BL Motore 1500Kv PRB3307 Motor Mount Motorhalter Support moteur Supporto motore PRB4107 Flex shaft Flexwelle Flexible Albero flessibile PRB4109 Prop Nut Propeller Mutter...
- Page 60 35902.1 Created: 3/2013 ©2012 Horizon Hobby, Inc. Pro Boat, DSM, DSM2, Dynamite, Speedpack, Prophet, EC3, the Pro Boat logo and the Horizon Hobby logo are trademarks or registered trademarks of Horizon Hobby, Inc. The Spektrum trademark is used with permission of Bachmann Industries, Inc. All other trademarks, service marks or logos are property of their respective owners.
Need help?
Do you have a question about the Miss GEICO 29 PRB4100B and is the answer not in the manual?
Questions and answers