Ares Gamma 370 Instruction Manual
Hide thumbs
Also See for Gamma 370:
- Instruction manual (40 pages) ,
- Instruction manual (56 pages) ,
- Instruction manual (40 pages)
Advertisement
Quick Links
Specif
fications
Wingspan
n:
Length:
Weight wi
ith Battery
Battery:
Charger:
Transmitt
er:
On‐Board
Electronic
s
38.6 in
30.6 in
y:
16.0 oz
1000m
DC 2S 7
RTF, re
6‐chan
s:
Receive
2 servo
Ins
struc
(980mm)
(775mm)
z (455g)
mAh 2S 7.4V
V LiPo (inclu
7.4V LiPo B
Balancing a
equired for
RFR)
nel 2.4GHz
z (included
er (installe
d in RTF, re
os (installed
d in RTF an
1
ction
n Man
uded with
RTF, requi
nd AC ada
pter (includ
with RTF,
required fo
equired for
r RFR), ESC
nd RFR)
nual
red for RFR
R)
ded with
or RFR)
C and
2150
0
Advertisement

Subscribe to Our Youtube Channel
Related Manuals for Ares Gamma 370


Summary of Contents for Ares Gamma 370
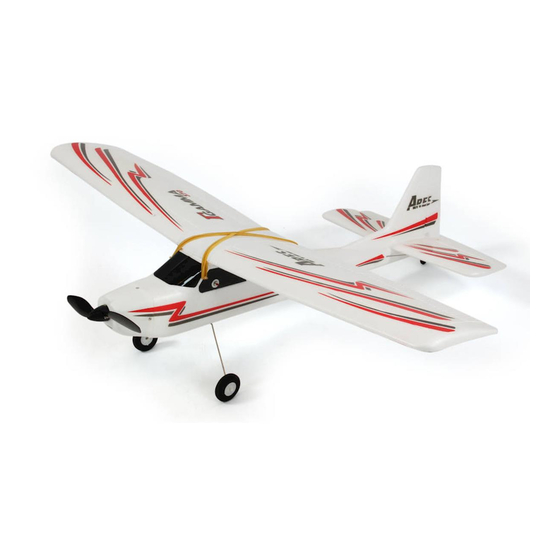
- Page 1 struc ction n Man nual Specif fications Wingspan n: 38.6 in (980mm) Length: 30.6 in (775mm) Weight wi ith Battery y: 16.0 oz z (455g) Battery: ...
- Page 2 Table of Cont tents Specificat ions ..........................1 Introducti ion ............................ 3 Safety Pre ecautions a and Warnin ngs ....................3 FCC/CE Inf formation .............
- Page 3 Introdu uction The Ares™ ™ [air‐eez] G Gamma 37 70 offers st ability and durability perfect fo r first‐time e pilots while also o delivering g the smoot th and cap able flight performan nce that ex xperienced sport flyer rs will enjoy. . The advan nced EPO f foam airfra ame design is not only y lightweig ht, durable e and easy to repair, it also arriv ves factory y‐assemble d and near rly ready‐to o‐fly right o out of the b...
- Page 4 As the use er of this pr roduct you u are solely and wholl y responsi ble for ope erating it in n a manner r that does not endan nger yourse elf and othe ers or resu lt in damag ge to the p roduct or t the property o of others. This mode el is contro lled by a ra adio signal that is sub bject to pos ssible inter ference fro om a variet ty of sources s outside yo our contro ol. This inte rference ca an cause m momentary y loss of con ntrol so it i s ...
- Page 5 Intended Use The remot te control is designed d exclusive ly for priva ate use in m model cons struction. T The remote e control is not for ind dustrial use e, e.g. to co ontrol mach hines and e equipment , determin ed. Any use ot ther than a as describe ed above, c can lead to damage of f the produ uct, and be eyond this, with the a associated risks, such as short ci rcuit, fire, electric sho ock, etc.. Contact w with water m must be av voided! ...
- Page 6 With direc ct sending to the serv vice depart tment must t be consu lted before ehand (held d by telephone e or e‐mail) ). The posta ge costs bo orne by the e consigno r. Paid pac kages are n not accept ed. Everyo ne sent in warranty c case is first t examined d by our se rvice depa rtment on admissibil ity. For reje ect warranty c claims will be charged d back to a a control an nd process ing fee bef fore we ret turn the product. R Repairs not t covered u under warr...
- Page 7 Gamm ma 370 RFR C ontents Item scription ......... Gam mma 370 R RFR Airfram me Requir red to C Comple The Gamm ma 370 RTF F version in ncludes eve erything ne eed to fly ri ight out of the box. T here’s ...
- Page 8 equipped with a rud der for pri mary ‘turn ing’ contro ol. This help ps to ensur re an easie r transition n to control ling ‘4‐cha nnel’ mode els equippe ed with aile erons later r on. Before e the Fir rst Fligh ht Chec cklist (R RTF Ve rsion O Only) PLEASE NO OTE: This c checklist is s NOT inten nded to rep place the c content inc...
- Page 9 LiPo B Battery W Warnin ngs and Usage e Guide elines IMPORTA ANT NOTE: Lithium Po olymer (LiP Po) batterie es are sign nificantly m more volati le than the e alkaline, N NiCd and N NiMH batte eries also u used in RC a application ns. All instr ructions an nd warnings must be fo ollowed ex xactly to pr revent prop perty dam age and/o r personal injury as ...
- Page 10 • When transporting or temporarily storing the battery, the temperature range should be from approximately 40–100°F. Do not store the battery or model in a hot garage, car or direct sunlight whenever possible. If stored in a hot garage or car the battery can be damaged or even catch fire. • Do not over‐discharge the LiPo flight battery. Discharging the LiPo flight battery to a voltage that is too low can cause damage to the battery resulting in reduced power, flight duration or failure of the battery entirely. LiPo cells should not be discharged to below 3.0V each under load. In the case of the 2‐Cell/2S 7.4V LiPo battery used to power the Gamma 370 you will not want to allow the battery to fall below 6.0V during flight. The included 20‐Amp Brushed Motor ESC (AZS1210) features a ‘soft’ low voltage cutoff (LVC) that smoothly reduces power to the motor/power system (regardless of the power level you have set with the left‐hand/throttle stick) to let you know the voltage of the battery is close to the 6.0V minimum. However, even before this reduction in power, if you find that more than the typical amount of throttle/power is required to cruise or climb you should land the model and disconnect the battery immediately to prevent over‐discharge. And while it is possible to power the model up and fly again after the soft LVC occurs, this is NOT recommended. Continued discharging can result in reaching the 5.0V ‘hard’ LVC which may cause permanent damage to the LiPo battery resulting in lost power and flight duration during subsequent fights (or failure of the battery entirely which is not covered under warranty). Also, it is not recommended that you fly to the soft LVC every time you fly. Instead you should be aware of the power level of the battery/airplane throughout the flight, and if at any time the airplane begins to require more throttle/power than typical to maintain cruise or climb you should land the airplane and disconnect the LiPo battery immediately. Constantly discharging the battery to the soft LVC can still cause permanent damage to the battery so it’s best to use a timer or stop‐watch to time the duration of your flights and to stop flying at a reasonable time before the soft LVC is reached. IMPORTANT NOTE: DO NOT LEAVE THE LIPO BATTERY CONNECTED TO THE ESC UNLESS YOU ARE READY TO FLY. IF THE BATTERY IS LEFT CONNECTED TO THE ESC ...
- Page 11 MALL AMOU UNT OF CU URRENT TH HE ESC CON NSUMES. It t can somet times take e a few urs or even n up to a fe ew days to o over‐disch harge the b battery thi is way but doing so l likely cau use perman nent dama age to or fa ailure of th e battery e entirely (w which is not t vered unde er warranty y). Charg ing the LiPo F Flight Ba attery For the Ga amma 370 0 RTF versio...
- Page 12 O ENSURE P PROPER PO OLARITY BE EFORE MA KING THE C CONNECTI ON. This is s complished d by ensur ring the bla ack color n egative/gr round wire e lead is or iented so it’s s toward th he right‐ha and side of f the charg er when lo ooking at th he charger r from bove. While e the white e connecto rs are ‘keye ed’ to mini imize the r isk of a rev verse olarity conn nection, if y you force t hem it is po ossible to m make conn nection wit h the ...
- Page 13 proximatel y 3.85V pe er cell) is ty pically bes t, however r it will take e some car reful anagement of the cha arge time a nd the use e of a volt m meter to ac chieve this voltage. If y you have th he equipme ent and ski lls to achie eve the 50% % charge le evel for sto rage it is commende d. If not, si imply be su ure to not s store the b battery fully y charged w whenever ssible. In fa act, as long g as the bat ttery will be e stored at t approxim ately room m ...
- Page 14 After asse embling the e two wing panels loc cate the pla astic ‘wing cover’. Thi is cover he lps protect t the wing f from the ru ubber band ds used to a attach it to o the fusela age while a also providi ing additional l support fo or the wing g joint. Before rem moving the e backing m material on the tape u used to sec cure the co ver to the wing check k the fit of t the cover o on the wing g. Line up t he trailing ...
- Page 15 NOTE: In s some cases s it may no ot be possib ble for all e edges of the e cover to fit flush ag gainst the surface of f the wing. This is not typically a problem a as the rubb ber bands u used to atta ach the wing to th he fuselage e will help h hold the ed dges of the cover in p lace. Howe ever, depen nding on the fit of s some parts s and the e nvironmen ntal conditi ons it may y be helpful l to apply t transparent t ‘packing’ t tape and/o or Cyanoac rylate (CA) glue (we r recommen...
- Page 16 Next, care efully slide the forwar rd section o of the verti ical tail into o the corre esponding a area on the e fuselage t hen ‘lower r’ the tail se ection into o place on t the fuselag ge so the sm mall ‘tabs’ o on the bottom of f the horizo ontal tail al lign and fit into the re ecesses in t the fuselag ge. Now the e entire tai il section sh hould be ‘p ress‐fit’ to the fuselag ge. Before ins stalling the plastic tail l mount be...
- Page 17 To comple ete the inst tallation us se the rema aining ‘pan n’ (large) he ead screw t to secure t the tail wheel bra acket/moun nt in place. . Installi ing the Landin ng Gear Part ts/Tools Re equired: Main La anding Gea ar Assembly y Plastic L Landing Ge ear Cover 2 x 8mm m ‘button’ (small) hea ad screw; ...
- Page 18 Installi ing the Transm mitter B atteries Install the e eight (8) i ncluded AA A batteries in the bac ck of the tra ansmitter b by first rem moving the battery co ompartmen nt cover/do oor. Ensure e proper po olarity of th he batterie es before in nstalling them as n oted by th e markings s molded in nto the bat ttery comp partment, t hen re‐inst tall the compartm ment cover/ /door. ...
- Page 19 NOTE: In some cases there are plastic ‘caps’ installed on the ends of the control sticks to protect the foam airframe and other components during shipping. Be sure to remove these caps to expose the ends of the sticks before using the transmitter. Low Battery Voltage/Power Indication When the AA battery voltage/power drops to a level that’s too low for safe continued operation, the red color LED indicator will begin flashing. DO NOT use the transmitter or fly when the red LED indicator is flashing and immediately install new AA batteries before using the transmitter or flying. Antenna Position/Orientation The RF output signals transmit best/strongest from the shaft of the antenna rather than from the tip. As a result you should never point the tip of the antenna directly at the model. Also, the transmitter antenna can be rotated up to 180° and folded up to 90° so be sure to hold the transmitter and position the antenna as needed to ensure the best possible signal transmission. Control/Servo Reversing The 6HPA transmitter features control/servo reversing functionality for the aileron, elevator, throttle and rudder channels. The control/servo directions were set correctly at the factory for the Gamma 370 RTF, however, in case the controls are operating in the wrong direction, or you use the electronics in other models later on, simply change the position of ‘Servo Reverse’ switch for the channel(s) as needed. Delta/Elevon Mixing Located to the right of the ‘Servo Reverse’ switches is a switch that activates/deactivates the optional‐use ‘Delta/Elevon’ mixing. No such mixing is used for the Gamma 370 so please be sure this switch is in the OFF/lower position (failure to do so will result in improper control and the inability to fly the Gamma 370). However, if using this transmitter with ‘flying wing’, delta or other airplanes that ‘combine (mix)’ the elevator and aileron (often known as ‘elevon’) controls you can move the switch to the ON/upper position. 19 ...
- Page 20 Installi ing the LiPo F light Ba attery IMPORTA ANT NOTE: You must A ALWAYS tu urn the tra ansmitter o on first BEF FORE connectin ng/installin ng the LiPo flight batt tery. And b before proc ceeding wi ith the follo owing steps, ple ase be sure e the trans smitter is p powered o n. After the L LiPo batter ry has been n fully char rged it’s rea ady to be in nstalled in ...
- Page 21 After the L LiPo batter ry is conne cted to the e ESC you c can insert it t into the b battery com mpartment t then secu re it with t he hook‐an nd‐loop ma aterial. Car refully ‘tuck k’ the wire leads and connector rs inside the compartm ment ensur ing they do o not dama age the bat ttery or foa am airfram e while also allow wing the hat tch cover t o be instal led over th he compart tment open ning. When n the hatch h cover is pr roperly alig gned and in nstalled rot...
- Page 22 outermos t hole on e each contro ol horn. It m may be hel pful to inse ert a flat bl lade screw driver (not includ ded) into t he clevis th hen careful lly ‘twist’ it t until it dis sengages th he pin from m the hole in the e clevis. Als so, it is not t necessary y to ‘snap’ t the clevis b back togeth her until th he centering adjustmen nts are com mplete. After conn necting the e clevises to o the contr rol horns v iew the ve rtical tail a nd rudder ...
- Page 23 NOTE: You u should al ways rotat te the clevi is until the pin is perp pendicular with the co ontrol horn to en nsure the p pin is not u nder any e excessive lo oad/pressu re when in nserted in t the hole and d during ope ration. In s some cases s it may not t be possib ble to cente er the surfa ace mechanica ally while p properly al igning the pin. In thes se cases be e sure the p pin is prop erly aligned th hen adjust t the positio n of the tri im lever sli ghtly as ne eeded. Also...
- Page 24 Installi ing the Propel ler/Prop p Save IMPORTA ANT NOTE: Before ins talling the propeller you MUST T disconnec ct the batt tery from the E ESC. Failur e to do so can result in serious bodily har rm and/or damage to o property! There are two option ns available e for instal lling the pr opeller on the Gamm ma 370. The e first option is f for ‘standa rd’ installa...
- Page 25 Standard Installatio n Part ts/Tools Re equired: Propelle er Rubber Spinner 3mm (s tandard) h ex nut; 2pc cs 3mm fla at washer; 1pc Pliers, a adjustable w wrench or 5.5mm socket/wre ench For standa ard installa ation with t the spinner r start by th hreading th he first (rea ar) 3mm he ex nut onto the t threaded p ortion of t he gearbox x propeller r shaft unti l it stops at...
- Page 26 Usually it’ s possible t to correct the angle/ out‐of‐trac ck conditio n by simply y loosening g the front hex nut until yo ou can rota ate the pro opeller to t he next po osition in w which it will engage th e rear hex nut. Then tighten the e font hex nut and ru n the moto or again. If the tips are st ill out of tr rack repeat t this proce ess until yo ou find the position w where the propeller tips track b best. Or, in very rare c cases, you ...
- Page 27 Installatio on With Pro op Saver Par rts/Tools Re equired: Propelle er Prop Sa aver Small ru ubber band d 3mm (s standard) h hex nut; 3p cs 3mm fla at washer; 1pc Ruler o r calipers Pliers o r adjustabl le wrench Additio nal pliers, a adjustable wrench h or 5.5mm socket/wr rench IMPORTA ANT NOTE: The prop s saver does NOT prev ent all dam mage to the e propeller r or ...
- Page 28 Measure t to be sure no more th han approx ximately 3/ /32” (2.5m m) of the s shaft exten nds beyond th he front he x nut. Othe erwise adju ust the pos sition of all parts acco ordingly to ensure the e prop save er works co orrectly. To install t the propel ler rotate i t as necess sary until it t lines up w with, slides over and engages t he front he ex nut and in a positio on as close e to perpen ndicular wit th the prop p ...
- Page 29 OPTIONA L: For impr roved appe earance an d protectio on of the ge earbox pro opeller shaf ft you can cut do own/shorte en the shaf ft accordin gly. Howev ver, note th hat if you s horten the e shaft it will not be possible e to switch h to standa rd installat tion of the propeller a and spinne er without ch hanging to a new gea arbox prope eller shaft (AZS1212) first. We recom mmend usin ng a high‐s peed rotar ry tool with h a suitable e cut‐off wh heel/disc to...
- Page 30 For first‐ti ime and low w‐time pilo ots that wi ll not be pe erforming a aerobatics we recom mend installing o only these four (4) ru ubber band s total. Th his offers pl lenty of sec curity for t he wing while e also allow wing it to s hift a bit m more easily on the fus elage. How wever, for experienc ed pilots th hat will be performin g aerobatic cs we reco mmend ins stalling an additional l two (2) ru ubber band ds (for a tot tal of six [6...
- Page 31 Movi ng the stic ck upward w will increas se the speed d/RPM of t the propell ler. Increas sing the speed d of the pr opeller inc creases the speed of the m model and a also provid des the thru ust needed d to cli mb/increa se altitude e. ...
- Page 32 The right‐ hand stick controls b oth the ele evator and the rudde r. Pushing t the stick forward/u upward wil l lower the e elevator a and pitch th he nose of the airplan ne downwa ard to descend. Pulling the e stick back kward/dow wnward wil ll raise the elevator a nd pitch th he nose of t the airplane u upward to c climb. The elevat tor trim lev ver (located d immedia tely to the left of the...
- Page 33 Moving th he right‐han nd stick to the left wi ill move the e rudder to o the left. T This will rol ll/turn the airplane to o the left. Moving th he stick to t the right w will move th he rudder t o the right t. This will r roll/turn th he airplane to the righ ht. The rudde er (aileron) trim lever (located im mmediately y below th e right‐han nd stick) ca an be used ...
- Page 34 Select ting a F lying A Area and d Flying g Condi itions Based on t the size an nd weight o of the Gam ma 370 it’s s typically c considered d to be a ‘p ark flyer’ class mod el. As a res sult it’s bes st to fly the e Gamma 3 370 at a loc cal park, sch hoolyard, f flying field or other a area that’s large enou ugh and fre e of people e and obst ructions. W We recomm mend an ...
- Page 35 ESC (E Electro nic Spe eed Con ntrol) A Arming For added d safety the e 20‐Amp B Brushed Mo otor ESC (A AZS1210) in nstalled in your Gamm ma 370 is equipped with an ‘ar rming’ swit tch/button n. This chec cklist includ des the ste ps you mu st follow to o ensure saf fe and prop per arming g of the ESC C: fore each f flight you s should alw ways turn th he transmi tter on bef...
- Page 36 hen you’re ready to c control the e throttle a nd fly, and d as long as s the left‐ nd/throttle e stick is se et to the lo owest poss sible positio on, press t the arming g tton locate ed on the le eft‐side of the airpla ne once. T The ESC wil l now be a armed so use extrem me caution as the pro opeller will l spin when n the left‐h hand/throt ttle stic ck is raised d beyond th he lowest p possible po osition! th all objec cts clear of ...
- Page 37 Flying Now that you’ve sele ected a sui table flying g area and the ESC is armed, yo ur Gamma a 370 is ready to f ly. And wh en making your first f flights we s suggest fol llowing the ese steps: The ere are two o ways to g get the Gam mma 370 in nto the air, , the first w way being t o ‘hand‐ nch’ the ai irplane. Th is is easy to o accompli sh by hold ing the bot ttom of the e airplane nder the wi ing) in your r hand with...
- Page 38 At the desired altitude you can level the airplane off by pushing forward slightly on the right‐hand stick (‘down’ elevator) until the airplane is flying level. Then, reduce the left‐hand/throttle stick position/power to approximately 1/2 to 2/3 for cruise flight. You’ll find that it only takes relatively small/minor rudder inputs to change direction in flight. Remember to keep these inputs as minimal as possible as significant inputs, such as moving the stick all the way to the left or right (and holding it there), could result in over‐control, loss of orientation and/or a possible crash. If you find the airplane constantly climbs, descends or drifts/turns left or right without any control input you’ll need to make adjustments to the trim settings using the trim levers on the transmitter (you can find more information regarding the location and function of the trim levers in the ‘Flight Controls and Trimming’ section of this manual): o If the airplane is drifting/turning to the left or right adjust the trim for the rudder (using the aileron channel trim lever located immediately below the right‐hand stick). o If the airplane is climbing at ‘cruise’ throttle/power, add down elevator trim (using the elevator channel trim lever located immediately to the left of the right‐hand stick) and/or reduce the throttle/power setting slightly. o If the airplane is descending at cruise throttle/power, add up elevator trim (using the elevator channel trim lever located immediately to the left of the right‐hand stick) and/or increase the throttle/power slightly. It’s important to continue making trim adjustments as needed until the airplane maintains straight and level flight with very little to no control input. Also, if this is your first airplane model it may be best to enlist the help of an experienced airplane pilot to trim the model for you before making your first flight. A properly trimmed airplane is much easier to fly! When the airplane is properly trimmed practice making shallow (approximately 5‐15 degree bank) turns by using a small amount of rudder to roll the airplane then a small ...
- Page 39 Sharper turns (approximately 15+ degree bank) will require more rudder and elevator input. Try not to excessively bank the model beyond 30‐45 degrees as doing so can cause the airplane to lose altitude very quickly. If at any time during flight you feel like the airplane is drifting out of/beyond your control, simply release the elevator and rudder controls while maintaining approximately 1/2 to 2/3 power. In most cases, and with enough altitude and space, this will allow the airplane to return to nearly level flight on its own. Also, if the airplane is flying too high or too far away, lower the left‐hand stick/throttle completely to power off the motor and allow the airplane to descend to a more reasonable altitude/position. At typical cruise throttle/power settings the Gamma 370 will fly for approximately 8– 10+ minutes per charge (when starting the flight with a fully charged battery). However, we strongly recommend using a timer to keep track of your time in the air and to land after approximately 5–7 minutes to ensure you have plenty of power to practice landing approaches and to ‘go around’ if needed. IMPORTANT NOTE: You can lose motor power abruptly if the voltage of the battery drops too low! Lowering the left‐hand/throttle stick and power to less than 1/2 to 1/3 will allow the airplane to enter a shallow descent. This is helpful if the airplane has climbed too high and when it’s time to set up for landing. To land, point the nose directly into any wind at an altitude of approximately 100–150 feet above the ground and approximately 150‐300 feet away from the desired landing area. Reduce the throttle/power to 1/3 as you descend slowly to approximately 20‐30 feet, then lower the throttle/power to 1/4 or less. At approximately 2‐4 feet above the ground lower the throttle/turn off the power completely while allowing the airplane to descend naturally. Just before the airplane contacts the ground add a small amount of up elevator to bring the nose up and ‘flare’ for a smooth landing. Later on you can practice landing with a small amount of throttle/power to help smooth out the approach and touchdown. However, you must be sure to lower the throttle/turn off the power completely if the prop comes into contact with the ground. ...
- Page 40 If y you do not lower the left‐hand/ /throttle st tick to the lowest pos ssible posi tion in the e ent of a cra ash/propel ller strike i it can resul lt in damag ge to the E ESC which m may quire it to b be replaced d. OTE: Crash d damage is not covere ed under w warranty. On ce you’ve g gained the experienc e and conf fidence in f flying your airplane yo ou can atte empt more e advanced d maneuve rs includin...
- Page 41 Option nal Brus shless P Power S System m Upgra Brushless motors are e typically more effic ient and ca an deliver h higher pow wer‐to‐weig ght ratios than their r brushed m motor coun nterparts. T This makes upgrading g to the opt tional brus shless power sys stem an exc cellent cho oice for tho ose interest ted in max imizing the e flight dura ation, performan nce and/or r aerobatic...
- Page 42 1.5mm hex driver/wrench cut‐off wheel/disc (suitable for Phillips screwdriver cutting Pliers, adjustable wrench or 5.5mm plastic) socket/wrench ‘Blue’ thread locking compound Small saw or high‐speed rotary tool (optional) with To install the Brushless Power System Upgrade Combo you’ll first need to remove the ‘stock’ brushed motor equipped power system. Start by removing the spinner and propeller from the gearbox propeller shaft. Next, use a sharp hobby knife (with a no. 11 blade or similar) to VERY CAREFULLY peel back or cut the decals that extend from the fuselage and onto the cowl on both the left and right sides. If cutting be sure to make a smooth cut that is ONLY deep enough to cut through the decal at the joint between the fuselage and the back edge of the cowl. Then, remove the three 2 x 8mm ‘pan’ (large) head screws that hold the cowl to the fuselage and carefully pull the cowl off of the fuselage entirely. Disconnect the 20‐amp brushed motor ESC from the receiver and remove it from the hook‐and‐loop material used to hold it in place. Remove the hex nut and washer holding the ESC arming switch/button in the side of the fuselage, then push the button assembly into the fuselage. Pull the battery connector and lead out of the battery compartment and into the fuselage. Remove the 2 x 8mm ‘pan’ (large) head screw that secures the gearbox then carefully slide the gearbox and motor assembly off the mounting ‘stick’. You can now pull the gearbox and motor assembly, along with the ESC, away from/out of the fuselage. IMPORTANT NOTE: IF YOU PROCEED TO ‘SHORTEN’ THE MOUNTING STICK IN ORDER TO INSTALL THE BRUSHLESS MOTOR AND MOUNT IT WILL NOT BE POSSIBLE TO ...
- Page 43 If not alre ady assem bled you’ll need to at ttach the a aluminum ‘ firewall’ m mount for th he motor to o the black c color plast ic 370 Brus shless Outr runner Mo tor Stick M Mount. If ne ecessary yo ou’ll need to remove e the alumi inum firew wall mount from the m motor by us sing a 1.5m mm hex driv ver/wrench h to loosen the two 3 x x 3mm set screws an d slide it of ff the mou nting shaft t of the mo otor. Then, use two 2 ...
- Page 44 may come e loose, esp pecially if v vibration is present w when the m otor is in o operation). It’s easier to check a and proper ly set the d direction of f rotation f for the brus shless mot or BEFORE E installing i it and the b brushless E ESC. To che eck, start by y connectin ng the thre ee gold ‘bu llet’ connector rs from the e motor lea ads to the m mating con nnectors on n the wire l leads of the e ESC. You can conne ect the lead ds/connect tors in any ...
- Page 45 Or, if the m motor/sha ft were spi inning in th he clockwis se direction n simply sw witch the co onnections s for any TW WO of the l eads betw ween the m otor and E SC. This wi ll ‘reverse’ ’ the rotatio on of the motor/sha aft, repeat the steps t to check th he direction n of rotatio on and mov ve on to th he next step only after confi rming the motor/sha aft are spin ning in the e counter‐c lockwise d irection. Disconnec ct the batte ery from th...
- Page 46 Use hook‐ ‐and‐loop m material to o mount the e 18‐amp b brushless m motor ESC i in approxim mately the same posi ition the 20 0‐amp brus shed moto r ESC was i in before it t was remo oved. Route e the battery le ads and co onnector fro om the ESC C into the b battery com mpartment t, then plug g the white/red d/black 3‐w wire lead int to the ‘THR RO’ (thrott le) channe l of the rec ceiver. This s is also a good oppo ortunity to o double‐ch heck that th he directio n of rotatio on for the m...
- Page 47 properly y up to ‘fu ll’ power. . Due to p possible v variations s in the ‘h hub’ of the propeller r, the hex x nuts and d threads s on the m motor sha aft someti mes the p propeller will be ‘a angled’...
- Page 48 Option nal Ailer ron (Ae erobatic c) Wing For full 4‐c channel co ontrol and a aerobatic c capability, t the optiona al Aileron ( (Aerobatic) ) Wing Set (AZS1226) ) can be mo ounted in p place of the e standard d wing with out the ne eed for any modificati ions. The a ileron‐equ ipped wing g also featu ures reduce ed dihedra al and a diff ferent airfoil tha n the stand dard wing f for improv ed maneuv...
- Page 49 The Ailero on (Aeroba tic) Wing S Set is mostl ly assemble ed right ou ut of the bo ox. Remove e all parts from the b box and loc cate the wh hite color p plastic ‘win ng cover’ th hen follow the steps o outlined in the ‘Assem mbling the Wing’ sect tion of this manual to o install it. A Also, check k to see if t he white color plast tic servo m mount is ins stalled nea r the cente er and on t he bottom of the win ng. If not installed u use Medium m/Gap‐Filli ing or Thick k Cyanoacr rylate (CA) ...
- Page 50 After selec cting and p preparing a a suitable s ervo arm, unplug the e rudder se ervo 3‐wire lead from the ‘AILE’ (aileron) c hannel of t the receive er then plug g the lead/ /connector r from the s servo you installed in n the wing into the A AILE (aileron n) channel instead. N OTE: You c can install t the optiona al ‘servo ext ension’ bet tween the receiver a nd aileron servo lead d to make it t easier to connect/d disconnect ...
- Page 51 After insta alling the s ervo arm o on the outp put shaft in n the positi on with th e best poss sible alignment t use one o of the suita ble screws included w with the se ervo to secu ure the ser rvo arm to the outpu t shaft (do not over‐t tighten!). With the s servo arm i installed an nd the righ ht‐hand stic ck and ailer ron trim lev ver still cen ntered carefully s spread ope en each ‘cle evis’ (the w white plastic c part insta alled on the e threaded...
- Page 52 If either aileron is ‘above’ center carefully remove the clevis from the control horn/bracket and screw it ‘in’ (clockwise) one half to one full turn then insert the pin back into the control horn/bracket. Or, if either aileron is ‘below’ center screw the clevis ‘out’ (counter‐clockwise) one half to one full turn then insert the pin back into the control horn/bracket. View the trailing edges of the ailerons and wing from directly behind again and continue adjusting the length/position of the pushrod/clevis until both ailerons are centered appropriately. NOTE: In some cases it may not be possible to exactly center the inboard and outboard portions of an aileron relative to the trailing edge of the wing. If you find this to be the case simply adjust the length/position of the pushrod/clevis to ‘split the difference’ between the inboard and outboard portions relative to the trailing edge of the wing. NOTE: You should always rotate the clevis until the pin is perpendicular with the control horn to ensure the pin is not under any excessive load/pressure when inserted in the hole and during operation. In some cases it may not be possible to ‘exactly’ center the surface mechanically while properly aligning the pin. In these cases be sure the pin is properly aligned then adjust the position of the trim lever slightly as needed. Also, it will likely be necessary to make further adjustments to the position of the trim lever during flight as most surfaces do not end up in exactly the centered position when an airplane is trimmed properly for actual flight (but ‘centered’ is still the best starting point). Also, we strongly recommend installing the included ‘clevis keepers’ to provide added security for the clevises. Typically you can carefully slide the keepers over the clevises when they are not connected to the control horn. Then, after connecting the clevis to the control horn and ‘snapping’ the clevis together you can slide the keepers into a position that does not allow them to ‘bind’ against the control horn/bracket during movement of the surface. Attaching the Aileron (Aerobatic) Wing Before attaching the aileron (aerobatic) wing to the fuselage, plug the 3‐wire lead from the rudder servo (which was recently unplugged from the ‘AILE’ channel of the receiver), into the ‘RUDD’ (rudder) channel of the receiver. Confirm that the rudder is functioning correctly and moving in the right directions based on moving the left‐hand stick to the left (rudder should move to the left) and right (rudder should move to the right). IMPORTANT NOTE: If using the 6HPA transmitter included with the RTF version Gamma 370 be sure to move the ‘RUDD’ (rudder) channel ‘SERVO REVERSE’ switch (located on the bottom front of the transmitter) to the ’REV’ (reversed) position before proceeding. This will ensure the rudder channel/servo is operating in the correct direction. ...
- Page 53 Use six (6) ) rubber ba ands to atta ach the aile eron (aero batic) wing g to the fus selage. You u can see more info rmation re egarding at taching the e wing in th he ‘Attachi ing the Win ng’ section of this manual no oting that y you must n now plug th he 3‐wire le ead for the e aileron se ervo into th he ‘AILE’ (aileron) c channel of the receive er BEFORE attaching t the wing. Y You must a lso keep th he 3‐wire lead from coming int to contact with/getti ng in the w way of any ...
- Page 54 The ailero on trim leve er (located immediate ely below t the right‐ha and stick) c can be used d to help keep the a airplane fro om rolling/ /turning lef ft or right d during fligh ht with no r right‐hand stick/ailer ron input. F For exampl e, if the air rplane rolls s/turns to t the right in n flight, add d left aileron tri m (by slidi ng the aile ron trim le ever to the left) until t the airplan e flies as st traight as possible. After conf firming the e ailerons a re function ning correc ctly and mo...
- Page 55 Replac cement t Parts List Item Num mber Description n AZSB1000 02S20T 1 1000mAh 2 ‐Cell/2S 7.4 4V 20C LiP o Battery, Tamiya Co nnector AZSC205C C 205C 2‐Cell/ /2S 7.4V Li Po, 0.5A D C Balancin g Charger AZSC120 5PS 1205PS 100 0‐120V AC t to 12V DC A Adapter, 0 .5‐Amp Po ower Supply y AZS1200 Gamma 370 0 RTF AZS1202 Gamma 370 0 RFR (Read dy‐For‐Rec...
- Page 56 ww.Ares-RC C.com © 2011 AZS12 200 / AZ ZS1202 Technical specific cations, fea atures and design are e subject to o change. Robitro nic Electro nic GmbH Brunhilden ngasse 1/1, 1150 Vien nna Austria Tel.:+ +43 (0)1‐98 82 09 20 Fax.: + +43 (0)1‐98 8 209 21 w.robitroni ic.com TW-745 ...
Need help?
Do you have a question about the Gamma 370 and is the answer not in the manual?
Questions and answers