Table of Contents
Advertisement
Advertisement
Table of Contents

Related Manuals for Ares Alara


Summary of Contents for Ares Alara
- Page 1 Owner’s Manual & Technical Information (RTF)
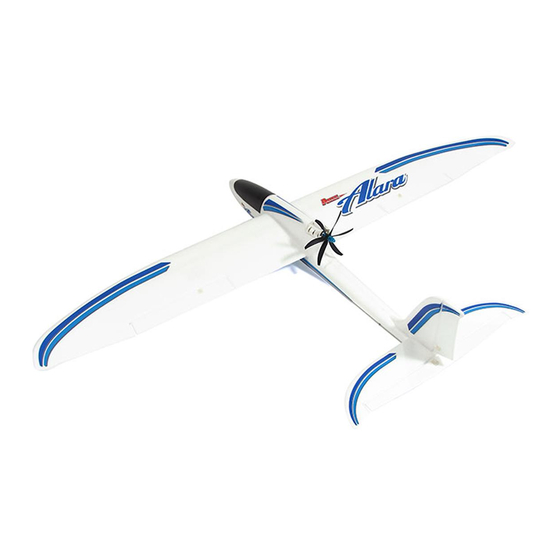
- Page 2 Specification Wingspan: ..... 54in. (1380mm) Wing Chord: ....7.9in. (200mm) Wing area: ..... 512sq.in (3,361sq.cm) Fuselage length: ... 36in. (920mm) All-up weight: ....24oz (620g) Battery: ......3S 11.1V 1500mAh LiPo Motor: ......4200kV brushless ESC: ....... 20A brushless Propeller:....... 6-blade...
-
Page 3: Table Of Contents
Transmitter details ..............7 Transmitter functionality ............8 Charging the supplied LiPo battery ........... 9 Final assembly ................. 10 Flying your Alara ...............15 Transmitter pairing ..............16 Replacement parts ..............17 Warranty, support and service UK ..........18 IMPORTANT! This radio control model is not a toy. It must be operated and... -
Page 4: Introduction
Introduction Thank you for purchasing the Ares Alara. As an aspiring R/C pilot, you need an airplane that checks off a number of crucial boxes. You need it to be easy to fly and forgiving of basic errors. You’ll want it to be tough, able to withstand some punishment, and you’ll demand solid everyday reliability. -
Page 5: Safety Precautions
Safety Precautions Failure to use this product in the intended manner as described in the following instructions can result in damage and / or personal injury. A Radio Controlled (RC) airplane is not a toy! If misused it can cause serious bodily harm and damage to property. -
Page 6: Contents
For best results, store the battery at room temperature – approximately 68 – 77°Fahrenheit (F) – and in a dry area. Contents • 1x Alara RTF airframe, comprising fuselage assembly, wing panels (left and right), horizontal stabiliser, fin and carbon spar. • 1x 4-channel Hitec Red enabled transmitter. -
Page 7: Required To Complete
Required To Complete • 4 x AA alkaline cells for the transmitter Transmitter Details (Mode 2) LED indicators Elevator dual Aileron dual rate rate switch switch Throttle trim lever Elevator trim lever Throttle/ Rudder stick Elevator/ Aileron stick Rudder trim lever Aileron trim lever Pair button... -
Page 8: Transmitter Functionality
Transmitter Functionality 1. Digital trims: Your Alara 4-channel transmitter has digital trims on all four primary controls – aileron; elevator; rudder; throttle. Each movement of the trim button is audibly highlighted by a single beep, whilst trim center is highlighted by two beeps. -
Page 9: Charging The Supplied Lipo Battery
The red ‘Charger’ LED will light indicating that the battery is charging. When fully charged the red LED will stop glowing, whereupon the battery can be disconnected. NOTE: It will take approximately 1 to 1.5 hours to fully charge a mostly discharged 1500mAh Alara flight battery. -
Page 10: Final Assembly
Airframe Assembly 1. Slot the fin and stabilizer together. 2. Position the fin and stabilizer assembly in its molded recess at the tail end of the fuselage. 3. Insert the two M3 x 40mm machine screws from the underside and tighten until the tail assembly is securely fixed. - Page 11 5. Offer the right-hand wing panel to the fuselage, plug the aileron servo lead into its female fuselage socket and ensure the lead-lock catch is engaged. Push the wing panel home. 6. Slide the left-hand wing panel onto the carbon spar. Connect the servo lead as before and push the panel firmly home.
- Page 12 9. Remove the transmitter battery cover and insert four AA alkaline cells taking care to observe the correct polarity. 10. Switch ON your transmitter and ensure the LED is lit solid red. Keep the throttle stick at its low position. IMPORTANT: Do not adjust the digital trims while switching on the transmitter as these are used in the servo reversing procedure (see Transmitter Functionality).
- Page 13 13. Now connect the aileron clevises to the outer hole of each control horn and note, again, that you may have to screw the clevis in or out to ensure that the control surface remains in the neutral position. 14. Ensure that the control surfaces operate in the right direction. With the model in front of you, facing away, move the rudder stick to the left and check that the rudder moves left in response.
- Page 14 19. Check that your Alara sits level when balanced on either side of the fuselage at a point 65 – 70mm back from the leading edge. Adjust the position of the battery to ensure that the balance point is achieved.
-
Page 15: Flying Your Alara
Alara you will easily be able to fly in less favorable conditions. If you’re new to model flying we strongly recommend that the services of an experienced model pilot be employed to assist with your first flight. -
Page 16: Transmitter Pairing
Transmitter Pairing In the unlikely event that your Alara’s radio does not operate straight out of the box (i.e. the transmitter is not paired with the receiver), use this guide to rectify the problem. Once a receiver has been paired to the transmitter, it should not be necessary to complete this procedure again as the ID code is stored in the receiver. -
Page 17: Replacement Parts
Replacement Parts AZSA1707T ....9g tail servo (150mm wire) AZSA1707W ...9g Wing Servo (400mm wire) AZSA1708 ....4-channel transmitter with Hitec Red protocol AZSA1710 ....18A brushless ESC with BEC AZSA1712 ....Servo covers (pair) AZSA1713 ....Wing set with decals AZSA1714 ....Horizontal and vertical tail with decals AZSA1715 ....Fuselage set with decals AZSA1716 ....Aluminum prop adapter AZSA1718 ....Canopy... -
Page 18: Warranty, Support And Service Uk
Warranty, support and service (UK) This product is covered by the current statutory guarantee regulations. If you wish to make a warranty claim, please contact the model shop where you originally purchased the product from. You should also present your proof of purchase. - Page 20 Ares-RC.com REV- 003...
Need help?
Do you have a question about the Alara and is the answer not in the manual?
Questions and answers