Table of Contents
Advertisement
Quick Links
Owner's Manual &
Technical Information
AZSA3000
Crusader II RTF US
AZSA3000EU Crusader II RTF EU
AZSA3000UK Crusader II RTF UK
AZSA3000M1 Crusader II RTF AU (Mode 1)
AZSA3000AU Crusader II RTF AU (Mode 2)
AZSA3001
Crusader II PTF US
AZSA3001EU Crusader II PTF EU
AZSA3001UK Crusader II PTF UK
AZSA3001AU Crusader II PTF AU
Advertisement
Table of Contents

Related Manuals for Ares Crusader II RTF


Summary of Contents for Ares Crusader II RTF
-
Page 1: Technical Information
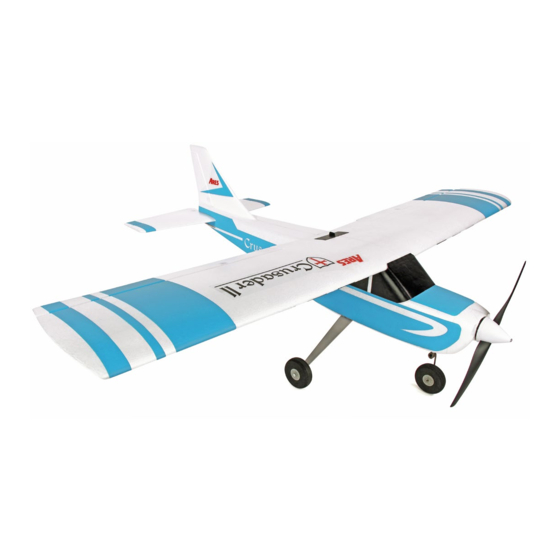
Crusader II PTF US AZSA3000EU Crusader II RTF EU AZSA3001EU Crusader II PTF EU AZSA3000UK Crusader II RTF UK AZSA3001UK Crusader II PTF UK AZSA3000M1 Crusader II RTF AU (Mode 1) AZSA3001AU Crusader II PTF AU AZSA3000AU Crusader II RTF AU (Mode 2) - Page 2 Specification Wingspan: ..... 54in. (1380mm) Wing Chord: ....8.63.in. (219mm) Wing area: ..... 465sq. in. Fuselage length: ... 37.1in. (942mm) All-up weight: ....40.6oz (1152g) Battery: ......3S 11.1V 2200mAh LiPo Motor: ......750kV brushless ESC: ....... 40A brushless Propeller:....... 12 x 8”...
-
Page 3: Table Of Contents
Contents Introduction ................4 FCC Information ................. 4 Safety Precautions ..............4 LiPo Battery Warnings ..............5 Contents (RTF) ................6 Contents (PTF) ................7 Required to Complete (RTF) ............7 Required to Complete (PTF) ............7 KA-6 Transmitter Details ............8 KA-6 Transmitter Functionality .......... -
Page 4: Introduction
Introduction Thank you for purchasing an Ares Crusader II. If you’re new to R/C model flying we’d like to welcome you to one of the most far-reaching, absorbing and rewarding hobbies that the aviation world has to offer. You’ve chosen the right product. -
Page 5: Lipo Battery Warnings
Keep items that could become entangled in the propeller away from the propeller, including loose clothing, tools, etc. Be especially sure to keep your hands, face and other parts of your body away from the propeller. As the user of this product you are solely and wholly responsible for operating it in a manner that does not endanger yourself and others or result in damage to the product or the property of others. -
Page 6: Contents (Rtf)
• 1 x 3S 11.1V 2200mAh LiPo battery. • 1 x 12V DC 3S LiPo balance charger. • 1 x Mains power adapter. • 1 x 12 x 8” propeller, prop adapter and spinner. • 1 x Tube of Ares Polystyrene Glue. • 1 x Quick-start guide. -
Page 7: Contents (Ptf)
• 1 x 12V DC 3S LiPo balance charger. • 1 x Mains power adapter. • 1 x 12 x 8” propeller, prop adapter and spinner. • 1 x Tube of Ares Polystyrene Glue. • 1 x Quick-start guide. Required to Complete (RTF) •... -
Page 8: Transmitter Details
KA-6 Transmitter Details (Mode 2) LED Power indicator Channel 5 Channel 6 Switch switch Digital throttle trim Digital Elevator Trim Throttle/Rudder stick Elevator/ Aileron stick Digital Rudder trim Digital Aileron trim ON/OFF switch Servo reversing Delta/Elevon switches Mode 1/Mode Mix switch 2 switch... - Page 9 KA-6 Transmitter Details (Mode 1) LED Power indicator Channel 5 Channel 6 Switch switch Digital elevator trim Digital Throttle Trim Elevator/ Rudder stick Throttle/ Aileron stick Digital Rudder trim Digital Aileron trim ON/OFF switch Servo reversing Delta/Elevon switches Mode 1/Mode Mix switch 2 switch...
-
Page 10: Ka-6 Transmitter Functionality
KA-6 Transmitter Functionality For a full description of your KA-6 transmitter’s features and functions refer to the online KA-6 instruction manual located here: http://ikonnik-rc.com/KA6/ support.asp 1. Digital trims: Your KA-6 transmitter has digital trims on all for primary controls – aileron; elevator; rudder; throttle. Each movement of the trim button is audibly highlighted by a single short beep, whilst trim center is highlighted by a single longer beep. -
Page 11: Final Assembly
Final Assembly 1. Apply a generous but even spread of glue (in the area indicated by the cross hatched lines) to the top and bottom surface of the horizontal stabilizer. 2. Slide the horizontal stabilizer into its slot at the rear of the fuselage and push it fully home. - Page 12 6. Insert the undercarriage nose leg into the joiner tube, position the flat section of the leg directly behind the Allen screw, then securely tighten the screw to clamp the leg in place. 7. Join the two wing panels using the main spar, noting that these do not need to be glued together.
- Page 13 10. Insert the wing bolt and push it firmly down to lock it in position. A firm twist in either direction will release it. 11. Open the battery hatch on the underside of the fuselage, insert the fully charged LiPo and slide it as far forward as it will go. 12.
- Page 14 MODE 2 MODE 1 14. Centre all the trim levers noting that trim center is indicated by an audibly longer beep tone. 15. Connect the battery to the Electronic Speed Controller (ESC). A series of three regular beeps, followed by two audibly dissimilar beeps will be heard indicating that the ESC is armed and operational.
- Page 15 18. Check that the ailerons are centered and, if not, adjust the clevises to suit. 19. Make sure the control surfaces operate in the correct direction. With the model in front of you, facing away, move the rudder stick to the left and check that the rudder moves left in response.
- Page 16 21. Pull the elevator stick back and check that the elevator moves in an upward direction. Push the elevator stick forward and check that the elevator moves in a downward direction. MODE 2 MODE 1 22. Moving the aileron stick to the left should cause the right-hand aileron to move in a downward direction whilst the left-hand aileron moves upward.
- Page 17 24. Open the battery hatch, unplug the Li-Po battery and switch OFF the transmitter. Assemble the propeller and spinner in the following sequence: a. Pass the circular propeller driver over the propeller shaft, noting its orientation. b. Add the spinner backplate. c.
- Page 18 f. Fit the spinner and secure the screw using a crosshead screwdriver. 25. With the LiPo battery inserted, check that your Crusader sits level when balanced on either side of the fuselage at a point 60–70mm back from the leading edge of the wing. 60-70mm (2-3/8”...
-
Page 19: Flying Your Crusader Ii
Flying Your Crusader II Where model flying is concerned, it’s not possible to have too much space. So, we recommend flying your Crusader in a large enough area to ensure that control is relaxed and that you have time to think. The area required will be free of obstructions and at least the size of a ball field. -
Page 20: Transmitter Pairing
than similar trainers of this type. This is a good thing and allows ample power for any number of regular aerobatic maneuvers, including loops, rolls, inverted flight, Cuban Eights, stall turns and, in experienced hands, even knife-edge. Landing can be intimidating for novice pilots, however the Crusader’s light wing loading and gentle slow speed characteristics make it easy. - Page 21 2. Power the receiver ON by connecting the LiPo battery to the ESC, as before. The receiver’s LED will initially flash red / blue, then change to fast-flashing red. For initial pairing the receiver must be powered on within 5 seconds of the transmitter.
-
Page 22: Recommended Accessories
Recommended Accessories To minimise your waiting time and maximise the enjoyment of your Crusader II we recommend the following accessories: • RDNB22003S30H - Additional Radient Superpax 3S 2200mAh LiPo battery • RDNA0044 - Radient Ascend multi chemistry battery charger Replacement Parts AZSA3007 .... -
Page 23: Warranty, Support And Service Usa
Warranty, Support & Service USA 30-Day Limited Warranty Term Period: We warranty that the Product(s) purchased (the ‘Product’) will be free from defects in materials and workmanship when the product is new (before being used) for the limited warranty term period, 30 days, from the date of purchase by the Purchaser. - Page 24 Ares-RC.com REV- 001...
Need help?
Do you have a question about the Crusader II RTF and is the answer not in the manual?
Questions and answers