Table of Contents

Related Manuals for Ares GAMMA 370 V2


Summary of Contents for Ares GAMMA 370 V2
-
Page 1: Instruction Manual
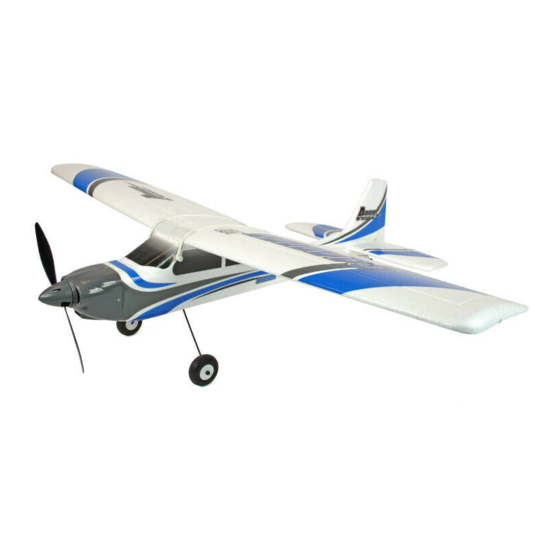
Instruction Manual Wingspan 38.60 in. (980mm) Wing Chord 7.50 in. (190.5mm) Wing Area 275 sq. in. Length 30.6 in (775mm) Flying Weight 16 oz. (455 grams) Battery 2S 1000mAh w/HCT Motor 370 Brushed/Geared 20A Brushed Prop 9 X 7 Slowflyer... -
Page 2: Table Of Contents
The Gamma 370 V2 can be upgraded to fly off water with the addition of the optional float kit. The float kit comes complete with everything needed to convert your Gamma 370 V2 for float flying. The Gamma 370 V2 can be flown off the water with either the brushed or brushless motors and with either wing choice. -
Page 3: General Precautions
SAFETY PRECAUTIONS Failure to use this product in the intended manner as described in the following instruction can result in damage and/or personal injury. A Radio Controlled (RC) airplane/helicopter/quadcopter is not a toy! If misused it can cause serious bodily harm and damage to property. Keep items that could become entangled away from the propeller, including loose clothing, tools, etc. -
Page 4: Gamma 370 V2 Rtf Contents
GAMMA 370 V2 RTF CONTENTS Item Description Not Available Separately ..Gamma 370 V2 RTF Airframe KNNA1002.......6-Channel Hitec Red Transmitter, 2.4GHz, Mode 2 Not Available Separately ..AA Batteries (8pcs) AZSB1631.........1000mAh 2-Cell/2S 8.4V 20C LiPo Battery, T-Connector AZSC205C .........2-Cell/2S 8.4V LiPo, 0.8 DC Balancing Charger AZSC1205PS ......100-120V AC to 13V DC Adapter, 0.8A Power Supply Gamma 370 V2 PTF CONTENTS Item Description AZSA1601....Gamma 370 V2 PTF Airframe W/Hitec Red Receiver REQUIRED TO COMPLETE PTF Item Description Hitec 2.4GHz Transmitter ..5 channel minimum... -
Page 5: Lipo Battery Warning
LiPo BATTERY WARNING IMPORTANT NOTE: Lithium Polymer batteries are significantly more volatile than the alkaline, NiCd or NiMH batteries also used in RC applications. All instructions and warnings must be followed exactly to prevent property damage and/or personal injury as mishandling of LiPo batteries can result in fire. By handling, charging or using the included LiPo battery you assume all risks associated with LiPo batteries. -
Page 6: Lipo Battery Charging
LiPo cells should not be discharged to below 3.0V each under load. In • the case of the 2-Cell/2S 8.4V LiPo battery used to power the Gamma 370 V2, you will not want to allow the battery to fall below 6.0V • during flight. The electronic speed control (ESC) has low voltage cutoff (LVC) protection. When the flight battery voltage drops below a set point the throttle gradually is reduced. At this point the airplane will need to be landed and the battery recharged. LiPo BATTERY CHARGING Plug power supply into 205C charger. Plug Plug 3-pin balance connector of flight power supply into main AC power. battery into 205C charger. Maintain correct polarity when plugging in Both red and green LEDs will light during 3-pin balance connector. -
Page 7: Airplane Assembly
AIRPLANE ASSEMBLY Assemble the vertical tail to the horizontal Place the tail assembly into position on the tail. fuselage. Insert the two 5/16” (8mm) long screws Install the tail wheel bracket with two small from the tail screw bag into the holes on screws. - Page 8 Locate the landing gear assembly and Using two washer head screws, secure the insert into slot at the rear of the battery box. landing gear to the fuselage. Locate the main wing halves. Slide the two halves partially together. It is not necessary to glue the wing halves tape (not included).
-
Page 9: Installing Flight Battery
Install 4 of the rubber bands to secure the The photo above shows the correct order wing as shown in the photo above. of installation for the propeller. Install 3mm nut on shaft and thread it all the way down. Completed installation should look like Then the spinner back plate, 3mm nut, prop, photo above. -
Page 10: Flight Controls
FLIGHT CONTROLS Before your first flight it is important to center all your control surfaces to their neutral positions. Turn on the transmitter with the throttle stick in the lowest (OFF) position and plug in the flight battery. This will initialize the servos. Center the digital trims, a long beep indicates center. The control surfaces for the elevator and rudder should be in their neutral position and not deflected in any direction. -
Page 11: Esc (Electronic Speed Control)
2.4GHz Hitec Red technology, trim levers, servo reversing switches and optional use “delta/ elevon” mixing (the PTF Pair-to-Fly) version requires a 5+ channel Hitec transmitter. The KA-6 transmitter makes it possible to upgrade your Gamma 370 V2 to brushless power and four channel operation. Upgrade parts are available at Ares-RC.com.The transmitter is also equipped... -
Page 12: First Flight Checklist
We suggest that initial flights be carried out when the wind conditions are light. Once you are familiar with the Gamma 370 V2 you will easily be able to fly in less favorable conditions. -
Page 13: Gamma 370 V2 Replacement Parts
Fuselage w/o decal: Gamma V2, Gamma Pro V2 AZSA1616 Main Landing Gear: Gamma V2, Gamma Pro V2 AZSA1617 Landing Gear Mount/Battery Hatch Set: Gamma 370 V2, Pro V2 AZSA1618 Tail Wheel Set: Gamma V2, Pro V2 AZSA1621 Painted Cowl: Gamma V2, Gamma Pro V2... -
Page 14: Warranty
WARRANTY USA 30-Day Limited Warranty Term Period: We warranty that the Product(s) purchased (the “Product”) will be free from defects in materials and work manship when the product is new (before being used) for the limited warranty term period, 30 days, from the date of purchase by the Purchaser. - Page 15 Damage due to improper installation, operation or maintenance; Normal wear and tear; Cosmetic damage; Modifications or repairs not carried out by Ares or by an authorised Ares Service Centre; Product not purchased from an authorized Ares dealer; The use of accessories other than original Ares items;...
- Page 16 ©2015 Rev. 1.2 2/1/16...
Need help?
Do you have a question about the GAMMA 370 V2 and is the answer not in the manual?
Questions and answers