Table of Contents
Advertisement
Advertisement
Table of Contents

Related Manuals for Ares Z-Line V-Hawk X4


Summary of Contents for Ares Z-Line V-Hawk X4
- Page 1 Owner’s Manual & Technical Information (RTF)
- Page 2 Legal Entire contents ©2015 Ares RC Before using your product, review all documentation and inspect the product carefully. If for some reason you decide it is not what you wanted, then do not continue with unpacking, setup or operation of your product. Your local hobby dealer cannot accept a product for return or exchange after partaking in actions that produce wear and tear.
-
Page 3: Table Of Contents
Contents Introduction ................4 Safety Precautions ..............4 General Precautions ..............4 FCC Information ................. 5 Package Contents ..............5 Required to Complete ..............6 LiPo Battery Warning ..............6 LiPo Care & Safety Precautions ..........6 Transmitter Details ..............7 Final Assembly ................ -
Page 4: Introduction
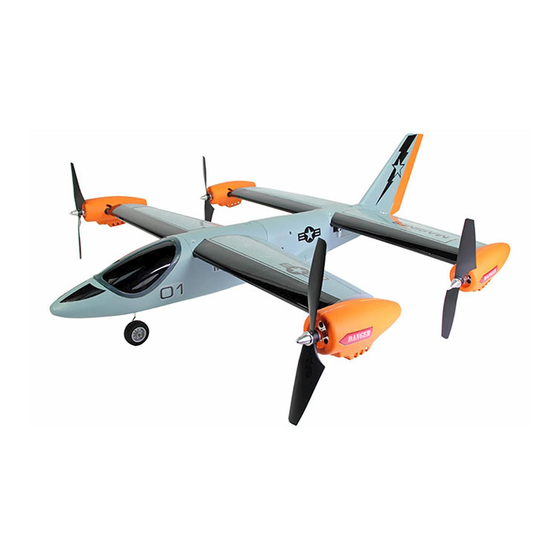
Introduction Congratulations for purchasing this Ready-To-Fly version of the Ares Z-Line V-Hawk X4. The V-Hawk X4 is designed for intermediate and experienced pilots who are looking for a unique flying experience. i.e. the ability to take off vertically like a helicopter or quadcopter and transition to forward flight like a conventional airplane. -
Page 5: Fcc Information
• Carefully follow the directions and warnings for this and any optional support equipment (chargers, rechargeable batteries, etc.). • Keep all chemicals, small parts and all electronic components out of the reach of children. • Moisture causes damage to electronic components. Avoid the exposure to water of all electronic components, parts, etc. -
Page 6: Required To Complete
Required To Complete • 4 x AA alkaline cells • 1 x 4S compatible Li-Po charger • 1 x LiPo charging sack (recommended) • 1 x Hook and loop tape (for battery retention) LiPo Battery Warning IMPORTANT NOTE: Lithium Polymer batteries are significantly more volatile than the alkaline, NiCd or NiMH batteries also used in RC applications. -
Page 7: Transmitter Details
• When transporting or temporarily storing the battery, the temperature range should be from approximately 40 – 100°F. Do not store the battery or model in a hot garage, car or direct sunlight. If stored in a hot garage or car the battery can be damaged or even catch fire! •... -
Page 8: Final Assembly
Final Assembly 1. Remove the components from the box and ensure you have the following parts: Fuselage and wing assembly, tail fin, foam cement, undercarriage set, propeller set (x4) with prop adapters, spare propellers (x4), transmitter and LiPo battery. 2. Glue the tail fin to the rear of the fuselage using the contact adhesive supplied. - Page 9 5. Use hook and loop tape to install the flight battery as far forward as possible. Be sure to keep the battery wires clear of the motor tilt control horn and its pushrod. 6. Remove the transmitter battery cover and insert four AA alkaline cells. 7.
- Page 10 9. With the sticks and trims centered check that the elevon control surfaces are in the neutral position. If not unhitch the clevis and screw it in or out on the threaded portion of the pushrod until the control surface is properly centered.
- Page 11 13. With motors still in the forward flying position operate the 5th channel function and check that they smoothly transition to the vertical hovering position. Note that in this configuration movement of the elevons will be restricted in all directions. Also note that the elevator stick will tilt the motors forward and backward to control forward/backward flight in hover mode.
- Page 12 15. Slide each propeller and clamp-style prop adaptor over its respective motor shaft, and push it as far down as it will go. Insert a neatly fitting torque bar through the hole in the spinner nut and firmly tighten, noting that a loose propeller has the potential to cause severe injury.
-
Page 13: Flight Preparation
Flight Preperation If you haven’t already done so it is important now to center all the control surfaces. To do this, remove the propellers, turn on the transmitter with the throttle stick in the lowest (OFF) position and plug in the flight battery. Allow the V-Hawk’s gyros to calibrate (as STEP 17 above), after which the servos will initialize. -
Page 14: First Flight Checklist
3V per cell the LVC will reduce the power to the motor gradually. If you feel that the airplane is beginning to lose power, land immediately and change or recharge your flight battery. Spare flight batteries are available - see ares-rc.com. First Flight CheckList • V-Hawk assembled and trims mechanically centered. -
Page 15: Routine Maintenance
Instead the model will tend to travel forwards or backwards in a level attitude. Position your V-Hawk facing into wind, tilt the motors to the VTOL (Vertical Take-off and Landing) position then gently open the throttle and lift the model into the air. -
Page 16: Ancillary Information
Ancillary Information The following Flight Controller wiring schematic is provided for reference only or to assist in the replacement of the supplied KA-6 receiver. For optimum flight performance the alignment of the motors should be in accordance with the following illustrations. Note that in the vertical hover position the front motors should display a slight rearward tilt whilst the rear motors should display a slight forward tilt. -
Page 17: Transmitter And Receiver Pairing
Transmitter & Receiver Pairing 1. Remove all four propellers from your V-Hawk X4, then switch ON your KA-6 transmitter. Ensure the LED is lit solid red, center all the digital trim levers, then move the throttle stick to the low position. For initial pairing the receiver must be powered on within 3 seconds of the transmitter. -
Page 18: Replacement Parts
Replacement Parts AZSZ2707 9 Gram Servo AZSZ2708 17 Gram Metal Gear Servo AZSZ2710 12A Brushless ESC AZSZ2710H Motor Housing Set (1 Right; 1 Left) AZSZ2713F Front Wing AZSZ2713R Rear Wing AZSZ2714 Tail Assembly AZSZ2715 Assembled Fuselage AZSZ2716 Complete Landing Gear Set AZSZ2723 Aluminum Spinner AZSZ2724... - Page 19 expense. In the event your product needs repair or a replacement part that is not covered by this warranty, your local HobbyTown store or Firelands can assist you with support and in obtaining the genuine replacement parts to repair your Product. Firelands will charge $40.00 per hour plus the cost of replacement parts to service your aircraft if after contacting you, you so authorize such repairs.
-
Page 20: Warranty
30 DAY WARRANTY Model Engines (Aust.) Pty. Ltd. warrants this product to be free from defects in materials or workmanship for 30 days from the date of purchase and will repair, replace or refund the purchase should the product prove to be defective. This warranty does not apply to any unit or system or component which has been dropped, damaged in a crash, improperly installed, assembled, handled or abused. - Page 21 Ares-RC.com...
Need help?
Do you have a question about the Z-Line V-Hawk X4 and is the answer not in the manual?
Questions and answers