Table of Contents
Advertisement
Quick Links
Advertisement
Table of Contents

Related Manuals for Erbauer ERB385DRL


Summary of Contents for Erbauer ERB385DRL
- Page 1 ERB385DRL 900W PERCUSSION DRILL...
- Page 2 Original Instructions (Version 1.0)
- Page 3 Congratulations on your purchase of a quality power tool from Erbauer (UK) Ltd. This product should give you reliable service but for your peace of mind this power tool does carry a 2 year guarantee, the terms of which are detailed below.
-
Page 4: General Safety Instructions
GENERAL SAFETY INSTRUCTIONS WARNING! Read all safety warnings and all instructions. Failure to follow the warnings and instructions may result in electric shock, fire and/or serious injury. Save all warnings and instructions for future reference. The term “power tool” in the warnings refers to your mains-operated (corded) power tool or battery-operated (cordless) power tool. - Page 5 f. Dress properly. Do not wear loose clothing or jewellery. Keep your hair, clothing and gloves away from moving parts. Loose clothes, jewellery or long hair can be caught in moving parts. g. If devices are provided for the connection of dust extraction and collection facilities, ensure these are connected and properly used.
- Page 6 ADDITIONAL SAFETY POINTS FOR YOUR PERCUSSION DRILL 1. Wear ear protectors when impact drilling. Exposure to noise can cause hearing loss. 2. Use auxiliary handle(s), if supplied with the tool. Loss of control can cause personal injury. 3. Hold power tool by insulated gripping surfaces, when performing an operation where the cutting accessory may contact hidden wiring or its own cord.
- Page 7 VIBRATION The European Physical Agents (Vibration) Directive has been brought in to help reduce hand arm vibration syndrome injuries to power tool users. The directive requires power tool manufacturers and suppliers to provide indicative vibration test results to enable users to make informed decisions as to the period of time a power tool can be used safely on a daily basis and the choice of tool.
- Page 8 Helping to minimise your vibration exposure risk. ALWAYS use sharp chisels, drills and blades. Maintain this tool in accordance with these instructions and keep well lubricated (where appropriate). Avoid using tools in temperatures of 10ºC or less. Plan your work schedule to spread any high vibration tool use across a number of days. Health Surveillance All employees should be part of an employer’s health surveillance scheme to help identity any vibration related diseases at an early stage, prevent disease progression and help employees...
- Page 9 SYMBOLS To reduce the risk of injury, user must read instruction manual Double insulation Warning Wear ear protection Wear eye protection Wear dust mask Waste electrical products should not be disposed of with household waste. Please recycle where facilities exist. Check with your Local Authority or retailer for recycling advice.
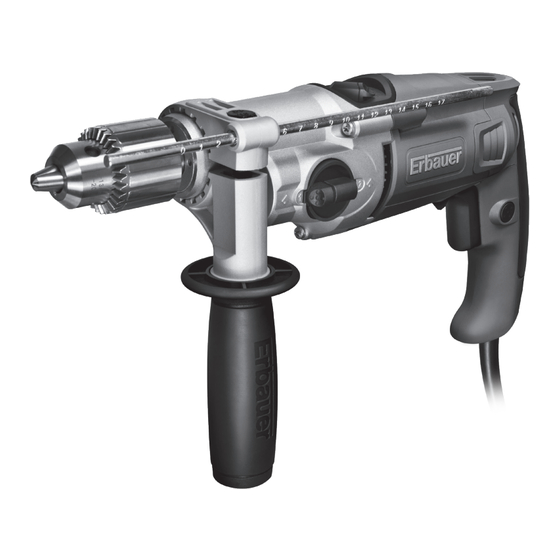
- Page 11 KEYED CHUCK AUXILIARY HANDLE GEAR BOX SWITCH FORWARD AND REVERSE ROTATION CONTROL ON/OFF SWITCH SWITCH LOCK-ON BUTTON DEPTH STOP HAMMER OR DRILL SELECTOR CHUCK KEY 900W PERCUSSION DRILL...
-
Page 12: Technical Data
TECHNICAL DATA Rated voltage 230-240V~50Hz Rated power 900W Rated no-load speed Gear 1 0-1300 /min Gear 2 0-2700 /min Rated Impact rate Gear 1 0-20800bpm Gear 2 0-43200bpm Protection Class Chuck capacity max. 13mm Drilling capacity max Steel 13mm Masonry 20mm Wood 40mm... -
Page 13: On/Off Switch
OPERATING INSTRUCTIONS NOTE: Before using the tool, read the instruction book carefully. Intended Use The machine is intended for impact drilling in brick, concrete and stone as well as for drilling in wood, metal and plastic. 1. ON/OFF SWITCH Depress to start and release to stop your tool. Fig. -
Page 14: Maintenance
Fig. 4 7. INSERTING TOOLS KEYED CHUCK Insert tool and tighten equally in all 3 bores with chuck key (9).Rotate chuck key (9) clockwise to tighten the chuck, and rotate it anti-clockwise to loosen the chuck. (See Fig. 5-1,5-2) 8. GEAR BOX SWITCH Choose position 1 for high torque/low speed range for large diameter drill bits and screw driving. -
Page 15: Environmental Protection
ENVIRONMENTAL PROTECTION Waste electrical products should not be disposed of with household waste. Please recycle where facilities exist. Check with your Local Authority or retailer for recycling advice. For further information visit www.recycle-more.co.uk 900W PERCUSSION DRILL... -
Page 16: Plug Replacement
PLUG REPLACEMENT (UK & IRELAND ONLY) If you need to replace the fitted plug then follow the instructions below. IMPORTANT The wires in the mains lead are colored in accordance with the following code: BLUE = NEUTRAL BROWN = LIVE As the colors of the wires in the mains lead of this appliance may not correspond with the colored markings identifying the terminals in your plug,... - Page 17 EN 55014-1 EN 55014-2 EN 61000-3-2 EN 61000-3-3 EN 60745-1 EN 60745-2-1 Authorised Signatory and technical file holder Date: 07/04/11 Signature: Name / title: Peter Harries / Quality Manager Erbauer (UK) Ltd. Trade House, Mead Avenue, BA22 8RT 900W PERCUSSION DRILL...
Need help?
Do you have a question about the ERB385DRL and is the answer not in the manual?
Questions and answers