
Related Manuals for PolyVision TS Series


Summary of Contents for PolyVision TS Series
-
Page 1: User Guide
TS Series Whiteboard and Webster Software ® User Guide Part Number 370-0200-00 © 2006 PolyVision Corporation All rights reserved Printed in the USA... - Page 2 5,623,129; US 5,665,942; US 5,790,114; US 5,838,309 US 6,353,193; US 6,355,895; US 6,445,384; US 6,667,739; Other patents pending. PolyVision Corporation reserves the right to make changes in product design, or detail, and to discontinue any product or material without notice.
-
Page 3: Table Of Contents
Uninstalling Webster Software ....... 7 Using Multiple PolyVision products ......7 Multiple PolyVision Products in Windows . - Page 4 Writing and Erasing with IP and FSM Models ....22 Using Webster with a Projector ....... . . 23 Getting Started Using Whiteboards in Projection Mode.
- Page 5 Inserting a Screen Shot as a Backdrop in Windows ... . 53 Changing or Removing a Backdrop ......54 Backdrops Provided with Webster .
- Page 6 Mounting the Whiteboard Transceiver ..... . 88 Connecting the Serial Cable ......89 Connecting Power .
-
Page 7: Overview
VERVIEW Welcome to the TS Series Whiteboard and Webster® Software User Guide. Webster software is designed to work with these PolyVision products: TS Interactive Whiteboard (TS) • TS Lightning™ Interactive Whiteboard (TSL) • Walk-and-Talk™ Interactive Whiteboard (WT) • Walk-and-Talk Lightning Interactive Whiteboard (WTL) •... -
Page 8: There Are Many Ways To Use Webster
This enables you to add or erase, save, print, or distribute the snapshot using the features of the Webster software at any time, even when a PolyVision product is not turned on or connected to the computer. -
Page 9: About This Manual
BOUT ANUAL This manual describes how to operate PolyVision interactive products using Webster software. This manual also provides instructions for installing and using PolyVision TS interactive whiteboards, TS Lightning interactive whiteboards, and the TS Wireless option. Installation and operating instructions for other Polyvision interactive products mentioned in this manual are provided in separate manuals. -
Page 10: Installing Webster Software
TS models 400, 600, and 800: one available serial port (or one USB • port and a USB to 9-pin serial adapter available from your PolyVision dealer) TS 410, 610, and 810; TSL; WT; WTL; and FSM models: one available •... -
Page 11: Installing Webster Software In Windows
Explorer and double-click “Setup.exe” on the CD. Follow the prompts to install the software. The setup program detects the port to which your PolyVision product is attached. To manually identify the port, see “Establishing Communication With Your Computer” on page 6. -
Page 12: Starting Webster Software
PDA or input device). To establish communication between your PolyVision product and the computer: Make sure the PolyVision product is plugged in and turned on, and properly connected to your computer, if necessary. Launch the Webster software. -
Page 13: Uninstalling Webster Software
• Webster Preferences in the [user home]/Library/Preferences folder • To delete these files, you need to enter an administrator password. SING ULTIPLE ISION PRODUCTS You can use Webster software with multiple PolyVision products connected to your computer. Installing Webster Software... -
Page 14: Multiple Polyvision Products In Windows
To use multiple PolyVision products in Windows: Launch Webster once for each PolyVision product you have connected. To identify or change the PolyVision product that is associated with an instance of Webster, choose “Find Whiteboard” from the Edit menu in that Webster window. -
Page 15: Register Webster
Webster application associated with that product. “Preferences” are saved in the same order that you launched the Webster applications. After you close the applications, reopen them in the same order and associate them with the same PolyVision products to maintain customized preferences for each product. EGISTER... -
Page 16: Webster Basics
Webster window. EBSTER ORKS To use Webster: Make sure the PolyVision product is plugged in and turned on, if necessary. On the computer connected to the PolyVision product, start the Webster application. If the Webster software is not installed on the computer, or if the software does not automatically detect the product, refer to “Installing Webster Software”... -
Page 17: About Erasing
About Erasing Erase functions are based on a calculated circle around a single point. Always use the erasers that are provided with your PolyVision product. Erasing depends upon which model you use. To erase on TS or TSL whiteboards: Large areas: Tap the Wide Erase icon on the board and erase with the •... -
Page 18: About Printing
Walk-and-Talk models: Press Print on the remote control. • The PolyVision product sends the image to the printer using the current “Print Setup” settings in the Webster software. About Capturing a Snapshot The Webster software records all the activity on the PolyVision product. -
Page 19: Getting Started With Webster Tools
Webster software provides many tools and makes them accessible to you either from your computer running the Webster software or from the PolyVision product you are using. If you use a TS or TSL whiteboard, icons that appear along the edge of the whiteboard control functions that are duplicated in the Webster toolbars. -
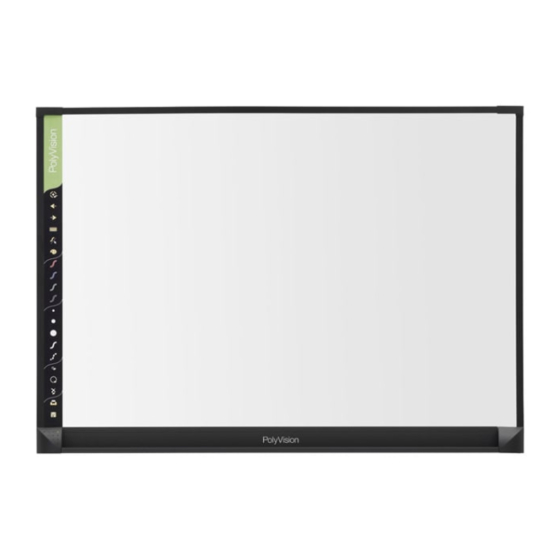
Page 20: Whiteboard Icons
HITEBOARD CONS TS and TSL whiteboards include an icon strip with the following functions: Projection toolbar: In projection mode, display or hide the projection tools. Forward arrow: In projection mode, scroll forward through snapshots or PowerPoint slides. Back arrow: In projection mode, scroll backward through snapshots or PowerPoint slides. -
Page 21: Sounds
PolyVision product. These images are called “snapshots.” Snapshots of the images from your PolyVision product are copies that you can manipulate and save on your computer. Snapshots are part of a Webster document file that you can save to disk at any time. You can work with individual snapshots even when the PolyVision product is turned off or disconnected. -
Page 22: The Webster Software Main Window
The Snapshot pane is a scrolling list of snapshots in the currently open Webster file. The Current Board pane displays whatever is currently on the PolyVision product, regardless of whether it is captured as a snapshot. The Selection pane provides an enlarged view of one snapshot or the Current Board pane. -
Page 23: The Webster Command Toolbar In Windows
Playback: Click to play, pause, stop, loop, play all snapshots, or specify playback preferences. The Webster Annotation Toolbar Use the annotation tools to edit: an existing snapshot whether or not the PolyVision product is • connected or turned on the image of the current board pane in the software •... - Page 24 Snapshot: Capture a snapshot from the PolyVision product. Snapshot/Erase All: Capture a snapshot from the PolyVision product and erase the Current Board pane in the software. Pen color: Choose a pen color to add writing to an existing snapshot or current board pane.
-
Page 25: The Annotation Toolbar In Full Screen View
The Annotation Toolbar in Full Screen View In Full Screen view, the annotation toolbar includes these functions: Esc: Escape or exit Full Screen view. Current board: Show the Current Board pane. Print: Print using the printer connected to the computer without creating a snapshot. -
Page 26: Showing, Hiding, And Moving The Toolbars
Showing, Hiding, and Moving the Toolbars You can hide or move any of the Webster toolbars. To hide or show toolbars in Windows: Choose “Toolbar,” “Annotation Bar,” or “Status Bar” from the View • menu to show or hide the Webster command toolbar, annotation toolbar, and status bar. -
Page 27: Pens, Erasers, And The Stylus
RASERS AND THE TYLUS The tool you use to write on your PolyVision product depends upon which model you have. Writing and Erasing with TS and TSL Whiteboards The PolyVision TS and TSL whiteboards are touch sensitive and send writing data to your computer by detecting a single point of pressure. Use standard dry-erase markers to write on the board. -
Page 28: Writing And Erasing With Ip And Fsm Models
When you choose a pen color and write, sounds from the board provide audible feedback to confirm that the software is recording. A selected pen color (or eraser) stays in effect until you select a different one. note: NOTE: If the whiteboard is inactive for 45 seconds after erasing, Webster automatically switches to the last used pen to protect your work. -
Page 29: Using Webster With A Projector
SING EBSTER WITH A ROJECTOR With a projector connected to your computer, a variety of powerful options become available. When you project your computer’s desktop onto an interactive whiteboard, the whiteboard acts as though it were a large touch-sensitive computer monitor. The Walk-and-Talk Interactive Panel and Flat-screen Module always display your computer screen, so these models always provide these powerful options in projection mode. - Page 30 For FSM models, use the stylus provided. At the completion of this procedure, your whiteboard is in projection mode, the projection toolbar appears, and you are ready to use the PolyVision product as a touch screen to control your computer. Refer to “The Projection Toolbar”...
-
Page 31: Alignment, If You Are Already In Projection Mode
However, if you move the projector or PolyVision product while you are in projection mode, you might need to re-align the product. You know that you need to re-align the PolyVision product if the computer’s cursor does not align with the point you touch on the product. -
Page 32: Using Webster In Projection Mode
ROJECTION While in projection mode, you can control your computer while standing at the PolyVision product using the stylus (or your finger on any interactive whiteboard) as a mouse. For mouse actions using the stylus (or your finger on any interactive whiteboard): Tap the PolyVision product once to click. -
Page 33: The Projection Toolbar
A second row of tools appears when Webster is not the active window. The projection toolbar provides the following tools: Snapshot: Capture a snapshot from the Polyvision product. The projected computer screen and your writing are all included when Webster is not the active application. -
Page 34: Projection Mark-Ups
Right Click (Windows only): For a right mouse click, tap this button, then tap the PolyVision product. Show Webster (Macintosh only): Bring the Webster window to the front. Reveal: Reveal the projected screen one line at a time by dragging the “window shade”... -
Page 35: Walk-And-Talk Models
Write on the projected computer screen with the stylus. Webster records your writing. Tap the Snapshot button in the projection toolbar to capture the contents of the PolyVision product. When done, tap the Cursor Tool button in the projection toolbar to erase your mark-ups and resume using the cursor. -
Page 36: Snapshots When Webster Is The Active Application
THER PPLICATIONS In projection mode, you can work with multiple software applications that are all projected on the PolyVision product. To bring the Webster application to the front: TS and TSL whiteboards: Tap the Show Webster icon on the •... -
Page 37: Using The On-Screen Keyboard
From your Macintosh PC: Tap the Show Webster button on the • projection toolbar, or choose “Go To Webster” from the System Menu in the menu title bar. SING THE CREEN EYBOARD In projection mode, Webster provides an on-screen keyboard that enables you to enter text from the whiteboard. -
Page 38: Using The Spotlight And Reveal Tools
SING THE POTLIGHT AND EVEAL OOLS In projection mode, Webster provides the spotlight and reveal tools that enable you to focus attention on a portion of the projected screen. Reveal Spotlight To reveal the projected screen one strip at a time: Tap the Reveal button in the projection toolbar. - Page 39 To reveal the entire projected screen and continue your presentation, do one of the following: Tap the Reveal button in the projection toolbar again. • Press the ESC key on your keyboard. • Drag the strip down to the bottom of the screen. •...
-
Page 40: Using Projection Mode With Powerpoint
OWER OINT In projection mode, you can control a Microsoft PowerPoint presentation from the PolyVision product, with no need for a mouse or keyboard to navigate the slides. To use Webster in projection mode with PowerPoint: If necessary, enter projection mode in Webster. (Refer to “Using Webster in Projection Mode”... -
Page 41: Printing In Projection Mode
RINTING IN ROJECTION In projection mode, you can print a snapshot of the image on your PolyVision product using a printer connected to your computer. To print: TS and TSL models: Tap the Print icon on the whiteboard icon strip. -
Page 42: Working With Snapshots
ORKING WITH NAPSHOTS A snapshot captures the current image of the PolyVision product in the Webster software. Taking a snapshot does not change the image; it captures the image in a Webster file. Snapshots can be: Edited • Saved •... -
Page 43: Taking Automatic Snapshots
Taking Automatic Snapshots Webster can automatically capture snapshots, enabling you to continue through a presentation with no distractions. Webster detects periods of inactivity and captures the contents of the PolyVision product after a specified duration. To take snapshots automatically: Choose “Options” (Windows) or “Preferences” (Macintosh) from the Edit menu. -
Page 44: Viewing Snapshots
IEWING NAPSHOTS When you capture a snapshot, a miniature “thumbnail” image appears in the Webster software in the Snapshot pane. Snapshots appear in the order you create them and include a caption with the date and time they were created. To view and edit a larger image of a snapshot in the Selection pane, •... -
Page 45: Selecting Snapshots
ELECTING NAPSHOTS You can view, edit, copy, move, rename, publish, playback, add a backdrop to, or export the selected snapshot(s). You can also send snapshots via e-mail. To select a snapshot: Click snapshot in the Snapshot pane. • To select all snapshots: Choose “Select All”... -
Page 46: Creating A File
Creating a File To create a new Webster file: Choose “New” from the File menu. If the existing file contains unsaved • changes, you are prompted to save the file. When you open a new file, Webster options enable you to choose whether or not the contents of the current board pane remain visible in the new file. -
Page 47: Password Protecting A File In Windows
In Windows, closing a Webster file opens a new untitled file, because Webster must always have an open file. To close a file and quit Webster: In Windows: Choose “Exit” or click the Close box in the upper right • corner of the Webster window. -
Page 48: Copying And Moving Snapshots
order, reorganize the snapshots. Refer to “Copying and Moving Snapshots” on page 42. Webster playback shortcuts appear on the command toolbar. Play: Click to play back the selected snapshot, or choose “Play” from the Playback menu. Pause: Click to pause playback, or choose “Pause” from the Playback menu. -
Page 49: Exporting Snapshots
To copy one or more snapshots within the same Webster file: Select the snapshot(s) and choose “Duplicate” from the Edit menu. • To copy one or more snapshots to another Webster file: Select the snapshot(s). Choose “Copy” from the Edit menu. Open another Webster file. -
Page 50: Renaming Snapshots
Click “Export” (Windows) or “Save” (Macintosh). If you selected multiple snapshots to export, the exported files have the file name you provided followed by a sequential number. For example, if you named the export file Myfile, the snapshots are named Myfile1, Myfile2, Myfile3, etc. -
Page 51: Editing Snapshots
DITING NAPSHOTS After you capture a snapshot, you can edit the snapshot in Webster software by writing or erasing using the tools in the annotation toolbar. You can also edit the current board pane using the tools in the annotation toolbar prior to printing or capturing it as a snapshot. -
Page 52: Printing Colors In Windows
Choose “Print” from the File menu or click the Print button in the Webster command toolbar. The following dialog appears: Specify the following print options: Printer name and printer properties • Which items to print (snapshots and/or current board pane) •... -
Page 53: Customizing Headers And Footers In Windows
Customizing Headers and Footers in Windows By default, snapshot printouts include the following footers: Webster file name • Webster notes • Date of snapshot • You can edit, delete, or format the header or footer by changing options in the Print dialog. To customize headers or footers in Windows: Choose “Print”... - Page 54 COMMAND KEYBOARD DESCRIPTION SHORTCUT Snapshot Date &g Inserts the date the snapshot was (Short Format) taken in the format 01/01/00. Snapshot Date &G Inserts the date the snapshot was (Long Format) taken in the format January 1, 2000. Snapshot Time &H or &h Inserts the time the snapshot was taken.
- Page 55 COMMAND KEYBOARD DESCRIPTION SHORTCUT Font Name &"font name" Sets all the following text in the specified font. Include the quotation marks and type the font name exactly as it appears in the font folder. Use the following guidelines when applying header/footer commands: Always place commands immediately before the text to which they •...
-
Page 56: Printing Resolution
To preview the snapshot before it prints: Choose “Print Preview” from the File menu. The following dialog appears: View each of your snapshots using the navigation buttons and scroll bar. Click “Print” to open the Print dialog, or click “Close” to close the window and return to the main window. -
Page 57: Adding A Backdrop To A Snapshot
To print snapshot(s) on a Macintosh: Select a snapshot(s) to print or the current board pane. Choose “Print” from the File menu. The Print dialog for your printer opens. A sample Print dialog is shown below. Choose “Webster” from the drop down list. To specify the items to print, click a radio button beside “All Snapshots and Current Board,”... -
Page 58: Creating A Backdrop File
As forms (such as patient admission forms) • For headers or footers (for example, to incorporate a logo as shown • below) Backdrops can be reused. You can remove a backdrop at any time, and only one backdrop can be used in a snapshot at a time. Backdrops are not available for snapshots taken in projection mode. -
Page 59: Adding A Backdrop File To A Snapshot
Save the file. (Hint: use a file name that is easy to recognize for later use, such as Backdrop.tif.) Adding a Backdrop File to a Snapshot You can add a backdrop file to one or more snapshots in your current Webster file at any time. -
Page 60: Changing Or Removing A Backdrop
Choose “Add from Screen” from the Backdrop menu. Arrange the screen contents as desired (including opening or closing other applications). note: NOTE: To avoid capturing the Webster software, minimize it first. Press F11. Although there is no visible or audible feedback, the screen shot is added to the snapshot(s). -
Page 61: Sending A Snapshot Via E-Mail
• Sports grids • Maps • Additional backdrops may be downloaded from www.polyvision.com. ENDING A NAPSHOT VIA MAIL On a Macintosh, you can send snapshots via e-mail as an Adobe PDF file. In Windows, you can send snapshots via e-mail in the following file formats: Bitmap (.bmp) - Page 62 Click “OK.” A new e-mail message opens containing the snapshot(s) as an attachment ready for you to address and send using your default e-mail application. Address and send the e-mail. To send all or part of a Webster file in e-mail on a Macintosh: (optional) Select the snapshot(s).
-
Page 63: Publishing A Snapshot As Html Or Adobe Pdf
HTML UBLISHING A NAPSHOT AS DOBE You can publish a snapshot in HTML or Adobe PDF format, posting it on the World Wide Web or saving it on your computer. note: NOTE: In Windows 98 or NT, before using this feature, make sure the Microsoft Web Publishing Wizard is installed. - Page 64 Click a radio button to select the desired option under “Format,” “Orientation,” “Images,” and “Selection.” (Optional) Enter a heading that appears at the top of the published Adobe PDF (Windows only) or HTML file. If you are publishing directly to the web, make sure your computer is connected to the Internet.
-
Page 65: Netmeeting And Webster
• By sharing the Webster software through a NetMeeting conference, all participants can share the use of a Webster PolyVision product. You and the other participants can share the annotation and projection tools. (No conferencing tools are provided on the Macintosh version of Webster.) -
Page 66: Using Webster With The Netmeeting Whiteboard
NetMeeting button Bring Webster to the front. Using Webster with the NetMeeting Whiteboard You can connect the Webster PolyVision product and the NetMeeting whiteboard so all writing is recorded on both applications’ windows simultaneously. To connect Webster and the NetMeeting whiteboard: Choose “Options”... -
Page 67: Using The Conference Control Center
note: NOTE: If the Webster status bar indicates “Cannot find NetMeeting Whiteboard,” click “Whiteboard” in NetMeeting to open the NetMeeting whiteboard. To write on the shared whiteboard, tap the Webster pen and eraser buttons. All participants see the results on the NetMeeting whiteboard. Choose “Join”... -
Page 68: Conference View Preferences
“Everything”: Remote users see the current board and everything • you write. “Don’t prompt me when remote users try to see my whiteboard”: • Check to receive no message when a remote user requests to look at your PolyVision product. SING EBSTER ROJECTION ODE WITH EETING... -
Page 69: Scrolling While Shared
To check how the software is recording data, maximize the Webster • window, then tap Show Webster to return to the NetMeeting whiteboard (Webster minimizes itself). It is better to use the stylus, not the markers, to annotate the • whiteboard. -
Page 70: Troubleshooting Netmeeting
ROUBLESHOOTING EETING PROBLEM CAUSE SOLUTION Participants cannot see Two-way communication Enable communication the Webster whiteboard is disabled with NetMeeting (see “Using Webster in a NetMeeting Conference” on page 59). NetMeeting “Share” No NetMeeting call set Host or join a NetMeeting menu is grayed out call. -
Page 71: Webster Options
EBSTER PTIONS Software options enable you to customize your use of Webster. USTOMIZING ENERAL PTIONS Options on the General tab enable you to specify settings that apply to features throughout Webster. To customize General options: Choose “Options” from the Edit menu (Windows) or “Preferences” from the application menu (Mac). -
Page 72: Customizing Pens And Erasers
settings for the computer. The cursor on your screen flickers slightly to indicate that the option is activated. note: NOTE: “Override screen saver” is not available in Windows NT. “E-mail enclosure warning”: Check to have Webster warn you if your e-mail enclosure exceeds a specified file size when you use “Send Mail”... - Page 73 Click the “Pens” tab. The following dialog appears. “Pen width”: Enter the desired pen width for the smallest pen. The medium and large pen widths are multiples of the smallest pen width. Changes apply only to all future strokes. “Eraser widths”: Specify the eraser width for the large or small eraser. “Pen shape”: (Macintosh only) Two pen shapes are available: round and square.
-
Page 74: Customizing Sounds (Whiteboards Only)
To restore factory default options: Click “Restore Defaults.” • USTOMIZING OUNDS HITEBOARDS Audible feedback on TS, TSL, WT or WTL whiteboards indicates which tool you are using. By default, the TS and TSL whiteboards emit sounds: On startup and shutdown •... -
Page 75: Customizing Image Export
Select a sound from the drop down menus. On a Macintosh, click the speaker icon to hear the sound. Click “OK” to apply the settings and close the dialog. To restore factory default options: Click “Restore Defaults.” • USTOMIZING MAGE XPORT You can specify the default characteristics for images that you export. -
Page 76: Customizing Projection Mode Settings
“Drag and drop file”: Choose the file type of the resulting image when you drag and drop a snapshot into another application. In Windows, the options are bitmap or metafile. On a Macintosh, the options are picture, bitmap, Compressed PICT, JPEG, JPEG-2000, MacPaint, Photoshop, PNG, QuickTime Image, SGI, TGA, Adobe PDF, and TIFF formats. -
Page 77: Customizing Playback Options
Later, you can drag the toolbar to any position on the screen. “Alignment type”: Choose between three levels of projection alignment: 4-point, 8-point, and 16-point. The more points you choose, the more accurately the cursor will be controlled from the PolyVision product. To restore factory default options: Click “Restore Defaults.”... - Page 78 Choose the “Playback” tab. The following dialog appears. “Real-time”: Check to play back all pen strokes, erasures, and pauses at the same speed that they were created, including any pause that occurred between strokes. “Optimized”: Check to optimize playback speed, so that pauses between strokes are eliminated.
-
Page 79: Customizing Backdrops On A Macintosh
USTOMIZING ACKDROPS ON A ACINTOSH When you create a backdrop on a Macintosh, you can specify to preserve the aspect ratio and to display a backdrop indicator. Refer to “Adding a Backdrop to a Snapshot” on page 51. To specify backdrop options (on a Macintosh): Choose “Preferences”... - Page 80 Background: White • For TS and TSL whiteboards, the default pen colors correspond to the colors of the pen icons on the whiteboard icon strip and the supplied markers. For Walk-and-Talk models the default pen colors correspond to the ink color buttons on the remote control. To change the default colors in Windows: Choose “Color”...
-
Page 81: Troubleshooting, Care, And Maintenance
ROUBLESHOOTING AINTENANCE This section contains suggestions to help you care for, maintain, and troubleshoot Webster. It also includes technical support information. ETTING On-line Help is available whether or not Webster is running. OPTION PROCEDURE Help file From the Windows taskbar, choose “Programs” from the Start menu and choose “Help”... -
Page 82: Troubleshooting Ts And Tsl Whiteboard Hardware
Troubleshooting TS and TSL Whiteboard Hardware PROBLEM CAUSE SOLUTION Green LED off No power Plug in the whiteboard power cord and check your power outlet. Green LED blinking No communication with Make sure your computer the software is on. Re-specify the port for the whiteboard in Webster (see “Establishing Communication With Your... -
Page 83: Troubleshooting Software
ROUBLESHOOTING OFTWARE PROBLEM CAUSE SOLUTION Some writing not Insufficient pressure while Maintain firm, consistent recorded properly writing on the whiteboard pressure while writing. Multiple contact points on Contact the whiteboard whiteboard only with the pen, stylus, or eraser. Improper eraser use For narrow erasures, maintain firm, consistent pressure. -
Page 84: Technical Support
8 AM Eastern time to 8 PM Eastern time. E-mail: support@polyvision.com • Internet: www.polyvision.com • Or, outside the USA, contact PolyVision Europe/Asia Technical Support: Phone: +32 (0)89 32 31 30 or +1.678.542.3100 • Fax: +32 (0)89 32 31 31 •... -
Page 85: Caring For The Ts Or Tsl Whiteboard
For all TS and TSL whiteboards: Use only the dry-erase markers and erasers recommended by • PolyVision. To order markers, call 1.800.620.POLY (7659) in the USA, 1.678.542.3100 outside the USA, or +32 (0)89 32 31 30 in Europe, or go to: www.polyvision.com... -
Page 86: Caring For The Markers, Stylus And Eraser
Rub the eraser against a towel to remove ink residues. If excessive ink • buildup occurs, contact PolyVision for a replacement pad. Call 1.800.620.POLY (7659) in the USA, 1.678.542.3100 outside the USA, or +32 (0)89 32 31 30 in Europe, or go to: www.polyvision.com... -
Page 87: Installing The Ts And Tsl Series Whiteboards
You can mount any TS or TSL whiteboard to a mobile stand available • from your Polyvision dealer. If you use this option, follow the mounting instructions provided with the mobile stand, then proceed to “Connecting Your Whiteboard” on page 84. -
Page 88: What Comes In The Box (Ts Or Tsl Models)
TSL M OMES IN THE ODELS 1 whiteboard 1 whiteboard stylus 1 box of four dry-erase markers (for some models) 1 round eraser 1 AC power cord (TS 400, 600, or 800 models) 1 serial port cable (TS 400, 600, or 800 models) 4 self-tapping sheet rock anchors (vary by model) 2 mounting brackets 4 Phillips screws... -
Page 89: Mounting Your Whiteboard On A Wall
OUNTING HITEBOARD ON A You will need a tape measure, Phillips screwdriver, and drill. To mount any TS or TSL whiteboard on a wall: Choose a location with convenient access to your computer, an AC power outlet, and any network connections or projectors you are using. -
Page 90: Connecting Your Whiteboard
To mount your whiteboard on an optional stand or easel, see the instructions included with your stand or easel, or visit www.polyvision.com. ONNECTING HITEBOARD Ensure that both your computer and whiteboard are powered off before you make connections. -
Page 91: Connections For Ts 400, 600 Or 800 Models
Plug the other end of the USB cable to the USB port on the whiteboard. Connections for TS 400, 600 or 800 Models To connect the whiteboard to your computer: Plug the AC power cord into the power connector on the bottom of the whiteboard, next to the serial port. -
Page 92: Installing And Using The Ts Wireless Option
Plug the power cord into an electrical outlet. Plug the 9-pin male end of the serial port cable into the whiteboard and tighten the screws. Plug the other end into your computer’s serial port (if necessary, use a USB to 9-pin serial adapter available from your Webster dealer). note: NOTE: The maximum serial port cable length is 25 feet (7.5 meters). -
Page 93: What Comes With The Wireless Option
TS Wireless works best when the two transceivers are within 24 feet (7 m) of one another. The TS wireless option only words with TS interactive whiteboards. Ceiling height and material also make a difference in performance. The higher the ceiling, the closer together the transceivers need to be. A non-IR reflective ceiling also reduces the range. -
Page 94: Connecting To Your Whiteboard
Connecting to Your Whiteboard There are three basic steps to installing the TS Wireless transceiver on your whiteboard: Mounting the whiteboard transceiver. Connecting the serial communications cable. Connecting the power cable. Mounting the Whiteboard Transceiver We recommend mounting the whiteboard transceiver on top of the whiteboard above the upper-left corner of the board. -
Page 95: Connecting The Serial Cable
in a smooth curve, not at a sharp angle. Bending cords at sharp angles can damage the cords. Connecting the Serial Cable The 9-pin serial plug at the end of the whiteboard transceiver cable plugs into the 9-pin serial socket below the lower-left corner of the board. The serial connection uses D connectors. -
Page 96: Connecting To Your Computer
The transceiver with the short cord connects to the 9-pin serial port of your computer. If necessary, you can connect the transceiver using a USB to 9- pin serial adapter available from your PolyVision dealer. Connect the barrel plug from the power supply to the back of the transceiver’s 9-pin serial connector and plug the power supply into the wall. -
Page 97: Transceiver Leds
Position the transceiver so the curved edge of the transceiver points toward the transceiver on the board. Adjust the position of the computer and whiteboard transceiver until both transceivers show a green light, then use the double-sided tape to fasten the whiteboard transceiver in place. -
Page 98: Establishing A Wireless Link
Establishing a Wireless Link TS Wireless transceivers attempt to establish a wireless link automatically whenever they are powered on. Connecting power to a TS Wireless transceiver does two things: The transceiver starts sending out a signal that the other transceiver •... -
Page 99: Troubleshooting The Wireless Option
Troubleshooting the Wireless Option PROBLEM CAUSE SOLUTION Both transceiver lights One or both ends of Check the serial are GREEN, but your the serial cable is connections at both board software says unplugged. and computer. communication has Some computers have been lost. - Page 100 The light on one This transceiver has Check that the cord from transceiver is OFF. lost power. the power supply is fully plugged into serial connector Check that the power supply is plugged into the wall. If a switch controls the wall plug, make sure the switch is on.
-
Page 101: Warranty
ARRANTY This warranty applies to only TS series whiteboards. Warranties for other models are printed in their respective installation guides. PolyVision Corporation warrants to the original consumer or other end-user purchaser that this product is free from defects in material and workmanship for a period of two years from the date of purchase and for five years if the product is... - Page 102 +32 (0)89 32 31 30 in Europe) to resolve the problem. If the product is diagnosed as being defective, return the product to the original place of purchase. If you are directed to return the product directly to PolyVision, you must obtain a Return Materials Authorization (RMA) number from PolyVision.
- Page 103 HOW STATE LAW RELATES TO THE WARRANTY In the USA, this warranty gives you specific legal rights, and you may also have other rights, which vary from state to state. PolyVision Corporation products are warranted in accordance with the terms of the applicable PolyVision Corporation limited warranty.
- Page 104 Warranty...
- Page 105 Index caring for the whiteboard 79 add from screen 54 changing background color in Windows Adobe Acrobat PDF (.pdf), exporting 43, 70 color aligning changing pen color in Windows 73 toolbar shortcut 25 print white background 46 alignment type 26, 71 printing in Windows 46 arrow COM port 6, 76...
- Page 106 eraser highlighter tool 19 in Walk-and-Talk whiteboard 11 HTML export 57 options 66 projection mode 28 installation toolbar icons 18, 19 TS whiteboard 81 widths 66 Webster software 4 eraser width IR light 86 (LT models only) 67 erasing Walk-and-Talk Flat-Screen Module JPEG, exporting 43, 70 Walk-and-Talk Interactive Panel 11 keyboard...
- Page 107 options printing backdrop 73 background color 46 export 43, 70 colors in Windows 46 general 65 commands 47 pens 66 headers and footers 47 playback 71 in black and white 46 projection mode 70 in projection mode 35 sounds 68 in Windows 46 override screen saver 65 on a Macintosh 51...
- Page 108 snapshot adding a backdrop 53 real time playback 72 automatic 37 re-align 27 copying/moving 42 red pen creating 36 whiteboard icon 14 deleting 44 register Webster 9 disabled 37 remember last alignment 71 editing 45 remember monitor selection 71 exporting 43 remember whiteboard contents 65 in projection mode 29 renaming snapshots 44...
- Page 109 timing for playback 42 Walk-and-Talk whiteboard toolbars click and double-click 26 annotation 17 erasing the board 11, 21, 22 command 17 using the remote control in full screen annotation 19 projection mode 26 projection mode 27 writing on the board 21, 22 show/hide 20 WAN 59 transceiver...
- Page 110 wireless broken link 92 ceiling height 87 components 87 link 91 maximum distance 87 obstructions 86 power sharing cable 90 troubleshooting 92, 93 wireless communication 86 zoom toolbar button 19 toolbar icon 18...
Need help?
Do you have a question about the TS Series and is the answer not in the manual?
Questions and answers