Table of Contents

Related Manuals for PolyVision a3 CeramicSteel Flow


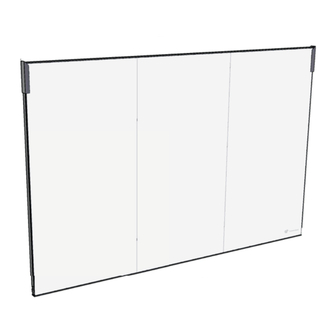
Summary of Contents for PolyVision a3 CeramicSteel Flow
- Page 1 CeramicSteel Flow 3™ ™ Installation Guide Americas 2019 English Español Français Canadien Guidelines for installing your new CeramicSteel Flow system Doc # 81816 | Rev C | Page 1 of 56...
-
Page 2: Safety Requirements
Safety Requirements English Safety Requirements CeramicSteel Flow - Wall Mounted Dry Erase Verify Wall Construction Board, Non-Seismic Applications CAUTION! Adequate wall construction is required to support the weight of the board. The building’s Engineer of Record must be Minimum wall construction must be capable consulted to determine if there are any seismic of supporting weight amounts listed in Table requirements. - Page 3 Glass suction cup lifters (2) adequately supported and clamped to prevent it or PolyVision Customer Service. PolyVision’s global from vibrating. customer service team can be contacted on •...
- Page 4 Key to System Details Standard Extrusions Key to System Details Standard Extrusions The details listed in the image below show placement for panel profiles and how the material can be installed. IMPORTANT: Profiles must be secured to studs in as many locations as possible and at least 24”...
- Page 5 D1 - D4 Systems D1 | Vertical Butt Joint D2 | Panel Head at Ceiling structural support max 24” o.c. (by others) top frame type S bugle head screws @ 16” o.c. (by erector) gypsum board plug or screw frame if located over stud CeramicSteel base frame...
- Page 6 D3 | Panel Terminator at Wall D4 | Panel Bottom Line structural support max 24” o.c. (by others) type S bugle head screws gypsum board plug or @ 16” O.C. (by erector) screw if located over stud base rame CeramicSteel interior panels base frame CeramicSteel...
-
Page 7: Installation
Installation Installation Before starting the installation of a CeramicSteel Flow Step Two Verify that the required equipment is available and material provided is accurate. Start with a leveled line for the vertical profile (base frame). A laser level is recommended. Be sure to allow a minimum of 3 mm (1/8”) space between the profile and any existing wall. - Page 8 Installation Step Four Step Five Before installing the first panel, locate the panel with the logo in the bottom right corner. (Note that the logo Insert the mid frame (H-profile) into the vertical side of the panel opposite from the vertical end is not drawn to size.) This panel will need to be the furthest right panel.
- Page 9 Installation Step Seven Step Eight Place the temporary snap on cover trim pieces on each end of the verticals. Measure and miter cut the vertical cover trim (top frame). Place snap on cover trims being sure to install using a piece of soft wood blocking or a rubber mallet in order to avoid damaging the exposed finish.
- Page 10 Correction in the manner provided above shall constitute a fulfillment of all liabilities of PolyVision with respect to the quality of the CeramicSteel. The warranty is applicable only under normal usage and maintenance and does not cover defects caused by improper handling, vandalism or abuse, or arising from failure to follow PolyVision’s instructions and...
-
Page 11: Requisitos De Seguridad
45 mm x 70 mm (1,5” x 3,5”). están unidas las pizarras y debe comprobar que los accesorios de montaje Sistemas D1 - D4 sean los adecuados, aun si fueron suministrados por PolyVision. • Montantes con centros a 600 mm (24”). - Page 12 Servicio de Atención al Cliente de PolyVision. 2 mm desde el borde. Cuando el astillamiento Ventosas para levantar vidrios (2) Podrá contactarse con el equipo perteneciente al supera los 2 mm, verifique el estado de las servicio global de atención al cliente de PolyVision...
- Page 13 Extrusiones estándar Clave para los detalles del sistema Clave para los detalles del sistema Extrusiones estándar Los detalles mencionados en la siguiente imagen muestran la ubicación de los perfiles del panel y cómo puede instalarse el material. IMPORTANTE: los perfiles se deben sujetar a los montantes en tantos lugares como sea posible y al menos a 24”...
- Page 14 Sistemas D1 - D4 D1 | Junta de tope vertical D2 | Parte superior del panel en el techo Soporte estructural de 24” máx. a eje (por otros) Bastidor superior Tornillos de cabeza de corneta Bastidor Tapón para placa de yeso o tipo S a 16”...
- Page 15 D3 | Terminador de panel en la pared D4 | Línea inferior del panel Soporte estructural de 24” máx. a eje (por otros) Tapón para placa de yeso o Tornillos de cabeza de corneta tipo S a 16” a eje tornillo si se ubicada sobre Bastidor montante...
-
Page 16: Instalación
Instalación Instalación Antes de comenzar la instalación de una pizarra a CeramicSteel Flow Paso dos Verifique que cuenta con los equipos requeridos y que el material proporcionado es Comience por una línea nivelada para el perfil vertical (bastidor de base). Se recomienda usar un nivel el correcto. - Page 17 Instalación Paso cuatro Paso cinco Antes de instalar el primer panel, localice el panel con el logotipo en la esquina inferior derecha. (Tenga en Inserte el bastidor medio (perfil en H) en el lado vertical del panel opuesto al perfil de tope vertical, cuenta que el logotipo no está...
- Page 18 Instalación Paso siete Paso ocho Coloque los encajes a presión sobre los bordes protectores a cada extremo de los perfiles verticales. Mida y corte a inglete los bordes verticales de la cubierta (bastidor superior). Coloque un encaje a presión sobre los bordes protectores utilizando un bloque de madera suave o un mazo de goma para no dañar el acabado expuesto.
- Page 19 PolyVision. La garantía no incluye el costo de la remoción ni el de la reinstalación. Esta garantía entró en vigencia el 4 de junio de 2009 y suplanta los términos y las condiciones de todas las demás garantías previas sobre superficies emitidas al cliente por parte de PolyVision.
-
Page 20: Français Canadien
(DF-L) ou Pruche-Sapin (H-F) de 45 x 70 mm bâtiment sur lesquels sont fixés les tableaux et doit vérifier l’exactitude du Systèmes D1 à D4 (1,5 x 3,5 po) matériel de montage, même s’il est fourni par PolyVision. Le propriétaire du bâtiment ou l’agent désigné est responsable de vérifier Installation •... - Page 21 Ancrages être protégées contre l’humidité par du ruban de Polyvision. Vous pouvez communiquer avec en chlorure de polyvinyle (PVC), des profilés de l’équipe de l’Assistance clientèle mondiale de protection/couverture ou des rondelles de fermeture.
- Page 22 Détails importants du système Extrusions standard Détails importants du système Extrusions standard Les détails indiqués dans l’image ci-dessous illustrent le positionnement des profils de panneau ainsi que la façon dont le matériel peut être installé. IMPORTANT : Les profils doivent être fixés aux montants aux plus d’endroits possibles et à...
- Page 23 Systèmes D1 à D4 D1 | Joint bout à bout vertical D2 | Dessus du panneau au plafond support de la structure à au plus 610 mm (24 po) entre-axes (par les autres) cadre supérieur vis à tête évasée de type S à 406 mm cadre du tenon ou vis du panneau de (16 po) entre-axes (par le monteur)
- Page 24 D3 | Extrémité du panneau au mur D4 | Bord inférieur du panneau support de la structure à au plus 610 mm (24 po) entre-axes (par les autres) vis à tête évasée de type S à tenon ou vis du panneau de gypse 406 mm (16 po) entre-axes s’il est situé...
-
Page 25: Installation
Installation Installation Avant l’installation d’un système a CeramicSteel Flow Étape deux Vérifier que l’équipement requis est accessible et que le matériel fourni est approprié. Commencer avec une ligne à niveau pour le profil vertical (cadre de la base). Un niveau à laser est recommandé. - Page 26 Installation Étape quatre Étape cinq Avant d’installer le premier panneau, repérer le panneau qui affiche le logo dans le coin inférieur droit (noter Insérer le cadre du milieu (profil en H) dans le côté vertical du panneau à l’opposé du profil d’extrémité que le logo n’est pas illustré...
- Page 27 Installation Étape sept Étape huit Installer les garnitures à encliqueter temporaires sur chaque extrémité des profils verticaux. Mesurer la garniture verticale et la couper à l’aide d’une scie à onglets (cadre supérieur). Fixer la garniture à encliqueter en veillant à l’installer à l’aide d’un bloc de bois résineux ou d’un maillet en caoutchouc pour éviter d’endommager le fini exposé.
- Page 28 Garantie Garantie sur les produits de collaboration Surface CeramicSteel : garantie à vie PolyVision garantit que toutes les surfaces et tous les produits en émail de porcelaine conçus par e CeramicSteel (surfaces d’écriture de qualité) ou par a CeramicSteel (produits de collaboration) conserveront leur qualité...
- Page 29 E info@polyvision.com E APACsupport@polyvision.com ©2019 PolyVision Corporation. All rights reserved. Trademarks used herein are the property of PolyVision Corporation or of their respective owner. PolyVision Corporation reserves the right to make changes in product design, construction or detail, and to discontinue any product or material without notice.
Need help?
Do you have a question about the a3 CeramicSteel Flow and is the answer not in the manual?
Questions and answers