Miele PW 6321 Operating And Installation Instructions
Hide thumbs
Also See for PW 6321:
- Operating and installation instructions (44 pages) ,
- Fitting instructions manual (60 pages) ,
- Programming instructions manual (48 pages)

Related Manuals for Miele PW 6321


Summary of Contents for Miele PW 6321
- Page 1 Operating and Installation instructions Washer PW 6241 PW 6321 To prevent accidents en - US, CA and machine damage read these instructions M.-Nr. 06 572 432 before installing or use.
-
Page 2: Table Of Contents
Contents IMPORTANT SAFETY INSTRUCTIONS Guide to the washer Operating panel ............. . 8 1. - Page 3 Contents Cleaning and Care After each use ............. . 28 Cleaning the exterior .
-
Page 4: Important Safety Instructions
IMPORTANT SAFETY INSTRUCTIONS Correct usage of the washer WARNING Do not wash articles that have been Read all instructions before installation or previously cleaned, washed, soaked or use to prevent injury and machine spotted with gasoline, dry-cleaning solvents, damage. organic oils or other flammable substances. These articles give off vapors that could This washer-extractor is only intended for ignite or explode. - Page 5 The drum door glass will be hot when Repairs to electrical or steam appliances washing at very high temperatures. Do should only be carried out by a Miele not touch the glass. authorized technician in accordance with Do not reach into the appliance if the local and national safety regulations.
- Page 6 If you are not sure Depending on the chlorine concentration, about an agent contact Miele’s Professional the exposure time, and the temperature, the Department. If you accidentally spill an use of liquid and powdered chlorine-based...
-
Page 7: Guide To The Washer
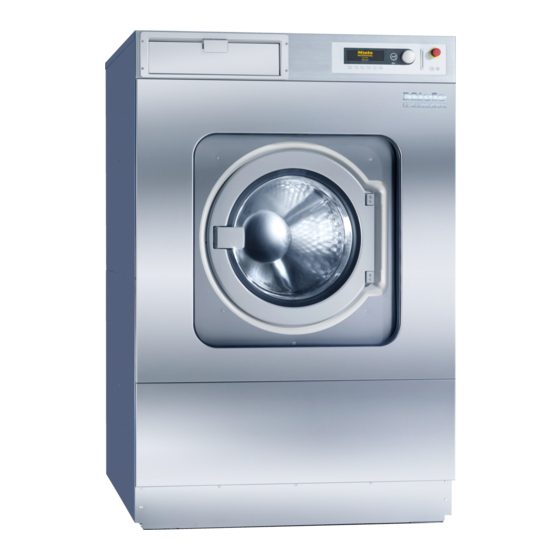
Guide to the washer a Emergency Stop button e Door handle Pressing the red button turns the machine The door handle is equipped with an extra off. safety mechanism to guarantee that the door remains locked. b Control panel f Service panel c Detergent compartments g Plinth Pull the handle to open the flap. -
Page 8: Operating Panel
Guide to the washer Operating panel a Display* d Optical interface PC The optical interface on the machine’s Hot Wash 194 °F control panel provides the connection point Cottons 140 °F for data transfer between the machine’s Cottons Intensive 140 °F controls and a PC. -
Page 9: Data Transfer
$ Program locked i Manual operation If a program is locked it cannot be stopped (Used by Miele Service Technicians) or ended with the 0 "Off" button after 1 See Programming Manual. FC Functions minute. -
Page 10: Use
1. Turn on the washer 2. Sort and load the laundry ^ Open the on-site water faucet (and the supply faucet for steam, if relevant). ^ Turn on the electrical supply at the mains (on site). ^ Press l "On" to turn the washer on. The welcome screen shows. -
Page 11: Maximum Dry Laundry Weights
3 = fabric softener 35 lbs / 16 kg wet cleaning 4 = liquid bleach 5 = liquid detergent PW 6321 72 lbs / 32 kg laundry 42 lbs / 19 kg wet cleaning ^ Do not exceed the maximum fill level, the excess will flow directly into the drum. - Page 12 Detergent Fabric softener ^ Pour liquid fabric softener into the Only use the correct amount of high compartment according to the efficiency low sudsing detergent. Too manufacturer’s instructions. Do not much detergent will cause oversudsing. exceed the maximum fill level, the excess will prematurely activate the siphon Dosage and be wasted.
- Page 13 Starch Bleach Only bleach items with the x symbol on In the detergent container the fabric care label. Hot Wash Program stop - Starch stop Liquid bleach can only be used in a Door can be opened. program designed for bleach. Add bleach to ü...
-
Page 14: Select A Program
4. Select a program 5. Select wash options (if needed) ^ Select a program by turning the jog shuttle ^ Press one of the wash option buttons. (e.g. Program 1 Hot Wash). To deselect the option, press it again. The following will appear in the display: + i Block Plus Extra Drain A pre-wash can be selected for heavily... -
Page 15: Adjust The Program (If Needed)
6. Adjust the program (if needed) Spin speed The spin speed can be adjusted from Laundry weight 0 - 300 in 25 rpm increments. Depending on The laundry weight can be manually the machine model and the program selected. selected the max. spin speed ranges from 600 - 1100 rpms. -
Page 16: Select Delay Start (If Needed)
7. Select Delay Start (if needed) 8. Start the program Use the m "Delay start" button to program ^ Press the h "Start" button to start the the washer to start automatically at a later program. time. Setting the delay start When using the "Spin Stop"... -
Page 17: End Of Program
9. End of program At the end of the program, once the drum is stationary and no water is in the machine the display shows (for example): Hot Wash Program end Door can be opened. At the same time a tone will sound for a short time to signal the program end. -
Page 18: Skipping Program Cycles
Skipping program cycles Program stop ^ To stop the program, press f "End". Cycles of a program in progress can be skipped or repeated. The program stops. ^ Press the f "End" button to stop the Hot Wash program. Program stop Hot Wash ü... -
Page 19: Canceling A Program
Canceling a program Canceling a locked program ^ To cancel a program, press the f "End" Locked programs cannot be stopped or button twice. canceled. If the program was canceled with water in Hot Wash the machine or during spinning, the display 194 °F Main wash shows:... -
Page 20: Program Sequence
K Information Program sequence The program sequence is shown in the Hot Wash display after the start of the program. 194 °F Main wash 140 °F Rinse 1 Cold End at 12:35 Hot Wash 104 °F Pre-wash 68 °F Main wash End at 12:35 Press the K "Information"... -
Page 21: Language Selection
Language selection The language can be selected with the F flag symbol. The language is set back to its original setting 5 minutes after the program ends or when the door is opened. Hot Wash 194 °F Cottons 140 °F Cottons Intensive 140°F Press the function button FC. -
Page 22: Program Guide Standard Programs
Program Guide Standard Programs Programs may vary depending on machine type. Wash Program / Fabric Program cycle options Display 1 Hot Wash Bed linens and terry cloth Pre-wash 104°F selectable 194 °F laundry made of cotton, Main wash 194°F linen or mixed fabrics 2 x Rinse last rinse warm* Final spin... -
Page 23: Program Guide Standard Programs
Program Guide Standard Programs 10 Delicates Synthetics, silk, rayon Pre-wash selectable Main wash 86°F Wash rhythm "delicate" 2 x Rinse Final spin 1 Min. 11 Woolens Machine washable woolens, Main wash limited to 104°F 86 °F sturdy woolens and mixed Wash rhythm "gentle"... -
Page 24: Chip Card Use
Chip card use Chip cards are programmed to a machine If the card was inserted the wrong way, the type. Empty cards can be used with any display shows: machine. Card fault § ^ Press l "On" to turn the washer on. Reinsert card correctly in card reader. -
Page 25: Optional Modules
Optional modules Liquid dispensing system Deselecting the dispensing (Dispensing systems vary) Hot Wash 194 °F Cottons 140 °F Cottons Intensive 140 °F ä The liquid dispensing can be manually deselected before a program start. The dispensing pump is turned off. The display shows: Hot Wash 56.0/56.0 lb t... - Page 26 Optional modules Priming the dispensing pumps Dispensing calibration Main menu Use the calibration to get liquid detergent to Dispensing pump 1 the pumphead. Once calibration is complete Dispensing pump 2 run an empty program to get detergent to the machine before actually washing a load of laundry in the machine.
-
Page 27: Peak Load Cutoff
It is possible to print out whole programs or laundry is displayed. parts of programs. This requires a special Editor Program which Hot Wash is available from the Miele Professional Program end Residual moisture 60 % Department. Door can be opened. -
Page 28: Cleaning And Care
Cleaning and Care After each use Detergent containers and siphon tube ^ Regularly clean detergent residues from Never use high pressure cleaners to hose the detergent dispensers, drawers and down the machine. siphons with warm water. The machine should be cleaned immediately after use. - Page 29 Cleaning and Care Vent grille Water inlet filters ^ Check and clean regularly the wash water vent grille at the rear of the machine. Rust The drum and the wash water drum are made of stainless steel. Water with a high iron content or items like paper clips or iron buttons which are in the laundry, can lead to rust in the drums.
- Page 30 Cleaning and Care Drum bearing lubrication Maintenance during downtime If the machine needs to be serviced the When the machine is not in use for an following message shows: extended time (4 weeks or more), the drum bearings must be lubricated (before the Drum bearing lubrication downtime).
-
Page 31: Frequently Asked Questions
Oversudsing detergent ^ Use a low sudsing detergent or contact Miele’s detergent application specialists. Very soft water The door handle has lost its function. The ^ In areas with soft water, use less door cannot be opened or closed. -
Page 32: Power Failure - Emergency Door Release
Frequently asked questions Power failure - Emergency door Open the door manually release During a short power failure The program remains in the last position. When power is restored the following message appears in the display: Power failure Program stop Press Start ^ Press h "Start"... -
Page 33: Fault Messages
Repairs to electrical or steam the display shows the following message appliances should only be carried out by after turning the machine on. a Miele authorized technician in Maintenance notice accordance with local and national safety § regulations. Unauthorized repairs could Call Technical Service. - Page 34 If the program has a "Thermostop" the press h "Start". program will time out. A defective drain valve should only be ^ Call Miele Technical Service. replaced by an authorized service ^ Some programs may be canceled if this technician.
-
Page 35: After Sales Service
Above the drum opening, or on the back panel of the machine. When calling Miele Technical Service report the error in the display. Only use original Miele spare parts when performing maintenance or repairs on this machine. -
Page 36: Guide To The Data Plate Symbols
10 Drum volume/Laundry dry weight 11 Kinetic Energy Noise level 12 Ex. time to top speed Wash cycle Spin cycle 13 Breaking time PW 6241 60 dB 82 dB 14 Heating PW 6321 60 dB 80 dB * Not valid for this machine. -
Page 37: Installation Instructions
Installation Instructions... -
Page 38: Help To Protect The Environment
Help to protect the environment Disposal of the packing materials Disposal of an old appliance The packing materials protect the appliance Old appliances may contain materials that during shipping. They have been designed can be recycled. Please contact your local to be biodegradable and recyclable. -
Page 39: Installation Instructions
Removing the shipping struts The washer must only be installed by a ^ The red-marked fixing angles "A" on the Miele authorized service technician. diagram, 2 on each side panel are fixed with 3 M 10 (SW 17) hex screws. Remove Before installation or service disconnect these. -
Page 40: Plumbing
The hoses should only be replaced with genuine Miele spare parts which fulfill the pressure requirements. The hot water intake must not exceed a temperature of 158°F (70°C). Cold water connection only... -
Page 41: Electrical Connection
Steam heated washers are factory set to 3 phase, 208 V, 60 Hz They can be converted to 3 phase, 240 V, 60 Hz by a Miele Service Technician. Electrically heated washers are factory set to 3 phase, 230 V, 50/60 Hz... -
Page 42: Quick Guide
Quick Guide 1. Sort the laundry Only use this machine for items that are machine washable, see the fabric care label. ^ Empty all pockets. 2. Turn the machine on and load the laundry ^ Press the I "On" button to turn the machine on. ^ Open the drum door and load the laundry. - Page 44 All rights reserved / 2008 06 572 433 / 00...
Need help?
Do you have a question about the PW 6321 and is the answer not in the manual?
Questions and answers