Miele PW 6241 Operating And Installation Instructions
Commercial washing machine
Hide thumbs
Also See for PW 6241:
- Operating and installation instructions (72 pages) ,
- Operating instructions manual (46 pages) ,
- Fitting instructions manual (60 pages)

Related Manuals for Miele PW 6241


Summary of Contents for Miele PW 6241
- Page 1 Operating and Installation Instructions Commercial Washing Machine PW 6241 PW 6321 To prevent accidents and machine damage, en-US, en-CA read these instructions before installation or use. M.-Nr. 12 124 160...
-
Page 2: Table Of Contents
Contents IMPORTANT SAFETY INSTRUCTIONS ................Explanation of the safety instructions and warnings on the machine....... Appropriate use ......................... Preventing misuse ......................Technical safety......................... Correct use........................Chlorine and component damage..................11 Accessories ........................11 Disposing of your old machine..................12 Caring for the environment .................... 13 Description of the machine .................... - Page 3 Contents Canceling a locked program ..................... 35 Skipping a program ......................36 Optional modules ......................37 Liquid dispensing (optional for machines with detergent compartment) ......37 Deselecting dispensing ..................... 38 Dispensing quantities ......................38 Commissioning the dispenser pumps................38 Dispensing calibration ....................... 39 Cleaning and maintenance of the dispensing system............
-
Page 4: Important Safety Instructions
This prevents both personal injury and dam- age to the washing machine. Miele expressly and strongly advises that you read and follow the instructions in the chapter on installing the washing machine as well as the IMPORTANT SAFETY INSTRUCTIONS. -
Page 5: Appropriate Use
IMPORTANT SAFETY INSTRUCTIONS Appropriate use The washing machine is only suitable for washing fabrics with a care label stating that they are suitable for machine washing. Any other applications may be hazardous. The manufacturer cannot be held responsible for damage resulting from incorrect or improper use or operation of the machine. -
Page 6: Preventing Misuse
IMPORTANT SAFETY INSTRUCTIONS Children must not be allowed near the washing machine unless they are constantly supervised. Children must not be allowed to clean or maintain the washing ma- chine. Please supervise children in the vicinity of the washing machine and do not let them play with it. -
Page 7: Technical Safety
It is essential that this standard safety re- quirement is met. If in any doubt, please have building's wiring sys- tem inspected by a qualified electrician. Miele cannot be held respon- sible for the consequences of an inadequate grounding system (e.g. - Page 8 Change the sets of hoses ahead of time to avoid the risk of leaks and subsequent water damage. Faulty components should only be replaced by genuine Miele re- placement parts. Miele can only guarantee the safety standards-com- pliant of the machine when Miele replacement parts are used.
-
Page 9: Correct Use
IMPORTANT SAFETY INSTRUCTIONS Correct use The maximum dry laundry weight is 53 lb (24 kg) for PW 6241 and 370 lb (32 kg) for PW 6321. See the “Program chart” for the maximum recommended load sizes for individual programs. Before using the washing machine for the first time, check that the shipping struts have been removed (see “Installation –... - Page 10 A special descaling agent is available to order from Miele (see “Optional accessories”). Turn off the water supply if the machine is to be left for any length of time (e.g.
-
Page 11: Chlorine And Component Damage
The laundry must also be tested to check whether it con- tains any active chlorine residues. Accessories Accessory parts may only be fitted when expressly approved by Miele. If other parts are used, any claims from the warranty will be void. -
Page 12: Disposing Of Your Old Machine
IMPORTANT SAFETY INSTRUCTIONS Miele cannot be held responsible for damage caused by failure to comply with these safety instructions and warnings. Disposing of your old machine Ensure that the door locks are unusable when disposing of or scrapping old washing machines. This will prevent the risk of children playing accidentally locking themselves in and endangering their lives. -
Page 13: Caring For The Environment
Consult with local authorities, dealers or Miele in order to dispose of and recycle electrical and electronic appliances. Miele assumes no responsibility for deleting any personal data left on the appliance be- ing disposed. - Page 14 Caring for the environment Energy-saving tips Energy and water - Make use of the maximum load that the wash program can ac- consumption commodate. The most efficient use of energy and water is achieved when a full load is washed. Detergent - Do not exceed the amounts of detergent recommended on the packaging.
-
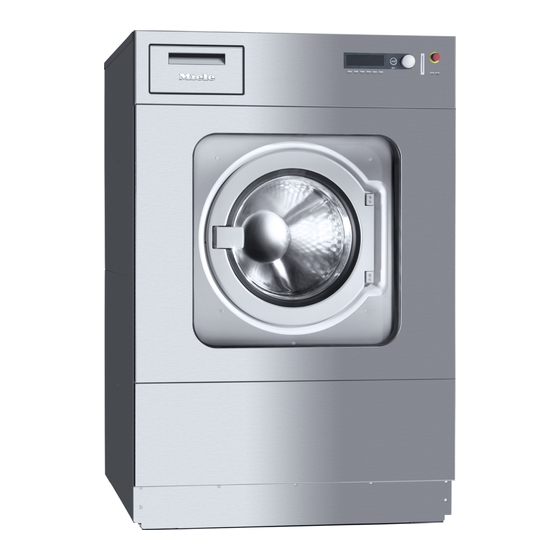
Page 15: Description Of The Machine
Description of the machine Machine description ① ② ③ ④ ⑤ ⑥ ⑦ Emergency-off button Pressing the red button switches the machine off. Control panel Detergent drawer Pull the handle to open the cover. Door handle The door handle is equipped with an anti-snap mechanism to ensure the safety function of the door lock. -
Page 16: Control Panel
Description of the machine Control panel Display Cottons Hygiene °F Cottons Universal °F Cottons Intensive °F When the machine is switched on the welcome screen will appear briefly, followed by the program list. The last started program is highlighted. Function buttons The six buttons underneath the display are the function buttons. -
Page 17: Function Buttons
Description of the machine Function buttons A function is activated when pressed and deactivated when pressed again. Stop/finish The right-hand function button is used as the finish button after a program has started. Pressing the button stops the selected program or finishes a stopped program. +... -
Page 18: Program Card For The Supervisor
Description of the machine Program card for the supervisor There are no programs on this card ex works. Please refer to the programming instructions for information on how data is transferred from the controls to the card. If a card with saved programs is placed in the card reader before the program is started, the controls no longer access the internal program memory. -
Page 19: Washing
Washing Before using for the first time The washing machine must be commissioned by Cus- tomer Service or an authorized dealer. Open the on-site shut-off valves for water and/or steam. Switch on the (on-site) power switch. Switch the machine on with the I “Power on” button. ... -
Page 20: Max. Load
Washing Max. load (dry laundry) PW 6241 PW 6321 1 Cottons 90°C 2 Cottons 60°C 3 Cottons 60°C intensive max. 53 lb max. 70 lb (24 kg) (32 kg) 4 Cottons 30°C 5 Cottons 30°C intensive 6 Cottons Eco short 7 Minimum iron 60°C 8 Minimum iron 60°C intensive max. -
Page 21: Washing With Detergent Drawers
Washing Washing with detergent drawers Adding detergent using the deter- gent dispenser drawer For standard wash programs, add powder detergent for the main wash to the compartment and if desired, add detergent for a pre-wash to the compartment. Add fabric softener to the front of the compartment. -
Page 22: Dyes, Dye Removers, And Descaling Agents
Washing Liquid bleaching agents must only be dispensed through the desig- nated dispenser drawer compartment. Only then it is ensured that the agent is added in to the second rinse cycle automatically. Liquid bleaching agents should only be used on colored textiles which have a wash care label stating that they are suitable for bleaching. -
Page 23: Water Hardness Levels
Washing Water hardness Water hardness Water proper- Total hardness German scale levels level ties °d Soft 0–7 Medium 7-15 7–14 Hard 15-22 14–21 Very hard Above 22 Above 21 Check with your local water supplier if you do not know the water hardness level in your area. -
Page 24: Selecting A Program
Washing Selecting a program - Select a program by rotating the selector dial (e.g., Program 1 Cot- tons). The following (for example) will appear in the display: Extra Drain Cottons Hygiene °F Cottons Universal °F Selecting the Pre-wash, Starch stop, or W/o spin addi- tional functions Confirm the selected program by pressing the inner button on the... -
Page 25: Changes Before Program Start
Washing Changes before program start If changes are to be made before the start of the program, e.g. load, temperature or spin speed: Load size The load size can be entered manually before the start of the pro- gram. Cottons Hygiene 10,0 24,0 lb 40°F... - Page 26 Washing Starting a pro- Press the “START” button. gram The wash program will start. After the program has started, the program sequence is shown in the display. Cottons Hygiene 40°F Pre-wash °F Main Wash Finish at 12:35 + ...
-
Page 27: Opening The Drum Door After The Program Has Finished
Washing Block 2. Spülgang Program step Wash time 1 Actual water level Required water level Actual temperature 35 °F °F Required temperature Cottons Hygiene rpm: Rhythm Press the “Back” button. The display will automatically revert to the program sequence. Opening the drum At the end of the program, when the drum has stopped rotating and door after the... -
Page 28: Procedure In The Event Of A Program Interruption During Operation
Washing Procedure in the If the program has been canceled while there is still water in the ma- event of a pro- chine or during spinning, the following (for example) will appear in the gram interruption display: during operation Cottons Hygiene Program finished. -
Page 29: Washing By Card Operation
Washing by card operation Card operation Cards with at least one program are intended for a particular model of machine. Blank cards can be used in any machine. Switch on the machine with the I “Power on” button. The welcome screen will appear in the display. Insert the card. -
Page 30: Laundry Load Operation
Washing by card operation Card fault Reinsert card correctly in card reader. Insert the card into the card reader correctly. If the card is not suitable for this model of machine, the following message will appear in the display: Card contents Card programs are only applicable for machine type ??. -
Page 31: Additional Functions
Additional functions Temporarily changing the language The display language can be changed temporarily via the flag symbol before starting the program. The language selected is reset 5 minutes after the end of the pro- gram when the door is opened. Cottons Hygiene °F Cottons Universal °F... -
Page 32: Start Time
Additional functions Start time A later wash start time can be allocated to a program using the “Start time” function button. Setting a start time Select the wash program required. When a program has been selected, the following (for example) will appear in the display: 10,0 / 16,0 Cottons Hygiene... -
Page 33: With Pre-Wash
Additional functions With pre-wash A Pre-wash can be added for heavily soiled laundry before the pro- gram has started in the standard programs 1 to 10. Press the + “Block+” button. The following will appear in the display: Cottons Hygiene 14,0 / 16,0 Pre-wash °F Main Wash... -
Page 34: Without Spin
Additional functions Without spin “W/o spin” can be selected before the program starts in all stan- dard programs (excluding Separate spin). Press the “W/o spin” button. The field will be highlighted in the display. Tip: The function can be deselected by pressing the button again. Cottons Hygiene ... -
Page 35: Program Cancelation
Additional functions Program cancelation The program can be canceled as follows. Press the “Stop/finish” button twice in succession. The program is canceled. If the program has been canceled while there is still water in the ma- chine or during spinning, the following will appear in the display: Cottons Hygiene Program stop - Water in the drum ... -
Page 36: Skipping A Program
Additional functions Cottons Hygiene °F Main Wash °F Rinse 1 Finish at 12:35 Skipping a program The current program can be skipped or program blocks can be re- peated. Press the “Stop/finish” button. The program will stop. Cottons Hygiene Program stop ... -
Page 37: Optional Modules
Optional modules Liquid dispensing (optional for machines with detergent compartment) a c b Dispenser pump Siphon tube Hose connection socket (suction side) Hose connection socket (pressure side) Outlet (in case of hose leakage) Suction inlet opening Display indicator level checker. When the dispenser is empty the pump and the machine switch themselves off. -
Page 38: Deselecting Dispensing
Optional modules Deselecting dispensing Liquid dispensing can be switched off manually before the program starts. Whites °F °F Cottons Cottons Intensive °F Switch liquid dispensing off manually using the “Dispensing off” function button. After the program has started, no detergent will be dispensed via ... -
Page 39: Dispensing Calibration
Optional modules Dispensing calibration Dispensing calibration is used to measure the throughput of the indi- vidual dispenser pumps. To go directly to Press and hold multifunction button 2 and switch the machine on with “Power on”. Dispensing cali- bration when the Dispensing calibration Main menu ... -
Page 40: Cleaning And Maintenance Of The Dispensing System
Optional modules Dispensing calibration Dispensing pump 1 100 ml Press the multifunction button Stop the pump by pressing the button, or the pump will stop au- tomatically after 60 seconds. Measure the required amount in the measuring vessel. ... -
Page 41: Communication Module
The slot for the communication module is located on the back of the machine. An Editor program is available for this from your sales and service center or your Miele dealer. Operating data With the Operating data module, Operating data can be read or deleted via the “Operating data” button either before program start... - Page 42 Optional modules Tip: If the “Back” button is pressed or if the “START” button is not pressed within 30 seconds, the program will not start and the dis- play appears as before program start.
-
Page 43: Total Data
Optional modules Total data Operating data module Total data Program data Select the Total data menu option. After selecting Total data (for example), the following appears in the display: Operating data module Total data 200.987 h Total time power on Operating hours 123456 h... -
Page 44: Program Data
Optional modules Program data Operating data module Program data Delete data Select the Program data menu option. After selecting Program data (for example), the following appears in the display: Operating data module Program data Cottons Hygiene 90 °F ... - Page 45 Optional modules Electrical energy : 12.5 kWh Gas energy : 0 kWh Steam energy : 0 kWh Total water amount : 140 l Max. wash water temp. : 200°F (95°C) Max. drain water temperature : 115°F (45°C) Program change : 2 (after selecting and pressing the selector dial, only the last 3 stops and 3 starts are displayed.) Program fault : none (only the last 3 faults are saved.)
-
Page 46: Delete Data
Optional modules Delete data Operating data module Program data Delete data Select the Delete data menu option. Delete data After selecting , the following appears in the display: Delete data Operating data module Module : 21.02.2020 Total data : 12.07.2020 ... -
Page 47: Weighing System/Weighing Base
Optional modules Weighing system/weighing base If the machine is equipped with a weighing base, the load weight is displayed in 0.5 lb (0.2 kg) increments during loading. The maximum load weight for the selected program is displayed beside it. Resetting the load Do not place any items on the machine. -
Page 48: Frequently Asked Questions
Frequently asked questions The drum door cannot be opened. Press against the door handle, turn the machine off and on, and then pull the door handle again. The safety catch of the door handle is disengaged The door handle has stopped working. It is no longer possible to open or close the drum door. -
Page 49: Power Failure During The Wash Cycle; Opening The Door In An Emergency
Frequently asked questions Power failure during the wash cycle; opening the door in an emergency In the event of a The program stops in the last position reached and the following brief power out- message appears in the display once the power supply has been re- age: stored: Power failure... - Page 50 Frequently asked questions In the event of a longer power failure Switch off the machine. Switch the machine off with the on-site power switch. Close the on-site shut-off valves for water or steam. To remove the laundry, first open the drain valve manually and then manually unlock the drum door.
-
Page 51: Possible Reasons For Increased Levels Of Foaming
Frequently asked questions Remove the laundry. Possible reasons for increased levels of foaming Detergent type Only use detergent suitable for use in commercial washing ma- chines. Domestic laundry detergent is not suitable. Too much detergent Dispense detergent following the instructions on the packaging and ... -
Page 52: Service Interval And Dguv Display
Frequently asked questions Service interval and DGUV display If the following message appears in the machine display after “Power on”, either a service or the annual DGUV check must be carried out. Maintenance interval Call Technical Service. DGUV test ... - Page 53 Frequently asked questions Door lock fault Call Technical Service if restart w/o success. Press firmly against the door handle until the door lock audibly en- gages and press the “START” button. Heating system fault Program stop. Press Start. Program runs with cold water.
- Page 54 Frequently asked questions Card fault Reinsert card correctly in card reader. Insert the card into the card reader correctly. ...
-
Page 55: Customer Service
Please also tell Customer Service the fault message that appears on the machine display. Use only original Miele parts. Customer Service will also require the model, serial number (SN), and material number (mat. no.) when or- dering. -
Page 56: Cleaning And Care
Cleaning and care Carry out cleaning and maintenance of the washing machine after use if possible. Do not use a pressure washer or water jet to clean the washing machine. Clean the machine casing, control panel, and plastic parts with a ... -
Page 57: Cleaning The Detergent Drawer, Detergent Compartments, And Siphons
Cleaning and care Cleaning the detergent drawer, detergent compart- ments, and siphons Clean the detergent drawer and the detergent compartments thor- oughly with hot water as required to remove detergent residues and incrustations. If the machine is not going to be used for a long time, leave the flap ... - Page 58 Cleaning and care Cleaning the drip Open the flap on the detergent drawer to an angle of 45° and lift out channel and the flap of the detergent drawer on the right side. siphon If the drip channel and associated drain connection are blocked, clean them.
-
Page 59: Drum Shaft Bearings
Cleaning and care Drum shaft bearings Once the service interval has been reached, the following message appears in the display: Drum bearing lubrication Call Technical Service. This message is removed by pressing the button. It appears after switching on the machine until the service technician has performed this work. -
Page 60: Meaning Of The Symbols On The Data Plate
Meaning of the symbols on the data plate Model Ramp-up time Serial number Braking time Item number Heating Material number Designation/year of construction Voltage/frequency Commissioning date Control fuse Electric heating Drive motor Fuse (on site) Drum data Indirect steam heating Drum diameter/drum depth Direct steam heating Spin speed... -
Page 61: Installation
Installation The washing machine must be installed by a Miele service techni- cian or by an authorized dealer. This washing machine is only intended for items of laundry that have not been proofed with dangerous or inflammable substances. Remove packaging carefully with a suitable tool. -
Page 62: Water Connection
Installation The front plinth panel is screwed to the rear panel and the rear plinth panel is located under the machine cover and they are both to be mounted after installation. The screws for this are in the accessory pack. Keep the struts in a safe place. -
Page 63: Connection To The Cold Water Supply Only
1,015 psi (7,000 kPa) overpressure and for water temperatures of a minimum of 195°F (90°C). This also applies to the associated connection fittings. Miele original parts meet these requirements. The hot water supply must not exceed a maximum temperature of 160°F (70°C). -
Page 64: Dispensing-Agent Connection To The Mixer Compartment
Installation Attach the non-return valve to the faucet. Attach the water inlet hose to the thread of the non-return valve. Dispensing-agent connection to the mixer compartment Connections 1 and 2 are provided for viscous agents. These con- nectors are sealed and need to be drilled open using an 8 mm drill bit. - Page 65 Installation Connections 3 to 12 are provided for liquid dispensing. These con- nectors are sealed and must be cut to the diameter of the hose with a small saw. If opened connectors are no longer required, they must be resealed.
-
Page 66: Electrical Connection
Installation Electrical connection The electrical connection must only be carried out by a suitably quali- fied electrician in accordance with local and national regulations. When installing a residual current device (RCD), it must be Type B. The electrical components of the machine PW 6241, PW 6321 com- ply with local codes. -
Page 67: Connecting The Dispenser Pumps
See the installation plan and installation instruc- tions provided. The steam valve and the condensate separator are available from Miele dealers or Miele Customer Service. Once the machine has been successfully installed and connected, reassemble all the casing parts that were removed. -
Page 68: Quick Start Guide
Quick Start Guide 1. Preparing the laundry Only machine wash items which have a care label stating that they are suitable for machine washing or for wet cleaning. Empty all pockets. 2. Switching on the machine and loading the laundry Switch on the washing machine with the button. - Page 69 Quick Start Guide 4. Select a program by rotating the selector dial 5. Press the “START” button to start the selected wash program If the message “Door lock error” appears, proceed as follows: Door lock fault Call Technical Service if restart w/o success.
- Page 72 Technical Service & Support Phone: 800-991-9380 Miele Professional proservice@mieleusa.com Technical Service Phone: 1-888-325-3957 serviceprofessional@miele.ca Manufacturer: Miele & Cie. KG Carl-Miele-Straße 29, 33332 Gütersloh, Germany Alteration rights reserved / Publication date: 01.22 M.-Nr. 12 124 160 / 01...
Need help?
Do you have a question about the PW 6241 and is the answer not in the manual?
Questions and answers