Miele PW 6163 Operating And Installation Instructions
Commercial washing machine
Hide thumbs
Also See for PW 6163:
- Operating instructions manual (46 pages) ,
- Operating and installation instructions (88 pages) ,
- Installations plan (234 pages)
Table of Contents
Advertisement
Quick Links
Advertisement
Table of Contents

Related Manuals for Miele PW 6163


Summary of Contents for Miele PW 6163
- Page 1 Operating and installation instructions Commercial washing machine PW 6163 PW 6243 PW 6323 To avoid the risk of accidents or damage to the en-GB machine, it is essential to read these instruc- tions before it is installed and used for the first time. M.-Nr.
-
Page 2: Table Of Contents
Contents Warning and Safety instructions..................Explanation of the safety instructions and warnings on the machine....... Intended use........................Foreseeable misuse......................Technical safety......................... Correct use........................11 Chlorine and component damage..................13 Accessories ........................14 Disposing of your old machine..................14 Caring for the environment .................... 15 Description of the machine .................... - Page 3 Contents End of the programme ...................... 37 End of programme (removal on unclean side)............... 37 End of programme (removal on clean side)..............37 End of programme (clean side without display) ............37 Opening the hinged door at the end of the programme ..........37 Opening the drum ......................
- Page 4 Contents Cleaning the ventilation grilles................... 67 Checking the closing device ..................... 68 Treating rust........................68 Drum shaft bearings ......................69 Meaning of the symbols on the data plate..............70 Airborne noise emission ....................71 Installation........................72 Installing the washing machine ..................72 General operating conditions ....................
-
Page 5: Warning And Safety Instructions
Miele cannot be held liable for damage caused by non-compliance with these instructions. Keep these operating instructions in a safe place and pass them on to any future owner. -
Page 6: Intended Use
Warning and Safety instructions Intended use The washing machine is only suitable for washing fabrics with a care label stating that they are suitable for machine washing. Any other applications may be dangerous. The manufacturer cannot be held liable for damage resulting from incorrect or improper use or op- eration of the machine. -
Page 7: Foreseeable Misuse
Warning and Safety instructions This washing machine can only be used by people with reduced physical, sensory or mental capabilities, or lack of experience or knowledge, if they are supervised whilst using it or have been shown how to use it in a safe way and understand and recognise the con- sequences of incorrect operation. - Page 8 Warning and Safety instructions If the detergent compartment drawer is open and any of the dis- penser drawers are missing, there is a danger of scalding from splashing water. Do not operate the machine if any of its components are missing. ...
-
Page 9: Technical Safety
Miele cannot be held liable for the consequences of an inad- equate earthing system (e.g. electric shock). - Page 10 Faulty components must only be replaced by genuine Miele spare parts. Miele can only guarantee the safety standards of the appliance when Miele spare parts are used. The cause of any leaks must be dealt with before the washing ma- chine is restarted.
-
Page 11: Correct Use
Warning and Safety instructions Correct use The maximum dry laundry weight is - for PW 6163: 16 kg - for PW 6243: 24 kg - for PW 6323: 32 kg See the “Programme chart” for the maximum recommended load sizes for individual programmes. Before using the washing machine for the first time, check that the transport safety devices have been removed (see “Installation –... - Page 12 If, however, you do wish to descale it, only use proprietary non-corrosive descaling agents and strictly observe the instructions on the packaging. Special descaling agent is available from Miele. Strictly observe the instructions for the descal- ing agent. ...
-
Page 13: Chlorine And Component Damage
Warning and Safety instructions Recommending chemical cleaning agents does not mean that the machine manufacturer is responsible for the influences of these agents on the laundry and the washing machine. Please note that un- disclosed product changes by the manufacturers of these agents may affect the quality of the wash result. -
Page 14: Accessories
Accessories Accessory parts may only be fitted when expressly approved by Miele. If other parts are used, guarantee, performance and product li- ability claims will be invalidated. Miele cannot be held liable for damage caused by non-compliance with these Warning and Safety instructions. -
Page 15: Caring For The Environment
Please dispose of it at your local community waste collection / recyc- ling centre for electrical and electronic appliances, or contact your dealer or Miele for advice. You are also responsible (by law, depend- ing on country) for deleting any personal data that may be stored on the appliance being disposed of. - Page 16 Caring for the environment Energy saving tips Energy and water - To get the most out of your machine, load the maximum dry load consumption size for the wash programme you are using. Energy and water consumption is most efficient when a full load is washed.
-
Page 17: Description Of The Machine
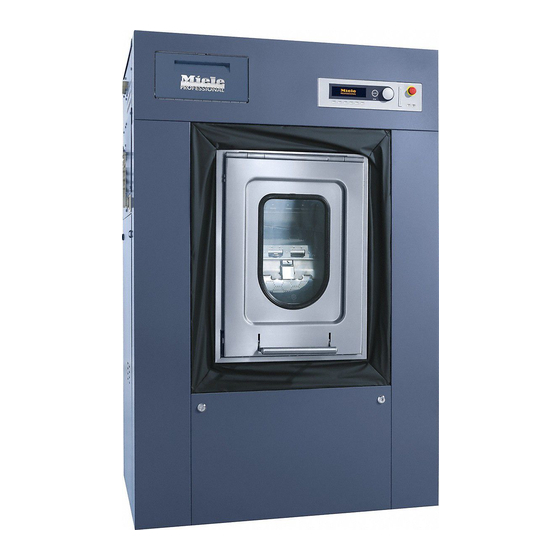
Description of the machine Machine description Unclean side Clean side (infeed side) (outfeed side) Emergency shut-off Pressing the red button switches the machine off in an emergency. Control panel Detergent drawer Hinged door The hinged door is opened by pulling up the door handle and closed by pushing down the door handle. -
Page 18: Control Elements - Unclean Side (Infeed Side)
Description of the machine Selector switch for heating type (depending on model) Steam heating Electric heating The switch can be used to change between the “steam heating” and “electric heating” heating types. Control elements – unclean side (infeed side) f g h i Display Function buttons These buttons are allocated specific functions depending on the washing machine... -
Page 19: Control Elements - Clean Side (Outfeed Side, Full Version)
Description of the machine button For switching on the washing machine button For switching off the washing machine Emergency shut-off Only press in case of danger. Pressing the red emergency-stop button switches the ma- chine off. Once the danger has been averted, the button can be unlocked by turning it clockwise. -
Page 20: Function Buttons
A later programme start time can be selected by pressing this button before starting a pro- gramme. Info If information (e.g. the telephone number of the Miele Customer Service Department) has been stored during commissioning, this information is shown in the display by pressing this button. -
Page 21: Programme Card For The Supervisor
Description of the machine Programme unlocked Pressing this button unlocks a locked programme. Dispensing Dispensing switched off Operating data Tare Press this button to set the weight on the scale of the weighing system to zero. Use this button when the load indicator is not 00.0 when the drum is empty. -
Page 22: Initial Commissioning
Installing and connecting the washing machine incorrectly will cause serious material damage. The washing machine must be installed by Miele Customer Service Department or by an authorised dealer. Follow the instructions in “Installation”. The washing machine must be commissioned by the Miele Cus- tomer Service Department or by an authorised dealer. -
Page 23: Washing
Washing Preparing the laundry Emptying pockets Empty all pockets. Damage due to foreign objects. Nails, coins, paper clips, and so on can cause damage to garments and components in the machine. Check the laundry before washing and remove any foreign objects. Maximum load Observe the maximum load size (dry weight) for your washing ma- size... -
Page 24: Loading The Washing Machine
Washing Loading the washing machine Opening the hinged door Pull the door handle upwards on the unclean side of the washing machine (infeed side). Pull the hinged door upwards. The gas pressure stays push the hinged door up. Opening the drum Press the locking mechanism with your thumb. -
Page 25: Loading The Laundry
Washing Press the upper half of the drum door into the catch in the upper part of the door. Loading the laun- Check the drum for pets or foreign objects before loading it with laundry. Unfold the laundry and load loosely into the drum. ... -
Page 26: Closing The Hinged Door
Washing Be careful not to trap any items of laundry in the drum when clos- ing it. First close the lower half of the drum door with the locking mechan- ism. Then close the upper half of the drum door until the locking hooks ... -
Page 27: Adding Detergent
Washing Adding detergent Open the detergent drawer. Pull out the required detergent drawers and add the appropriate de- tergent: - Detergent for the pre-wash - Detergent for the main wash and soaking - (front compartment) Fabric conditioner or liquid starch Do not add cleaning agents beyond the marking in the drawer;... -
Page 28: Bleaching Agents
Washing Bleaching agents Only use bleach on fabrics with the symbol on the wash care la- bel. Only pour liquid bleaching agents into the rear compartment of the drawer. This is the only way to ensure that the bleaching agent is added automatically during the second rinse cycle. - Page 29 Washing Water hardness Water proper- Total hardness Total hardness level ties (mmol/l) (°d) Soft 0–1.3 0–7 Medium 1.3–2.5 7–14 Hard 2.5–3.8 14–21 Very hard > 3.8 > 21 Check with your local water supplier if you do not know the water hardness level in your area.
-
Page 30: Selecting A Programme
Washing Selecting a programme Separate drain Cottons hygiene °C Cottons universal °C Cottons hygiene Selected programme (example): Rotate the rotary control to select the desired programme. The selected programme is highlighted. Press the rotary control to confirm the selected programme. ... -
Page 31: Additional Functions
Washing Additional functions Press the + function button to select the Pre-wash additional Selecting a Pre- wash function. Cottons hygiene 16,0 / 16,0 40°C Pre-wash °C Main wash + The + symbol is highlighted. Press the + function button again if you want to reselect the Pre- ... - Page 32 Washing The following message (for example) is shown in the display after se- lecting the programme: Cottons 10,0 / 16,0 °C Main wash Rinses 975 rpm + Example display after the programme selection Press the function button. ...
- Page 33 Washing Cottons 10,0 / 16,0 Pre-wash 4.1.2015 20:50 3.1.2015 Start: 6:00 + Display example after setting a start time If the hinged door is opened after setting the start time, the button must be pressed again. To cancel the start time function, press the function button or the Cancelling the start ...
-
Page 34: Temporarily Changing The Language
Washing Temporarily chan- The display language can be changed temporarily via the flag symbol ging the language before starting the programme. The language selected is reset 5 minutes after the end of the pro- gramme when the door is opened. Cottons hygiene °C Cottons universal °C... -
Page 35: Programme Modifications
Washing Programme modifications Changing the load The load size can be changed manually before the start of the pro- size gramme. Cottons hygiene 10,0 16,0 kg 40°C Pre-wash °C Main wash + Display with highlighted “Load size” entry field Rotate the rotary control until the “Load size”... -
Page 36: Starting The Programme
Washing Rotate the rotary control until the required spin speed has been set. Depending on the model of the machine, the spin speed can be changed in 25 rpm increments from 300 rpm to a maximum of 1025 rpm (PW 6323) or 975 rpm (PW 6243/6163). Press the rotary control to confirm the set spin speed. -
Page 37: End Of The Programme
Washing Time after start Time left 10.07.2018 °C Time after start 09:47 Display after pressing the function button (example 2) Press the function button to return to the programme status. End of the programme Depending on the selected wash programme, the laundry can be re- moved on either the clean or unclean side. -
Page 38: Removing The Laundry And Closing The Drum
Washing Opening the drum Press the locking mechanism with your thumb. Press the two halves of the drum door simultaneously until they are unlocked. Open the two halves of the drum door outwards. Press the upper half of the drum door into the catch in the upper ... -
Page 39: Closing The Hinged Door
Washing First close the lower half of the drum door with the locking mechan- ism. Then close the upper half of the drum door until the locking hooks clasp together and engage. Closing the It is essential to close the hinged door of the clean side again after hinged door unloading. -
Page 40: Switching Off The Washing Machine
Washing Separate spin Starting an addi- Select the programme. tional spin pro- Press the button. gramme The washing machine runs the spin programme. The programme finishes on the unclean side. Switching off the washing machine To allow the washing machine to dry out after use, do not close the hinged door on the unclean side after washing. -
Page 41: Washing By Card Operation
Washing by card operation Washing with a programme card Cards with a programme saved on them are intended for a particular model of washing machine. Blank cards can be used in any ma- chine. Damage due to insertion of unsuitable objects. The card reader can be damaged if other objects (e.g. -
Page 42: Fixing Card Errors
Washing by card operation Fixing card errors Card errors are indicated by a message in the display. Card incorrectly inserted in card reader. When the message appears in the display, the card has been inserted into the card reader the wrong way round. -
Page 43: Additional Functions
Additional functions Temporarily changing the language The display language can be changed temporarily via the flag symbol before starting the programme. The language selected is reset 5 minutes after the end of the pro- gramme when the door is opened. Cottons hygiene °C Cottons universal °C... -
Page 44: Start Time
Additional functions Start time A later wash start time can be allocated to a programme using the “Start time” function button. Setting a start time Select the wash programme. When a programme has been selected, the following (for example) will appear in the display: 10,0 / 16,0 Cottons hygiene °C... -
Page 45: With Pre-Wash
Additional functions With pre-wash A Pre-wash can be added for heavily soiled laundry before the pro- gramme has started in the standard programmes 1 to 10. Press the + “Block+” button. The following will appear in the display: Cottons hygiene 14,0 / 16,0 Pre-wash °C Main wash... -
Page 46: Without Spin
Additional functions Without spin “Without spin” can be selected before the programme starts in all standard programmes (excluding Separate spin). Press the “Without spin” button. The field will be highlighted in the display. Tip: The function can be deselected by pressing the button again. Cottons hygiene ... -
Page 47: Programme Cancellation
Additional functions Programme cancellation The programme can be cancelled as follows. Press the “Stop/finish” button twice in succession. The programme is cancelled. If the programme has been cancelled while there is still water in the machine or during spinning, the following will appear in the display: Cottons hygiene Programme stopped. -
Page 48: Skipping A Programme
Additional functions Cottons hygiene °C Main wash °C Rinse 1 Finish at 12:35 Skipping a programme The current programme can be skipped or programme blocks can be repeated. Press the “Stop/finish” button. The programme is stopped. Cottons hygiene Programme stop ... -
Page 49: Optional Modules
Optional modules Liquid dispensing (optional for machines with dispenser compartment) a c b Dispenser pump Siphon Hose connection (suction side) Hose connection (pressure side) Leakage outlet Suction inlet opening Empty indicator. When the dispenser is empty the pump and the machine switch themselves off. -
Page 50: Amount To Be Dispensed
Optional modules Whites °C Cottons °C Cottons Intensive °C Switch liquid dispensing off manually using the “Dispensing off” function button. After the programme has started, no detergent will be dispensed via the dispensing pumps and the following message (for example) will be displayed: ... - Page 51 Optional modules When a dispensing pump is selected, the following will appear in the display: Dispenser calibration Dispenser pump 1 100 ml Tip: The dispensing quantity can be set from 0 to 9999 ml in 1 ml in- crements. Press the multifunction button ...
-
Page 52: Cleaning And Maintenance Of The Dispensing System
The slot for the communication module is located on the back of the machine. An Editor programme is available for this from your sales and service centre or your Miele dealer. Operating data With the Operating data module, Operating data can be read or de- leted via the “Operating data” button either before programme... -
Page 53: Total Data
Optional modules Press the “Operating data” button. When the button is pressed, the following appears in the display: Operating data module Total data Programme data You have the following options: Total data Data from all programmes is collected and added together in Total data. -
Page 54: Programme Data
Optional modules Operating hours: 123,456 h Duration heating active: 73,456 h Duration drive motor active: 93,456 h Programme starts: 23,456 Programme stops: 567 Programme cancellations: 67 Water volume: 1,234,567 l Load: 1,234,567 kg Liquid agent: 2345 l Energy: 12,345,678 kWh Programme data Operating data module Programme data ... -
Page 55: Delete Data
Optional modules Town : Lehrte Serial number : 12345678 Machine type PW 6321 Load : 13 kg + button : pressed Starch stop button : pressed Without spin button : not pressed Programme start : 11:30 Programme finished : 12:05 Total operating time : 0 h 35 min Electrical energy : 12.5 kWh... -
Page 56: Weighing System/Weighing Plinth
Optional modules Delete data Operating data module Module : 21.02.2020 Total data : 12.07.2020 Module With the menu option, the Total data and the Programme data will be deleted from the Operating data. Total data With the menu option, only the Total data will be deleted from the Operating data. - Page 57 Optional modules 00,0 / 16,0 kg Cottons hygiene 60 °C Main wash Rinses ->I<- + If after resetting to 0 (taring), you discover an overlooked item in the drum, the following will appear in the display: --,- / 16,0 kg Cottons hygiene 60 °C...
-
Page 58: Sampling Tap
Optional modules Sampling tap Some machine models are equipped with a sampling point for suds for analytical purposes in laboratories. The sampling point may only be used by trained personnel. Special precautions must be taken when using the tap to extract suds: - Wear personal protective equipment to avoid eye damage, skin damage or respiratory impairment. - Page 59 Optional modules The ball valve must remain closed in normal operation. The ball valve may only be opened during operation when necessary for taking samples in accordance with the specified safety instructions. There may be residual water in the hose system to the ball valve at the end of the programme.
-
Page 60: Problem Solving Guide
You are able to correct the majority of faults and problems that arise during day-to-day use without external assistance. You can save time and money in many cases, as you do not need to call Miele Service. The following tables are designed to help you to find the cause of a malfunction or a fault and to resolve it. - Page 61 Problem solving guide Problem Cause and remedy Total power failure during There is no power to the washing machine due to a pro- the wash cycle. To remove longed power failure. the laundry, first open the Switch the washing machine off by pressing the but- ...
- Page 62 Problem solving guide Problem Cause and remedy Only use detergent formulated for use in commercial washing machines. Domestic laundry detergent is not suitable. You are using too much detergent. Dispense detergent following the instructions on the packaging and in accordance with local water hardness levels.
-
Page 63: Fault Messages In The Display
Problem solving guide Fault messages in the display Message Cause and remedy Service interval Call the Ser- The washing machine needs to be serviced by the Cus- vice Department. tomer Service Department. Contact the Customer Service Department. Water inlet fault Call the Ser- A fault has been identified in the water inlet. - Page 64 Problem solving guide Message Cause and remedy Positioning fault Programme The drum position is not correct at the end of the pro- finished. Use the emergency gramme. release. Switch the washing machine off with the button and then back on with the button. Contact the Customer Service Department if the message continues to be displayed.
-
Page 65: Contact In Case Of Malfunction
Problem solving guide Contact in case of malfunction In the event of any faults which you cannot remedy yourself, please contact your Miele Dealer or Miele Service. Contact information for Miele Service can be found at the end of this document. -
Page 66: Cleaning And Care
Cleaning and care Carry out cleaning and maintenance after using the washing machine if possible. Risk of electric shock. Only ever perform cleaning and maintenance work when the appli- ance is disconnected from the power. Disconnect the washing machine from the mains electricity supply. Cleaning the casing and fascia panel ... -
Page 67: Cleaning The Ventilation Grilles
Cleaning and care Cleaning the drip Open the flap on the detergent drawer to an angle of 45° and lift out channel and si- the flap of the detergent drawer on the right side. phon If the drip channel and associated drain connection are blocked, clean them. -
Page 68: Checking The Closing Device
Cleaning and care Checking the closing device Check the condition of the drum’s closing device regularly. If there is lint on the drum door, remove the lint. Treating rust The drum and the suds container are made of stainless steel. Water containing iron or ferrous foreign objects (e.g. -
Page 69: Drum Shaft Bearings
Cleaning and care Drum shaft bearings Once the service interval has been reached, the following message appears in the display: Lubricate drum bearings Call the Service Department. This message is removed by pressing the button. It appears after switching on the machine until the service technician has performed this work. -
Page 70: Meaning Of The Symbols On The Data Plate
Meaning of the symbols on the data plate Model Ramp-up time Serial number Braking time Item number Heating Material number Designation/year of construction Voltage/frequency Commissioning date Control fuse Electric heating Drive motor Fuse (on site) Drum data Indirect steam heating Drum diameter/drum depth Direct steam heating Spin speed... -
Page 71: Airborne Noise Emission
Meaning of the symbols on the data plate Airborne noise emission A-weighted emission sound pressure level PW 6163 70 dB (A) PW 6243 71 dB (A) PW 6323 71 dB (A) max. in the workplace EN ISO 11204 A-weighted sound power level PW 6163 79 dB (A) PW 6243 81 dB (A) PW 6323 81 dB (A) max. -
Page 72: Installation
Danger due to incorrect installation. Improper installation of the washing machine may result in injury and damage. The washing machine must be installed by Miele Customer Service Department or by an authorised dealer. General operating conditions This washing machine is intended only for use in a commercial envir- onment and must only be operated indoors. - Page 73 Installation Disassemble the casing of the frequency converter (1). The casing is attached with 3 screws. Hang the frequency converter at the side (2). Disassembling the mounting bracket on steam- heated machines On steam-heated washing machines, also disassemble the mount- ...
-
Page 74: Removing The Transit Bars
Installation Removing the transit bars The transit bars must only be removed at the installation site before the washing machine is commissioned. Remove the 2 transit bars on the clean side of the washing ma- chine. Remove the 2 transit bars on the unclean side of the washing ma- ... -
Page 75: Removing The Transit Bars On The Weighing System
Installation Removing the transit bars on the weighing system Loosen the nuts on the 4 screws with an open spanner. Retain the transit bars. The transit bars will need to be reassembled should the washing machine ever need to be moved again. Assembling the transit bars Assemble the 4 screws and their 3 nuts by hand. -
Page 76: Water Connection
Hoses must be replaced with hoses tested for a burst pressure of at least 7000 kPa (70 bar) overpressure. The hoses must be suitable for a water temperature of at least 90 °C. The same requirements also apply to associated connection fittings. Miele original spare parts meet these requirements. -
Page 77: Use Of Non-Return Valves
Installation Use of non-return In Germany, the machine must be connected to the water supply us- valves ing the non-return valve provided. According to national regulations for drinking water quality, with ef- fect from 21 March 2021, a non-return valve to prevent backsiphon- ing must be installed between the stopcock and the water inlet hose during commissioning on all machines in Germany. - Page 78 Installation Detergent connections on the back panel of the machine Use connections 1 and 2 for viscous agents or for high-pressure dis- pensing systems with water injection. The dispensing systems must be installed with a separate drinking water safety feature (in accord- ance with EN 61770 and EN 1717).
-
Page 79: Electrical Connection
Miele Customer Service Department. Conversion to a different voltage must only be carried out by the Miele Customer Service Department or by an authorised dealer. The wiring instructions given on the provided wiring diagram must be fol- lowed. The washing machine can either be hard-wired or connected using a plug-and-socket connection in accordance with IEC 60309-1. -
Page 80: Equipotential Bonding
Installation Tip: It is recommended to connect the washing machine to the power supply via a plug and socket so that it is easier to conduct electrical safety checks (e.g. during maintenance). If it is necessary to install a residual current device (RCD) in ac- cordance with local regulations, a residual current device type B (sensitive to universal current) must be used. -
Page 81: Connecting The Dispensing Pumps
For steam-heated machine variants, the steam connection must only be carried out by an authorised installation technician. The steam valve and the condensate separator are available from the Miele Cus- tomer Service Department. Risk of electric shock and injury from live or rotating machine parts. -
Page 82: Quick Start Guide
Quick Start Guide 1. Preparing the laundry Only machine wash items which have a wash care label stating that they are suitable for machine washing or for wet cleaning. Empty all pockets. 2. Switching on the machine and loading the laundry Switch on the washing machine with the button. - Page 83 Quick Start Guide 4. Select a programme by rotating the rotary control 5. Press the “START” button to start the selected wash programme If the message “Door lock error” appears, proceed as follows: Door lock fault Call the Service Department if restart does not work.
- Page 84 United Kingdom Malaysia Miele Sdn Bhd Miele Co. Ltd., Fairacres, Marcham Road Suite 12-2, Level 12 Abingdon, Oxon, OX14 1TW Menara Sapura Kencana Petroleum Professional Sales, Tel: 0845 365 6608 Solaris Dutamas No. 1, Jalan Dutamas 1 E-mail: professional@miele.co.uk 50480 Kuala Lumpur, Malaysia Internet: www.miele.co.uk/professional...
Need help?
Do you have a question about the PW 6163 and is the answer not in the manual?
Questions and answers