Miele PW 6163 Operating And Installation Instructions
Commercial washing machine
Hide thumbs
Also See for PW 6163:
- Operating instructions manual (46 pages) ,
- Operating and installation instructions (84 pages) ,
- Installations plan (234 pages)
Table of Contents
Advertisement
Quick Links
Advertisement
Table of Contents

Related Manuals for Miele PW 6163


Summary of Contents for Miele PW 6163
- Page 1 Operating and installation Instructions Commercial Washing Machine PW 6163 PW 6243 PW 6323 To avoid the risk of accidents or damage to the en-AU, NZ appliance, it is essential to read these instructions before it is installed and used for the first time.
-
Page 2: Table Of Contents
Contents Warning and Safety instructions..................Explanation of the safety instructions and warnings on the machine....... Correct application......................Preventing problems ......................Technical safety......................... Correct use........................11 Chlorine and component damage..................13 Accessories ........................14 Disposing of your old appliance..................14 Caring for the environment .................... 15 Guide to the machine ...................... - Page 3 Contents At the end of the programme .................... 37 End of programme (removal on unclean side)............... 37 End of programme (removal on clean side)..............37 End of programme (clean side without display) ............37 Opening the top-hinged door at the end of the programme......... 37 Open drum ........................
- Page 4 Contents Cleaning the ventilation grille .................... 67 Check the closing device ....................68 Treating rust........................68 Drum shaft bearings ......................69 Meaning of the symbols on the data plate..............70 Airborne noise emission ....................71 Installation........................72 Installing the washing machine ..................72 General operating conditions ....................
-
Page 5: Warning And Safety Instructions
“Installation”, as well as in the “Warning and Safety instructions”. Miele cannot be held liable for injury or damage caused by non- compliance with these instructions. Keep these operating instructions in a safe place and pass them on to any future owner. -
Page 6: Correct Application
Warning and Safety instructions Correct application The washing machine is only suitable for washing fabrics with a care label stating that they are suitable for machine washing. Any other applications may be dangerous. The manufacturer cannot be held liable for damage resulting from incorrect or improper use or operation of the machine. -
Page 7: Preventing Problems
Warning and Safety instructions This washing machine is not intended for use by persons (including children) with reduced physical, sensory or mental capabilities, or lack of experience and knowledge, unless they have been given supervision or instruction concerning its use by a person responsible for their safety. - Page 8 Warning and Safety instructions Be careful not to put your hands in the gap between door and frame when closing the drum door. If the dispensing drawer is open and the chute is missing, there is a risk of scalding due to splashing water. Only operate the machine with all attachments in place! ...
-
Page 9: Technical Safety
It is most important that this basic safety requirement is present and regularly tested and, where there is any doubt, the on- site wiring system should be inspected by a qualified electrician. Miele cannot be held liable for the consequences of an inadequate earthing system (e.g. electric shock). ... - Page 10 1000 kPa. Faulty components must only be replaced by genuine Miele original spare parts. Miele can only guarantee the safety standards of the machine when Miele replacement parts are used. If leakages occur, remedy their cause before operating the washing machine again.
-
Page 11: Correct Use
Warning and Safety instructions Correct use The maximum load (dry laundry) - for PW 6163: 16 kg - for PW 6243: 24 kg - for PW 6323: 32 kg See the "Programme chart" for the maximum recommended loads for individual programmes. - Page 12 If, however, you do wish to descale your washing machine, only use proprietary non-corrosive descaling agents and strictly observe the instructions on the packaging. Special descaling agent is available from Miele. Strictly observe the instructions for the descaling agent. ...
-
Page 13: Chlorine And Component Damage
Warning and Safety instructions The application-technical recommendation of chemical washing additives does not mean that the appliance manufacturer is responsible for the effects of these addtives on the wash load and the washing machine. Note that product changes not disclosed by the manufacturer of these aids may affect the quality of the washing result. -
Page 14: Accessories
Warning and Safety instructions Accessories Only use genuine Miele spare parts and accessories with this machine. Using spare parts or accessories from other manufacturers will invalidate the warranty, and Miele cannot accept liability. Miele cannot be held liable for damage caused by non-compliance with these Warning and Safety instructions. -
Page 15: Caring For The Environment
Caring for the environment Disposal of the packing material The packaging is designed to protect the washing machine from damage during transportation. The packaging materials used are selected from materials which are environmentally friendly for disposal and should be recycled. Recycling the packaging reduces the use of raw materials in the manufacturing process and also reduces the amount of waste in landfill sites. - Page 16 Caring for the environment Energy saving tips Energy and water - To get the most out of your machine, load the maximum dry load consumption for the programme you are using. The most efficient use of energy and water is achieved when a full load is washed.
-
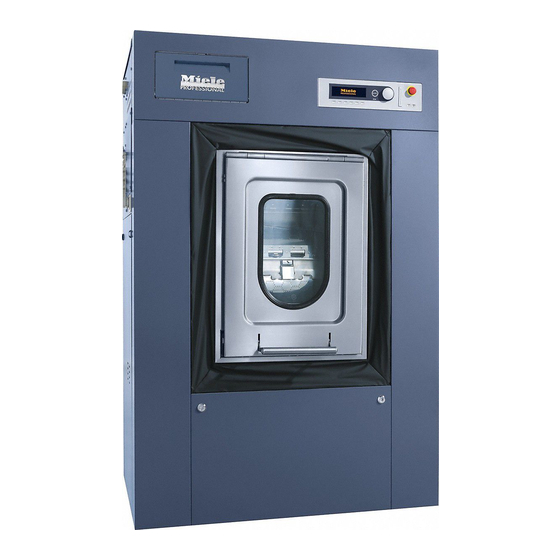
Page 17: Guide To The Machine
Guide to the machine Guide to the appliance Unclean side (loading side) Clean side (unloading side) Emergency stop switch Pressing the red switch switches the machine off in an emergency. Control panel Detergent dispenser drawer Top-hinged door: The top-hinged door is opened by pulling up the door handle and closed by pushing down the door handle. -
Page 18: Operating Elements - Unclean Side (Loading Side)
Guide to the machine Switch for heating mode (depending on model) Steam heating Electric heating The switch can be used to switch between the heating modes "steam heating" and "electric heating". Operating elements - unclean side (loading side) f g h i Display Function buttons Depending on the washing machine status, certain functions are assigned to these... -
Page 19: Controls - Clean Side (Unloading Side, Full Version)
Guide to the machine Card reader When a programme card is inserted into the card reader, washing can be performed using the programmes stored on the card. Always insert the programme card in the direction of the arrow. button For switching on the washing machine button For switching off the washing machine Emergency stop switch... -
Page 20: Function Buttons
If the button is pressed before the programme start, a later programme start time can be selected. Info If information (e.g. the telephone number of Miele customer service) was stored during commissioning, the information is shown in the display by pressing the button. Water drainage Manual control... -
Page 21: Programme Card For The Operator
Guide to the machine Programme unlocked Pressing the button unlocks a locked programme. Dispensing Dispensing switched off Operating data Tare Pressing the button will zero the weight on the scale of the weighing system. Use this button with an empty drum when the load indicator is not at 00.0 Programme card for the operator There are no programmes on this card ex-works. -
Page 22: Using For The First Time
Damage resulting from incorrect installation and connection. Installing and connecting the washing machine incorrectly will cause serious damage to property. The washing machine must be installed by a Miele authorised installer. Please observe the instructions in “Installation”. The machine must be commissioned by a Miele service technician... -
Page 23: Washing
Observe the maximum load quantity (dry laundry) for your washing machine. The most efficient use of energy and water is achieved when a full load is washed. However, do not overload as this reduces cleaning efficiency and causes creasing. PW 6163 PW 6243 PW 6323 ≤ 16 kg ≤... -
Page 24: Loading The Washing Machine
Washing Loading the washing machine Opening top- hinged door Pull up the door handle on the unclean side of the washing machine (loading side). Pull the top-hinged door upwards. The gas struts push the top-hinged door upwards. Open drum Press the locking device with your thumb. -
Page 25: Loading The Laundry
Washing Press the upper half of the drum door into the catch at the top of the door. Loading the Check the drum for pets or foreign objects before loading it with laundry laundry. Unfold the laundry and load loosely in the drum. ... -
Page 26: Closing Top-Hinged Door
Washing First close the lower half of the drum door with the locking device. Then close the upper half of the drum door until the locking hooks grip and engage. The arrow must be fully visible on the locking device. Only then is the drum door properly closed. -
Page 27: Adding Detergent
Washing Adding detergent Open the detergent dispenser drawer. Pull out the required detergent dispenser compartments and fill with the appropriate detergent: - Detergent for the pre-wash - Detergent for the main wash and soaking - (front compartment) Fabric softener, liquid starch Do not fill the washing additive beyond the marking in the dispenser ... -
Page 28: Bleaching Agent
Washing Bleaching agent Only textiles marked with the care symbol may be bleached. Liquid bleach may only be poured into the rear compartment of the dispenser compartment . Only then can it be guaranteed that the bleaching agent will be dispensed automatically during the 2nd rinse. The use of liquid bleaching agents for coloured laundry is only safe if the textile manufacturer expressly permits bleaching on the care label. - Page 29 Washing Water hardness Water Overal Overall range characteristic hardness hardness (°d) (mmol/l) Soft 0–1.3 0–7 Medium 1.3–2.5 7–14 Hard 2.5–3.8 14–21 Very hard > 3.8 > 21 Check with your local water supplier if you do not know the water hardness range in your area.
-
Page 30: Selecting A Programme
Washing Selecting a programme Separate drain Cottons hygiene °C Cottons universal °C Cottons hygiene Selected programme (example): To select the desired programme, turn the rotary selector. The selected programme is highlighted. Press the rotary selector to confirm the selected programme. ... -
Page 31: Additional Functions
Washing Additional functions To select the Pre-wash additional function, press the + function Selecting Pre- wash button. Cottons hygiene 16,0 / 16,0 40°C Pre-wash °C Main wash + The symbol + is highlighted. Pre-wash function, press the + If you want to deselect the ... - Page 32 Washing After you have selected the programme, the following display message is shown, for example: Cottons 10,0 / 16,0 °C Main wash Rinses 975 rpm + Example display after programme selection Press the button. You can now set the start time and start date for the programme.
- Page 33 Washing Cottons 10,0 / 16,0 Pre-wash 4.1.2015 20:50 3.1.2015 Start: 6:00 + Display example after set start date If the top-hinged door is opened after setting the start time, the button must be pressed again. To cancel the start date function, press the function button or the Undoing the start ...
-
Page 34: Temporarily Changing The Language
Washing Temporarily The display language can be changed temporarily via the flag symbol changing the before starting the programme. language The language selected is reset 5 minutes after the end of the programme when the door is opened. Cottons hygiene °C Cottons universal °C Cottons intensive... -
Page 35: Programme Adjustments
Washing Programme adjustments Changing the fill Before starting the programme, the load quantity can be changed weight manually. Cottons hygiene 10,0 16,0 kg 40°C Pre-wash °C Main wash + Display with "Fill weight" input field highlighted Turn the rotary selector until the "Fill weight"... -
Page 36: Starting A Programme
Washing Turn the rotary selector until the desired spin speed is set. Depending on the machine type, the spin speed can be changed in 25 rpm steps from 300 rpm to a maximum of 1025 rpm (PW 6323) or 975 rpm (PW 6243/6163). Press the rotary selector to confirm the set spin speed. ... -
Page 37: At The End Of The Programme
Washing Time after start Time left 10.07.2018 °C Time after start 09:47 Display after pressing the function button (example 2) To return to the programme status, press the function button. At the end of the programme Depending on the selected wash programme, the laundry can be removed either on the clean side or on the unclean side. -
Page 38: Open Drum
Washing Open drum Press the locking device with your thumb. Press the two drum door halves simultaneously until the drum door halves are unlocked. Fold the two halves of the drum door outwards. Press the upper half of the drum door into the catch at the top of ... -
Page 39: Closing Top-Hinged Door
Washing First close the lower half of the drum door with the locking device. Then close the upper half of the drum door until the locking hooks grip and engage. Closing top- It is essential that the top-hinged door on the clean side is closed hinged door again after unloading. -
Page 40: Switching Off The Washing Machine
Washing The programme ends on the unclean side. Switching off the washing machine To allow the washing machine to dry out after use, do not close the top-hinged door of the unclean side after washing. Just leave the top-hinged door ajar after washing. Switch off the washing machine by pressing the button. -
Page 41: Washing By Card Operation
Washing by card operation Wash with programme card Cards on which a programme is located are matched to a type of washing machine. Blank cards can be used in any machine. Damage caused by the insertion of unsuitable objects. The card reader can be damaged if other objects (e.g. -
Page 42: Rectifying A Card Error
Washing by card operation Rectifying a card error Card errors are indicated by a corresponding display message. Card incorrectly inserted in card If the display shows the message reader. , the card has been inserted into the card reader the wrong way round. -
Page 43: Additional Functions
Additional functions Temporarily changing the language The display language can be changed temporarily via the flag symbol before starting the programme. The language selected is reset 5 minutes after the end of the programme when the door is opened. Cottons hygiene °C Cottons universal °C... -
Page 44: Start Time
Additional functions Start time A later wash start time can be allocated to a programme using the "Start time" button. Setting a start time Select the programme required. When a programme has been selected, the following (for example) appears in the display: 10,0 / 16,0 Cottons hygiene °C... -
Page 45: With Pre-Wash
Additional functions With Pre-wash For heavily soiled laundry, a Pre-wash can be added before the programme start in the standard programmes 1 to 10. Press the + "Block+" button. The following will appear in the display: Cottons hygiene 14,0 / 16,0 Pre-wash °C Main wash... -
Page 46: Without Spin
Additional functions Without spin "Without spin" can be selected in all standard programmes (except Extra spin) before the programme start. Press the “Without spin” button. The field will be highlighted in the display. Useful tip: The function can be deselected by pressing the button again. -
Page 47: Programme Cancellation
Additional functions Programme cancellation The programme can be cancelled as follows: Press the "Stop/Finish" button twice in succession. The programme is cancelled. If the programme is interrupted when there is water remaining in the machine or during a spin, the following will appear in the display: Cottons hygiene Programme stopped. -
Page 48: Skipping A Programme
Additional functions Cottons hygiene °C Main wash °C Rinse 1 Finish at 12:35 Skipping a programme The current programme can be shortened (skipped) or programme blocks can be repeated. Press the "Stop/Finish" button. The programme is stopped. Cottons hygiene Programme stop ... -
Page 49: Optional Modules (Depending On Country)
Optional modules (depending on country) Liquid dispensing a c b Dispenser pump Siphon Hose connection (suction side) Hose connection (pressure side) Leakage outlet Suction inlet opening Level sensor for level indicator. When the dispenser container is empty, the pump and the machine switch themselves off. Dispensing system fault Fill dispenser ??. -
Page 50: Amount To Be Dispensed
Optional modules (depending on country) After the programme has started, no detergent will be dispensed via the dispenser pumps and the following message (for example) will be displayed: 10,0 / 10,0 Cottons hygiene 90 °C Main wash Rinses 1000 +... -
Page 51: Cleaning And Maintenance Of The Dispensing System
Optional modules (depending on country) Useful tip: The dispensing amount can be set from 0 to 9999 ml in 1 ml increments. Press the multifunction button. The dispensing hose will fill up. Stop the process by pressing the button. Run the hose of the dispenser pump upwards into a measuring ... -
Page 52: Peak Load Cut-Out
The machine can be connected to a PC (personal computer) using the communication module. The slot for the module is located on the back of the machine. An Editor programme is available for this from Miele. Operating data The module Operating data can be used to read or delete Operating data before a programme start or after programme end by pressing the ... -
Page 53: Total Data
Optional modules (depending on country) Operating data module Total data Programme data You have the following options: Total data Data from all programmes is collected and added together in Total data. Programme data Programme data is data which is recorded during the course of a programme. -
Page 54: Programme Data
Optional modules (depending on country) Duration heating active: 73,456 h Duration drive motor active: 93,456 h Programme starts: 23,456 Programme stops: 567 Programme cancellations: 67 Water volume: 1,234,567 l Load: 1,234,567 kg Liquid agent: 2345 l Energy: 12,345,678 kWh Programme data Operating data module Programme data ... -
Page 55: Delete Data
Optional modules (depending on country) Serial number : 12345678 Machine type : PW 6321 Load : 13 kg + button : pressed Starch stop button : pressed Without spin button : not pressed Programme start : 11:30 Programme finished : 12:05 Total operating time : 0 h 35 min Electrical energy : 12.5 kWh... -
Page 56: Weighing System/Weighing Plinth
Optional modules (depending on country) Delete data Operating data module Module : 21.02.2020 Total data : 12.07.2020 Module The menu item deletes the Total data and the Programme data from the Operating data. Total data The menu item only deletes the Total data from the Operating data. - Page 57 Optional modules (depending on country) 00,0 / 16,0 kg Cottons hygiene 60 °C Main wash Rinses ->I<- + If after resetting to 0 (taring), you remove an overlooked item from the drum, the following will appear in the display: --,- / 16,0 kg Cottons hygiene 60 °C...
-
Page 58: Sampling Tap
Optional modules (depending on country) Sampling tap Some machine types are equipped with a sampling point for the suds solution for analytical purposes in the laboratory. The sampling point may only be operated by instructed personnel. Special precautions must be taken when drawing off the sids solution with the tap: - Wear personal protective equipment to prevent eye damage, skin damage, or respiratory impairment. - Page 59 Optional modules (depending on country) The ball valve must remain closed in normal operation. The ball valve may only be opened during operation when necessary for taking samples in accordance with the specified safety instructions. There may be residual water in the hose system to the ball valve at the end of the programme.
-
Page 60: Problem Solving Guide
Miele. This will save you time and money because you will not need a service call. Please note, however, that a call-out charge will be applied to unnecessary service visits where the problem could have been rectified as described in these operating instructions. - Page 61 Problem solving guide Problem Possible cause and remedy Total power failure during There is no power to the washing machine due to a the washing process. To prolonged power failure. remove the laundry, first Switch off the washing machine by pressing the ...
- Page 62 Problem solving guide Problem Possible cause and remedy Only use detergent formulated for use in commercial washing machines. Domestic laundry detergent is not suitable. You are using too much detergent. Dispense detergent following the instructions on the packaging and in accordance with local water hardness levels.
-
Page 63: Fault Messages In The Display
Dispensing system fault Fill The dispensing container is empty. dispenser ??. Press the start Fill the dispensing container or replace the dispensing button. container. Press the button. Call Miele Professional Service if the message continues to be displayed. - Page 64 Switch the washing machine off with the button and then back on with the button. Call Miele Professional Service if the message continues to be displayed. To perform the emergency release, insert a flathead screwdriver into the opening under the door handle. Turn the screwdriver anti-clockwise and pull the door handle upwards.
-
Page 65: Contact In Case Of Fault
Problem solving guide Contact in case of fault In the event of any faults which you cannot remedy yourself, please contact Miele. Contact information for Miele can be found at the end of this booklet. Please quote the model and serial number of your appliance when contacting Miele. This... -
Page 66: Cleaning And Care
Cleaning and care Carry out cleaning and maintenance after using the washing machine if possible. Risk of electric shock! Only ever perform cleaning and maintenance work when the appliance is disconnected from the power. Disconnect the washing machine from the mains electricity supply. Cleaning the external casing and fascia panel ... -
Page 67: Cleaning The Ventilation Grille
Cleaning and care Cleaning the drip Open the flap on the detergent drawer to an angle of 45° and lift out channel and the flap of the detergent drawer upwards on the right side. siphon If the drip channel and its drain connector are blocked, then these should be cleaned. -
Page 68: Check The Closing Device
Cleaning and care Check the closing device Check the drum closing device regularly to ensure that it is in perfect condition. If there is fluff on the drum door, remove the fluff. Treating rust The drum and the suds container are made of stainless steel. Water containing iron or ferrous foreign objects (e.g. -
Page 69: Drum Shaft Bearings
Cleaning and care Drum shaft bearings Once the service interval has been reached, the following message appears in the display: Lubricate drum bearings Call the Service Department. Press to remove this message. It appears after switching on the machine until the service technician has performed this work. -
Page 70: Meaning Of The Symbols On The Data Plate
Meaning of the symbols on the data plate Model Ramp-up time Serial number Braking time Item number Heater Material number Designation/Year of construction Voltage/Frequency Commissioning date Control fuse Electric heating Drive motor Fuse (on-site) Drum data Indirect steam heating Drum diameter/Drum depth Direct steam heating Spin speed Gas heating... -
Page 71: Airborne Noise Emission
Meaning of the symbols on the data plate Airborne noise emission A-weighted emission sound pressure level PW 6163 70 dB (A) PW 6243 71 dB (A) PW 6323 71 dB (A) max. in the workplace EN ISO 11204 A-weighted sound power level... -
Page 72: Installation
Danger due to incorrect installation. Improper installation of the washing machine may result in injury and damage. The washing machine must be installed by a Miele authorised installer. General operating conditions This washing machine is intended only for use in a commercial environment and must only be operated indoors. - Page 73 Installation Dismantle the housing of the frequency inverter (1). The housing is fixed with 3 screws. Hang the frequency inverter on the side (2). Disassembling the mounting bracket on steam- heated machines On steam-heated washing machines, also disassemble the ...
-
Page 74: Removing The Transit Bars
Installation Removing the transit bars The transit bars may only be removed at the installation site before the washing machine is commissioned. Remove the 2 transit bars on the clean side of the washing machine. Remove the 2 transit bars on the unclean side of the washing ... -
Page 75: Removing The Transit Bars From The Weighing System
Installation Removing the transit bars from the weighing system Loosen the nuts on the 4 bolts with an open-end wrench. Retain the transit bars. The transit bars must be refitted if the machine is to be transported again. Fitting the transit bars Install the 4 bolts and 3 nuts each by hand. -
Page 76: Water Connection
Hoses must be replaced with hoses tested for a burst pressure of at least 7000 kPa (70 bar) overpressure. The hoses must be suitable for a water temperature of at least 90 °C. The same requirements also apply to the integrated connection fittings. Miele original spare parts meet these requirements. - Page 77 Installation This appliance must be connected to the water supply in strict accordance with local and national requirements (e.g. Plumbing Code of Australia (PCA)). This appliance must be installed according to AS/NZS 3500.1 and AS/NZS 3500.2. This washing machine has been supplied separately with backflow prevention devices (dual check valves).
-
Page 78: Use Of Backflow Prevention Devices
Installation Use of backflow For the water connection, the backflow prevention devices (dual prevention check valves) must be used. devices The backflow prevention device to prevent backsiphoning must be installed between the tap and the water inlet hose during commissioning on all machines. The non-return valve prevents water from the water inlet hose from flowing back into the on-site drinking water supply. -
Page 79: Electrical Connection
Installation Use connections 1 and 2 for viscous agents or for high-pressure dispensing systems with water injection. The dispensing systems must comply with all relevant local and national regulations and be fitted with suitable backflow prevention. The maximum flow rate is 1500 ml/min at a maximum water connection pressure of 300 kPa. - Page 80 Conversion to a different voltage must only be carried out by a Miele Professional Service technician or by an authorised service technician. When doing so, the rewiring instructions on the...
-
Page 81: Equipotential Bonding
See enclosed wiring diagram. Steam connection (depending on country) For steam-heated machine variants, the steam connection must only be carried out by an authorised installation technician. The steam valve and condensate trap are available from Miele. - Page 82 Installation Risk of electric shock and injury from live or rotating machine parts. If the washing machine’s casing is not fully assembled, it is possible to come into contact with live or rotating machine parts. Once the washing machine has been installed, completely reassemble all the casing parts that were removed.
-
Page 83: Quick Start Guide
Quick Start Guide 1. Preparing the laundry Only machine wash items which have a wash care label stating that they are suitable for machine washing or for wet cleaning. Empty all pockets. 2. Switching on the machine and loading the laundry Switch on the washing machine with the button. - Page 84 Quick Start Guide Liquid bleaching agents must only be dispensed through the designated dispenser compartment. 4. Selecting a programme by turning the rotary selector 5. Pressing the “START” button to start the selected wash programme If the message "Door lock fault" appears, proceed as follows: Door lock fault ...
- Page 88 Freemans Bay Auckland 1011 New Zealand Telephone: 0800 4 MIELE (0800 464 353) www.miele.com.au/professional sales@miele-professional.com.au Miele Global Headquarters: Miele & Cie. KG Carl-Miele-Straße 29, 33332 Gütersloh, Germany Alteration rights reserved / Publication date: 01.22 M.-Nr. 12 191 890 / 00 ...
Need help?
Do you have a question about the PW 6163 and is the answer not in the manual?
Questions and answers