Table of Contents
Advertisement
Quick Links
Operating Instructions
Translation of the original operating instructions
Tool Carrier
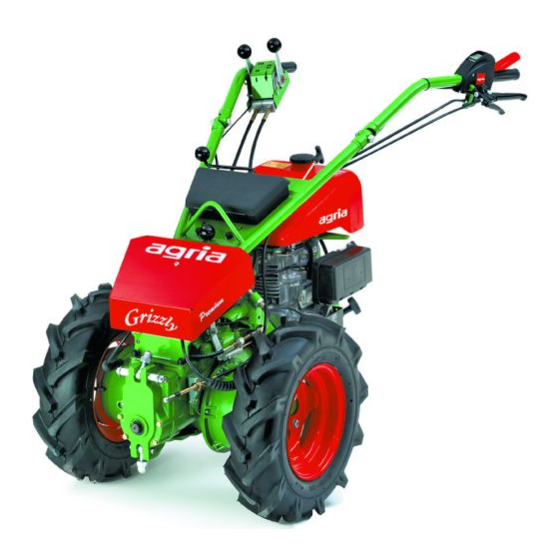
5500 Grizzly
compact:
- Differential
- Safety hillholder
- Petrol engine EH 25 D
comfort:
- Differential
- Safety hillholder
- Petrol engine EH 34 D
premium:
- Steering brake clutch
- Brake central
- Petrol engine EH 25 D
- Petrol engine EH 34 D
4436, 4672_1
&
Before commissioning the machine, read operating
instructions and observe warnings and safety instructions!
Operating Instructions No. 998 766-B
- compact
- comfort
- premium
03.12
Advertisement
Table of Contents

Related Manuals for Agria 5500 GRIZZLY compact


Summary of Contents for Agria 5500 GRIZZLY compact
-
Page 1: Operating Instructions
Operating Instructions Translation of the original operating instructions Tool Carrier 5500 Grizzly - compact - comfort - premium compact: - Differential - Safety hillholder - Petrol engine EH 25 D comfort: - Differential - Safety hillholder - Petrol engine EH 34 D premium: - Steering brake clutch - Brake central... -
Page 2: Scope Of Supply
Please state these data when order- Engine Start ing spare parts to avoid wrong deliv- eries. Engine Stop Only use original agria spare parts! Engine oil level Specifications, figures and dimen- Air cooling sions stated in these instructions are not binding. No claims can be derived Transmission oil level from them. -
Page 3: Designation Of Parts
Designation of Parts Grizzly compact, comfort with Differential Fig. A Fig. B Grizzly premium with Steering brake clutch Fig. A Fig. B agria Tool Carrier 5500 Grizzly... - Page 4 12 Pawl for F-R shifting 13 Lever for F-R shifting 14 Pawl for differential lock 15 Lever for differential lock 16 Hand lever for steering brake clutch, right 17 Pawl for parking brake 18 Lever for brake central agria Tool Carrier 5500 Grizzly...
-
Page 5: Table Of Contents
Fixing Points ........27 Fig. A + B ........3 Drive-Wheels ......28 - 30 Fig. C ........56 Wheel Weight ........31 Hood ..........31 Fig. D ........60 Coupling and Decoupling Attachments ........32 agria Tool Carrier 5500 Grizzly... -
Page 6: Recommendations Lubricants
Repair wellbeing of humans, animals and plants. The trained mechanics of your agria workshop carry out expert maintenance and repair. You should only carry out major main- tenance work and repairs on your own,... -
Page 7: Safety Instructions
Due use includes compliance with mowed, ensure that the engine is turned manufacturer’s instructions on opera- off. tion, maintenance and repair. Any unauthorized changes to the ma- chine render manufacturer liability null and void. agria Tool Carrier 5500 Grizzly... - Page 8 For operation in enclosed areas, ensure Never adjust the operating handles dur- that a safety distance is kept to enclo- ing work – danger! sures to prevent damage to tools. agria Tool Carrier 5500 Grizzly...
-
Page 9: Machine
If machine is equipped with igni- springs. tion key, remove the key. For all other Do not transport the dismounted cutter versions, remove spark plug connector. bar without protective strips. agria Tool Carrier 5500 Grizzly... - Page 10 Snow Clearing Only use original agria spare parts. All Ensure snow dozer is mounted cor- other commercial spare parts must cor- rectly! Wear slip-proof shoes.
- Page 11 Read and observe enclosed instruc- tions. Before you dispose of opened and seemingly empty pressurised tins (e.g. agria Tool Carrier 5500 Grizzly...
- Page 12 Do not touch mov- machinery par ts. Wait until they have come to a complete stop. With engine run- ning, keep at a safe distance from tool carrier. agria Tool Carrier 5500 Grizzly...
-
Page 13: Specifications Dimensions
3490 511 ..20x 8.00 - 10 grass tyre 20x8.00 - 10 ......0,8 bar 3490 611 ..21x11.00 - 8 terra-tyre Drive-wheel attachment and applica- 3221 051 Pair wheel weight ..52 kg tion ......see page 28 - 30. agria Tool Carrier 5500 Grizzly... -
Page 14: Vibration Acceleration Value
Weights: Weights: Empty weight Empty weight (with fuel tank filled up): (with fuel tank filled up): without drive-wheels 5.00-10 without drive-wheels 5.00-10 EH 25 D 94,5 kg 110kg EH 34 D 105,5 kg 123 kg agria Tool Carrier 5500 Grizzly... -
Page 15: Track Width Plan
Wheel combination Track Widths Table 5500 Grizzly compact, comfort (mm) 4.00-8 AS 460 360 260 570 470 370 550 450 350 660 560 460 670 570 470 780 680 580 730 630 530 840 740 640 16x6.50-8 AS 480 310 140 700 530 360 570 400 230 790 620 450 690 520 350 910 740 570 750 580 410 970 800 630... - Page 16 4.50-10 AS 20x8.00-10 R 1,9 3,25 7,1 21x11.00-8 TG 1,05 2,0 3,4 PTO: ........825 rpm gear independent at engine speed 3600 rpm direction of rotation: clockwise, looking on PTO constant in forward and reverse agria Tool Carrier 5500 Grizzly...
- Page 17 Wheel combination and Track Widths Table 5500 Grizzly premium (mm) + B1 +90 +S " " 4.00-8 AS 630 530 430 640 540 440 750 650 550 700 600 500 810 710 610 1070 430 1090 430 16x6.50-8 AS 760 590 420 660 490 320 880 710 540 720 550 380 940 770 600 1200 1080 420 1220 420...
-
Page 18: Petrol Engine Eh 25D
III, part B, chapter 32 lawn mower: Acoustic power level: L = 100,2 dB(A) Operability on Slopes: Engine is suited for use on slopes (with oil level at “max” = upper level mark) Continuous operation possible: up to 45° inclination (100%) agria Tool Carrier 5500 Grizzly... -
Page 19: Petrol Engine Eh 34D
III, part B, chapter 32 lawn mower: Acoustic power level: L = 103 dB(A) Operability on Slopes: Engine is suited for use on slopes (with oil level at “max” = upper level mark) Continuous operation possible: up to 45° inclination (100%) agria Tool Carrier 5500 Grizzly... -
Page 20: Devices And
3. Devices and Operating Elements The tool carrier agria 5500 Grizzly is a base power machine and is always op- erated with an implement mounted. Therefore, the machine is suited for all common applications in farming and for- estry, as well as for winter service. -
Page 21: Safety Circuit
Do not fasten safety lever. The safety lever also serves to switch off in an emergency. In an emergency release the safety le- ver for fast engine switch-off. The lever automatically goes to STOP position. agria Tool Carrier 5500 Grizzly... -
Page 22: Clutch/Safety Hillholder
This may damage the clutch release bearing. Ensure the lever is pulled (pawl is locked in place) when you park the machine with the engine stopped, otherwise clutch problems may result due to corrosion. agria Tool Carrier 5500 Grizzly... -
Page 23: Gearbox
The PTO shifting mechanism (B/8), however, is arranged at the tool carrier and is connected upon mounting of the attachment by the ball cup (A/9). PTO-shaft drive is connected PTO-shaft drive is disconnected agria Tool Carrier 5500 Grizzly... - Page 24 The PTO shifting mechanism (B/8), however, is arranged at the tool carrier and is connected upon mounting of the attachment by the ball cup (A/9). PTO-shaft drive is connected PTO-shaft drive is disconnected agria Tool Carrier 5500 Grizzly...
-
Page 25: Differential Gear
On the move: Release throttle. Pull lever for differential lock slightly (B/15). Unlock pawl (B/14). Slowly release lever while pressing the throttle. Disengaging the Differential Lock: Pull lever for differential lock until pawl locks into place. agria Tool Carrier 5500 Grizzly... -
Page 26: Single Wheel Steering Brake Clutch26
– brake is released. Hand Brake Pull hand lever (B/18) and lock with pawl (B/17) – both drive-wheels are blocked. To release hand brake, unlock pawl (B/17) and release lever (B/18) – B/18 B/17 brake is released. agria Tool Carrier 5500 Grizzly... -
Page 27: Steering Handle
Never walk or remain under moving loads. Dan- ger! Fixing Points For towing away, recovering and tying down and to ensure a safe transport, use the fixing points at the connection flange and engine food guard. agria Tool Carrier 5500 Grizzly... -
Page 28: Drive-Wheels
2 operating hours with 100 Nm. Retighten bolts and nuts in each maintenance. Snow Chains When working with snow chains fitted on wheels, observe manufacturer’s in- structions, make sure there is sufficient clearance between chains and machine parts. agria Tool Carrier 5500 Grizzly... - Page 29 Fit spring-lock washers between wheel bowl and flanges (centring) Make sure that wheel Spring lock washer carriers point to machine, when looked into travel di- rection (see fig.). Block the tommy screw by positioning the spring. agria Tool Carrier 5500 Grizzly...
- Page 30 Use a grease gun (Bio lubrication grease). Adjustment of the differential Differential position The differential hubs are factory- set to differential effect, mount- ing of rigid position see fig. Rigid position agria Tool Carrier 5500 Grizzly...
-
Page 31: Wheel Weight
By slightly applying pressure to the rear and front of the engine cowling, have the ball cups engage in the ball heads. To facilitate the installation, you may apply some bio-grease onto the rub- ber cups. agria Tool Carrier 5500 Grizzly... -
Page 32: Coupling And Decoupling
Tighten cap nuts evenly. For PTO driven attach- ment, press link (6) onto shift lever (4) until it locks into place. Insert circlip and se- cure. For decoupling, proceed in reverse order. agria Tool Carrier 5500 Grizzly... -
Page 33: Commissioning And Operation
Check transmission oil level (see page 43) Note: For reasons of transport, the engine is not filled completey with engine oil! Before you operate the engine the first time, fill in engine oil (see page 38)! agria Tool Carrier 5500 Grizzly... -
Page 34: Starting The Petrol Engine
Then pull hard and fast to start the engine. After the start, carefully let rope glide back. Do not let snap. Once the engine has started, let it warm up for some time. Slowly push choke back into operating position, if necessary. agria Tool Carrier 5500 Grizzly... -
Page 35: Switching Off The Petrol Engine
This ensures carburetor to be empty and no resin residue to de- posit. agria Tool Carrier 5500 Grizzly... - Page 36 For direction change from forward to reverse, proceed as follows: Set speed control lever to idling po- sition. Pull hand clutch lever and hold. Move F/R drive to position reverse. Slowly release hand clutch lever while pressing the throttle. agria Tool Carrier 5500 Grizzly...
-
Page 37: Mowing
Starting the Engine on Slopes Keep the mowing drive and travel- ling drive in engaged mode; braking effect. Move the hand clutch lever and safety shifting lever to “Start” position. Start engine. agria Tool Carrier 5500 Grizzly... -
Page 38: Maintenance
Clean filling- and drain plug and sur- rounding parts. Change the oil and dispose of prop- erly. Check sealing washer for good condition and exchange, if necessary! - For engine oil quality refer to “Specifi- cations”. agria Tool Carrier 5500 Grizzly... -
Page 39: Air Filter
Reinstall the filter element and the foamed preliminary filter. Reposition the filter cap and fasten the wing nut. Replace the filter element af- ter 5 cleaning actions or approx. every 200 operating hours. Replace immediately damaged filter elements. agria Tool Carrier 5500 Grizzly... - Page 40 Close the fuel tap. Remove the fuel strainer and remove the impurities, replace if damaged. Rinse the strainer container in fuel. Then screw it back on correctly, to avoid fuel leakage. agria Tool Carrier 5500 Grizzly...
-
Page 41: Spark Plug
Clean the electrodes on the spark plug from dust and dirt using a wire brush. Check spark plug gap and, if neces- sary, readjust it to 0,6 - 0,7 mm. Exchange the spark plug at approx. 200- hour intervals. agria Tool Carrier 5500 Grizzly... - Page 42 Loch 3 und B the spring increases the risk of accident and will render the warranty and type approval null and void! Keep governor spring, lever and linkages free from dirt and plant trash at all times. agria Tool Carrier 5500 Grizzly...
-
Page 43: Machine
(A/12) after the first 2 operating hours, then every 50 operating hours with 100 Nm. Check the tyre air pressure regularly. For smooth driving, make sure that there is the same pressure in both tyres. agria Tool Carrier 5500 Grizzly... - Page 44 1 Lock nut for stop buffer Adjust stop buffer (1) by turning it to 2 Stop buffer 3 Adjustment nut for steering handle central the above stated play “A”. mounting Re-tighten hexagonal nuts (2) (lock) agria Tool Carrier 5500 Grizzly...
- Page 45 Adjust stop buffer (1) by turning it to 1 Stop buffer the above stated play. 2 Lock nut for stop buffer 3 Adjustment nut for steering handle central Re-tighten hexagonal nut (lock). mounting 4 Lock nut 5 Fastening nut for steering handle agria Tool Carrier 5500 Grizzly...
- Page 46 (B/4), the engine Check electric conductors and con- must automatically nections for good condition. come to a stop. - Service Check electric conductors and con- nections for good condition, exchange, if necessary. - Service agria Tool Carrier 5500 Grizzly...
-
Page 47: Hand Lever Adjustment
1 Hand lever ! = The Bowden 2 Retaining spring cable must be 3 Threaded end of cable placed in the hand 4 Adjusting pin lever support on bottom position! agria Tool Carrier 5500 Grizzly... -
Page 48: Safety Hillholder
Loosen and unscrew the hex head nut (1) on both sides. Dismount the angles (2) with discs and brake housing. Replace the brake linings (4 + 5). Mount the park brake in the opposite 100 h order. Adjust. agria Tool Carrier 5500 Grizzly... -
Page 49: General Maintenance, Cleaning
Apply grease generously to leave a grease ring around bearings to prevent water, plant sap, and dirt from penetrating. agria Tool Carrier 5500 Grizzly... -
Page 50: Storage
Engine preservation Drain the fuel completely from the e) Clutch system or fill the fuel tank and add stabilisator (agria No. 799 09) to the fuel Always park mower tank with hand clutch le- - Observe instructions. -
Page 51: Diagram: Electric Circuit
Electric Circuit Electric Circuit Safety Circuit 1 Engine 2 Magnet ignition system 3 Engine-off-switch bl = blue 4 Switch in clutch lever br = brown 5 Switch in safety lever rt = red agria Tool Carrier 5500 Grizzly... -
Page 52: Troubleshooting
6. Troubleshooting Observe safety instructions! Have all serious malfunctions on the machine or engine repaired by your agria workshop. They have the proper tools. Improper repairs can only add to the damage. Problem Possible cause Possible solution Page Petrol Engine:... - Page 53 Clutch slips - Hand clutch lever misadjusted Adjust clutch free play - Worn out clutch Exchange clutch disc Excessive - Loosened screws Tighten fastening screws vibration = For this purpose contact your agria workshop. agria Tool Carrier 5500 Grizzly...
-
Page 54: Varnishes, Wear Parts
009 16 Sealing washer 16x22x1.5; oil dip-stick and oil drain plug Emergency Tyre Repair 713 13 Tyre repair gel Terra-S bottle Lists of Spare Parts 997 024 Tool carrier 5500 997 083 Attachments for 3400/5500 997 077 Robin Engines agria Tool Carrier 5500 Grizzly... - Page 55 7 Recoil starter/cooling-air screen 8 Spark plug 9 Exhaust 10 Engine oil filler neck with oil dip-stick 11 Engine type no. 12 Engine oil drain plug 13 Engine ID no. 14 Speed control lever and linkages agria Tool Carrier 5500 Grizzly...
- Page 56 Designation of Parts: Petrol Engine Fig. C Grizzly compact Grizzly comfort Grizzly premium Motor EH 34 Engine EH 25 D agria Tool Carrier 5500 Grizzly...
-
Page 57: Lubrication Plan
Lubrication Plan 25 h 50 h (25h) 200 h (50 h) yearly and always after cleaning with a high-pressure cleaner agria Tool Carrier 5500 Grizzly... -
Page 58: Inspection And Maintenance Chart
K = Checks and maintenance to be executed by operator W = Maintenance to be executed by professional workshop F = Maintenance should be carried out by your agria workshop * = after 2 years agria Tool Carrier 5500 Grizzly... - Page 59 8 Spark plug 9 Exhaust 10 Engine oil filler neck with oil dip-stick 11 Engine type no. 12 Engine oil drain plug 13 Engine ID no. 14 Speed control lever and linkages 15 Fuel tap agria Tool Carrier 5500 Grizzly...
- Page 60 Designation of Parts: Petrol Engine Fig. D Grizzly premium Motor EH 34 D agria Tool Carrier 5500 Grizzly...
-
Page 61: Conformity Declaration
Declaration Conformity agria Tool Carrier 5500 Grizzly... - Page 62 Agria-Werke GmbH Bittelbronner Straße 42 D-74219 Möckmühl Tel. +49 62 98 39-0 Fax +49 62 98 39-111 e-mail: info@agria.de Internet: www.agria.de Your local agria specialist dealer:...
Need help?
Do you have a question about the 5500 GRIZZLY compact and is the answer not in the manual?
Questions and answers