Agria 3100 Operating Instructions Manual
Single wheel hoe
Hide thumbs
Also See for 3100:
- Operating instructions manual (44 pages) ,
- Operating instructions manual (44 pages)
Table of Contents
Advertisement
Advertisement
Table of Contents

Related Manuals for Agria 3100


Summary of Contents for Agria 3100
-
Page 1: Operating Instructions
Operating Instructions Translation of the original operating instructions Single Wheel Hoe 3100 3100 353 Honda Engine 6086_2 & Before commissioning the machine, read operating instructions and observe warnings and safety instructions! Operating Instructions No. 998 415GB-B 11.15... -
Page 2: Amount Of Delivery
(in connector co ver on the outside of the cardboard box). Wear safety shoes The completed machine identity card = contact your è agria - Service ç is to be sent back to Agria-Werke. agria workshop Single Wheel Hoe agria 3100... -
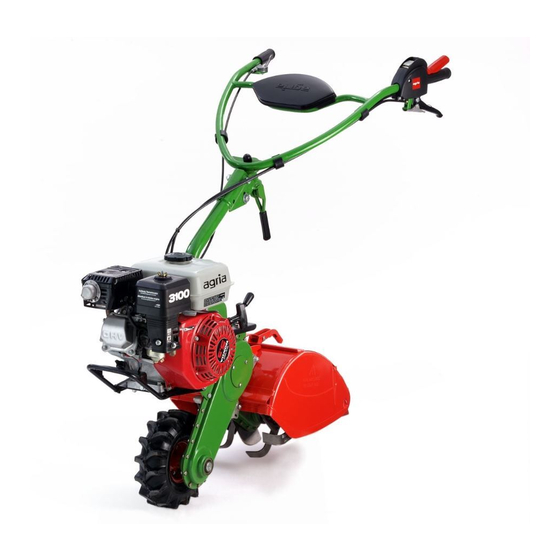
Page 3: Designation Of Parts
Designation of Parts Single Wheel Hoe agria 3100... - Page 4 7 Starter handle 8 Cooling-air screen 9 Exhaust with protecting device 10 Spark plug/spark plug connector 11 Filler screw plug for engine oil- controlling opening 12 Engine oil drain plug 13 Fuel tap 14 Engine Shut-off Switch Single Wheel Hoe agria 3100...
-
Page 5: Table Of Contents
Tilling ........24 - 25 Note fold-out pages! Switching off the Engine ....26 Danger zone ........27 Fig. A + B ........3 Working on slopes ......27 Ridging ..........28 Safety references for the handling . 28 Single Wheel Hoe agria 3100... -
Page 6: Assembly Instructions
(refer to page 19). • Mount protective hood (refer to page • 19). • Carry out all steps f or starting-up (refer to page 22) and see oper ation instructions for Honda engine! • Single Wheel Hoe agria 3100... -
Page 7: Safety Instructions
- removal or manipulation of the the Agria sales list (due use). protective and safety equipment The single wheel hoe hoe is intended - the use of non-approved attachments... - Page 8 Foreign powered parts shear and crush! With no attachment mounted, mak e Riding on the attachment during opera- sure PTO-shaft is covered with the pro- tion is not per mitted. tective cap. Single Wheel Hoe agria 3100...
- Page 9 Depending on the st ate of the ground necessary, install tr ansport or secur ity (vegetation, dampness ...), special devices and secure. footwear must be worn so that the operator does not slip or fall. Single Wheel Hoe agria 3100...
- Page 10 Adjust protective hood of hoeing attach- Only use original Agria spare parts. ment so that only those par ts of tools A thorough functional test must be which penetrate the soil are not co vered.
-
Page 11: Electrical System
Be careful when dr aining hot oil, dan- ger of burns. Make sure oil used is of specified qual- ity. Storage is in approved cans only. Dispose of oil, g reases, and filters seperately and properly. Single Wheel Hoe agria 3100... -
Page 12: Safety Instructions
Warning: danger of fire - before each fuel fill, shut off the engine and wait until it has cooled off - no open fire. Before any cleaning, maintenance, and repair work switch off the engine and pull spark plug connector. Single Wheel Hoe agria 3100... -
Page 13: Specifications
....83 dB(A) ....Tilling attachment 10–50 cm (in accordance with EN 709) .... Ridging attachment 2152 011 ......Front weight 3128 011 Weight: ......approx. 51 kg ...... Leaf deflector 2130 031 Single Wheel Hoe agria 3100... -
Page 14: Engine
(with oil level at “max“”= upper level screened according to VDE 0879 mark). Valve lash (engine cold): Intake: ....0.15 mm ± 0.02 mm Outlet: ....0.20 mm ± 0.02 mm Starter: ......Recoil starter Single Wheel Hoe agria 3100... -
Page 15: Devices And Operating Elements
3. Devices and Operating Elements The agria 3100 single wheel hoe is a Cooling System motorised unit f or turning over the Cooling system is fan-cooled. Therefore ground and may also be used with an keep screen at recoil star ter and cool- implement. -
Page 16: Speed Control Lever
0 and the clutch lever is in the disengaged position. Do not manipulate safety circuit and tie down safety lever. The safety lever also serves as an emergency shut-off. In an emergency release it. The lever automatically goes to STOP position. Single Wheel Hoe agria 3100... -
Page 17: Clutch
The tilling dr ive is secondar y to the 2-speed mechanical gearbox. This means that the tilling drive can only be engaged when the 1st or 2nd gear is engaged. The tilling dr ive is engaged/disengaged with shift lever (A/30). A/30 Single Wheel Hoe agria 3100... -
Page 18: Steering Handle
Steering handle side adjustment l Pull tensioning le ver upwards (1), swivel handlebar to desired position and fit into proper toothing. l Press tensioning le ver back down (tension). Single Wheel Hoe agria 3100... -
Page 19: Tilling Tool
Hang tensioning spr ing into spik e plate and fold tensioning lever back. No tilling without protective hood! The hood flap (K) must fall down on its own, service where necessary! Single Wheel Hoe agria 3100... -
Page 20: Drive-Wheels
– danger of burns! Mounting Front Weight Mount the front weight (1) in front on the engine support and fasten with hex- agonal screw (3), washer (2) and hexagon nut (4). Single Wheel Hoe agria 3100... -
Page 21: Leaf Deflector
(3) flector with the rope (5). and counternuts (4). l Press ball cups of leaf deflector (1), located on both sides at the rear , onto ball pivots until these lock into place. Single Wheel Hoe agria 3100... -
Page 22: Commissioning And Operation
5 mm margin for the fuel to ex- pand. Please observe that only those activities are described here which are required for operating the single wheel hoe. All other information on the engine may be taken from the enclosed engine operating instructions! Single Wheel Hoe agria 3100... -
Page 23: Starting The Engine
The exhaust and other engine parts become very hot, if the engine r uns and immediately after turning off. Hold f or sufficient distance from hot surfaces and keep children away from the running engine. Single Wheel Hoe agria 3100... -
Page 24: Tilling
Do not clean tilling tools with the engine running. Switch off the engine and remove spark plug connector. If clogging occurs, turn off the engine and clean the attachment with an appropriate tool (wooden stick). Single Wheel Hoe agria 3100... -
Page 25: Tilling
End of Tilling Œ Œ Set speed control le ver to idling position (min.) • • Pull hand clutch le ver and hold Ž Ž Move lever for gear shift and tilling to position “0” Single Wheel Hoe agria 3100... -
Page 26: Switching Off The Engine
This is to ensure the carb uretor is empty and to a void resin deposits. Never leave the machine unattended with the engine running. When a cleaning must be carried out during the work, shut off the engine and pull spark plug connector for safety reasons. Single Wheel Hoe agria 3100... -
Page 27: Danger Zone
When hoeing and milling in difficult soils (stony, hard etc.) a jerky movement of the machine can be affected, therefore special care is required. Single Wheel Hoe agria 3100... -
Page 28: Ridging
(4). clamping screw (6). 1 Special protective hood for ridging 2 Ridger 3 Clamping screw for ridger 4 Adjusting screw for slant adjustment 5 Slip heel 6 Clamping screw for mouldboard adjustment 7 Tilling tool Single Wheel Hoe agria 3100... -
Page 29: Safety References For The Handling
If the tank is to be emptied, this is to be accomplished outdoor . l l l l l Let the engine cool down, before you store the machine in closed areas. l l l l l Replace for safety reasons worn out or damaged par ts. Single Wheel Hoe agria 3100... -
Page 30: Maintenance
6 6 6 6 6 A - Danger of fire! Check each time bef ore you take up operation. Single Wheel Hoe agria 3100... -
Page 31: Mechanical Gearbox
Ž brication is alright. If necessary, add flow grease. 6 6 6 6 6 J Note: There are two chain housings! è agria - Service ç Drive-Wheel Check tyre air pressure (0.8 bar) A/32 frequently. Single Wheel Hoe agria 3100... -
Page 32: Safety Circuit
Adjustment is carr ied out using the bowden cable adjusting scre w on the hand clutch lever: l Loosen counter-nut (2) l Set bowden cable adjusting screw (1) as required l Re-tighten the counter-nut (2) against the lever bearing (locking). Single Wheel Hoe agria 3100... -
Page 33: Handlebar Side Adjustment
3 Conternut to centre position and tension. 4 Nut cap l Check jamming. If it is still not satis- factory, repeat adjustment. l Tighten top hexagonal nut (3) – lock and put on nut cap (4). Single Wheel Hoe agria 3100... -
Page 34: General Maintenance
Apply grease generously to leave a grease ring around bearings to prevent water, plant sap, and dirt from penetrating. è Single Wheel Hoe agria 3100... -
Page 35: Storage
Drain fuel outdoors in a appropr iate do not park the container completely or fill fuel tank and machine add fuel stabilizer (Agria-No. 799 09). - in humid rooms - Observe directions for use. Let engine run for approx. 1 minute. -
Page 36: Maintenance Chart
A = Each time before you take up operation B = After every cleaning, especially with a high-pressure cleaner J = yearly Electrical Wiring 1 Engine flywheel 2 Ignition coil unit 3 Spark plug 4 Engine shut-off switch sw = black Single Wheel Hoe agria 3100... -
Page 37: Recommendations
Only use genuine Agria replacement parts. Carry out a thorough functional test af t er maintenance work Single Wheel Hoe agria 3100... -
Page 38: Troubleshooting
6. Troubleshooting Observe safety instructions! Have all ser ious malfunctions on the machine or engine repaired by your agria workshop. They have the proper tools. Improper repairs can only add to the damage . Problem Possible cause Remedy Page Engine... -
Page 39: Varnishes, Wear Parts
- Worn out clutch linings Exchange clutch linings ¬ Excessive - Loosened screws Tighten fastening screws vibration ¬ = For this purpose contact your agria workshop! BM = Honda operating instructions Varnishes, Wear Parts Agria Order No. 799 09 Fuel stabilizer... -
Page 40: Decommissioning, Disposal
To avoid injury when decom- The agria single wheel hoe is made missioning the tool carrier unit from valuable raw materials which can must be parked in a stable position be reused by recycling. -
Page 41: Inspection And Maintenance Sheet
= Min. yearly = Checks and service to be executed by operator W = Maintenance to be executed by professional workshop = Maintenance should be carried out by your agria workshop BM = See engine operating instructions = Item in lubrication chart... - Page 42 Single Wheel Hoe agria 3100...
-
Page 43: Conformity Declaration
EC Declaration Conformity Single Wheel Hoe agria 3100... - Page 44 Agria-Werke GmbH Bittelbronner Straße 42 D-74219 Möckmühl Tel. +49 62 98 39-0 Fax +49 62 98 39-111 e-mail: info@agria.de Internet: www.agria.de Your local agria specialist dealer:...
Need help?
Do you have a question about the 3100 and is the answer not in the manual?
Questions and answers