Table of Contents
Advertisement
Operating
Operating
Operating
Operating
Operating
Instructions
Instructions
Instructions
Instructions
Instructions
Single-Wheel Power Hoe
Single-Wheel Power Hoe
Single-Wheel Power Hoe
Single-Wheel Power Hoe
Single-Wheel Power Hoe
2100
2100
2100
2100
2100
3220
Before commissioning the machine, read operating
instructions and observe warnings and safety instructions.
Operating Instructions No. 998 705-A 12.07
Advertisement
Table of Contents

Related Manuals for Agria 2100


Summary of Contents for Agria 2100
- Page 1 Instructions Instructions Instructions Single-Wheel Power Hoe Single-Wheel Power Hoe Single-Wheel Power Hoe Single-Wheel Power Hoe Single-Wheel Power Hoe 2100 2100 2100 2100 2100 3220 Before commissioning the machine, read operating instructions and observe warnings and safety instructions. Operating Instructions No. 998 705-A 12.07...
-
Page 2: Amount Of Delivery
Please state these data when order- ing spare parts to avoid wrong deliv- eries. Engine Stop Only use original agria spare parts! Specifications, figures and dimen- Hoeing/tilling drive sions stated in these instructions are not binding. No claims can be derived from them. -
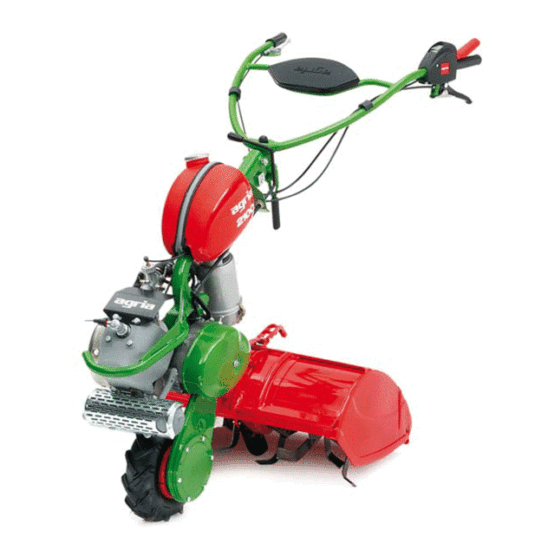
Page 3: Designation Of Parts
Designation of Parts Single-wheel power hoe 2100... - Page 4 Carburetor - tickler Engine No. Spark plug/spark plug connector Tensioning lever for protective hood Tensioning spring for protective hood Mechanical gearbox – oil filler screw/oil control screw Starter handle Tilling drive Cooling-air screen Drive-wheel Hexagonal nut for drive-wheel Single-wheel power hoe 2100...
-
Page 5: Table Of Contents
Fig. A + B ........3 Commissioning the Machine ..22 Starting the Engine ......23 Fig. C ..........46 Tilling ..........24 Change of work-site ......25 Switching off the Engine ....26 Ridging ..........27 Single-wheel power hoe 2100... -
Page 6: Assembly Instructions
(7) onto handlebar rods. Mount tilling shaft (refer to page 17). Mount tilling tools and hoeing skid (refer to page 18). Mount protective hood (refer to page 18). Carry out all steps for starting-up Single-wheel power hoe 2100... -
Page 7: Safety Instructions
Compliance is for your own safety. When transporting the single-wheel power hoe on vehicles or trailers out- side the area to be cultivated, ensure that the engine is turned off. Careful with rotating tools – keep at a safe distance! Single-wheel power hoe 2100... - Page 8 Never adjust the steering handles dur- For operation in enclosed areas, ensure ing work – danger! that a safety distance is kept to enclo- sures to prevent damage to tools. Single-wheel power hoe 2100...
- Page 9 Never leave the single-wheel power hoe unattended with the engine running. Before you leave the single-wheel power hoe, turn off the engine. Then close fuel tap. Secure single-wheel power hoe against unauthorized use – remove spark plug connector. Single-wheel power hoe 2100...
- Page 10 Make sure fuel is of specified quality. erly after maintenance and cleaning. Store fuel in approved cans only. Only use original agria spare parts. All Store anti-corrosive agents and stabi- other commercial spare parts must cor- lizing liquids out of reach of children. If...
- Page 11 Persons having a pacemaker may not touch live parts of the ignition system Signs when the engine is running. When working with the machine, wear individual protective ear plugs. Wear protective gloves. Single-wheel power hoe 2100...
-
Page 12: Specifications Dimensions
: ....101.5 dBA (in accordance with EN 709) Vibration acceleration value: on handlebar: ....a = 2,7 m/s in accordance with EN 709, EN 1033 at 85% of rated engine speed with tool at work. Single-wheel power hoe 2100... -
Page 13: Engine
Idling speed: ....... 1800 rpm Starter: ......Recoil starter Operability on Slopes: Stop device: ....Contact break Engine is suited for use on slopes: via short circuit cable Engine-stop-switch on handlebar continuous operation possible up to ....45° inclination (100%) Single-wheel power hoe 2100... -
Page 14: Devices And Operating Elements
3. Devices and Operating Elements Cooling System The single-wheel power hoe agria 2100 is suited for common applications in Cooling system is fan-cooled. Therefore farming and forestry, horticulture and keep screen at recoil starter and cool- park maintenance ing ribs of cylinder clean and free from The following attachments are available: sucked-in plant trash. -
Page 15: Safety Circuit
(C/4). Do not fasten safety lever. The safety lever also serves to switch off in an emergency. Release the safety lever for fast engine switch-off. The lever automatically goes to STOP position. Single-wheel power hoe 2100... -
Page 16: Clutch
(A/19). Thus, the travelling drive can be used to change the site of work while the tilling drive is off. A/19 The PTO at the gear unit and a bevel drive to the tilling shaft transmit power to the tilling shaft. Single-wheel power hoe 2100... -
Page 17: Steering Handle
Steering handle side adjustment Pull tensioning lever upwards (1), swivel handlebar to desired position and fit into proper toothing. Press tensioning lever back down (tension). Single-wheel power hoe 2100... -
Page 18: Tilling Tools
- adjust tine point to an downward po- sition. No tilling without skid! Protective Hood Mounting Slide protective hood with the hook in hood carriers. Hang tensioning spring into spike plate and fold tensioning lever back. No tilling without protective hood! Single-wheel power hoe 2100... -
Page 19: Drive-Wheels
(Item no. 2128 011) Only mount weight with en- gine and muffler cooled down – danger of burns! Mounting Front Weight Hook front weight (1) over engine hoop guard (3) from the front and fasten with hexagonal screw (2). Single-wheel power hoe 2100... -
Page 20: Leaf Deflector
(4). For turns, slightly lift the leaf deflector Press ball cups of leaf deflector (1), with the rope (5). located on both sides at the rear, onto ball pivots until these lock into place. Single-wheel power hoe 2100... - Page 21 Single-wheel power hoe 2100...
-
Page 22: Commissioning And
Each time you take up operation Fill in engine oil up to the oil filling mark in the pot of the oil bath air filter, filling quantity approx. Ölstand 50 ml. Control transmission oil level in mechanical gear- box. Single-wheel power hoe 2100... -
Page 23: Starting The Engine
Do not let it snap back. Do not touch the hot engine - danger of burns! Do not touch the ignition cable and do not touch or remove ignition spark connector while the engine is running. Single-wheel power hoe 2100... -
Page 24: Tilling
Do not clean tilling tools with the engine run- ning. Switch off the engine and remove spark plug connector. If clogging occurs, turn off the engine and clean the attachment with an appropriate tool (wooden stick). Single-wheel power hoe 2100... -
Page 25: Change Of Work-Site
– single-wheel power hoe drives forward and tilling tools stop turning. End of Tilling Set speed control lever to idling position (min.) Pull hand clutch lever and hold Move lever for gear shift and tilling to position “0” Single-wheel power hoe 2100... -
Page 26: Switching Off The Engine
This is to ensure the carburetor is empty and to avoid resin deposits. Danger zone Danger zone Keep out of the machine’s danger zone during starts and operation! Single-wheel power hoe 2100... -
Page 27: Ridging
7 Adjusting screw for slant adjustment 2 Strake wheel 8 Ridger 3 Tilling tool 9 Clamping screw for mouldboard 4 Hood carriers adjustment 5 Special protective hood for ridging 10 Slip heel 6 Clamping screw for ridger 11 Mouldboard Single-wheel power hoe 2100... -
Page 28: Maintenance
Spin dry. Screw air filter back into place and fill cleaned filter pot with fresh engine oil. Then re-fit filter pot. Never wash air filter in petrol, water, lye or hot liquids. Single-wheel power hoe 2100... - Page 29 Afterwards, clean with soft paint brush. Exchange head gasket and reassem- ble to cylinder head. Tighten cylinder head screws in turn at 22 Nm. - Service Single-wheel power hoe 2100...
- Page 30 (B/31). Check each time before you take up operation! Air-Cooling System Clean internal cooling fins and surfaces at least eve- ry 100 operating hours (earlier in very dusty condi- tions). 100 h Single-wheel power hoe 2100...
-
Page 31: Mechanical Gearbox
The wheel drive chain tension should neither be too tight nor too loose. Slightly loosen 3 fastening nuts (1) and counternut (3). Adjust chain tension by hexagonal screw (2). Retighten counternut (3) and fas- tening nuts (1). Single-wheel power hoe 2100... -
Page 32: Tilling Drive
(use appropriate filling tool, such as funnel or something similar) Oil level Srew down screw plug and tighten. For oil quality and quantity, refer to “Specifications”. Drive-Wheel Check tyre air pressure (0.8 bar) frequently. Single-wheel power hoe 2100... - Page 33 Check engine-off-switch (C/3) for pro- per function each time you maintain the machine. The engine-off-switch in position „0“, the engine must come to a stop. Check electric lines and connections for proper condition and exchange, if necessary. - Service Single-wheel power hoe 2100...
-
Page 34: Adjustments On Hand Levers
Adjust the set pin (4) to a play of X. Screw set pin in to reduce play, screw out to increase play. Hook the cable end and set pin into the bracket and fit retaining spring (2). Single-wheel power hoe 2100... - Page 35 3 Conternut to centre position and tension. 4 Nut cap Check jamming. If it is still not satis- factory, repeat adjustment. Tighten top hexagonal nut (3) – lock and put on nut cap (4). Single-wheel power hoe 2100...
-
Page 36: General Maintenance
Apply grease generously to leave a grease ring around bearings to prevent water, plant sap, and dirt from penetrat- ing. Single-wheel power hoe 2100... -
Page 37: Storage
Slowly crank engine every 2–3 weeks - in stables or adja- (spark plug connector disconnected). cent rooms. Then set the piston to compresion again. g) Protect machine with cloth or a simi- lar cover. Single-wheel power hoe 2100... -
Page 38: Recommendations
We recommend using bio-slushing oil Repair for preservation of machines and im- plements (do not apply on painted The trained mechanics of your agria external covers). Oil can be brushed workshop carry out expert mainte- or sprayed on. nance and repair. - Page 39 Single-wheel power hoe 2100...
-
Page 40: Troubleshooting
6. Troubleshooting Observe safety instructions! Have all serious malfunctions on the machine or engine repaired by your agria workshop. They have the proper tools. Improper repairs can only add to the damage. Problem Possible cause Possible solution Page Engine - Spark plug connector not connected... - Page 41 Clutch slips - Hand clutch lever misadjusted Adjust clutch free play - Worn out clutch linings Exchange clutch linings Excessive - Loosened screws Tighten fastening screws vibration = For this purpose contact your agria workshop. Single-wheel power hoe 2100...
-
Page 42: Varnishes, Wear Parts
Sealing for upper chain housing, inside 256 45 Sealing for upper chain housing, outside 254 97 Hoeing tine, left 254 98 Hoeing tine, right Spare Parts 997 008 Single-wheel power hoe 2100 997 050 Engine agria right left Single-wheel power hoe 2100... -
Page 43: Diagram: Electric Circuit
50 h / 100 h (25 h) 50 h (25 h) 50 h 25 h A = Each time before you take up operation B = After every cleaning, especially with a high-pressure cleaner 25 h J = yearly Single-wheel power hoe 2100... -
Page 44: Inspection And Maintenance Chart
= Each time before you take up operation = After every cleaning, especially with a high-pressure cleaner = Maintenance should be carried out by your agria workshop = Checks and service to be executed by operator = Item in lubrication chart... - Page 45 Single-wheel power hoe 2100...
-
Page 46: Designation Of Parts
Designation of Parts Figure C 1 Hexagonal screw for handlebar height adjustment 2 Tensioning lever for handlebar side adjustment 3 Engine-off-switch 4 Safety lever 5 Hand clutch lever 6 Pawl 7 Speed control lever Single-wheel power hoe 2100... -
Page 47: Conformity Declaration
EC Declaration Conformity Single-wheel power hoe 2100... - Page 48 GmbH Bittelbronner Straße 42 D-74219 Möckmühl Tel. +49/ (0)6298 /39-0 Fax +49/ (0 )62 98/39-111 e-mail: info@agria.de Internet: www.agria.de Your local agria specialist dealer:...
Need help?
Do you have a question about the 2100 and is the answer not in the manual?
Questions and answers