Oki MC561 Maintenance Manual
Mfp
Hide thumbs
Also See for MC561:
- Brochure & specs (4 pages) ,
- Manual de l’utilisateur de base (302 pages) ,
- Manual básico do usuário (294 pages)
Table of Contents
Advertisement
Quick Links
Advertisement
Chapters
Table of Contents
Troubleshooting

Related Manuals for Oki MC561


Summary of Contents for Oki MC561
- Page 1 MC361/MC561/CX2731MFP Maintenance Manual 12610B...
- Page 2 Copyright Information Copyright © 2007 by Oki Data. All Rights Reserved Disclaimer Every effort has been made to ensure that the information in this document is complete, accurate, and up-to- date. The manufacturer assumes no responsibility for the results of errors beyond its control. The manufacturer also cannot guarantee that changes in software and equipment made by other manufacturers and referred to in this guide will not affect the applicability of the information in it.
- Page 3 Caution for used batteries are as follows; do not recharge, force open, herein. Oki Data assumes no responsibility to the damages caused or claimed to have been caused by the user as a result of repair, adjustment heat or dispose of in fire.
-
Page 4: Table Of Contents
3.5.3.2 Extension Memory Installation ............74 1.5.1.1 Outline of USB Interface ..............30 3.5.3.3 16GB SD Memory card (for MC561 only) ........... 75 1.5.1.2 USB Interface Connector and Cable ........... 30 3.6 Configuration Page Print ................... 78 1.5.1.3 USB Interface Signal ................30 3.7 Network Information Print ................. - Page 5 5.6 Settings after Parts Replacement ..............153 4.2.7.10 Frame-assy-OP ................. 105 5.4.1 Notes on CU/PU board replacement ............153 4.2.7.11 Frame-OP-panel / OPE board (MC561) ..........106 5.7 About the manual setting of density correction ..........156 4.2.7.12 Frame-OP-panel / OPE board (MC361) ..........106 4.2.7.13 Frame-OP-panel / OPE board (MC351) ..........
- Page 6 Oki Data CONFIDENTIAL 7.5.5 Image Problem Troubleshooting ..............246 7.5.6 Response after Flash compulsive initialization .......... 253 7.5.7 Copy Image Abnormality Error Troubleshooting ........253 7.5.8 Network Troubleshooting ................255 7.6 Fuse Checking ....................256 8. CONNECTION DIAGRAMS ..........257 8.1 Check of resistance values ................
-
Page 7: Configuration
Oki Data CONFIDENTIAL CONFIGURATION 1.1 System configuration ..............8 1.2 Structure of MFP ................10 1.3 Offer of Options ................11 1.4 Specifications ................12 1.5 Interface specifications ..............30... -
Page 8: System Configuration
1. CONFIGURATION Oki Data CONFIDENTIAL 1.1 System configuration System Configurations of the MFP Unit. Scanner Unit The system configuration of this product is shown in Photo Clutch/ Photo IMAGE SENSOR MOTOR Solenoid Interrupter MOTOR Interrupter(x4) Figure 1-1-1 ADF Relay Board... - Page 9 1. CONFIGURATION Oki Data CONFIDENTIAL System Configurations of the Printer Unit. The system configuration of this product is shown in Figure 1-1-2 Rear EXIT WR sensor cover SW sensor Waste toner Registration IN sensor sensor board motor clutch clutch C LED HEAD...
-
Page 10: Structure Of Mfp
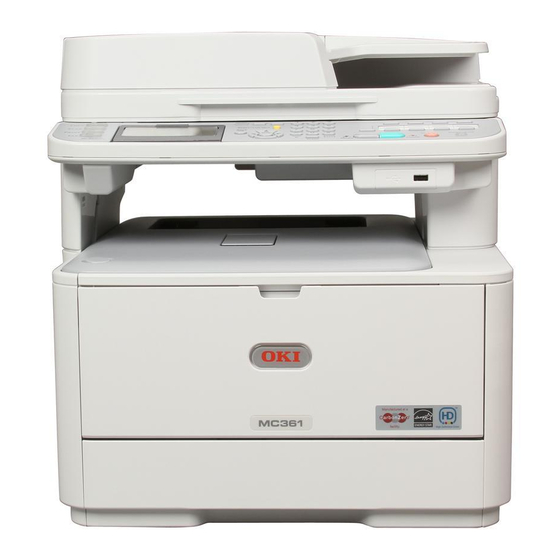
1. CONFIGURATION Oki Data CONFIDENTIAL 1.2 Structure of MFP The insides of MC561/MC361/MC351/ES5461/ES3461/ES3451/CX2731 multi function printers are composed of the following parts. • Scanner part • Electronic photography process part • Paper path • Control part (CU part/PU part) • Power supply parts (high voltage part/low voltage part) Figure 1-2 shows the composition of the MFP. -
Page 11: Offer Of Options
1. CONFIGURATION Oki Data CONFIDENTIAL 1.3 Offer of Options This product can be installed with the following option. Additional memory board 256MB/512MB. (2) Additional SD memory Card 16GB (Class 6) (for MC561 only). (3) Second Tray Unit 11 / 44473001TH Rev.1... -
Page 12: Specifications
1. CONFIGURATION Oki Data CONFIDENTIAL 1.4 Specifications Fundamental specifications Category Item MC351 MC361 MC561 Operating environment During operation 10 °C to 32 °C,17 °C to 27 °C (Full color Category Item MC351 MC361 MC561 (temperature) print quality assurance temperature) Outside dimensions... -
Page 13: Printer Section Specifications
1. CONFIGURATION Oki Data CONFIDENTIAL Printer section specifications Category Item MC351 MC361 MC561 Life Image drum life Continuous 30K Category Item MC351 MC361 MC561 3P/J Print width Print width A4 horizontal 1P/J Engine speed (A4) Monochrome 24ppm 30ppm Transfer belt life... -
Page 14: Scanner Section Specifications
1. CONFIGURATION Oki Data CONFIDENTIAL Scanner section specifications Category Item MC351 MC361 MC561 Paper thickness Tray 1 64 – 176 g/m Item Tray 2 (option) 64 – 176 g/m Scanner type Flat bed scanner with automatic document feeder 64 – 220 g/m... -
Page 15: Network Specifications
1. CONFIGURATION Oki Data CONFIDENTIAL Network specifications Fax section specifications Item Item Connection Ethernet 10BaseT/100BaseTX automatic negotiation Compatibility ITU-T Super G3/Super G3 Communication protocol TCP/IP V4, TCP/IP V6, LPR, Port9100, IPP, FTP, Compression system MH/MR/MMR JBIG SMTP, POP3, HTTP, HTTPS, Telnet, NetBIOS over... -
Page 16: Copy Function
1. CONFIGURATION Oki Data CONFIDENTIAL Copy function Categories Specs Duplex Copy Method OFF, Categories Specs 1→2 sided Long Edge Scanner Type RADF : 50 sheets (80g/m2) , Flatbed 1→2 sided Short Edge Copy Resolution Scan: 300x600dpi / 600x600dpi 2 sided→2 sided 2 sided Long Edge→1 sided... - Page 17 1. CONFIGURATION Oki Data CONFIDENTIAL Copy Image Adjustments ScanTo Common Specification Items FX750 Supplement Item Setting Description Document Type Text, Text/Photo, Allows the user to select the type of Color/Mono Color/Mono Hard Key Selects Color Copy/Mono Copy Photo, Glossy Photo...
- Page 18 1. CONFIGURATION Oki Data CONFIDENTIAL Items FX750 Supplement Items FX750 Supplement Password / Sets a password to open created PDF Contrast -3, -2, -1, 0, +1, +2, Adjusts the difference between the light and dark areas of an image. Re-enter Password document.
- Page 19 1. CONFIGURATION Oki Data CONFIDENTIAL ScanToEmail Fucntion Items FX750 Supplement Change Not allowed *1 Applicable only when Encryption Level Commenting is Low. Items FX750 Document allowed *2 Applicable only when Encryption Level Address confirmation To, Cc, Bcc Page layout allowed is Medium or High.
- Page 20 1. CONFIGURATION Oki Data CONFIDENTIAL ScanToNetworkPC Function Push Scan Function Items FX750 Item FX750 Protocol FTP, HTTP, CIFS server Interface (PC - FX750) USB2.0 (High Speed) Device IF, Ethernet 10/100 Base-T Max. number of File Push Scan Utility ActKey Utility...
- Page 21 1. CONFIGURATION Oki Data CONFIDENTIAL PC Scan Function Item FX750 Image Brightness Item FX750 Quality Contrast Adjustment Interface (PC <-> FX750) USB2.0 (High Speed), Ethernet (10/100 Base-T) Gamma Scan Mode Scan method Flatbed, ADF, Auto Histogram Level * In Options Direction (Left/Upper) and Duplex can be Curves selected.
-
Page 22: Fax Specification
1. CONFIGURATION Oki Data CONFIDENTIAL Fax specification Function Description Tx function Transmission Real-time Tx Support Function Description (Send) Memory Tx Support Basic Fax FAX, TEL line PSTN, PBX Manual Tx Support function Line Interface LINE 1,TEL 1 Dial Direct dial Max 40 degits RJ11 ×... - Page 23 1. CONFIGURATION Oki Data CONFIDENTIAL Function Description Function Description Rx function Automatic receive Support Rx function Print function Effective Legal14, Legal13.5, Legal13, Letter, A4 (Receive) (Receive) record size Manual receive Support Print margin same as printer Standby Support mode Threshold level Yes...
-
Page 24: Internet Fax
1. CONFIGURATION Oki Data CONFIDENTIAL Internet Fax Function/Item Description IFAX Images Basic Features Scan size A4, Letter, Legal13, 13.5, Legal14 (Document Function/Item Description Size) IFAX file Send TIFF-S File format supported in Internet FAX Density -3, -2, -1, 0, +1, +2, +3 format Send. -
Page 25: Report Print
1. CONFIGURATION Oki Data CONFIDENTIAL Report Print Manual Report Name Auto Op Panel Configuration Web Page Special Manual Tool Operations Report Name Auto Op Panel Configuration Web Page Special 29 T30 Monitor Tool Operations E-mail/IFAX Transmit Configuration and Receipt Journal... -
Page 26: Print From Usb Memory
1. CONFIGURATION Oki Data CONFIDENTIAL Print from USB memory Item Description Possible to print color images in mono mode and Color/Mono switch Item Description monochrome images in color mode. Interface USB2.0 (High Speed) Host IF Job Log : Print Print logs... - Page 27 1. CONFIGURATION Oki Data CONFIDENTIAL Display information Email To Print Overview Spec. Information provided Comment Item Description (displayed) Mail format Compliant to MIME1.0. Can be displayed in Japanese Printing mail text Path (Maximum Length 2-byte Code : 255 characters) Yes (v1.7)
- Page 28 PC Fax Send Use enabled / Use disabled E-mail to Print Print from USB Memory Use enabled / Use disabled Transmission Data Save Function (MC561 only) PIN ID 1 ~ 10 digits Number of ID that can be registered Max. 100...
- Page 29 1. CONFIGURATION Oki Data CONFIDENTIAL Item Description Fax Received Sheets printed with the images received by Fax are counted as printed sheets. PC Fax Send E-mail to Print Print from USB Memory (Counted as USB Memory to Print.) 29 /...
-
Page 30: Interface Specifications
1. CONFIGURATION Oki Data CONFIDENTIAL 1.5 Interface specifications (2) Cable 1.5.1 USB Interface Specification Cable length : Specification Cable of USB2.0 spec. of less than 5m.(less 1.5.1.1 Outline of USB Interface than 2m is recommended) (Shielded cable is used here.) (1) Basic Specification 1.5.1.3 USB Interface Signal... -
Page 31: Network Interface Specification
1. CONFIGURATION Oki Data CONFIDENTIAL 1.5.2 Network Interface Specification 1.5.2.3 Network Interface Signal Pin No. Singles Single Direction Functions 1.5.2.1 Outline of Network Interface TXD+ FROM PRINTER Send Data + TXD- FROM PRINTER Send Data - Table 1.5.2 Basic Specification of Network Interface... -
Page 32: Telephone Line Interface Specification (Only Mc561/Mc361)
Unspecified 1.5.3.1 Outline of telephone Line Interface Unspecified The machine will reliably communicate with distant stations over voice-level telephone line. MC561/MC361 CHN-M is connectable only for erclncive use conversion equipment. Unspecified Unspecified LINE Unspecified 1.5.3.2 Telephone Line Interface Connector and Cable... -
Page 33: Description Of Operation
Oki Data CONFIDENTIAL DESCRIPTION OF OPERATION 2.1 Electrophotographic process mechanism ........34 2.2 Printing process ................38 2.3 Image Scanning process ...............50... -
Page 34: Electrophotographic Process Mechanism
2. DESCRIPTION OF OPERATION Oki Data CONFIDENTIAL 2.1 Electrophotographic process mechanism (1) Electrophotographic process (2) Charging The electrophotographic process is explained briefly below: A voltage is applied to the charging roller, which is placed in contact with the OPC drum surface, to charge the OPC drum surface. - Page 35 2. DESCRIPTION OF OPERATION Oki Data CONFIDENTIAL (4) Development (5) Transfer Toner adheres to an electrostatic latent image on the drum surface, thereby turning A sheet of paper is placed over the OPC drum surface, and an electric charge is the electrostatic latent image into a toner image.
- Page 36 2. DESCRIPTION OF OPERATION Oki Data CONFIDENTIAL (6) Fusing (7) Drum cleaning The toner image transferred on the paper is fused on the paper by heat and Unfixed toner remaining on the OPC drum is removed by the drum cleaning blade pressure when the paper passes through the heat roller and the backup roller unit and collected into the waste toner area of the K toner cartridge.
- Page 37 2. DESCRIPTION OF OPERATION Oki Data CONFIDENTIAL (9) Belt cleaning Toner remaining on the transfer belt is scraped off by the belt cleaning blade and collected into the waste toner box of the transfer belt unit. Transport belt Belt waste toner box...
-
Page 38: Printing Process
2. DESCRIPTION OF OPERATION Oki Data CONFIDENTIAL 2.2 Printing process Paper fed from Tray 1, Tray 2 is carried by the paper feed roller, the registration roller L, and the transport roller. When paper is fed from the MPT, it is carried by the MPT paper feed roller and the registration roller U. - Page 39 2. DESCRIPTION OF OPERATION Oki Data CONFIDENTIAL (1) Paper fed from 1st Tray (3) Transport belt As illustrated in Figure 2-1, after the paper feed motor starts running As the transport belt motor runs in the direction of the arrow, the transport (clockwise) and the 1st clutch comes ON, the paper is fed from the 1st Tray.
- Page 40 2. DESCRIPTION OF OPERATION Oki Data CONFIDENTIAL (4) Up/down-motions of ID units The up/down motions of the ID units take place driven by the fuser motor ID unit motions during color printing and the up/down clutch. Y-ID unit Down Figure 2-3 shows the motions of each of the ID units when the printer is...
- Page 41 2. DESCRIPTION OF OPERATION Oki Data CONFIDENTIAL (5) Ejection unit and paper ejection Eject roller (drive) Face-up tray (a) Face-down ejection detection sensor Face-down ejection is available when the face-up tray is closed. Fuser unit In that state, the separator FU is fixed in the direction illustrated in Figure 2-5, and the face-up tray detection sensor is enabled.
- Page 42 2. DESCRIPTION OF OPERATION Oki Data CONFIDENTIAL (6) Duplex printing system (paper flipping and returning to the paper feed route) In a cer tain period of time af ter the fuser motor star ts running Eject roller (drive) counterclockwise and the rear end of paper being fed passes the eject sensor, the fuser motor starts running clockwise.
- Page 43 2. DESCRIPTION OF OPERATION Oki Data CONFIDENTIAL (7) Cover-opening motions of the color registration sensor and the density sensor As illustrated in Figure 2-9, when the solenoid is energized, the link lever moves, causing the cover of the color registration sensor and the density sensor to open.
- Page 44 2. DESCRIPTION OF OPERATION Oki Data CONFIDENTIAL Outline of color registration correction Color registration is corrected by reading correction patterns, which are printed on the belt, Transport belt by use of the color registration sensor located inside the sensor shutter under the belt unit.
- Page 45 2. DESCRIPTION OF OPERATION Oki Data CONFIDENTIAL Error checking methods and remedies The color registration correction test function among the other self-diagnostic functions is employed to check errors. (Section 5.3.2.6) Remedies for different errors • CALIBRATION (L or R), DYNAMICRANGE (L or R) Check 1: If the above indication appears, check the connected state of the sensor cable.
- Page 46 2. DESCRIPTION OF OPERATION Oki Data CONFIDENTIAL Outline of density correction Density is corrected by reading correction patterns, which are printed on the belt, by use of Transport belt the density sensor located inside the sensor shutter under the belt unit.
- Page 47 2. DESCRIPTION OF OPERATION Oki Data CONFIDENTIAL Error checking methods and remedies Principle of toner sensor detection The density correction test function among the other self-diagnostic functions is employed to check errors. (Section 5.3.2.7) Shielding plate Remedies for different errors Prism •...
- Page 48 2. DESCRIPTION OF OPERATION Oki Data CONFIDENTIAL Counter specifications Total page count MPT page count Tray 1 page count Tray 2 page count Color page count Monochrome page count Description Total number of Number of print media Number of print media...
- Page 49 2. DESCRIPTION OF OPERATION Oki Data CONFIDENTIAL A4/Letter conversion table Each count shall increase, in relation to every sheet of paper, by the values in the table below. Paper size Simplex Duplex LETTER EXECUTIVE LEGAL14 LEGAL13.5 LEGAL13 COM-9 COM-10 MONARCH...
-
Page 50: Image Scanning Process
2. DESCRIPTION OF OPERATION Oki Data CONFIDENTIAL 2.3 Image Scanning process 2.3.1.2 Electrical configuration 2.3.1 Structure and process of RADF Electrical circuit configuration 2.3.1.1 Cross-section view Electrical control of the MFP is executed by the main controller circuit PCB. The ASIC of the main controller circuit PCB interpret the input signals that are supplied from sensors and the signals that are supplied from the externally connected equipment. -
Page 51: Fundamental Operations
2. DESCRIPTION OF OPERATION Oki Data CONFIDENTIAL 2.3.1.3 Fundamental operations Overview of operation modes There are four operation modes that are executed by the MFP. The respective operation Drive force trasmission diagram modes are executed in accordance with the instructions given by the connected equipment The MFP is a document feed device of skim reading only. - Page 52 2. DESCRIPTION OF OPERATION Oki Data CONFIDENTIAL → Normal direction feed paper and unload paper (single-sided document single sided print) operation Outline of document flow is shown below. Supplement : When a single-sided document is selected, this operation is performed regardless of the same size mixed documents or different sizes mixed documents.
- Page 53 2. DESCRIPTION OF OPERATION Oki Data CONFIDENTIAL Normal direction feed paper/Inverted unloading of paper (both-sided → document both sided print) operation Outline of document flow is shown below. Supplement : When a both-sided document is selected, this operation is performed regardless of the same size mixed documents or different sizes mixed documents.
- Page 54 2. DESCRIPTION OF OPERATION Oki Data CONFIDENTIAL 2.3.1.4 Document detection Detection of final document The final document detection sensor (PI14) detect if the document that has started of the Document present/absent detection final document has passed the set sensor lever, the detection lever moves together with...
-
Page 55: Jam Detection
2. DESCRIPTION OF OPERATION Oki Data CONFIDENTIAL 2.3.1.5 Jam detection 2.3.1.6 Power supply Document jam is detected by the sensors shown in the illustration.Check timing of the Overview of the power supply is shown in the illustration below the power supply block of the document jam detection has already been memorized in the ROM of the sensor main PCB MFP receives the power supply of two systems that are 24V power supply and 3.3V power... - Page 56 2. DESCRIPTION OF OPERATION Oki Data CONFIDENTIAL 2.3.2 Document table structure 2.3.2.2 Exposure block 2.3.2.1 Overview Flatbed unit consist of Cover-Top-Assy, Frame-Bottom-Assy, Carriage-Assy and Flatbed drive block. The lamp (LED) is located on top of the Carriage-Assy. The light imadiated by the lamp (LED) rodrenze in this order and reaches the CIMOS Sensor.
- Page 57 2. DESCRIPTION OF OPERATION Oki Data CONFIDENTIAL 2.3.2.3 Mirror carraige drive mechanism Carriage-Assy drive mechanism Carriage-Assy performs the function of irradiating the lamp light uniformly over a document while moving its position. The carriage-Assy is driven by a belt which is driven by the FB motor. Scanner moves at the scan speed corresponding to the respective magnification ratios that are set with reference to the standard scanning speed.
-
Page 58: Mfp Installation
Oki Data CONFIDENTIAL MFP INSTALLATION 3.1 Precautions and Prohibition ............59 3.2 MFP Unpacking Procedure ............60 3.3 MFP Installation Instructions ............61 3.4 Packed Units and Attachments .............62 3.5 Assembly Procedure ..............63 3.6 Configuration Page Print ...............78 3.7 Network Information Print ..............80 3.8 Connection Procedures ..............81... -
Page 59: Precautions And Prohibition
3. MFP INSTALLATION Oki Data CONFIDENTIAL 3.1 Precautions and Prohibition Warning Caution • Do not install the MFP at the place where the vent hole is blocked. • Do not install the MFP in the vicinity of high temperature or fire. -
Page 60: Mfp Unpacking Procedure
3. MFP INSTALLATION Oki Data CONFIDENTIAL 3.2 MFP Unpacking Procedure Warning Personal injury may occur. This MFP weighs about 29kg. So lift it up with 2 or more persons. • Open the upper lid. • Take out the accessory box. -
Page 61: Mfp Installation Instructions
3. MFP INSTALLATION Oki Data CONFIDENTIAL 3.3 MFP Installation Instructions • Install the MFP at a place under the following temperature and humidity: Top View Ambient Temperature : 10 to 32°C Ambient Humidity : 20 to 80% relative humidity 20cm Maximum Wet-Bulb Temperature : 25°C... -
Page 62: Packed Units And Attachments
3. MFP INSTALLATION Oki Data CONFIDENTIAL 3.4 Packed Units and Attachments • Confirm whether there are scratches, stains, etc. on the exterior of the MFP . MFP Software CD-ROM • Confirm whether there are lacking items, damages, etc. among the accessories. -
Page 63: Assembly Procedure
3. MFP INSTALLATION Oki Data CONFIDENTIAL 3.5 Assembly Procedure (3) Remove the adhesive tapes and remove the paper. 3.5.1 MFP Main Body Remove Protective Equipment (1) Remove the 5 adhesive tapes on the outside of MFP . Then remove the protection pad. - Page 64 3. MFP INSTALLATION Oki Data CONFIDENTIAL (6) Remove the adhesive tapes. (9) Remove the adhesive tapes, desiccant and film. Protective tape Protective tape (7) Close the document cover. (8) Open the scanner unit. (10) Press the top cover open button and open the top cover.
- Page 65 3. MFP INSTALLATION Oki Data CONFIDENTIAL (11) Remove the protection sheets. Install Image Drum Cartridges (1) Slide the lock of the each toner cartridge to the left side. Lock (blue) Protection sheet (12) Remove the orange stopper while pressing the blue lever of the fuser unit in the (2) Close the top cover.
- Page 66 3. MFP INSTALLATION Oki Data CONFIDENTIAL Loading Paper in Tray 1 and Tray 2 (3) Slide the paper width guide to the width of paper to be loaded. The following procedure explains how to load paper in tray 1 or tray 2 (optional).
- Page 67 3. MFP INSTALLATION Oki Data CONFIDENTIAL (5) Load paper with the print side face down. Loading paper in the MP Tray (1) Open the MP tray. (2) Pull out the paper support. Important Do not load paper above the fill line.
- Page 68 3. MFP INSTALLATION Oki Data CONFIDENTIAL (4) Adjust the paper width guide to the width of paper to be loaded. (6) Adjust the paper width guide to hold the paper in place. (7) Press the tray latch button. (5) Insert the paper with the print side face up until its edge touches the paper feed Latch button entrance.
-
Page 69: Loading Documents On The Adf
3. MFP INSTALLATION Oki Data CONFIDENTIAL Loading Documents on the ADF Loading Documents on the Document Glass (1) Load your documents face up on the ADF. (1) Lift and open the document glass cover. If your documents are portrait, load them with the top edge of the documents in first. -
Page 70: Power Cable Connection
3. MFP INSTALLATION Oki Data CONFIDENTIAL 3.5.2 Power Cable Connection Connect Power Supply Cord Note! Be certain the power switch is placed in the OFF (O) position. Conditions for Power Supplies • Observe the following conditions: (1) Insert the electric cord in the MFP . -
Page 71: Installation Of Optional Components
• Additional RAM (256 MB or 512 MB) (2) Lift the MFP and align the three pins of the second tray unit with the holes at the • 16GB SD Memory card (for MC561 only) bottom of the MFP . - Page 72 (3) Select the [Device Option] tab. For Windows 2000, click [Start] → [Settings] → [Printers]. (2) Right-click the [OKI MC561 (PS)] icon and then select [Printer properties]. For Windows Server 2008, Windows Vista, Windows Server 2003, Windows XP, and Windows 2000, select [Properties].
- Page 73 Note! • This procedure uses Mac OS X 10.6 as an example. For the USB connection, select [2-Tray Module] for [Available Tray] under [Installable • This procedure uses MC561 driver as an example. Options]. (1) Select [System Preferences] from the Apple menu.
-
Page 74: Extension Memory Installation
768MB Loosen the screw and then remove the bracket.. Note! You must use genuine Oki Original. Otherwise, the memory will not work. Switch the power supply of the MFP off and pull out the electric cord. Note! If installed with the switch on, an electric shock or a trouble to the MFP may occur. -
Page 75: 16Gb Sd Memory Card (For Mc561 Only)
AC cable and Ethernet or USB cable, and then reinstall the additional RAM. Note! • Use only genuine Oki Data products. The performance cannot be guaranteed when using other products. • The card cannot be used with its write-protect switch (to guard against accidental erasure on the card) in the unlocked position. - Page 76 3. MFP INSTALLATION Oki Data CONFIDENTIAL (1) Switch the power supply of the MFP off and pull out the electric cord. (6) Push the SD Memory Card and remove the SD Memory Card. (2) Push the lock button on the right side of the machine while pressing the lock button.
- Page 77 3. MFP INSTALLATION Oki Data CONFIDENTIAL (8) Attach the bracket and then tighten the screw. (9) Plug the Ethernet/USB cable into the MFP . (10) Attach the interface cover. (11) Plug the AC cable into the MFP . (12) Press the <SETTING> key on the control panel.
-
Page 78: Configuration
3. MFP INSTALLATION Oki Data CONFIDENTIAL 3.6 Configuration Page Print Make sure that the MFP operates normally. (Sample) MC561 (1) From the panel, press "Setting" button. (2) Select "Reports". (3) Select "Configuration". (Press the down button to go to "Configuration" and then press the right button.) 78 / 44473001TH Rev.1... - Page 79 3. MFP INSTALLATION Oki Data CONFIDENTIAL (Sample) MC361 (Sample) MC351 79 / 44473001TH Rev.1...
-
Page 80: Network Information Print
3. MFP INSTALLATION Oki Data CONFIDENTIAL 3.7 Network Information Print Make sure that the MFP operates normally. (Sample) In case of MC561 (1) From the panel, press "Setting" button. (2) Select "Reports". (3) Select "System". (4) Select "Network Information". (Press the down button to go to "Network Information" and then press the right button.) -
Page 81: Connection Procedures
3. MFP INSTALLATION Oki Data CONFIDENTIAL 3.8 Connection Procedures <USB Connection> (2) Plug one end of the USB cable into the USB connection on the back of the MFP . Prepare a USB Cable. Note! • The cable of the MFP is not attached. Users should buy seperately. - Page 82 3. MFP INSTALLATION Oki Data CONFIDENTIAL (5) Plug the other end of the USB cable into the computer’s USB interface connector. Important • For Windows OSs, do not plug the other end of the USB cable into the computer until prompted while driver installation.
- Page 83 3. MFP INSTALLATION Oki Data CONFIDENTIAL <LAN Cable Connection> (3) Hook the Ethernet cable on the hook of the MFP . Prepare the LAN cable. Switch off the power of the MFP and computer. Connect the computer and MFP. Hook (1) Remove the side cover on the right side of the MFP while pressing the lock button.
- Page 84 3. MFP INSTALLATION Oki Data CONFIDENTIAL <TEL cable/ Line Cable Connection> Connecting for Fax and Telephone Prepare the TEL cable and Line cable. (1) Plug one end of the supplied telephone cable into the LINE connection of the MFP and the other end into an active telephone jack.
-
Page 85: Checking Of User Paper
3. MFP INSTALLATION Oki Data CONFIDENTIAL 3.9 Checking of User Paper Set the medium the user uses, set up media type/weight, conduct menu map/demo print and confirm that the toner does not peel off. Setting values of the printer Setting*... -
Page 86: Replacement Of Parts
Oki Data CONFIDENTIAL REPLACEMENT OF PARTS This chapter describes the procedures of the field replacement of parts, assemblies and units. The procedures are to detach them. Reverse the procedures to attach them. The reference part numbers used in this manual (such as ) do not identical to the part numbers in the maintenance disassembly configuration diagram (44346007TL) and RSPL (44346007TR) for the manual. -
Page 87: Notes On Replacement Of Parts
4.REPLACEMENT OF PARTS Oki Data CONFIDENTIAL 4.1 Notes on replacement of parts (1) Prior to replacing a part, unplug the AC cord and the interface cable. (2) Do not disassemble the printer so long as it operates properly. (a) Be sure to use the following procedure to unplug the AC cord: (3) Minimize disassembly. -
Page 88: Maintenance Tools
4.REPLACEMENT OF PARTS Oki Data CONFIDENTIAL Maintenance Tools: Table 4-1-2 shows the tools necessary to use Maintenance Utility software. Table 4-1-1 shows the tools necessary to replace printed-circuit boards and units: Table 4-1-2: Maintenance Tools Maintenance Tool Quantity Remarks Table 4-1-1: Maintenance Tools... -
Page 89: Part Replacement Procedure
4.REPLACEMENT OF PARTS Oki Data CONFIDENTIAL 4.2 Part replacement procedure This section describes the procedure for replacing the parts and assemblies shown in the (3) Turn the (two blue) lock handles of the belt unit ② in the direction of the arrows disassembly diagrams below. -
Page 90: Fuser Unit
4.REPLACEMENT OF PARTS Oki Data CONFIDENTIAL 4.2.2 Fuser unit 4.2.3 Left side cover (1) Open the scanner and the top cover. (1) Open the scanner and the top cover. (2) Remove the two (silver-colored) screws ① . (2) Pull the (blue) fuser unit lock lever in the direction of the arrow and detach the fuser unit ①... -
Page 91: Right Side Cover
4.REPLACEMENT OF PARTS Oki Data CONFIDENTIAL 4.2.4 Right side cover (1) Open the scanner and the top cover. (2) Remove the cassette assembly. (3) Remove the interface cover ① . Scanner (4) Loosen the screw ② to remove the bracket ③ . -
Page 92: Cu/Pu Pcb And Low-Voltage Power Supply
4.REPLACEMENT OF PARTS Oki Data CONFIDENTIAL 4.2.5 CU/PU PCB and low-voltage power supply Warning Electric shock hazard Note! The LED head cables When replacing the low-voltage power supply, electric shock may occur. Wear insulated should be attached, the gloves, or be careful not to touch the conductors or terminals of the power supply directly. - Page 93 4.REPLACEMENT OF PARTS Oki Data CONFIDENTIAL 93 / 44473001TH Rev.1...
-
Page 94: Front Cover
4.REPLACEMENT OF PARTS Oki Data CONFIDENTIAL (3) Remove the cover-stay-L ② in the direction of the arrow. 4.2.6 Front cover (1) Remove the left side cover and right side cover. (See.4.2.3,4.2.4) (2) Remove the cover-hinge-R ① in the direction of the arrow. - Page 95 4.REPLACEMENT OF PARTS Oki Data CONFIDENTIAL (5) Remove the two screws (black) ④ and one screw (silver-coloved) ⑤ to detach the front cover ⑥ . 95 / 44473001TH Rev.1...
-
Page 96: Scanner Unit
4.REPLACEMENT OF PARTS Oki Data CONFIDENTIAL (8) Remove the screw ⑥ and remove the guide cable ⑦ . Remove the three screws ⑧ 4.2.7 Scanner unit and remove the hinge Assy FB ⑨ . (9) Remove the three screws ⑩ and remove the plate support R ⑪ . Remove the two (1) Remove the left side cover, the right side cover, the PU/CU PCB and the front screws ⑫... -
Page 97: Tray-Assy-Document / Cover-Adf-R-Assy
4.REPLACEMENT OF PARTS Oki Data CONFIDENTIAL 4.2.7.1 Tray-assy-document / Cover-ADF-R-assy (4) Push the portion A. (Concurrent to push the (3) ) (1) Open the cover-assy-top-ADF . (2) Remove the tray-assy-document ① by pull it in the direction of the arrow. -
Page 98: Adf-Unit
4.REPLACEMENT OF PARTS Oki Data CONFIDENTIAL (3) Remove the ADF-unit ④ by insert the screwdriver to gap between ADF-unit ④ and 4.2.7.2 ADF-unit flatbed-unit. (1) Remove the cover-ADF-R-assy. (See 4.2.71) (2) Detach a connector ① and ② from the ADF board (FX750), and remove the screw ③... -
Page 99: Sheet-Document / Paper-Weight-Assy / Spring-Pw-Adf
4.REPLACEMENT OF PARTS Oki Data CONFIDENTIAL 4.2.7.3 Sheet-document / Paper-weight-assy / Spring-PW-ADF <Attention of affix the sheet-document> (1) Degrease the affix area of ADF-unit. (1) Open the ADF-unit. (2) Remove the peeling-off sheet. (2) Remove the sheet-document ① . (3) Set the sheet-document ① (see the figure below). -
Page 100: Hinge-Assy-L / Hinge-Assy-R
4.REPLACEMENT OF PARTS Oki Data CONFIDENTIAL 4.2.7.4 Hinge-assy-L / Hinge-assy-R (1) Remove the two screws ① and remove the hinge-assy-R ② . (2) Remove the two screws ③ and remove the hinge-assy-L ④ . 100 / 44473001TH Rev.1... -
Page 101: Cover-Adf-F / Guide-Assy-Exit-Sub / Adf-Assy
4.REPLACEMENT OF PARTS Oki Data CONFIDENTIAL 4.2.7.5 Cover-ADF-F / Guide-assy-exit-sub / ADF-assy / ADF- (3) Open the cover-top-ADF . board (FX750) (1) Turn the ADF unit upside down and remove the support-sponge ① . Cover-top-ADF (4) Push the claw of cover-ADF-F ③ . - Page 102 4.REPLACEMENT OF PARTS Oki Data CONFIDENTIAL (7) Remove the screw (silver) ④ and remove the ADF-board (FX750) ⑤ . (5) Push the portion A (2 places). (Concurrent to push the (4) ) (8) Remove the two screws (black) ⑥ and remove the ADF-assy ⑦ .
-
Page 103: Cover-Assy-Top-Adf / Guide-Assy / Roller / Motor / Clutch
4.REPLACEMENT OF PARTS Oki Data CONFIDENTIAL 4.2.7.6 Cover-assy-top-ADF / Guide-assy / Roller / Motor / Clutch / Solenoid (1) Remove the cover-assy-top-ADF ① . (2) Remove the guide-assy-A ② . (3) Remove the guide-B ③ . (4) Remove the guide-cable ④ . -
Page 104: Guide-A-Sub / Frame-Assy-Separator / Spring-Separator
4.REPLACEMENT OF PARTS Oki Data CONFIDENTIAL 4.2.7.7 Guide-A-sub / Frame-assy-separator / Spring-separator / 4.2.7.8 Cable (ADF-Rev SNS) Rubber-friction (1) Remove the cable ① . (1) Remove the guide-A-sub ① with rubber-friction ② . (2) Remove the frame-assy separator ③ and spring-separator ④ . -
Page 105: Cable (Adf-Reg Sns)
4.REPLACEMENT OF PARTS Oki Data CONFIDENTIAL 4.2.7.9 Cable (ADF-Reg SNS) 4.2.7.10 Frame-assy-OP (1) Remove the cable ① . (1) Remove the eight claws to remove the frame-assy-OP ① . (2) Remove the screw ② to remove FG cable ③ . -
Page 106: Frame-Op-Panel / Ope Board (Mc561)
4.REPLACEMENT OF PARTS Oki Data CONFIDENTIAL 4.2.7.11 Frame-OP-panel / OPE board (MC561) 4.2.7.12 Frame-OP-panel / OPE board (MC361) (1) Remove the eight claws to remove the OPE board ① . (1) Remove the eight claws to remove the OPE board ① . -
Page 107: Frame-Op-Panel / Ope Board (Mc351)
4.REPLACEMENT OF PARTS Oki Data CONFIDENTIAL 4.2.7.13 Frame-OP-panel / OPE board (MC351) 4.2.7.14 LCD-assy (1) Remove the eight claws to remove the OPE board ① . (1) Remove the LCD-assy ① . (2) Remove the rubber-pad (R) ② and rubber-pad (L) ③ . -
Page 108: Frame-Assy-Fb
4.REPLACEMENT OF PARTS Oki Data CONFIDENTIAL 4.2.7.15 Frame-assy-FB (1) Remove the four screws (black) ① , remove the screw (silver) ② . (2) Take off two parts (Plate-FG-SU ③ / Plate-FG-FAX ④ ) (3) Remove the cover-SU ⑤ . (4) Remove the two screws (silver) ⑥ , remove the plate-shield-FAX ⑦ . - Page 109 4.REPLACEMENT OF PARTS Oki Data CONFIDENTIAL 109 / 44473001TH Rev.1...
-
Page 110: Face-Up Tray
4.REPLACEMENT OF PARTS Oki Data CONFIDENTIAL 4.2.8 Face-up tray 4.2.9 Rear cover (1) Open the face-up tray ① in the direction of the arrow and, warping it, disengage (1) Remove the left side cover and the right side cover. (See 4.2.3, 4.2.4) (2) Remove the three (silver-colored) screws ①... -
Page 111: Led Assembly. And Led Assembly Springs
4.REPLACEMENT OF PARTS Oki Data CONFIDENTIAL 4.2.10 LED assembly. and LED assembly springs 4.2.11 Image drum fan and ZHJ board (1) Open the Scanner and the top cover. (1) Remove the left side cover. (See 4.2.3) (2) Remove the (silver-colored) screw ① and the two (silver-colored) screws to detach (2) Remove the cables of the LED assembly. -
Page 112: Top Cover Assembly
4.REPLACEMENT OF PARTS Oki Data CONFIDENTIAL 4.2.12 Top cover assembly 4.2.13 Top cover and LED head cable assembly (1) Remove the left side cover, the right side cover and the rear cover. (1) Demount the top cover assembly. (2) Remove the 18 (black) screws ① to detach the top cover ② . -
Page 113: Mpt Assembly
4.REPLACEMENT OF PARTS Oki Data CONFIDENTIAL 4.2.14 MPT assembly (1) Remove the cassette assembly. (2) Open the MPT assembly ① . (3) Pull the direction of the arrow and remove the MPT assembly ① . 113 / 44473001TH Rev.1... -
Page 114: Front Fan, Hopping Motor, Rear Fan, Image Drum Motor And Cover-Open Switch
4.REPLACEMENT OF PARTS Oki Data CONFIDENTIAL 4.2.15 Front fan, hopping motor, rear fan, image drum motor and cover-open switch (1) Remove the left side cover, the right side cover, the rear cover, the MPT assembly, the plate-rear, the plate shield assembly and the operator panel assembly. -
Page 115: High-Voltage Power Supply Board
4.REPLACEMENT OF PARTS Oki Data CONFIDENTIAL 4.2.16 High-voltage power supply board (1) Remove the right side cover and the CU/PU PCB. (2) Remove the four (silver-colored) screws ① to remove the film-PUCU board ② and the plate board ③ . -
Page 116: Guide-Ejection Assembly, Fuser Connector Assembly And Color-Registration Assembly
4.REPLACEMENT OF PARTS Oki Data CONFIDENTIAL 4.2.17 Guide-ejection assembly, fuser connector assembly and color-registration assembly (1) Remove the left side cover, the right side cover, the rear cover and the top cover assembly. (2) Remove the CU/PU PCB and the low-voltage power supply. -
Page 117: Frame-Mpt Assembly And Feeder Assembly
4.REPLACEMENT OF PARTS Oki Data CONFIDENTIAL 4.2.18 Frame-MPT assembly and feeder assembly (1) Remove the left side cover, the right side cover, the rear cover, the hopping motor, the plate shield assembly, the operator panel assembly, the cover-open switch and the frame-MPT-side. -
Page 118: Side-L Assembly, Side-R Assembly And Base Assembly
4.REPLACEMENT OF PARTS Oki Data CONFIDENTIAL 4.2.19 Side-L assembly, side-R assembly and base assembly (1) Remove the left side cover, the right side cover, the rear cover, the top cover assembly, the operator panel assembly, the feeder assembly, the guide-ejection assembly and the registration assembly. -
Page 119: Feed Rollers
4.REPLACEMENT OF PARTS Oki Data CONFIDENTIAL (3) Press the tab ③ on the black cover attached to the left side of the rear paper feed 4.2.20 Feed rollers roller and open the black cover ④ downward. (4) Remove the rear paper feed roller ⑤ . -
Page 120: Locations To Lubricate
4.REPLACEMENT OF PARTS Oki Data CONFIDENTIAL 4.3 Locations to lubricate This section shows the locations to lubricate. The other locations must not be lubricated. Lubrication is not required during assembly or disassembly, except that, after lubricant is wiped off locations, the appropriate lubricant specified must be applied to the locations. -
Page 121: Adf
4.REPLACEMENT OF PARTS Oki Data CONFIDENTIAL ① -2 44527201PP Slider Inner 4.3.1 ADF ① -1 44597101PP Cam-Hinge (FB) EM-D110 Class A Apply a small amount of MOLYKOTE (EM-D110) to the surface 2 places of projection. Cam-Hinge (FB) Slider-Inner Application Direction... - Page 122 4.REPLACEMENT OF PARTS Oki Data CONFIDENTIAL ① -3 44527301PP Slider-Hinge (FB) ② 44659101PA Gear-Idle-Assy Gear-Planet SF-133 Class C Apply a normal amount of HANARL (SF-133) to the hatched area. (all circumference of post) EM-D110 Class E Apply a large amount of MOLYKOTE Slider-Hinge (FB) (EM-D110) to the sliding surface.
- Page 123 4.REPLACEMENT OF PARTS Oki Data CONFIDENTIAL ③ -1 44529501PA ADF-Assy ③ -2 Portion A and F Motor-Z20 Wave-Washer Detail Portion F Portion E Bearing-Regist EM-30LP Class C Apply a normal amount of MOLYKOTE (EM-30LP) to the hatched area. Bearing-Shaft EM-D110 Class C Apply a normal amount of MOLYKOTE (EM-D110) to the hatched area.
- Page 124 4.REPLACEMENT OF PARTS Oki Data CONFIDENTIAL ③ -3 Portion I ③ -4 Portion B, C, D and E EM-30LP Class C Frame-ADF Apply a normal amount of MOLYKOTE (EM-30LP) to the hatched area. SF-133 Class C (all circumference of shaft) Apply a normal amount of HANARL (SF-133) to the hatched area.
- Page 125 4.REPLACEMENT OF PARTS Oki Data CONFIDENTIAL ④ 44531101PA Frame-Assy-Hopping-ADF For detail Gear-Planet Fram e-Pickup EM-30LP Class C x 3 Apply a normal amount of MOLYKOTE to the hatched area. (to 3 places on the gear tooth circle) (Refer to detail) Apply to 3 places.
- Page 126 4.REPLACEMENT OF PARTS Oki Data CONFIDENTIAL ⑤ 44539301PA Hinge-Assy-L (ADF) ⑥ 44538701PA Tray-Assy-Document 44538801_Tray-Document 44539901PA Hinge-Assy-R (ADF) SF-133 Class C EM-D110 Class C Apply a normal amount of HANARL Apply a normal amount of MOLYKOTE (SF-133) to the hatched area.
- Page 127 4.REPLACEMENT OF PARTS Oki Data CONFIDENTIAL ⑦ 44534901PA Roller-Assy-Eject-ADF EM-30LP Class A Apply a normal amount of MOLYKOTE (EM-30LP) to slide portion of Lever-Separator-EX and Roller-Eject-ADF. Roller-Eject-ADF Lever-Separator-EX Washer-A EM-30LP Class A Apply a normal amount of MOLYKOTE (EM-30LP) to the hatched area.
-
Page 128: Printer
4.REPLACEMENT OF PARTS Oki Data CONFIDENTIAL ① -2 44452301PA Side-R Assy. 4.3.2 Printer ① -1 44452301PA Side-R Assy. EM-30LP Class Bx2 Apply a normal amount of MOLYKOTE (EM-30LP) EM-30LP Class Bx4 to the whole circle of 2 places Apply a normal amount of... - Page 129 4.REPLACEMENT OF PARTS Oki Data CONFIDENTIAL ① -3 44452301PA Side-R Assy. ① -4 44452301PA Side-R Assy. EM-30LP Class B x2 Gear-Reduct-FU EM-30LP Class C Apply a normal amount of Gear-Idle-FUA Apply a normal amount MOLYKOTE (EM-30LP) of MOLYKOTE to the whole circle of gear...
- Page 130 4.REPLACEMENT OF PARTS Oki Data CONFIDENTIAL ① -5 44452301PA Side-R Assy. ① -6 44452301PA Side-R Assy. EM-30LP Class C EM-30LP Class A Apply a normal amount of MOLYKOTE (EM-30LP) Apply a small amount of MOLYKOTE to the whole circle of hatched areas (Shaft end (EM-30LP) to the hatched areas.
- Page 131 4.REPLACEMENT OF PARTS Oki Data CONFIDENTIAL ② 44452401PA Side-L Assy. ③ 44452601PA Sensor Assy.-Regist EM-30LP Class A Frame-Shutter Apply a small amount of MOLYKOTE Plate-Position-Caulking (EM-30LP) to the hatched areas. EM-30LP Class C Apply a normal amount of MOLYKOTE (EM-30LP) to the gear tooth tops.
- Page 132 4.REPLACEMENT OF PARTS Oki Data CONFIDENTIAL ④ -1 44452701PA Front Assy.-Reg/Hop ④ -2 44452701PA Front Assy.-Reg/Hop EM-30LP Class A Apply a normal amount of MOLYKOTE Note :1 (EM-30LP) to the hatched areas. (Side of roller and ditch of shaft) (The other side is also the same. : Two...
- Page 133 4.REPLACEMENT OF PARTS Oki Data CONFIDENTIAL ④ -3 44452701PA Front Assy.-Reg/Hop ④ -4 44452701PA Front Assy.-Reg/Hop EM-30LP Class C Apply a normal amount of Plate-Feed-A_Caulking MOLYKOTE (EM-30LP) to the hatched areas (Shaft end surface side). EM-30LP Class C Apply a normal amount of MOLYKOTE (EM-30LP) to the hatched areas (Shaft).
- Page 134 4.REPLACEMENT OF PARTS Oki Data CONFIDENTIAL ④ -5 44452701PA Front Assy.-Reg/Hop ⑤ 44364101PA Eject Assy Gear-Idle_Exit(Z38) Plate-Feed-B_Caulking Gear-Idle-Z35 Gear-Idle-MPT-Z35 EM-30LP Class C Apply a normal amount of MOLYKOTE (EM-30LP) to EM-30LP Class C the hatched areas Apply a normal amount of MOLYKOTE (EM- (Post end surface side).
- Page 135 4.REPLACEMENT OF PARTS Oki Data CONFIDENTIAL ⑥ -1 44453001PA Printer Unit-PX750 ⑥ -3 44453001PA Printer Unit-PX750 EM-30LP Class C Spring-Torsion-L Apply a normal amount of MOLYKOTE (EM-30LP) to the hatched areas. Panmotoroil Class C Spring-Torsion-R Apply a normal amount of Panmotoroil to the portion of the slot of solid Plate-Assy.Side R...
- Page 136 4.REPLACEMENT OF PARTS Oki Data CONFIDENTIAL ⑥ -5 44453001PA Printer Unit-PX750 ⑦ 44452501PA Base-Assy EM-30LP Class C Apply a normal amount of MOLYKOTE (EM-30LP) to the end face of Plate-R. (hatched areas) EM-30LP Class C Plate-Base Apply a normal amount of MOLYKOTE (EM-30LP) to the end face of Plate-R.
- Page 137 4.REPLACEMENT OF PARTS Oki Data CONFIDENTIAL ⑧ 44458601PA Belt-Unit ⑨ 44381001PA Fuser-Assy EM-30LP Class A x8pcs Cam-Release Apply a small amount of MOLYKOTE EM-30LP Class C x2pcs (EM30LP) to the inside of Bearing- Apply a normal amount of TR(Belt). MOLYKOTE (EM30LP) to...
- Page 138 4.REPLACEMENT OF PARTS Oki Data CONFIDENTIAL ⑩ -1 44453701PA Cover-Assy.-Rear ⑪ 44359201PA Frame-Assy.-MPT EM-30LP Class B SF-133 Class B Apply a normal amount of MOLYKOTE (EM-30LP) to Stacker-FU_Base Apply a normal amount of HANAL (SF-133) the hatched areas. (Center of shaft) to the hatched areas.
-
Page 139: Maintenance Menus
Oki Data CONFIDENTIAL MAINTENANCE MENUS MC561/MC361/MC351 can be adjusted by using Maintenance Utility, or button operation on its operator panel. The printer has maintenance menus in addition to general menus. The menus intended for adjustment purposes should be selected. 5.1 Maintenance Menu ..............140 5.2 Service Bit Menu .................148... -
Page 140: Maintenance Menu
Device reboots automatically after exiting the menu. OEMA Displayed under the following conditions: OEML "System Maintenance"- When "OKIUSER" is other than JPOEM1, OEMA, or OEML, and Manufacturer is "OKI DATA CORP" Format SD Execute Formats the SD card. Memory Card A confirmation message is displayed when the Enter switch is pressed. - Page 141 5. MAINTENANCE MENUS Oki Data CONFIDENTIAL Default Default Default Item1 Item2 Item3 Item4 Item5 Value value value value Notes Password System Change New Pass- *********** Set a new password for accessing the maintenance menu. Maintenance Password word 6 to 12 characters (numerals and lower-case alphabetic characters) may be entered.
- Page 142 5. MAINTENANCE MENUS Oki Data CONFIDENTIAL Default Default Default Item1 Item2 Item3 Item4 Item5 Value value value value Notes Password Adjust Scan Side Reg. +8 ~ -8 mm Adjust the starting read pixel position in the horizontal scanning direction when reading...
- Page 143 5. MAINTENANCE MENUS Oki Data CONFIDENTIAL Default Default Default Item1 Item2 Item3 Item4 Item5 Value value value value Notes Password Adjust CIS Adjust CIS simple Sequentially light the designated RGB colors and check them during calibration (Back-side) R continuous configuration duties.
- Page 144 5. MAINTENANCE MENUS Oki Data CONFIDENTIAL Default Default Default Item1 Item2 Item3 Item4 Item5 Value value value value Notes Password Change AFE (IC) register settings Change AFE (IC) register settings (3 - 9 settings). (Back-side) Parameter Decimal number displayed, Then, read the document using PC Scan.
- Page 145 5. MAINTENANCE MENUS Oki Data CONFIDENTIAL Default Default Default Item1 Item2 Item3 Item4 Item5 Value value value value Notes Password Mechanical FBS Test Speed Color 300x300dpi Conduct mechanical testing (without reading an image). (Back-side) Test Color 300x600dpi ADF : Test moving original document (stops when set document has been moved) Color 600x600dpi May choose from single- or double-sided feeding.
- Page 146 5. MAINTENANCE MENUS Oki Data CONFIDENTIAL Default Default Default Item1 Item2 Item3 Item4 Item5 Value value value value Notes Password Mechanical Solenoid Once After a short press of the button, intake for 2 seconds and then stop. (Back-side) Test Test Continuous After a long press of the button, intake for 2 seconds and stop for 3 seconds repeat.
- Page 147 5. MAINTENANCE MENUS Oki Data CONFIDENTIAL Default Default Default Item1 Item2 Item3 Item4 Item5 Value value value value Notes Password Country Code Korea Maintenance Thailand *This menu Malaysia not shown on Jordan models with Argentina no fax. Brazil South Africa...
-
Page 148: Service Bit Menu
5. MAINTENANCE MENUS Oki Data CONFIDENTIAL 5.2 Service Bit Menu Additional Fax Setting menu Item Settings Description (When setup ServiceBit=ON, the following items will be displayed at Asmin Setup→Fax Korea Thailand Setup) Malaysia Jordan Item Settings Description Argentina Service Bit... -
Page 149: Maintenance Utility
5. MAINTENANCE MENUS Oki Data CONFIDENTIAL 5.3 Maintenance Utility The adjustments described in table 5-1 should be made by using Maintenance Utility. Section in Operation from Maintenance operator panel The following details the utility: Option Adjustment Utility (section in this... - Page 150 5. MAINTENANCE MENUS Oki Data CONFIDENTIAL Section in Operation from Section in Operation from Maintenance operator panel Maintenance operator panel Option Adjustment Utility (section in this Option Adjustment Utility (section in this Operating maintenance Operating maintenance Manual manual) Manual manual) 11 Network Stores a network log file.
-
Page 151: Various Printing Of The Printer Unit With Controller
5. MAINTENANCE MENUS Oki Data CONFIDENTIAL 5.4 Various printing of the printer unit with controller Status page printing Print the information of program version and composition of the controlling parts. Operation: 1. Under [ONLINE] state, press the START key for 2 seconds then release it. -
Page 152: Switch Pressing Function When Power Supply Is Turned On
5. MAINTENANCE MENUS Oki Data CONFIDENTIAL 5.5 Switch pressing function when power supply is turned on When power supply of printer is turned on, the functions of usable switches are as follows. And, the switches below are effective when pressed before LED is lighted in the special start confirming pattern. -
Page 153: Settings After Parts Replacement
5. MAINTENANCE MENUS Oki Data CONFIDENTIAL 5.6 Settings after Parts Replacement The necessary adjustments after the parts exchange are explained as follows. Note! When removing or writing information from/into the EEPROM by using Maintenance Utility, use the procedure shown below to place the printer to... - Page 154 5. MAINTENANCE MENUS Oki Data CONFIDENTIAL • If you want to specify the PU serial number, please add a “0” (a • On the menu of [Section 2.4.1.1.4.3, Serial number information normal-width zero) then input the 11-digit number. (Please notice setting] of [Section 2.4.1.1.4 CU circuit board setting function],...
- Page 155 5. MAINTENANCE MENUS Oki Data CONFIDENTIAL (2) [When not facing OEL] (2-2) Set the CU serial number CU serial numbe setting is unnecessary When not facing OEL. (2-1) Set the PU serial number (Maintenance utility operation manual, Section 2.4.1.2, PU circuit (3) Change to Shipping mode (section 2.4.1.1.10.4 of Maintenance Utility...
-
Page 156: About The Manual Setting Of Density Correction
5. MAINTENANCE MENUS Oki Data CONFIDENTIAL 5.7 About the manual setting of density correction At shipment the density correction mode of printer is set to [Auto], if the user set it to [Manual] mode, the density in use will be changed, thus the density might appear strange. -
Page 157: Regular Maintenance
Oki Data CONFIDENTIAL REGULAR MAINTENANCE 6.1 Recommended substitutes ............158 6.2 Cleaning ..................159 6.3 Cleaning LED lens array ..............160 6.4 Cleaning the Paper Feed Roller ..........162 6.5 Cleaning the Paper Feed Rollers for MP Tray ......163 6.6 Cleaning Rollers in the ADF ............164... -
Page 158: Recommended Substitutes
6. REGULAR MAINTENANCE Oki Data CONFIDENTIAL 6.1 Recommended substitutes It is recommended by our company that only heavy users should change the following parts. (If not changed, the printing quality cannot be guaranteed and failures may arise.) Part Name Parts No. -
Page 159: Cleaning
6. REGULAR MAINTENANCE Oki Data CONFIDENTIAL 6.2 Cleaning If necessary, users should use soft cloths and minitype cleaner to clean the inside and outside of the machine. Note! Don’t touch image drum terminals, LED lens array and LED head connector. -
Page 160: Cleaning Led Lens Array
6. REGULAR MAINTENANCE Oki Data CONFIDENTIAL 6.3 Cleaning LED lens array If there appear white vertical lines or white stripe (white defection, light printing), please clean your LED lens array. Note! Make sure to use soft tissues to clean the LED lens array. - Page 161 6. REGULAR MAINTENANCE Oki Data CONFIDENTIAL Cleaning LED head (4) Lightly wipe the lens (4 points) of the LED head with soft tissues. Note! Do not use solvents as methyl alcohol or thinner, as they might cause damage If there appear line breaks or white lines, or the letters and characters are blurred, please to the LED head.
-
Page 162: Cleaning The Paper Feed Roller
6. REGULAR MAINTENANCE Oki Data CONFIDENTIAL 6.4 Cleaning the Paper Feed Roller If there appear vertical lines on the printing side, please clean the pick-up roller. (2) Wipe the paper feed rollers inside the machine with a soft cloth lightly moistened with water. -
Page 163: Cleaning The Paper Feed Rollers For Mp Tray
6. REGULAR MAINTENANCE Oki Data CONFIDENTIAL 6.5 Cleaning the Paper Feed Rollers for MP Tray (3) Wipe the paper feed roller with a soft cloth lightly moistened with water. (1) Open the MP tray. Feed roller (4) Close the cover of the paper feed roller. -
Page 164: Cleaning Rollers In The Adf
6. REGULAR MAINTENANCE Oki Data CONFIDENTIAL 6.6 Cleaning Rollers in the ADF If the document feeding rollers in the ADF are contaminated with ink, toner particles or paper dust, documents and outputs get dirty and a paper jam may occur. To prevent this, it is recommended to clean the rollers once a month. -
Page 165: Cleaning The Document Glass
6. REGULAR MAINTENANCE Oki Data CONFIDENTIAL 6.7 Cleaning the Document Glass It is recommended to clean the document glass once a month to maintain image quality of the printouts. (1) Open the document glass cover. (2) Wipe the document holding pad, document glass and ADF document glass surface with a soft cloth lightly moistened with water. -
Page 166: Troubleshooting Procedures
Oki Data CONFIDENTIAL TROUBLESHOOTING PROCEDURES 7.1 Precautions prior to repair ............167 7.2 Items to be checked prior to taking action on abnormal images ..167 7.3 Precautions when taking action on abnormal images ....167 7.4 Preparations for troubleshooting ..........167 7.5 Troubleshooting method ..............168... -
Page 167: Precautions Prior To Repair
7. TROUBLESHOOTING PROCEDURES Oki Data CONFIDENTIAL 7.1 Precautions prior to repair (1) Confirm the basic check items indicated in the User's Manual. (2) Through hearing from the user, obtain information, as far in detail as possible, on the situation concerning the fault. -
Page 168: Troubleshooting Method
7. TROUBLESHOOTING PROCEDURES Oki Data CONFIDENTIAL 7.5 Troubleshooting method If a trouble occurs in the printer, search for it by the following procedure: 7.5.1 LCD messages list Problem Initializing & Shutdown generated Category Status Error Warning Description Code Problem is displayed... - Page 169 7. TROUBLESHOOTING PROCEDURES Oki Data CONFIDENTIAL Category Status Error Warning Description Category Status Error Warning Description Code Code Initializing Flash Memory Format Displays that Flash memory is Shutdown Shutdown in progress. It is shown that a unit is being formatted.
- Page 170 7. TROUBLESHOOTING PROCEDURES Oki Data CONFIDENTIAL Normal Category Status Error Warning Description Code Category Status Error Warning Description Code Normal 40828 Please check data. Indicates that writing of Message Data Write Error message data to be uploaded Normal 40988 PU downloading ...
- Page 171 7. TROUBLESHOOTING PROCEDURES Oki Data CONFIDENTIAL Category Status Error Warning Description Category Status Error Warning Description Code Code Normal 40967 Please check data. An error has happened Normal Please check data. Indicates that an error has Program Data Receive Error...
- Page 172 7. TROUBLESHOOTING PROCEDURES Oki Data CONFIDENTIAL Category Status Error Warning Description Category Status Error Warning Description Code Code Normal 40090 Error Postscript Interpreter detects an Normal 30114 Received invalid data. Invalid data was received. error due to the following 10827 Press the On-line switch reason.
- Page 173 7. TROUBLESHOOTING PROCEDURES Oki Data CONFIDENTIAL Category Status Error Warning Description Category Status Error Warning Description Code Code Normal 10818 Job Log Writing Error The log is not registered Normal Invalid Password Notifies that the entered correctly because of thr disc...
- Page 174 7. TROUBLESHOOTING PROCEDURES Oki Data CONFIDENTIAL Category Status Error Warning Description Category Status Error Warning Description Code Code Normal Status Mode Displays that normal Online Normal 10096 Data present. Un-printed data remains in mode starts. Buffer. Waiting for data to Data (Job) from an external follow.
- Page 175 7. TROUBLESHOOTING PROCEDURES Oki Data CONFIDENTIAL Category Status Error Warning Description Category Status Error Warning Description Code Code Normal 10056 File List printing ... Printing File Lists. Normal 10099 Print page %PAGES% No. of Collate printing. Indicates that printing of Copies %A%/%B% "Print page"...
- Page 176 7. TROUBLESHOOTING PROCEDURES Oki Data CONFIDENTIAL Category Status Error Warning Description Category Status Error Warning Description Code Code Normal 10099 Print page %PAGES% No. of Copy printing. Normal 10007 Deleting data. Indicates if JAM occurs Copies %A%/%B% "Print page" means the...
- Page 177 7. TROUBLESHOOTING PROCEDURES Oki Data CONFIDENTIAL Category Status Error Warning Description Category Status Error Warning Description Code Code Normal 10994 Preparing ... Executing Auto Density Normal 10863 <Scan To Mail/ Network PC Indicates that it is scanning of 10988 Adjustment.
- Page 178 7. TROUBLESHOOTING PROCEDURES Oki Data CONFIDENTIAL Category Status Error Warning Description Category Status Error Warning Description Code Code Normal Scan Pages sss Indicates that it is copying. Normal <Copy Screen> This screen is displayed Print Pages ppp sss: the number of current Please set next document.
- Page 179 7. TROUBLESHOOTING PROCEDURES Oki Data CONFIDENTIAL Category Status Error Warning Description Category Status Error Warning Description Code Code Normal Fax receiving ... Indicates that it is receiving Normal Fax calling ... Indicates that it is calling. fax data. %TXFAXNUMBER%: fax...
- Page 180 7. TROUBLESHOOTING PROCEDURES Oki Data CONFIDENTIAL Category Status Error Warning Description Category Status Error Warning Description Code Code Normal Fax sending ... Indicates that it is sending fax Normal 10878 Network communicating ... Indicates that the details of data. 10868 %STATUS% network communication.
- Page 181 7. TROUBLESHOOTING PROCEDURES Oki Data CONFIDENTIAL Category Status Error Warning Description Category Status Error Warning Description Code Code Normal 10875 Cancelling sending ... Indicates that E-mail sending Normal 10800 Speed Dial List printing ... Indicates that printing of fax is cancelling.
- Page 182 7. TROUBLESHOOTING PROCEDURES Oki Data CONFIDENTIAL Category Status Error Warning Description Category Status Error Warning Description Code Code Normal 10807 Check Message printing ... Indicates that printing of fax Normal This status is for confirming communication error report. the number of copy job.
- Page 183 7. TROUBLESHOOTING PROCEDURES Oki Data CONFIDENTIAL Category Status Error Warning Description Category Status Error Warning Description Code Code Normal Fax Store Doc. printing ... Printing Stored fax sending Normal An error occurred. Indicates that scanning has data. Scanning is pending.
- Page 184 7. TROUBLESHOOTING PROCEDURES Oki Data CONFIDENTIAL Warning PJL Status Category Error Warning Description Code PJL Status Category Error Warning Description Code Warning 10955 (Y) %COLOR% Toner Cartridge The Region ID of toner 10956 (M) Region Mismatch cartridge is not proper to...
- Page 185 7. TROUBLESHOOTING PROCEDURES Oki Data CONFIDENTIAL PJL Status PJL Status Category Error Warning Description Category Error Warning Description Code Code Warning 10979 Fuser Unit Near Life Notifies the fuser unit is Warning 10966 (Y) %COLOR% Toner Empty Notifies the toner is near its life.
- Page 186 7. TROUBLESHOOTING PROCEDURES Oki Data CONFIDENTIAL PJL Status PJL Status Category Error Warning Description Category Error Warning Description Code Code Warning 10053 Belt Reflex Error Belt Reflex Check Error. Warning 10885 Density Color Calibration Density Adjustment Color PU firmware does not Calibration Error.Error...
- Page 187 7. TROUBLESHOOTING PROCEDURES Oki Data CONFIDENTIAL PJL Status PJL Status Category Error Warning Description Category Error Warning Description Code Code Warning 10882 Density Black Sensor Error Density Adjustment Black Warning 10975 %COLOR% Low Density Error Density Adjustment ID Sensor Error.Error that ERROR;...
- Page 188 7. TROUBLESHOOTING PROCEDURES Oki Data CONFIDENTIAL PJL Status PJL Status Category Error Warning Description Category Error Warning Description Code Code Warning 10052 Registration Sensor Error When a color registration Warning 1090x %TRAY% missing. Indicates that paper trays <%CODE%> error is detected with the are not installed.
- Page 189 7. TROUBLESHOOTING PROCEDURES Oki Data CONFIDENTIAL PJL Status PJL Status Category Error Warning Description Category Error Warning Description Code Code 10760 (K) Warning Please install new K Toner Indicates that a waste Warning %COLOR% Cartridge. toner box represented by %COLOR% has become full and needs to be replaced.
- Page 190 7. TROUBLESHOOTING PROCEDURES Oki Data CONFIDENTIAL PJL Status Category Error Warning Description Code Warning 10756 Wait Timeout is disabled. Indicates that Print If your printer is connected to USB Timeout is disabled. port, it may become unable to print a job without via the USB port.
- Page 191 7. TROUBLESHOOTING PROCEDURES Oki Data CONFIDENTIAL Error (Enable to restore) PJL Status Error Warning Description Category Code PJL Status Error Warning Description Category Code Error 46012 Please close %TRAY%.: 430,440 Indicates that paper feed is unavailable in Error 10899 Erased Data Full...
- Page 192 40947 (K) but the group of signature 40910 (K) and the group of signature ID is proper (OKI regional Please see Help for details. ID is not proper (OEM Please see Help for details. mismatch). channel mismatch).
- Page 193 7. TROUBLESHOOTING PROCEDURES Oki Data CONFIDENTIAL PJL Status PJL Status Error Warning Description Error Warning Description Category Category Code Code Error 40907 (Y) %COLOR% Toner Cartridge The signature ID of Error 40944 (Y) %COLOR% Toner Cartridge The signature ID of toner...
- Page 194 7. TROUBLESHOOTING PROCEDURES Oki Data CONFIDENTIAL PJL Status PJL Status Error Warning Description Error Warning Description Category Category Code Code Error 40903 (Y) %COLOR% Toner Cartridge not The toner cartridge is not Error 40077 Paper Jam: 390 Paper Jam occurred 40904 (M) installed.: %ERRCODE%...
- Page 195 7. TROUBLESHOOTING PROCEDURES Oki Data CONFIDENTIAL PJL Status PJL Status Error Warning Description Error Warning Description Category Category Code Code Error 40997 (Y) Please install new Image Drum The life of the image drum Error 40970 Please change Belt Unit.: 355...
- Page 196 7. TROUBLESHOOTING PROCEDURES Oki Data CONFIDENTIAL PJL Status PJL Status Error Warning Description Error Warning Description Category Category Code Code Error 40992 Please check Fuser Unit.: 320 The fuser unit is not Error 40779 Lamp Error. Please call service. Indicates that the lamp correctly installed.
- Page 197 7. TROUBLESHOOTING PROCEDURES Oki Data CONFIDENTIAL PJL Status PJL Status Error Warning Description Error Warning Description Category Category Code Code Error Communication Error Indicates that the fax Error 40761 POP3 Login failed. Indicates that failed to receiving was failed. login in POP3 server.
- Page 198 7. TROUBLESHOOTING PROCEDURES Oki Data CONFIDENTIAL PJL Status PJL Status Error Warning Description Error Warning Description Category Category Code Code Error 40565 Document Jam At machine initial time Error 411yy Please install paper on MP Tray. Manual paper feed is...
- Page 199 7. TROUBLESHOOTING PROCEDURES Oki Data CONFIDENTIAL PJL Status PJL Status Error Warning Description Error Warning Description Category Category Code Code Error Memory Overflow Rx Indicates that the fax Error 32000 Disk Use Failed %FS_ERR% A disk error is occurred, Memory Overflow was...
- Page 200 7. TROUBLESHOOTING PROCEDURES Oki Data CONFIDENTIAL PJL Status PJL Status Error Warning Description Error Warning Description Category Category Code Code Error 482yy Tray Media Mismatch: The media type in the tray Error 480yy Tray Media Mismatch: The media type in the tray...
- Page 201 7. TROUBLESHOOTING PROCEDURES Oki Data CONFIDENTIAL PJL Status PJL Status Error Warning Description Error Warning Description Category Category Code Code Error 480yy Tray Media Mismatch: The size of paper or Error 40735 Memory Overflow Indicates that Memory %ERRCODE% media type in the tray...
- Page 202 7. TROUBLESHOOTING PROCEDURES Oki Data CONFIDENTIAL PJL Status PJL Status Error Warning Description Error Warning Description Category Category Code Code Error 40744 Changing data Transfer Type Indicates that the data The same type of status Error Memory Overflow failed. transfer type of FTP...
- Page 203 7. TROUBLESHOOTING PROCEDURES Oki Data CONFIDENTIAL Error (Disable to restore) PJL Status Error Warning Description Category Code PJL Status Error Warning Description Category Code Error Inspection is required. It is shown that PU PU Flash Error firmware has booted in...
- Page 204 7. TROUBLESHOOTING PROCEDURES Oki Data CONFIDENTIAL PJL Status PJL Status Error Warning Description Error Warning Description Category Category Code Code Power OFF and wait for a while.: 321 Error 40972 Motor Driver IC overheat Error 40057 Power OFF/ON A fatal error occurred.
- Page 205 7. TROUBLESHOOTING PROCEDURES Oki Data CONFIDENTIAL PJL Status PJL Status Error Warning Description Error Warning Description Category Category Code Code Error 40057 Power OFF/ON A fatal error occurred. Error 40057 Power OFF/ON Downloading Media Table %ERRCODE%:Error For more information, see %ERRCODE%:Download Error to PU has failed.
-
Page 206: Service Call List
7. TROUBLESHOOTING PROCEDURES Oki Data CONFIDENTIAL 7.5.2 Service Call List Display Cause Error details Measure Inspection is CU flash Turn off and on the required. memory error MFP. 041 : Error or CU board Is the error display provided Replace the CU/ PU... - Page 207 7. TROUBLESHOOTING PROCEDURES Oki Data CONFIDENTIAL Display Cause Error details Measure Display Cause Error details Measure Power OFF/ON Video error. Is the CU/PU board installed Reinstall it properly. Inspection is The 2nd tray Is the 2nd tray for the MFP Install proper 2nd tray.
- Page 208 7. TROUBLESHOOTING PROCEDURES Oki Data CONFIDENTIAL Display Cause Error details Measure Display Cause Error details Measure Inspection is LED head Is the LED head installed Install the LED head Inspection is Fuser unit Is the fuser unit installed Clean the connection required.
- Page 209 7. TROUBLESHOOTING PROCEDURES Oki Data CONFIDENTIAL Display Cause Error details Measure Display Cause Error details Measure Inspection is A fuser Turn off and on the Inspection is PU firmware An error occurred in re- Turn off and on the required.
- Page 210 7. TROUBLESHOOTING PROCEDURES Oki Data CONFIDENTIAL Display Cause Error details Measure Display Cause Error details Measure Inspection is SD card Power OFF/ON A lock error The image drum does not Be sure the image required. erasure error 923 : Error with black revolve properly.
-
Page 211: Fax Error List
7. TROUBLESHOOTING PROCEDURES Oki Data CONFIDENTIAL 7.5.3 Fax Error List Bit rate Value(Hex) Description(bps) Error Code is contained by 4 Hex values. The contents are as follows. 2400 Bit rate Termination code 4800 See Table.3 : Termination code 7200 See Table.2 : Bit rate... - Page 212 7. TROUBLESHOOTING PROCEDURES Oki Data CONFIDENTIAL Termination Cpde List Value Description (Hex) Value Description (Hex) T1 timeout after EOM (T1 timeout after EOM receiving) NORMAL (Ended normally) Invalid CSI error (Dialing numbers didn't match with ID of the machin on the other end in confirmation sending.)
-
Page 213: Preparing For Troubleshootin
(1-1) LCD displays nothing ................. 214 (8-5) Paper is not supplied from the Duplex unit to the regist roller..... 237 (1-2) Display of OKI logo ................215 (9) Paper size error (error code 400) ..............238 (1-3) Error message display ............... 215 (9-1) Jam occurs when paper end is located near the IN1 sensor. -
Page 214: Oki Data Confidential
7. TROUBLESHOOTING PROCEDURES Oki Data CONFIDENTIAL 7.5.4.(1) LCD Display Trouble Check item Checking Action in case of fail (1-1) LCD displays nothing (1-1-3) Checking power supplies AC power supplied to the Check the supplied voltage from Supply AC power. Check item... -
Page 215: Display Of Oki Logo
7. TROUBLESHOOTING PROCEDURES Oki Data CONFIDENTIAL (1-2) Display of OKI logo 7.5.4.(2) Abnormal MFP operation after powered on (2-1) No operation Check item Checking Action in case of fail Check item Checking Action in case of fail (1-2-1) Operation panel display does not change. -
Page 216: Abnormal Sound
7. TROUBLESHOOTING PROCEDURES Oki Data CONFIDENTIAL (2-2) Abnormal sound Check item Checking Action in case of fail Check item Checking Action in case of fail (2-2-4) Checking cable wiring (2-2-1) Checking for loss of synchronization of motor (driver failure) Cable wiring around cooling Check whether a cable touches Lay the cable properly. -
Page 217: Abnormal Odor
7. TROUBLESHOOTING PROCEDURES Oki Data CONFIDENTIAL (2-3) Abnormal odor (3) Error number and jam location at paper jam Name Reference Corresponding Jam release method Confirmation Items Confirmation Tasks Action at NG Feed (front cover jam) IN2, WR Jam release method (2-3-1) Locate the position with abnormal odor occurred. - Page 218 7. TROUBLESHOOTING PROCEDURES Oki Data CONFIDENTIAL Cleaning Paper Jam (4) Hold the handles (blue) of the image drum unit with both hands and lift it out of the machine, and then place it on a flat surface. Warning Cover the image drum unit with black paper or a black bag.
- Page 219 7. TROUBLESHOOTING PROCEDURES Oki Data CONFIDENTIAL (7) Hold the fuser unit handle and lift the fuser unit out of the MFP . (10) Push the locking levers on each side of the fuser unit to the "lock" position. handle (8) Remove any jammed paper in the direction of the arrow.
- Page 220 7. TROUBLESHOOTING PROCEDURES Oki Data CONFIDENTIAL (4) Hold the handles (blue) of the image drum unit with both hands and lift it out of the (6) Turn the lock lever on each side of the belt unit toward you, hold the lock levers with MFP , and then place it on a flat surface.
- Page 221 7. TROUBLESHOOTING PROCEDURES Oki Data CONFIDENTIAL (8) Hold the lock levers on each side of the belt unit with both hands and place it into Error Code 380, 390 the MFP . (1) Remove any documents from the document tray.
- Page 222 7. TROUBLESHOOTING PROCEDURES Oki Data CONFIDENTIAL (6) Hold jammed paper by the top edge, and gently pull it out. Error Code 381, 382, 385 (1) Remove any documents from the document tray. (2) Open the scanner unit. (3) Press the top cover open button and open the top cover.
- Page 223 7. TROUBLESHOOTING PROCEDURES Oki Data CONFIDENTIAL (5) Remove any paper from the belt unit. (8) While pushing the jam release lever of the fuser unit, gently pull jammed paper directly outward. (6) Pull the locking levers on each side of the fuser unit to the "unlock" position.
- Page 224 7. TROUBLESHOOTING PROCEDURES Oki Data CONFIDENTIAL Error Code 389 (5) Remove any jammed paper in the direction of the arrow. (1) Remove any documents from the document tray. (2) Open the scanner unit. (3) Press the top cover open button and open the top cover.
-
Page 225: Document Jam
7. TROUBLESHOOTING PROCEDURES Oki Data CONFIDENTIAL Error Code 391, 392 Document Jam Note! The following images use tray 1 as an example, but the same procedure In the Duplex Paper Path applies to tray 2. (1) While opening the ADF cover, pull out the document from the duplex paper path. - Page 226 7. TROUBLESHOOTING PROCEDURES Oki Data CONFIDENTIAL (3) Hold jammed document by the top edge, and gently pull it out. If the edge of the document cannot be seen in the ADF, lift the document tray and then pull out the document.
-
Page 227: Paper Feed Jam (Error Code 391: 1St Tray)
7. TROUBLESHOOTING PROCEDURES Oki Data CONFIDENTIAL 7.5.4. (3) Paper feed jam (error code 391: 1st tray) (3-2) Jam occurs immediately after the paper feed is started. (1st tray) (3-1) Jam occurs immediately after the power is turned on. (1st tray) - Page 228 7. TROUBLESHOOTING PROCEDURES Oki Data CONFIDENTIAL Check item Check operation Actions for NG Check item Check operation Actions for NG results results (3-2-4) Check the system connection (3-2-6) Check the system connection Paper feed motor Check the connection condition of the cable.
-
Page 229: Feed Jam (Error Code 380)
7. TROUBLESHOOTING PROCEDURES Oki Data CONFIDENTIAL 7.5.4. (4) Feed jam (error code 380) (4-2) Jam occurs immediately after the paper feed is started. (4-1) Jam occurs immediately after the power is turned on. Check item Check operation Actions for NG... -
Page 230: Paper Feed Jam (Error Code 390: Multipurpose Tray)
7. TROUBLESHOOTING PROCEDURES Oki Data CONFIDENTIAL 7.5.4. (5) Paper feed jam (error code 390: Multipurpose tray) Check item Check operation Actions for NG (5-1) Jam occurs immediately after the power is turned on. (Multipurpose tray) results (4-2-4) Check the system connection... -
Page 231: Jam Occurs Immediately After Paper Feed Is Started
7. TROUBLESHOOTING PROCEDURES Oki Data CONFIDENTIAL (5-2) Jam occurs immediately after paper feed is started. (Multipurpose tray) Check item Check operation Actions for NG results Check item Check operation Actions for NG (5-2-3) Motor operation check results Paper feed motor... -
Page 232: Paper Running Jam (Error Code 381:)
7. TROUBLESHOOTING PROCEDURES Oki Data CONFIDENTIAL 7.5.4. (6) Paper running jam (error code 381:) (6-2) Jam occurs immediately after a paper is taken into printer. (6-1) Jam occurs immediately after the power is turned on. Check item Check operation Actions for NG... -
Page 233: Jam Occurs In The Middle Of Paper Running Path
7. TROUBLESHOOTING PROCEDURES Oki Data CONFIDENTIAL (6-3) Jam occurs in the middle of paper running path. Check item Check operation Actions for NG results Check item Check operation Actions for NG (6-2-4) Check the system connection results Feed motor driving Check the connection condition of the cables. -
Page 234: Jam Occurs Immediately After Paper Has Reached The Fuser
7. TROUBLESHOOTING PROCEDURES Oki Data CONFIDENTIAL (6-4) Jam occurs immediately after paper has reached the fuser. 7.5.4. (7) Paper unloading jam (error code 382) (7-1) Paper unloading jam occurs immediately after the power is turned on. Check item Check operation... -
Page 235: Paper Unloading Jam Occurs After A Paper Is Taken Into Printer
7. TROUBLESHOOTING PROCEDURES Oki Data CONFIDENTIAL (7-2) Paper unloading jam occurs after a paper is taken into printer. Check item Check operation Actions for NG results Check item Check operation Actions for NG (7-2-3) Motor operation check results Fuser motor... -
Page 236: Paper Unloading Jam Occurs In The Middle Of Paper Running Path
7. TROUBLESHOOTING PROCEDURES Oki Data CONFIDENTIAL (7-3) Paper unloading jam occurs in the middle of paper running path. Check item Check operation Actions for NG results Check item Check operation Actions for NG (8-1-2) Check condition of the mechanical parts... -
Page 237: Two-Sided Printing Jam Occurs In The Process Of Reversing Paper
7. TROUBLESHOOTING PROCEDURES Oki Data CONFIDENTIAL (8-4) Two-sided printing jam occurs during transporting paper inside the Duplex unit. Check item Check operation Actions for NG results Check item Check operation Actions for NG (8-2-3) Check condition of the paper running path... -
Page 238: Paper Size Error (Error Code 400)
7. TROUBLESHOOTING PROCEDURES Oki Data CONFIDENTIAL 7.5.4. (9) Paper size error (error code 400) 7.5.4. (10) ID unit Up/Down error (Service call 142) (10-1) Error occurs during the Up movement of the ID unit (9-1) Jam occurs when paper end is located near the IN1 sensor. -
Page 239: Error Occurs During The Down Movement Of The Id Unit
7. TROUBLESHOOTING PROCEDURES Oki Data CONFIDENTIAL 7.5.4. (11) Fuser unit error (error 170 to 177) Check item Check operation Actions for NG (11-1) Error occurs immediately after the power is turned on. results (10-1-3) Sensor check Check item Check operation... -
Page 240: Error Occurs Approx. 1 Minute After The Power Is Turned On
7. TROUBLESHOOTING PROCEDURES Oki Data CONFIDENTIAL (11-2) Error occurs approx. 1 minute after the power is turned on. Check item Check operation Actions for NG results Check item Check operation Actions for NG (11-2-2) Temperature increase of fuser unit results... -
Page 241: Motor Fan Error (Error Code 122, 128)
7. TROUBLESHOOTING PROCEDURES Oki Data CONFIDENTIAL 7.5.4. (12) Motor fan error (error code 122, 128) 7.5.4. (13) Print speed is slow. (Performance is low.) (12-1) The low voltage power supply fan does not rotate immediately after the power is (13-1) Print speed decreases. -
Page 242: Led Head Cannot Be Recognized. (Error Code 131, 132, 133, 134)
7. TROUBLESHOOTING PROCEDURES Oki Data CONFIDENTIAL 7.5.4. (16) Toner cartridge cannot be recognized. (error code 540, 541, 542, 543) Check item Check operation Actions for NG results (16-1) Error caused by the consumable items. (14-1-3) Check the control signals. Check item... -
Page 243: Error Caused By The Defective Mechanism
7. TROUBLESHOOTING PROCEDURES Oki Data CONFIDENTIAL Note! Toner sensor operation check method using the SWITCH SCAN function of (16-3) Error caused by the defective mechanism the self-diagnostic mode. Check item Check operation Actions for NG (1) How to check operation of the toner sensor at the printer side. -
Page 244: Humidity Sensor Error (Error Code 123)
7. TROUBLESHOOTING PROCEDURES Oki Data CONFIDENTIAL 7.5.4. (18) Humidity sensor error (error code 123) Check item Check operation Actions for NG results (18-1) Humidity sensor error (18-1-2) Environment condition Check item Check operation Actions for NG Sharp change Is the environment condition changed sharply... -
Page 245: Connection Diagram
7. TROUBLESHOOTING PROCEDURES Oki Data CONFIDENTIAL Density Seneor 7.5.4.(19) Connection diagram Photo Interrupter Dup Rear PCB-IBB ColorReg Seneor Photo Interrupter Belt Fuse Dup Front PCB-EOE LED1 LED2 Belt Thermistor Film-FG SW5 SW6 REAR Cover SW3 SW4 Photo Interrupter EXIT Y LED HEAD... -
Page 246: Image Problem Troubleshooting
7. TROUBLESHOOTING PROCEDURES Oki Data CONFIDENTIAL 7.5.5 Image Problem Troubleshooting (1) Color is faint and fades across pages (see Fig. 7-2 A)......... 247 (1-1) Color is faint and fades............... 247 (2) The white area of printed pages is dirty (see Fig. 7-2 B)......248 (2-1) The white area of printed pages is dirty (partially). -
Page 247: Color Is Faint And Fades Across Pages (See Fig. 7-2 A)
7. TROUBLESHOOTING PROCEDURES Oki Data CONFIDENTIAL 7.5.5 (1) Color is faint and fades across pages (see Fig. 7-2 A). Check item Check operation Actions for NG results (1-1) Color is faint and fades. (1-1-4) High-voltage terminal Check item Check operation... -
Page 248: The White Area Of Printed Pages Is Dirty (See Fig. 7-2 B)
7. TROUBLESHOOTING PROCEDURES Oki Data CONFIDENTIAL 7.5.5 (2) The white area of printed pages is dirty (see Fig. 7-2 B). Check item Check operation Actions for NG results (2-1) The white area of printed pages is dirty (partially). (2-1-2) Fuser unit... -
Page 249: The White Area Of Printed Pages Is Dirty (All Over)
7. TROUBLESHOOTING PROCEDURES Oki Data CONFIDENTIAL (2-2) The white area of printed pages is dirty (all over). 7.5.5 (3) Printed pages are blank (see Fig. 7-2 C). (3-1) A printed pages are entirely blank. Check item Check operation Actions for NG... -
Page 250: Vertical Lines Are Produced In Printed
7. TROUBLESHOOTING PROCEDURES Oki Data CONFIDENTIAL 7.5.5(4) Vertical lines are produced in printed pages. Check item Check operation Actions for NG (4-1) Fine lines (colored) (see Fig. 7-2 D) results (3-1-3) High-voltage terminal Check item Check operation Actions for NG... -
Page 251: Print Quality Problems Appear Periodically (See Fig. 7-2 E)
7. TROUBLESHOOTING PROCEDURES Oki Data CONFIDENTIAL 7.5.5 (5) Print quality problems appear periodically (see Fig. 7-2 E). 7.5.5 (6) Color misregistration is significant. (6-1) The message “Adjusting color” displayed at power on stays for a short time. (5-1) Print quality problems appear vertically and periodically. -
Page 252: Black Filled-In Printing
7. TROUBLESHOOTING PROCEDURES Oki Data CONFIDENTIAL 7.5.5 (7) Black filled-in printing 7.5.5 (8) Color jobs are printed in monochrome, not in color. (7-1) Printed pages are filled-in black entirely. (8-1) False setting of the limited-color printing menu Check item Check operation... -
Page 253: Response After Flash Compulsive Initialization
7. TROUBLESHOOTING PROCEDURES Oki Data CONFIDENTIAL 7.5.6 Response after Flash compulsive initialization 7.5.7 Copy Image Abnormality Error Troubleshooting • When the following symptom occurs in the copy image, implement the inspection and Explain the response after compulsive initialization is performed with trouble occurred in adjustment of the copy image. - Page 254 7. TROUBLESHOOTING PROCEDURES Oki Data CONFIDENTIAL 4. Scanner inspection and adjustment accordance with the following table. Perform inspection of the scanner based on the NG judgment result using the "Field Scanner Inspection Scanner Adjustment Checker" tool. Step STEP 1, 2, 3...
-
Page 255: Network Troubleshooting
7. TROUBLESHOOTING PROCEDURES Oki Data CONFIDENTIAL 7.5.8 Network Troubleshooting (1) Cannot print from Utility. Confirmation Items Confirmation Tasks Action at NG (1) Checo the LINK iamp. Check whether LINK lamp Check whether HUB and printer Reconnect the network (green) is lighted. -
Page 256: Fuse Checking
7. TROUBLESHOOTING PROCEDURES Oki Data CONFIDENTIAL 7.6 Fuse Checking Table 7-6 MC561/MC361/MC351 Fuse Errors Fuse Name Error Description Insert Point Resistance CU/PU board Service Call 128 Front fan, hopping motor, (CLP board) Error08 registaration clutch, hopping clutch, MPT clutch, Duplex clutch... -
Page 257: Connection Diagrams
Oki Data CONFIDENTIAL CONNECTION DIAGRAMS 8.1 Check of resistance values ............258 8.2 Layout of parts ................262 8.3 Firmware revision numbers ............275... -
Page 258: Check Of Resistance Values
8. CONNECTION DIAGRAMS Oki Data CONFIDENTIAL 8.1 Check of resistance values Unit Circuit diagram and composition Part drawing Resistance value Between pins 1 and 2: 3.4 Transport belt motor Between pins 3 and 4: 3.4 ID motor Both ends of IP2: 1... - Page 259 8. CONNECTION DIAGRAMS Oki Data CONFIDENTIAL Unit Circuit diagram and composition Part drawing Resistance value Fuser motor Both ends of IP1: 1 or less Between pins 1 and 2: 3.4 Feed motor Between pins 3 and 4: 3.4 Between pins 1 and 2: 3.4 2nd feed motor Between pins 3 and 4: 3.4...
- Page 260 8. CONNECTION DIAGRAMS Oki Data CONFIDENTIAL Unit Circuit diagram and composition Part drawing Resistance value Between pins 1 and 2: 3.4 ADF motor Between pins 3 and 4: 3.4 Between pins 1 and 2: 14 FB motor Between pins 3 and 4: 14 260 / 44473001TH Rev.1...
- Page 261 8. CONNECTION DIAGRAMS Oki Data CONFIDENTIAL Unit Circuit diagram and composition Part drawing Resistance value Upper roller heater #1 Between pins 1 and 2: Several ohms to several tens of ohms Between pins 3 and 4: Several ohms to several tens of ohms Upper roller heater #2 Between pins A1 and A2: Approx.
-
Page 262: Layout Of Parts
8. CONNECTION DIAGRAMS Oki Data CONFIDENTIAL 8.2 Layout of parts (1) Print engine controller PCB (PU PCB) MC561 Component side INTH DUPR YHEAD MHEAD CHEAD KHEAD DTNR C104 C105 C106 MFPIF C103 R238 R239 R240 R241 R232 IC21 SNSLD R209... - Page 263 8. CONNECTION DIAGRAMS Oki Data CONFIDENTIAL Soldering side C682 C683 BF508 C638 C661 R639 C637 R636 C625 C627 C618 C619 C610 C592 C589C588 C701 R758 C700 C700 C699 R793 R777 R755 R738 R737 R736 R735 R734 R796 R778 R723 R720...
- Page 264 8. CONNECTION DIAGRAMS Oki Data CONFIDENTIAL MC361/MC351 Component side DUPR INTH YHEAD MHEAD CHEAD KHEAD DTNR C104 C105 C106 MFPIF C103 R238 R239 R240 R241 R232 IC21 SNSLD R209 TEST27 R201 TEST25 TEST28 C100 C102 C101 IC19 R198 TEST24 TEST26...
- Page 265 8. CONNECTION DIAGRAMS Oki Data CONFIDENTIAL Soldering side C682 C683 BF508 C638 C661 R639 C637 R636 C625 C627 C618 C619 C610 C592 C589C588 C701 R758 C700 C700 C699 R793 R755 R777 R738 R737 R736 R735 R734 R796 R778 R723 R720...
- Page 266 8. CONNECTION DIAGRAMS Oki Data CONFIDENTIAL (2) Second tray control PCB Component side Soldering side MAIN1 D510 FET502 R542 R541 C535 R544 MAIN2 R543 R501 J520 R511 J503 R506 Q502 R557 C519 R556 TR502 C518 R555 C517 R554 C516 R553...
- Page 267 8. CONNECTION DIAGRAMS Oki Data CONFIDENTIAL (3) Control panel PCB (4) Toner sensor PCB MC561/MC361/MC351 LED5 LED6 SNS2 LED7 LED8 IDFUSE FUCUT_PWR CSNS 267 / 44473001TH Rev.1...
- Page 268 8. CONNECTION DIAGRAMS Oki Data CONFIDENTIAL (5) Waste toner sensor PCB (6) Color adjustment sensor PCB 268 / 44473001TH Rev.1...
- Page 269 8. CONNECTION DIAGRAMS Oki Data CONFIDENTIAL (7) High-voltage power supply PCB JP105 JP106 JP107 CH-M CH-C CH-Y CH-K DB-M SB-M DB-C SB-C DB-Y SB-Y DB-K SB-K JP100 JP103 JP102 JP101 JP95 JP98 JP99 JP97 JP94 JP96 JP92 JP93 JP87 JP90...
- Page 270 8. CONNECTION DIAGRAMS Oki Data CONFIDENTIAL (8) Low-voltage power supply PCB (9) ID unit ID unit (for consumables) Contact point Fuse Toner-low sensor PCB (PRZ PCB) ID unit Contact point 270 / 44473001TH Rev.1...
- Page 271 8. CONNECTION DIAGRAMS Oki Data CONFIDENTIAL (10) Transfer belt unit Transfer belt unit (for consumables) Contact point Fuse Relay PCB Contact point Transfer belt unit Fuse 271 / 44473001TH Rev.1...
- Page 272 8. CONNECTION DIAGRAMS Oki Data CONFIDENTIAL (11) Scanner Main PCB MC561/MC361/MC351 Component side R182 R178 R174 R170 R165 R159 CP21 CP20 C116 C117 R239 BF16 BF15 IC22 IC18 CP18 IC21 C127 R181 IC20 R187 C124 R177 R179 C123 R173 R180...
- Page 273 8. CONNECTION DIAGRAMS Oki Data CONFIDENTIAL Soldering side C709 C685 C686 C675 C673 R685 C674 C672 R710 R676 BF506 C668 R680 R679 Q512 R677 Q511 C669 R670 R669 R667 BF507 C664 C708 R668 C665 C657 C656 C654 R653 BF508 R675...
- Page 274 8. CONNECTION DIAGRAMS Oki Data CONFIDENTIAL (12) ADF Relay PCB (13) FAX PCB (Over sea) MC561/MC361/MC351 MC561/MC361 SNSIE MOTIF SNS4 SNS3 SNS1 SNS2 274 / 44473001TH Rev.1...
-
Page 275: Firmware Revision Numbers
8. CONNECTION DIAGRAMS Oki Data CONFIDENTIAL 8.3 Firmware revision numbers (2) Scanner ROM 8.3.1 ROM control numbers MC561/MC361/MC351 (1) Printer ROM ROM-FD ROM-FD Firmware MC561/MC361/MC351 Date of issue Notes revision no. drawing no. revision no. For BETA2 ROM-FD ROM-FD Firmware... -
Page 276: Checking And Indication Of The Revision Number
[Maintenance Series No. Board Series No.] Sample 1 Revision 1 444240 [21] CLP (44601504) CLP-4 maintenance board for MC561 (ODA) 444240 [22] CLP (44601504) CLP-4 maintenance board for MC561 (OEL) CLP-4 maintenance board for CX2731 MFP 444240 [25] CLP (44601504)
Need help?
Do you have a question about the MC561 and is the answer not in the manual?
Questions and answers