
Related Manuals for Oki MC352


Summary of Contents for Oki MC352
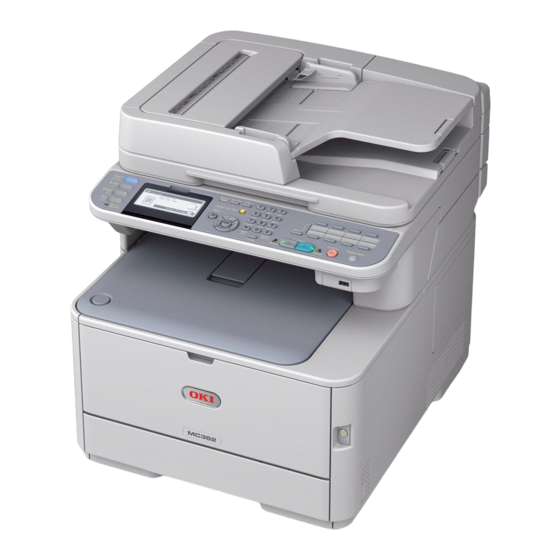
- Page 1 Start-up Guide This guide supports the following models: MC352, MC362, MC562, ES3452 MFP, ES5462 MFP...
-
Page 2: Preface
All rights reserved by Oki Data Corporation. No part of this document may be reproduced in any form or by any means without prior written permission from Oki Data Corporation. -
Page 3: Emergency First Aid
4-11-22 Shibaura, Minato-ku, Tokyo 108-8551, Japan For all sales, support and general enquiries contact your local distributor. IMPORTER TO THE EU/AUTHORISED REPRESENTATIVE OKI Europe Limited (trading as OKI Printing Solutions) Blays House Wick Road Egham Surrey, TW20 0HJ United Kingdom For all sales, support and general enquiries contact your local distributor. -
Page 4: For Your Safety
● For Your Safety ● Read the Start-up Guide (this guide) and User’s Guide for your safety before using the product. Cautions related to safety Indicates the presence of a hazard for which not following the instructions noted may result WARNING in serious injury or death. -
Page 5: Table Of Contents
Table of Contents PREFACE ....................2 EMERGENCY FIRST AID ................3 MANUFACTURER ..................3 IMPORTER TO THE EU/AUTHORISED REPRESENTATIVE ........3 ENVIRONMENTAL INFORMATION ...............3 For Your Safety ..................4 About This Guide ..................8 Machine Setup ..............10 Names of Components ................10 Machine ......................... 10 Operator Panel ....................... - Page 6 Table of Contents Faxing (For MC362, MC562, ES5462 MFP only) ....24 Initial Setup for Faxing ................25 Step 1 Setting Country Code ..................25 Step 2 Connecting a Telephone Line ................26 Connecting to a Public Line (Connecting for Fax Only) ............26 Connecting to a Public Line (Connecting for Fax and Telephone) ..........
- Page 7 Table of Contents Scanning ................49 Scanning to E-mail ................49 Initial Setup for Scan to E-mail ................. 49 Step 1 Configuring the Network Settings of Your Machine ............49 Step 2 Configuring the E-mail Settings of Your Machine ............53 Procedure of Scan to E-mail ..................
-
Page 8: About This Guide
● About This Guide ● Terms in this document The following terms are used in this guide: Note ● Indicates important information on operations. Please ensure you read these. Memo ● Indicates additional information on operations. It is recommended that this be read. Reference ●... - Page 9 Notation used in this guide The following notations may be used in this manual. ● PostScript3 Emulation → PSE, POSTSCRIPT3 Emulation, POSTSCRIPT3 EMULATION ® ® 7 64-bit Edition operating system → Windows 7 (64bit version) * ● Microsoft Windows ® ®...
-
Page 10: Machine Setup
1 Machine Setup This chapter explains the initial setup for the machine, including the names of the machine components, how to unpack and install the machine, how to turn on/off the machine, and how to load paper into tray 1. ●... - Page 11 Names of Components LINE TEL Name Faceup stacker AC power socket Air vents LINE connection (for MC362/MC562/ES5462 MFP only) TEL connection (for MC362/MC562/ES5462 MFP only) Name Network interface connection USB interface connection SD memory card slot (for MC562/ES5462 MFP only) - 11 -...
-
Page 12: Operator Panel
Names of Components Operator Panel The following shows the names of the components of the operator panel. Reference ● For the details on the functions of each component, refer to the User’s Guide > “Introduction” > “Control panel”. Name Display screen Main function keys <COPY>... -
Page 13: Installing Your Machine
Installing Your Machine ● Installing Your Machine ● This section explains how to unpack and install the machine. Installation Requirements Installation Space Install your machine on a flat surface that is This section explains the required environment wide enough to accommodate the machine. and space for machine installation. -
Page 14: Unpacking And Installing Your Machine
Installing Your Machine Remove the protection tapes (2) at the Unpacking and Installing Your top and sides of your machine, and take Machine out cushioning materials (3). This section explains how to unpack and install the machine. Note ● The image drum is very delicate. Handle it carefully. ●... - Page 15 Installing Your Machine Remove the protection tapes (6). Press the top cover open button (8) and open the top cover. Open the ADF and remove the protection tapes. Remove the protective sheets (9). Close the document glass cover. Now, you can open or close the scanner. Open the scanner unit.
-
Page 16: Available Options
Installing Your Machine While pushing the right side of the toner Available Options cartridge, quickly slide the blue lock (12) to the left side to lock it. The following option is available for your Slide the locks on all 4 toner cartridges. machine: ●... -
Page 17: Turning Your Machine On And Off
Installing Your Machine Turning Your Machine On and There is a risk of electric WARNING shock and/or fire. ● Be sure to turn off the power switch when This section explains how to turn the machine on attaching or removing the AC cable and earth wire. -
Page 18: Turning On Your Machine
Installing Your Machine Turning On Your Machine Turning Off Your Machine Plug the AC cord into the AC power Hold down the power switch for socket of your machine. approximately one second. Note Plug the AC cord into the electric socket. ●... -
Page 19: Loading Paper
Installing Your Machine Loading Paper Your machine has two built-in trays (tray 1 and MP tray) and an optional tray (tray 2). This section explains the supported paper and capacity of tray 1 and how to load paper into the tray 1. After you load paper, you need to register the loaded paper on your machine. -
Page 20: Step 2 Configuring The Settings For Tray 1
Installing Your Machine Flex paper back and forth, and then fan Press the to select [Paper Setup] and it. Straighten the edges of the paper then press stack on a level surface. Check that [Tray 1] is selected and then Load paper with the print side face press down. -
Page 21: Printing Configuration
Printing Configuration ● Printing Configuration ● This section explains how to print the Configuration on which you can check the detailed information of your machine, such as the settings and status of your machine. When you finished the initial setup, follow the procedure below to confirm that the machine is properly installed. -
Page 22: Copying
2 Copying This chapter explains the basic operation for your machine’s copy function. Starting a Copy Job ● Document Glass Place the document face down and align its top edge to the upper-left corner of the glass. Memo ● The following procedure uses the factory default settings. Press the <COPY>... - Page 23 Starting a Copy Job Press to start copying. OLOR Memo ● You can cancel the operation by pressing the <STOP> key on the operator panel until the message showing the copy completion is displayed. Reference ● To load a landscape document, refer to the User’s Guide > “Operation”...
-
Page 24: Faxing (For Mc362, Mc562, Es5462 Mfp Only)
3 Faxing (For MC362, MC562, ES5462 MFP only) This chapter explains the initial setup, such as how to set the country code, connect a telephone line and configure the basic settings, and basic procedure for the Fax and Fax from Computer functions. Your machine supports the following functions regarding fax. -
Page 25: Initial Setup For Faxing
Initial Setup for Faxing ● Initial Setup for Faxing ● This section explains the initial setup necessary for the Fax and Fax from Computer functions. To set up the machine for the Fax and Fax from Computer functions, follow the 3 steps below: ●... -
Page 26: Step 2 Connecting A Telephone Line
Initial Setup for Faxing Press the to select [Fax Setup] and Step 2 Connecting a then press Telephone Line Press the to select [Fax Setting] and This section explains how to connect a telephone then press line for faxing. Be sure to connect the telephone line depending on your environment before you Press the to select [Country Code]... -
Page 27: Connecting To A Public Line (Connecting For Fax And Telephone)
Initial Setup for Faxing Plug one end of the [Telephone cable] Remove the [Telephone connector into the [LINE connection] of your cover]. machine and the other end into the [Public Line (Analog)]. LINE connection Telephone connector cover Plug the external telephone’s cable into the [TEL connection] of your machine. -
Page 28: Connecting To An Adsl Environment
Initial Setup for Faxing Connecting to an ADSL Environment Connecting to an IP Telephone Note Note ● Do not connect with USB cable or LAN cable at this point. ● Do not connect with USB cable or LAN cable at this point. First, check that the machine is turned off. -
Page 29: Connecting To A Cs Tuner Or Digital Television
Initial Setup for Faxing Connecting to a CS Tuner or Digital Connecting to a PBX, Home Television Telephone or Business Phone Note Note ● Do not connect with USB cable or LAN cable at this point. ● Do not connect with USB cable or LAN cable at this point. First, check that the machine is turned off. -
Page 30: Connecting As An Internal Telephone
Initial Setup for Faxing Connecting as an Internal Telephone Step 3 Configuring Basic Settings Note ● Do not connect with USB cable or LAN cable at this point. This section explains how to configure the basic First, check that the machine is turned off. If settings on the machine for the fax function. -
Page 31: Step 3-2 Setup Of Date/Time
Initial Setup for Faxing Press the to select [Admin Setup], Press the until the top screen is and press displayed. Step 3-2 Setup of Date/Time Set up Date/Time of your region. Press the <SETTING> key on the operator panel. Enter the administrator password. The factory default password is “aaaaaa”. - Page 32 Initial Setup for Faxing Press the to select the current Press , , to select the date and then press character you want, and then press To move to the next box, press the Press the to select the current time and then press To move to the next box, press the - The selected character is entered as “*”...
-
Page 33: Step 3-3 Specifying Sender Information
Initial Setup for Faxing Step 3-3 Specifying Sender Press , , to select the Information character you want, and then press Specify the fax number and sender name for your machine. The information specified here is printed on the top of the faxes you sent from the machine. -
Page 34: Step 3-4 Pbx Connecting
Initial Setup for Faxing Step 3-4 PBX Connecting Enter the fax number of your machine with the ten-key pad. When connecting to PBX (internal exchange), set [PBX Line] to [ON]. Press the <SETTING> key on the operator panel. Press the to select [Admin Setup] and then press Check that [Enter] is selected and then... -
Page 35: Step 3-5 Setting For Super G3
Initial Setup for Faxing Step 3-5 Setting for Super G3 - The selected character is entered as “*” in the text field. If you cannot send or receive faxes correctly - If you have entered an incorrect value, when the machine is connected to the ADSL press the <CLEAR>... -
Page 36: Step 3-6 Specifying Reception Mode
Initial Setup for Faxing Step 3-6 Specifying Reception Mode - The selected character is entered as “*” in the text field. The optimal reception mode differs depending - If you have entered an incorrect value, on your machine’s environment. Check with the press the <CLEAR>... - Page 37 Initial Setup for Faxing Press , , to select the character you want, and then press - The selected character is entered as “*” in the text field. - If you have entered an incorrect value, press the <CLEAR> key and then enter the correct value.
-
Page 38: Faxing
Faxing ● Faxing ● This section explains the basic procedure for the Fax function. The Fax function enables you to scan documents and transmit them as faxes or receive faxes via a telephone line. Be sure to finish the initial setup before using this function. Procedure for Fax ●... -
Page 39: Operator Panel
Faxing Check that [Add Destination] is Press to start transmission. selected on the start screen and then Note press ● You cannot use the button. OLOR ● If the <STATUS> key is pressed and is pressed twice, the information is displayed on the display screen. -
Page 40: Receiving A Fax
Faxing Printing Received Faxes Receiving a Fax The machine automatically prints out the This section explains how your machine behaves received fax. By factory default, tray 1 is set to when the machine whose reception mode is set be used. to [Fax Ready Mode] is receiving and printing Note faxes. -
Page 41: Faxing From A Computer (For Windows)
Faxing from a Computer (For Windows) ● Faxing from a Computer (For Windows) ● This section explains how to install a fax driver and the basic procedure of sending a fax from a computer. The fax driver allows you to send faxes directly from your computer to a destination via the machine without printing the document. - Page 42 Faxing from a Computer (For Windows) Prepare an Ethernet cable and a hub. Plug the other end of the Ethernet cable into the hub. Prepare an Ethernet cable (category 5, twisted pair, straight) and a hub separately. Hold down the power switch for approximately one second to turn off the power.
- Page 43 Faxing from a Computer (For Windows) Enter the IP address using the ten-key Press , , to select the pad, and press character you want, and then press - The selected character is entered as “*” in the text field. - If you have entered an incorrect value, press the <CLEAR>...
- Page 44 Faxing from a Computer (For Windows) Press the <SETTING> key on the Select the device of your machine, and operator panel. then click [Next]. Check that [Reports] is selected and press Press the to select [System] and Read the license agreement and then press click [I Agree].
- Page 45 If a printer driver for the machine is already installed, the OKI MC562 icon may represent device search. these drivers. In this case, right-click the OKI MC562 icon and select one of the menu items, and then check that the fax driver is displayed in the submenu.
-
Page 46: For Usb Connection
Faxing from a Computer (For Windows) „ For USB Connection Click [Run Setup.exe] after [AutoPlay] is displayed. Follow the procedure below to connect a USB If the [User Account Control] dialog box is cable and install a fax driver on your computer. displayed, click [Yes]. - Page 47 Faxing from a Computer (For Windows) Click the Install button on the [FAX When the instruction to connect the driver] row. machine to the computer and turn on the machine is displayed, plug the other end of the USB cable into the computer’s USB interface connector and hold down the power switch for approximately one second to turn on the power.
-
Page 48: Procedure For Fax From A Computer
If a printer driver for the machine is already installed, the OKI MC562 icon may represent This section explains how to send fax data from these drivers. In this case, right-click the OKI your computer. MC562 icon and select one of the menu items,... -
Page 49: Scanning
4 Scanning This chapter explains the initial setup and basic procedure for the Scan to E-mail, Scan to Network PC, and Scan to Local PC functions. Your machine supports the following scan functions. Function Overview “Scanning to E-mail” Scans documents and sends the scanned images as an attached file of an e-mail to the specified e-mail address on the network. - Page 50 Scanning to E-mail Plug one end of the Ethernet cable into Memo the network interface connection on the ● If configuring a small network consisting of only your machine and a computer, set IP addresses as shown back of the machine. below (according to RFC1918).
- Page 51 Scanning to E-mail Press the <SETTING> key on the Press the to select [Enter] operator panel. and press Press the to select [Network Setting], and then press the . If setting the IP address manually, check Press the to select [Easy Setup], and that [Manual] is selected, and press press If obtaining the IP address automatically, press...
- Page 52 Scanning to E-mail Enter the DNS server and WINS server if ◆ Print the Network Information to check that the IP address and other network information needed. are properly set. If it is not necessary to connect the DNS server or WINS server to the network, press until the Press the <SETTING>...
-
Page 53: Step 2 Configuring The E-Mail Settings Of Your Machine
Scanning to E-mail Step 2 Configuring the E-mail Settings of Your Machine To configure the E-mail Settings of your machine, follow the 3 sub steps below: ● “Step 2-1 Checking the E-mail Settings of the Computer” P.53 ● “Step 2-2 Setting the E-mail Address for Your Machine” P.54 ●... - Page 54 Scanning to E-mail On the [General] tab, enter the Check the login information on the contents of [Name] and [E-mail [Outgoing Mail Server] dialog box. address] in B-9 and B-10 of the Setup Information Form. - If [Use same settings as my incoming B-10 mail server] is selected, enter the same values as B-7 and B-8 on B-5 and B-6.
- Page 55 Scanning to E-mail Press the <SETTING> key on the Press the to select [Enter] operator panel. and press Press the to select [E-mail Setting] and then press the . Press the and then enter the Press the to select [Easy Setup] and information in B-2.
-
Page 56: Procedure Of Scan To E-Mail
Scanning to E-mail Press the and then enter the Procedure of Scan to E-mail information in B-6. This section explains how to start Scan to Select [Enter] and then press E-mail. The following procedure uses the direct Proceed to step 21. input method for specifying a destination. - Page 57 Scanning to E-mail ● Document Glass Enter a destination e-mail address up to 80 characters. Place a document face down and align its top edge to the upper-left corner of the glass. Press , , to select the character you want, and then press Close the document glass cover gently.
-
Page 58: Scanning To Network Pc
Scanning to Network PC ● Scanning to Network PC ● This section explains the initial setup and basic procedure for the Scan to Network PC function. This function enables you to scan documents and save the scanned images to the “shared folder” of a computer on the network. - Page 59 Scanning to Network PC Plug one end of the Ethernet cable into Press the <SETTING> key on the the network interface connection on the operator panel. back of the machine. Press the to select [Easy Setup], and press Plug the other end of the Ethernet cable into the hub.
- Page 60 Scanning to Network PC Press the to select [Enter] Enter the DNS server and WINS server if and press needed. If it is not necessary to connect the DNS server Press the to select [Network or WINS server to the network, press until the Setting], and then press the .
-
Page 61: Step 2 Setting Up Your Computer And Machine For Scan To Network Pc
Scanning to Network PC Step 2 Setting Up Your Computer and Machine for Scan to Network PC To setup your computer and machine for Scan to Network PC, follow the 4 sub steps below: ● “Step 2-1 Checking the Name of the Computer” P.61 ●... - Page 62 Scanning to Network PC „ Step 2-2 Determining the Names ‰ For Windows Server 2003 and Windows XP of the Items Required for Scan to Network PC Click [start] > [Control Panel] > Determine the names of the following items and [Performance and Maintenance] >...
- Page 63 Scanning to Network PC „ Step 2-3 Configuring the Enter the information in C-3 in [New password] and [Confirm new Computer for Scan to Network PC password], and then click [Create With the Setup Information Form, create an password]. account and shared folder for the machine in the computer.
- Page 64 Scanning to Network PC Select the user account created in step 5 Click [Add]. from the drop down box, and then click [Add]. Enter the value in C-2 in the entry field and then click [OK]. Check that the user added in step 13 is displayed and then click [Share].
- Page 65 Scanning to Network PC Enter the value of C-2 in the text box Right-click the folder created in step and click [Next]. 10, and then select [Sharing and Security]. Click [If you understand the security risks but want to share files without running the wizard, click here.].
- Page 66 Scanning to Network PC Select the [Share this folder on the Select the [Allow] checkbox for [Full network] and [Allow network users Control], and then click [OK]. to change my files] checkbox, and then click [OK]. Proceed to “Step 2-4 Creating a Profile for Scan to Network PC”...
- Page 67 Scanning to Network PC Select [User can not change Enter the value in C-2 in the entry field password] and [Password never and click [OK]. expires], and then click [Create]. Memo ● If [User must change password at next logon] is selected, deselect so that you can select [User can not change password] and [Password never expires].
- Page 68 Scanning to Network PC Select [Standard] from [New Select the checkbox for [File Sharing]. Account]. Enter the value of C-2 in [Full Name]. For Mac OS X 10.5, enter the value of C-2 in [Name]. Click [+] under [Shared Folders]. Enter the value in C-3 in both [Password] and [Verify].
- Page 69 Scanning to Network PC Click the triangle button at the right side ‰ For Mac OS X 10.3.9 to 10.4.11 of the user added in step 17 and select Memo [Read & Write]. ● The following procedure uses Mac OS X 10.4.11 as an example.
- Page 70 Scanning to Network PC Check that an account is added to Enter the value in C-3 in [Password] [Other Accounts] with the name of and click [OK]. C-2, and close [Accounts]. Click [Done]. Close [Sharing]. Proceed to “Step 2-4 Creating a Profile for Scan to Network PC”...
- Page 71 Scanning to Network PC Press , , to select the Enter the information in C-2. character you want, and then Note press ● If domain management is done, enter “C-2@domain name”. ● When carrying out domain management, if you cannot connect even after entering “C-2@ Domainname”, delete “@Domainname”.
-
Page 72: Procedure For Scan To Network Pc
Scanning to Network PC Note Procedure for Scan to Network ● Do not apply an excessive load to the document glass. This section explains how to start Scan to Network PC. You need to configure the initial settings before using the Scan to Network PC function. Memo ●... -
Page 73: Scanning To Local Pc
Scanning to Local PC ● Scanning to Local PC ● This section explains the initial setup and basic procedure for the Scan to Local PC function. This function enables you to scan documents to the computer via network or USB, and manipulate the scanned images as necessary. -
Page 74: For Network Connection
Scanning to Local PC „ For Network Connection Memo ● If configuring a small network consisting of only your To configure the Scan to Local PC function via machine and a computer, set IP addresses as shown the network connection, follow the 2 steps below (according to RFC1918). - Page 75 Scanning to Local PC Plug one end of the Ethernet cable into Press the <SETTING> key on the the network interface connection on the operator panel. back of the machine. Press the to select [Easy Setup], and press Plug the other end of the Ethernet cable into the hub.
- Page 76 Scanning to Local PC Press the to select [Enter] Enter the DNS server and WINS server if and press needed. If it is not necessary to connect the DNS server Press the to select [Network or WINS server to the network, press until the Setting], and then press the .
- Page 77 Scanning to Local PC ‰ Step 2 Installing Driver and Software Check that [Scanner driver] and [ActKey] are selected, and then click The following procedure installs a scanner driver the Install bunch button. and ActKey at once. Memo Check that your machine and the ●...
- Page 78 Scanning to Local PC Click [Restart search] to restart the Remove the “Software DVD-ROM” from device search. the computer. The installation is complete. Reference ● When installing ActKey, Network Configuration is also installed simultaneously. Network Configuration automatically acquires the IP address of your machine and network information (IP address, computer name, port number) of the computer.
- Page 79 Scanning to Local PC Plug one end of the USB cable into the Read the “Environmental advice for USB interface connector on the back of Users” and click [Next]. the machine. Turn on the computer. Check that [Scanner driver] and Insert “Software DVD-ROM”...
- Page 80 Scanning to Local PC „ For WSD Scan Connection When the instruction to connect the machine to the computer and turn on To configure the Scan to Local PC via the WSD the machine is displayed, plug the other Scan connection, follow the 2 steps below: end of the USB cable into the computer’s ●...
- Page 81 Scanning to Local PC Plug one end of the Ethernet cable into Memo the network interface connection on the ● If configuring a small network consisting of only your machine and a computer, set IP addresses as shown back of the machine. below (according to RFC1918).
- Page 82 Scanning to Local PC Press the <SETTING> key on the Press the to select [Enter] operator panel. and press Press the to select [Network Setting], and then press the . If setting the IP address manually, check Press the to select [Easy Setup], and that [Manual] is selected, and press press If obtaining the IP address automatically, press...
- Page 83 Scanning to Local PC Enter the DNS server and WINS server if ‰ Step 2 Installing Your Machine to the needed. Computer If it is not necessary to connect the DNS server Memo or WINS server to the network, press until the ●...
-
Page 84: For Mac Os X
Scanning to Local PC For Mac OS X When the balloon message saying that the installation is complete is displayed on the task bar, click the balloon to „ Overview check the details, and click [Close]. ‰ Connecting Methods You can select either of the following connection methods: ●... - Page 85 Scanning to Local PC „ Step 1 Connecting Your Machine Memo and Computer ● If configuring a small network consisting of only your machine and a computer, set IP addresses as shown Select the connection method and follow each below (according to RFC1918). procedure.
- Page 86 Scanning to Local PC Plug one end of the Ethernet cable into Press the <SETTING> key on the the network interface connection on the operator panel. back of the machine. Press the to select [Easy Setup], and press Plug the other end of the Ethernet cable into the hub.
- Page 87 Scanning to Local PC Press the to select [Enter] Enter the DNS server and WINS server if and press needed. If it is not necessary to connect the DNS server Press the to select [Network or WINS server to the network, press until Setting], and then press the .
- Page 88 Then, load the “Software DVD-ROM” on the drive of the computer. Double-click [OKI] on the desktop. Double-click [Drivers] > [Scanner] > Plug one end of the USB cable into the [Installer for Mac OSX].
- Page 89 Scanning to Local PC Check the display and click [Continue] Click [Continue Installation]. if OK. Click [Restart]. Read the license agreement and click [Continue]. „ Step 3 Registering Your Computer in Network Scanner Setup Tool To use the Scan to Local PC function via the network connection, be sure to register your computer as a destination in Network Scanner Setup Tool before starting a scan job.
-
Page 90: Procedure For Scan To Local Pc
Scanning to Local PC Place your document in the ADF or on Procedure for Scan to Local PC the document glass as below: This section explains how to start Scan to Local ● ADF PC. The following procedure is common for Load documents face up with the top edge of the Windows and Mac OS X. - Page 91 Scanning to Local PC „ For USB Connection Press the to select [Local PC] and then press Press the <SCAN> key on the operator panel. Check that [Select A Connecting PC] is selected and then press Check that [From Network] is selected and then press Press the to select the computer you...
- Page 92 Scanning to Local PC Place your document in the ADF or on Press the to select [Local PC] and the document glass as below: then press ● ADF Load documents face up with the top edge of the documents in first. Check that [Select A Connecting PC] is selected and then press Press the...
-
Page 93: Windows Only
Scanning to Local PC „ For WSD Scan Connection Note (Windows only) ● Do not apply an excessive load to the document glass. Press the <SCAN> key on the operator panel. Memo ● The machine prioritizes the ADF when scanning Place your document in the ADF or on documents. - Page 94 Scanning to Local PC Press OLOR The scan job is processed according to the action set for the selected event. Reference ● To load a landscape document, refer to the User’s Guide > “Operation” > “Loading document(s)”. ● You can scan double-sided documents. For details on dual-side scanning, refer to the User’s Guide >...
-
Page 95: Printing
5 Printing This chapter explains the initial setup and basic procedure for the Print from Computer function. Your machine supports the following print functions. Function Overview “Printing from a Computer” Prints a document sent from a computer connected via USB or network. The printer driver must be installed on the computer to use this function. - Page 96 Printing from a Computer „ For Network Connection Prepare an Ethernet cable and a hub. Prepare an Ethernet cable (category 5, twisted To install a printer driver on your computer pair, straight) and a hub separately. via the network connection, follow the 2 steps below: ●...
- Page 97 Printing from a Computer Plug the other end of the Ethernet cable Press , , to select the into the hub. character you want, and then press - The selected character is entered as “*” in the text field. - If you have entered an incorrect value, Hold down the power switch for press the <CLEAR>...
- Page 98 Printing from a Computer Enter the IP address using the ten-key ◆ Print the Network Information to check that the IP address and other network information pad, and press are properly set. Press the <SETTING> key on the operator panel. Check that [Reports] is selected and press To move to the next box, press the...
- Page 99 Printing from a Computer Select the device of your machine, and If the [Windows Security] dialog box then click [Next]. is displayed, click [Install this driver software anyway]. Click the [Network] button. The device search starts. - If the machine is detected, it is Read the license agreement and then automatically installed.
- Page 100 Hold down the power switch for Click [Start] > [Devices and Printers]. approximately one second to turn off the power. Right-click the OKI MC562 icon and select [Printer properties] (> a desired printer driver if you have installed multiple drivers) from the pop-up menu.
- Page 101 Printing from a Computer Insert “Software DVD-ROM” into the Select the checkbox for the printer computer. driver you want to install, and click the Install bunch button. Click [Run Setup.exe] after [AutoPlay] Memo is displayed. ● By factory default, [PCL driver], [Scanner driver], If the [User Account Control] dialog box is and [ActKey] are selected.
- Page 102 Click [Start] > [Devices and Printers]. USB interface connector and hold down the power switch for about a second to Right-click the OKI MC562 icon and turn on the power. select [Printer properties] (> a desired printer driver if you have installed multiple drivers) from the pop-up menu.
-
Page 103: For Mac Os X
Printing from a Computer For Mac OS X ‰ Step 1 Configuring the Network Settings of Your Machine Connect your machine to a network with an „ Overview Ethernet cable, and then configure the machine’s IP address and other network information from ‰... - Page 104 Printing from a Computer Hold down the power switch for Hold down the power switch for approximately one second to turn off the approximately one second to turn on the power. And turn off a computer. power. Plug one end of the Ethernet cable into Press the <SETTING>...
- Page 105 Printing from a Computer Enter the IP address using the ten-key Press , , to select the pad, and press character you want, and then press - The selected character is entered as “*” in the text field. - If you have entered an incorrect value, press the <CLEAR>...
- Page 106 Printing from a Computer ◆ Print the Network Information to check that Press the to select [Admin Setup], the IP address and other network information and press are properly set. Press the <SETTING> key on the operator panel. Enter the administrator password. The factory default password is “aaaaaa”.
- Page 107 [OKI MC562(PS)] is displayed in computer. [Print Using]. Double-click the [OKI] icon on the The name of your machine is displayed “OKI- desktop. MC562- (the last six digits of the MAC address)”. Double-click [Drivers] folder > [PS] folder > [Installer for MacOSX].
- Page 108 [Show], and then check that displayed in [Kind]. [Built-in Ethernet] is selected. Note ● If [OKI MC562(PS)] is not correctly displayed Close [Network]. in [Kind], click [-] to remove your machine from [Printers] and then redo the procedure from step 8 Insert “Software DVD-ROM”...
- Page 109 [Connection] is [Bonjour], and then displayed correctly under [Format for]. check that [OKI MC562(PS)] is displayed in [Print Using]. The name of your machine is displayed “OKI- MC562- (the last six digits of the MAC address)”. Click [OK]. Select the [File] menu > [Print].
- Page 110 And turn off the computer. Insert “Software DVD-ROM” into the computer. Double-click the [OKI] icon on the Plug one end of the USB cable into the desktop. USB interface connector on the back of the machine.
- Page 111 For Mac OS X 10.5 and 10.6, click [+]. Note Note ● If [OKI MC562(PS)] is not correctly displayed, click ● If the machine is already shown in [Printers], select [-] to remove your machine from [Printers] and your machine, and click on [-] to delete. After this, then redo the procedure from steps 11 to 13.
- Page 112 Plug one end of the USB cable into the USB interface connector on the back of Insert “Software DVD-ROM”. the machine. Double-click the [OKI] icon on the desktop. Double-click [Driver] folder > [PS] folder > [Installer for Mac OS X].
- Page 113 [Printer]. Select the name of your machine whose [Connection] is [USB], and then check Click [Print]. that [OKI MC562(PS)] is displayed in [Print Using]. Click [Add]. Check that the name of your machine is displayed in [Printer List], and then close the window.
-
Page 114: Starting A Print Job
Printing from a Computer Select a tray from [Source]. Starting a Print Job Memo ● If you select [Auto] for a paper source, the tray with This section explains how to configure the print the designated paper type is automatically selected. settings such as paper size, paper source, and media weight, and start printing on each printer Select a media weight from [Weight]. -
Page 115: For Mac Os X Ps Printer Driver
Printing from a Computer For Mac OS X PS Printer Driver Select a tray from [Paper Source]. Open the file you want to print from an application. From the [File] menu, select [Page Setup]. Select the PS driver from [Format For]. Memo ●... - Page 116 Printing from a Computer Select [Paper input options] from [Feature Sets]. Select a media type from [Media Type]. Memo ● For general use, [Use Printer Settings] suffices for paper weight. When you select [Use Printer Settings], the paper weight setting configured on the operator panel menu of the machine is applied.
-
Page 117: Index
Index Printer Driver (Windows) ......98, 100 ActKey ......77, 78 Initial Setup Printing ......95 Fax ....25, 26, 30 Printing Configuration ..21 Fax from Computer Printing Network Information ...98 ..... 25, 26, 30, 41 Component Name Procedure Print from Computer ..95 Machine ..... - Page 118 Index Scanning ......49 Sender Information....33 Setup Information Form ... 53, 61 Super G3 ......35 Tray Setting ......20 Turning Off Machine ..... 18 Turning On Machine ..... 18 - 118 -...
- Page 119 - 119 -...
- Page 120 Oki Data Corporation 4-11-22 Shibaura, Minato-ku,Tokyo 108-8551, Japan www.okiprintingsolutions.com 45002302EE Rev1...
Need help?
Do you have a question about the MC352 and is the answer not in the manual?
Questions and answers