Miele CM 6110 Operating Instructions Manual
Hide thumbs
Also See for CM 6110:
- Operating instructions manual (84 pages) ,
- Operating instructions manual (84 pages) ,
- Operating instructions manual (88 pages)

Related Manuals for Miele CM 6110


Summary of Contents for Miele CM 6110
-
Page 1: Operating Instructions
Operating instructions Coffee maker To avoid the risk of accidents or damage to the appliance, it is essential to read these instructions before it is installed and used for the first time. en – AU, NZ M.-Nr. 10 022 790... -
Page 2: Packaging Material / Disposal Of Old Machine
The original packaging should also be correct functioning of your appliance. kept in case the machine ever needs to Therefore, please do not dispose of be returned to Miele for servicing. your old appliance with your household waste. Please dispose of it at your local community waste collection / recycling centre. -
Page 3: Table Of Contents
Contents Packaging material / Disposal of old machine ........... 2 Warning and Safety instructions ................6 Guide to the appliance ..................16 Controls and display .................... 17 Accessories ......................18 Using for the first time..................19 Before using for the first time................. 19 Switching on for the first time ................ - Page 4 Contents Portion size ......................37 Changing the portion size during drink preparation ..........37 Selecting portion size in the Parameters menu ..........39 Changing the portion size for different User profiles ..........39 User profiles ......................40 Calling up User profiles..................40 Creating a User profile ...................
- Page 5 Contents Brew unit ........................ 60 Remove the brew unit and wash by hand ............60 Degreasing the brew unit .................. 61 Housing........................62 Descaling the machine ..................63 Problem solving guide ..................67 Transporting the machine ................... 76 Evaporate the coffee machine ................76 Packing ........................
-
Page 6: Warning And Safety Instructions
They contain important notes on the installation, safety, operation and care of the appliance. Miele cannot be held liable for damage caused by non- compliance with these Warning and Safety instructions. Keep the instructions in a safe place and pass them along to any... - Page 7 Warning and Safety instructions Correct application This appliance is designed for domestic use and for use in similar environments by guests in hotel or motel rooms, bed & breakfasts and other typical living quarters. This does not include common/ shared facilities or commercial facilities within hotels, motels or bed &...
- Page 8 Warning and Safety instructions Safety with children Caution! Danger of burning and scalding on the dispensing spouts. Children's skin is far more sensitive to high temperatures than that of adults. Ensure children do not touch hot surfaces of the coffee machine or place parts of their body under the dispensing spouts.
-
Page 9: Technical Safety
Warning and Safety instructions Technical safety A damaged coffee machine is dangerous. Check it for any visible damage before setting it up. Never attempt to use a damaged coffee machine. Before connecting the appliance to the mains supply, make sure that the rating on the data plate corresponds to the voltage and frequency of the household supply. - Page 10 The manufacturer's warranty will be invalidated if the appliance is not repaired by a Miele approved service technician. Faulty components must only be replaced by genuine Miele Original spare parts. The manufacturer can only guarantee the safety of the appliance when Miele replacement parts are used.
- Page 11 Disconnect the coffee machine from the power supply if it is not going to be used for a while, e.g. while on holiday. Use only Miele Original spare parts. If spare parts or accessories from other manufacturers are used, the warranty will be invalidated, and Miele cannot accept liability.
-
Page 12: Correct Use
Warning and Safety instructions Correct use The dispensing spouts present a danger of burning or scalding. The liquids and steam dispensed are very hot. Please note: – Keep well away from the area underneath the spouts when hot liquids and steam are being dispensed. - Page 13 Warning and Safety instructions Do not use green (unroasted) coffee beans or mixtures of coffee beans which contain green coffee beans. Green coffee beans are very hard and still contain a certain amount of residual moisture. These can damage the coffee machine grinder as soon as grinding begins.
- Page 14 Descale the coffee machine regularly depending on the water hardness level in your area. Descale the machine more frequently in areas with very hard water. Miele cannot be held liable for damage arising from insufficient descaling, the use of incorrect descaling agent or the use of descaling agent which is not of the appropriate concentration.
- Page 15 Warning and Safety instructions The following applies to appliances with stainless steel surfaces: Do not adhere stickers, adhesive tape or any other adhesive materials to stainless steel surfaces. The coating on the stainless steel surfaces will become damaged and lose its protective properties against soiling.
-
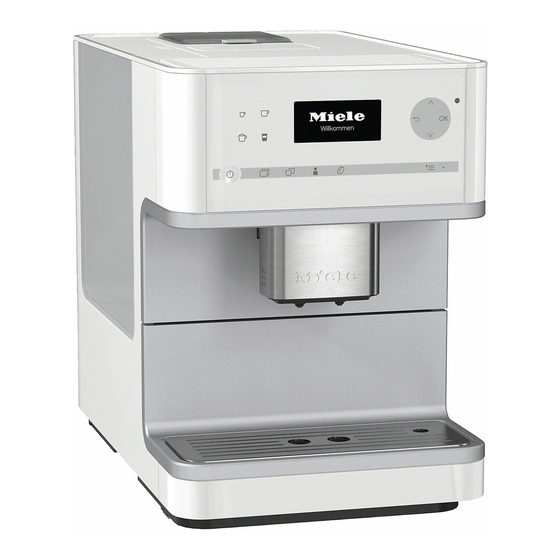
Page 16: Guide To The Appliance
Guide to the appliance a Master switch (bottom left) i Brew unit (behind the service panel) b Hot water spout* j Central spout with cappuccinatore c Controls and display k Park position for milk pipework (behind the service panel) d Cup heating l Drip tray with lid and waste container e Water container m Milk tube aperture... -
Page 17: Controls And Display
Controls and display h LED a On/Off sensor Flashes when the machine is For switching the coffee machine on switched on and the display is black and off b Drink sensors i Settings Espresso , For displaying and changing settings Coffee , j Parameters ... -
Page 18: Accessories
Accessories These products and other useful Optional accessories accessories can be ordered via Miele also offers a range of optional www.miele-shop.com or from Miele accessories, as well as cleaning and (see back cover for contact details). conditioning products for your coffee machine. -
Page 19: Using For The First Time
When you switch the machine on for the first time the following message will appear in the display: " Miele - ". Willkommen... -
Page 20: Water Hardness
Using for the first time Water hardness Measuring water hardness You can measure the water hardness The water hardness level indicates how yourself using the enclosed test strip. much calcium is dissolved in the water. Alternatively, your local water authority The higher the calcium content, the will be able to tell you the hardness of harder the water, and the harder the... -
Page 21: Operation
Leaving the menu or cancelling display, you are in the drinks menu: an action To exit the current menu, touch "Back" Miele . Select drink To prepare a drink, select a coffee blend and touch one of the drink sensors. -
Page 22: Filling The Water Container
Filling the water container Change the water every day to prevent a build-up of bacteria. Only use cold, fresh tap water to fill the water container. Hot or warm water or other liquids can damage the coffee machine. Do not use mineral water. Mineral water will cause serious limescale deposits to build up in your machine ... -
Page 23: Filling The Coffee Bean Container
Filling the coffee bean container Fill the coffee bean container with roasted espresso or coffee beans if you want to use freshly ground coffee beans for each cup of espresso or coffee. Alternatively, you can make coffee or espresso with ready ground coffee (see "Making coffee or espresso using ready ground coffee"). -
Page 24: Switching The Coffee Machine On And Off
Switching the coffee machine on and off Switching on Switching off Switch the master switch on the left- Touch the On/Off sensor . hand side of the machine to the "I" After a coffee has been dispensed, the position. pipework will be rinsed before the ... -
Page 25: Cup Heating
Cup heating (CM 6310) Pre-heating cups Cups should always be pre-heated to allow the flavour of the coffee to develop and be retained. The smaller the volume of the coffee/ espresso and the thicker the cup, the more important it is to pre-heat the cup. You can pre-heat cups or glasses on the cup heating surface on the top of the coffee machine. -
Page 26: Adjusting The Central Spout To The Correct Cup Height
Adjusting the central spout to the correct cup height You can adjust the central spout to suit the height of the cup you are using so that the coffee or espresso will not cool down as quickly and the crema will have a better consistency. -
Page 27: Making Drinks
Making drinks The following drinks can be made: Making a coffee drink – Ristretto is a concentrated, strong espresso. It is made with the same quantity of ground coffee as for an espresso, but with very little water. – Espresso is a strong, aromatic coffee with a thick hazelnut brown coloured layer of froth - known as the crema - on top. -
Page 28: Dispensing A Double Portion
Making drinks Dispensing a double portion Cancelling preparation You can dispense two portions into one To cancel preparation: cup or dispense two portions into two Touch the drinks sensor which is lit cups at the same time. up, or for drinks from Further again. -
Page 29: Drinks Made With Ready Ground Coffee
Making drinks Drinks made with ready ground coffee To make espresso or coffee using ready ground coffee, add a portion of ground coffee to the ground coffee chute. This gives you the option of preparing a cup of decaffinated coffee, for example, even though the coffee bean container is filled with roasted coffee beans. -
Page 30: Making Drinks With Ready Ground Coffee
Making drinks Making drinks with ready ground coffee If you want to make a drink with ready ground coffee: Select and touch OK. You can now select which type of drink you would like to make with ready ground coffee. ... -
Page 31: Drinks With Milk
Making drinks Drinks with milk Stainless steel milk flask (Supplied with CM 6310) Caution! Danger of burning and The stainless steel flask keeps milk cool scalding from the central spout. for longer. Good milk froth can only be Liquids and steam dispensed from made with cold milk (<... -
Page 32: You Can Use Bottled Milk Or Cartons
Making drinks Connect the milk pipe to the aperture in the central spout. Place a container with sufficient milk beside the coffee machine on the right-hand side. Place the end of the milk tube in the container making sure that it is sufficiently immersed in the milk. -
Page 33: Preparing Hot Water (Cm 6310)
Making drinks Preparing hot water (CM 6310) Preparing User profile drinks You can enter individual profiles to cater Danger of burning and scalding for different tastes and preferences. on the hot water spout. The water If you have already created your own dispensed is very hot. -
Page 34: Coffee The Way You Like It
Coffee the way you like it In order to customise the coffee Grinder setting machine to the type of coffee being When the beans are ground correctly, used, you can the coffee or espresso will flow evenly – change the grinder setting, into the cup with a good crema. -
Page 35: Displaying And Changing The Parameters Of A Drink
Coffee the way you like it Displaying and changing the parameters of a drink Touch . Select the drink you want and touch The current settings for the amount of coffee, brewing temperature and pre- brewing will be displayed for this drink. Amount of coffee ... -
Page 36: Brewing Temperature
Coffee the way you like it Useful tip: If the coffee is too strong for through the moistened coffee at high you or it tastes bitter, try a different type pressure. This helps release the flavour of bean. of the coffee. You can set pre-brewing for a normal Brewing temperature length of time or an extra long length of... -
Page 37: Portion Size
Portion size The flavour of the coffee produced Useful tip: To cancel portion size depends not just on the type of coffee programming, touch the drinks sensor used, but also on the amount of water which is lit up or for drinks from used. - Page 38 Portion size Portion sizes for Cappuccino and Portion sizes for Ristretto, Long Latte macchiato coffee, Caffé latte, Hot milk and Milk froth Place a suitable vessel underneath the central spout. Place a suitable vessel underneath the central spout. ...
-
Page 39: Selecting Portion Size In The Parameters Menu
Portion size Selecting portion size in the Changing the portion size for different User profiles Parameters menu You can set the portion size for Touch . individual drinks for each User profile. Select the required drink with the ... -
Page 40: User Profiles
User profiles In addition to the Miele profile, you can Calling up User profiles enter individual profiles to cater for Touch . different tastes and preferences. You can now create a User profile. For each profile you can adjust the... -
Page 41: Creating A User Profile
This selection is only possible if a sensors and touch OK. profile has been allocated in addition to the Miele standard profile. Letters will appear in the display that you can select with the arrow sensors. Use the arrow sensors to select You can use the arrow sensors to select and touch OK. -
Page 42: Deleting A Profile
Changing a User profile You can programme the coffee machine This selection is only possible if a so that it changes back to the Miele profile has been allocated in addition standard profile automatically after to the Miele standard profile. -
Page 43: Settings
Settings Calling up the "Settings" menu Changing and saving settings Touch . Touch . You can now check or change the Select the setting you wish to change settings. with the arrow sensors and touch OK. Options which are currently selected will have a tick ... -
Page 44: Overview Of Available Settings
Settings Overview of available settings The factory default for each option is indicated by *. Menu option Available settings * and other languages Language deutsch Country Time Clock format – 12 h 24 h Timer (0:30)* / Switch on at Switch off after Switch off at Activate... - Page 45 Settings Menu option Available settings Display brightness Set the brightness Volume Buzzer tones Keypad tone Cup heating Showroom programme Demo mode Factory default Do not reset Reset The lighting, cup heating and volume functions are only available on the CM 6310.
-
Page 46: Language
Settings Language Timer You can select a language and country The timer offers the following options: for all display texts. The coffee machine Useful tip: If you select the wrong – switches on at a particular time, e.g. language by mistake, you can find the in the morning for breakfast ( Switch on "Language"... -
Page 47: Eco Mode
Settings Switch off at Eco mode Use the arrow sensors to set the Eco mode is an energy-saving mode. hours and minutes. If Eco mode is switched on, the coffee In the event of a longer absence the machine heats up anew before each programmed times will remain in drink preparation, making preparation memory and will be reactivated after... -
Page 48: Lighting
Settings Lighting Info (display information) (CM 6310) In the option you can choose to Info display the number of prepared Change the brightness using the arrow portions for each type of drink. sensors . You can also see whether more than If no sensors are touched or 50 portions can be dispensed before maintenance programmes carried out,... -
Page 49: Locking The Coffee Machine (System Lock )
Settings Locking the coffee machine Water hardness (System lock ) See "Setting up and using the coffee machine" for information about water You can lock the coffee machine to hardness. prevent it being used without your knowledge, by children, for example. Display brightness Activating and deactivating the Change the display brightness using... -
Page 50: Factory Default
- the factory domestic use. default settings. The appliance can be presented in The number of drinks and the appliance Miele Centers or retail stores with the status (No. of drinks until ...) cannot be function. The Showroom programme reset. -
Page 51: Cleaning And Care
Remove the brew unit and wash by hand Clean the inside of the coffee machine When prompted Milk pipework (with the Original Miele cleaning agent for milk pipework) Brew unit (with cleaning tablets) Descale the machine (depending on water hardness) - Page 52 Cleaning and care All external surfaces are susceptible Danger of burning and scalding to scratching. Scratches on glass on hot components or by hot liquids. surfaces could even cause a Always allow the coffee machine to breakage. Contact with unsuitable cool down before cleaning it.
-
Page 53: Rinsing The Appliance
Cleaning and care Rinsing the appliance Milk pipework You can also rinse the appliance Ensure that all components in which manually. milk is transported are cleaned on a regular basis. Milk naturally contains After a coffee has been dispensed, the bacteria that rapidly multiply if the machine is rinsed before it switches milk pipework is not cleaned... -
Page 54: Cleaning The Milk Pipework
The milk pipework cleaning agent is counter for the cleaning interval will be available to order from Miele or via the reset. You will not be reminded again. internet at www.miele-shop.com. There are two options for cleaning the ... -
Page 55: Milk Flask
Cleaning and care Carrying out the cleaning process: Milk flask (CM 6310) The milk flask should be taken apart and cleaned every day. Clean all parts by hand only using hot water, a little washing-up liquid and a soft cloth. Use the cleaning brush supplied to remove milk residue from the milk pipework if necessary. -
Page 56: Central Spout With Cappuccinatore
Cleaning and care Central spout with cappuccinatore Clean the central spout cover by hand only using warm water and a little washing-up liquid. All other parts are dishwasher-safe. Twist the upper section with the holder for the milk pipework and pull it off. -
Page 57: Water Container
Cleaning and care If the milk pipe is blocked, clean it Water container under running water with the brush Clean the water container lid by supplied: hand only using hot water, a little Insert the brush in the tube and move washing up liquid, and a soft cloth. -
Page 58: Drip Tray Cover
Cleaning and care Drip tray cover Drip tray and waste container Remove the drip tray cover from the Clean the drip tray and waste drip tray. container every day to avoid unpleasant smells and mildew. The drip tray cover can be cleaned in the dishwasher, or by hand using The waste container is located in the warm water, a little washing up liquid,... -
Page 59: Bean Container And Ground Coffee Chute
Cleaning and care Clean all parts thoroughly. Bean container and ground coffee chute Clean the drip tray holder by hand only using hot water, a little washing Danger of injury on the grinder. up liquid, and a soft cloth. All other Disconnect the coffee machine from parts are dishwasher-safe. -
Page 60: Brew Unit
Cleaning and care Brew unit Do not change the position of the brew unit handle, as this would Danger of injury! cause the brew unit to be out of Disconnect the coffee machine from alignment and you will not be able to the power supply before cleaning. -
Page 61: Degreasing The Brew Unit
We recommend using Miele cleaning tablets to clean the brew unit. These have been specially developed for use with Miele coffee machines and prevent Press the button under the handle of subsequent damage. the brew unit and, whilst doing so, Miele cleaning tablets can be ordered turn the handle to the right . -
Page 62: Housing
Then dry all parts with a soft cloth. Useful tip: You can also clean the appliance front with the Original Miele all purpose microfibre cloth. -
Page 63: Descaling The Machine
Descaling the machine The coffee machine prompts you when Important! When descaling the it needs to be descaled. No. of portions machine, cover delicate surfaces until appliance needs descaling: and natural flooring to prevent appears in the display. Each time a damage from splashes of descaling drink is prepared, the coffee machine solution. - Page 64 and replace concentration. proceed as follows. Miele descaling tablets are available to order from Miele or via the internet at www.miele-shop.com.
- Page 65 Descaling the machine You will need 1 descaling tablet to Carrying out descaling descale the machine. Push the water container back into the appliance. Follow the further instructions given in the display. When Rinse the water container and fill with fresh tap water up to the descaling symbol appears in the display: ...
- Page 66 Descaling the machine Descaling when not prompted by a message Touch . Select and touch OK. Maintenance Select Descale appliance The descaling programme cannot be cancelled once you have touched OK. The programme has to be completed through to the end.
-
Page 67: Problem Solving Guide
Repairs should only be carried out by technicians approved by Miele. If you can't remedy the problem yourself, please call Miele. Please note that a call- out charge will be applied to unnecessary service visits where the problem could have been rectified as described in these operating instructions. - Page 68 Problem solving guide Problem Possible cause and remedy F73 or The brew unit cannot be positioned correctly. Check the brew unit Switch the machine off with the On/Off sensor. Remove and clean the brew unit (see "Cleaning and care –...
- Page 69 The mains fuse has tripped because the coffee machine, mains voltage or another appliance is defective. Switch off at the wall socket and remove the plug. Contact a qualified electrician or Miele. CM 6310: The lighting has been switched off. The lighting remains off ...
- Page 70 Problem solving guide Problem Possible cause and remedy The coffee machine The system lock has been activated. does not switch itself You need to deactivate the system lock (see on, although the Switch "Settings - System lock"). setting has been on at The machine was not used after being switched on activated for the timer.
- Page 71 Problem solving guide Problem Possible cause and remedy The drip tray isn't sitting correctly in the appliance. Empty the drip tray and the appears waste container Push the drip tray all the way into the appliance. in the display, even ...
- Page 72 Problem solving guide Problem Possible cause and remedy Drink preparation has If the water container becomes empty while a drink is been cancelled. being prepared, the message Continue preparation? will appear in the display after the water container has been refilled and put back in the machine. If you do not confirm this message with within 5 minutes, preparation will be cancelled.
- Page 73 Push the central spout up as far as it will go. though no milk is being dispensed. The display lights up The Demo mode of the coffee machine for Miele but the coffee machine Centers or Chartered Agents has been activated. does not heat up and ...
- Page 74 The coffee bean container has become empty during makes a louder noise the grinding process. than usual. Fill the container with fresh beans. There may be stones in amongst the coffee beans. Switch the coffee machine off immediately. Call Miele.
- Page 75 Problem solving guide Problem Possible cause and remedy The coffee flows too The coffee is too coarsely ground. quickly into the cup. Set the grinder to a finer setting (see "Setting the coffee grinder"). The coffee trickles too The coffee is too finely ground. slowly into the cup.
-
Page 76: Transporting The Machine
Transporting the machine If you are not going to use the coffee The evaporation process is finished machine for an extended period of time, when appears in the Process finished e.g. whilst on holiday, or if it needs to display. be moved, a number of procedures will ... -
Page 77: After Sales Service And Warranty
This appliance has a manufacturer's correct yourself, please contact Miele. warranty period of 2 years. For further information, please refer to The contact details for Miele are given your warranty booklet. at the back of these instructions. When contacting Miele, please quote the model and serial number of your machine. -
Page 78: Saving Energy
Saving energy If the default settings for "Eco mode" or Switching the machine off with the "Timer" have been altered, energy the master switch and at the consumption will increase. wall socket appears in This setting uses more energy If the coffee machine is not going to be the display. -
Page 79: Electrical Connection
Electrical connection Before connecting the appliance to the The machine must not be used with so- mains supply, make sure that the called energy saving plugs either. connection data on the data plate These reduce the amount of energy corresponds to the voltage and supplied to the machine causing it to frequency of the household supply. -
Page 80: Installation
Installation If the machine is installed in a niche, the Danger of overheating! niche must provide the following Please ensure that there is adequate minimum dimensions: ventilation around the machine. Do not cover the machine with tea Height 508 mm towels or similar objects whilst it is in Width 450 mm... -
Page 81: Appliance Dimensions
Appliance dimensions... -
Page 82: Technical Data
Technical data Current draw in standby mode < 0.5 Watt (default setting): Pump pressure: max. 15 bar Through-flow heater: 1 stainless steel thermo block Appliance dimensions (W x H x D): 251 x 359 x 427 mm Net weight: 9.9 kg Connection cable length: 140 cm Water container... - Page 83 Miele Australia Pty. Ltd. ACN 005 635 398 ABN 96 005 635 398 Miele Center and Head Office Melbourne: 1 Gilbert Park Drive Knoxfield, VIC 3180 Miele Center and Office Melbourne: 206-210 Coventry Street South Melbourne, VIC 3205 Miele Center and Office Sydney:...
- Page 84 CM 6110, CM 6310 en – AU, NZ M.-Nr. 10 022 790 / 00...
Need help?
Do you have a question about the CM 6110 and is the answer not in the manual?
Questions and answers