Table of Contents
Advertisement
Quick Links
Advertisement
Table of Contents

Related Manuals for Miele CM6


Summary of Contents for Miele CM6
- Page 1 TECHNICAL INFORMATION CM6 Countertop Coffee Systems © 2018 Miele USA...
-
Page 2: Table Of Contents
Technical Information Table of Contents A Warning and Safety Instructions ............... 6 1 General ........................6 2 Risk of Burning or Scalding ................... 6 3 Touch Current Measurement ................6 4 Before the First Use ....................7 B Modification History .................... 7 C ... - Page 3 Technical Information 3.16 F235 - Display/Control Electronic (N1-2) Communication Fault ....29 3.17 “50 Portions until Descale” Message ............29 3.18 “Empty Drip Tray” Message, But Drip Tray Isn't Full ........29 3.19 Drip Tray Must Be Emptied Frequently ............
- Page 4 Technical Information Figure 001-7: Rinse ......................15 Figure 001-8: Brew Unit Drive Switches ................. 16 Figure 001-9: Actuator and Compensation Microswitch ..........17 Figure 001-10: Measurable Volume Areas ..............17 Figure 001-11: Selectable Volume Areas ............... 17 Figure 001-12: Home Position, Rear View ..............18 Figure 001-13: Home Position, Front View ..............
- Page 5 Technical Information List of Tables Table C-1: Serial Modifications ..................8 Table C-2: Technical Data ....................9 Table C-3: Quantities until Obligatory Descaling .............. 9 Table C-4: Technical Data ....................9 Table 001-1: Switch Cam Settings .................. 17 Table 001-2: Drink Settings (Customer Programming) ........... 33 Table 001-3: Machine Settings (Customer Programming) ..........
-
Page 6: Warning And Safety Instructions
Technical Information Warning and Safety Instructions General Any repairs or maintenance performed by unqualified personnel could be dangerous. All applicable laws, codes, regulations, and accident prevention guidelines must be observed when serving, modifying, testing or maintaining appliances. All repairs should be performed by a trained technician in strict accordance with local, state and national codes. -
Page 7: Before The First Use
Technical Information Before the First Use Clean the appliance and remove any protective foils before the first use. See the operating manual. Plug in the appliance. If the power cord is too long, it can be pushed into the hole in the back of the appliance. -
Page 8: Figure C-2: Cm 63X0
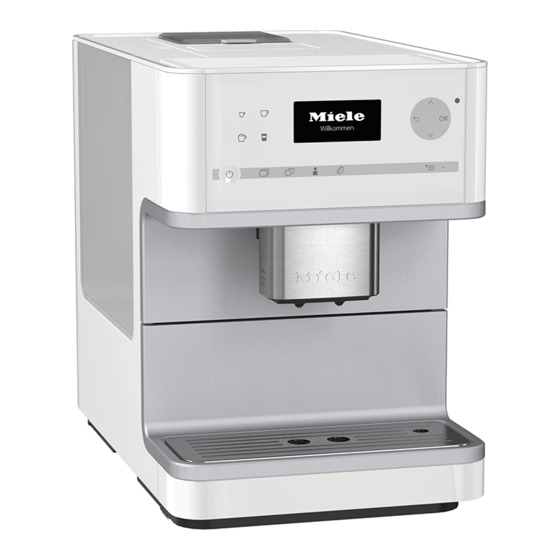
Technical Information Figure C-2: CM 63x0 Effective Production index Modification ID no. Machine no. Date Series start 3059_V2 3058_V2 97276816 10/25/2013 Serial Modifications Table C-1: Model CM 61x0 CM 63x0 Construction Countertop with bean system Display with DirectSensor Design Dimensions Height 14.1”... -
Page 9: Table C-2: Technical Data
Technical Information Model CM 61x0 CM 63x0 Capacity Water tank 1.8L (61 fl.oz.) Beans container 300g (10.6 oz.) Waste container 10 pucks Electrical connection max. 1.45kW (incl. cup Output power max. 1.45kW warmer) Fuse rating Voltage 120VAC Frequency 60Hz Power cord 4.5’... -
Page 10: D Layout Of Electrical Components
Technical Information Layout of Electrical Components CM 61x0 Figure D-1: CM 61x0 Component Layout 1 EPL power electronic (1N1-1, 2N1-1) 10 Pump (M7) with thermostat (F3-2) 105°C 2 Chute present switch (S87-5) 11 Drip tray present switch (S87-1) 3 Grinder (M25) 12 Spout present switch (S87-6) 4 Grinder thermostat (F3-3) 90°C 13 Water tank sensor (B3-18) -
Page 11: Cm 63X0
Technical Information CM 63x0 Figure D-2: CM 63x0 Component Layout 1 EPL power electronic (1N1-1, 2N1-1) 11 Drip tray present switch (S87-1) 2 Chute present switch (S87-5) 12 Spout present switch (S87-6) 3 Grinder (M25) 13 Water tank sensor (B3-18) 4 Grinder thermostat (F3-3) 90°C 14 EPB display/control electronic (N1-2) 5 Brew unit present switch (S87-2) -
Page 12: 001 Overview
Technical Information Overview Function Optical Interface Figure 001-1: Optical Interface Location The appliance has an optical interface for diagnostics and program updates. It can be located with the “Find optical interface” function. Water Paths 2.2.1 Overview Figure 001-2: Water Path Overview Pump (M7) -
Page 13: Coffee
Technical Information Flow meter (B3-4) Water tank Drain valve Heater (R1) Ceramic valve (M29) Pos. 1 = Vacant Pos. 2 = Ventilation, hot water Pos. 3 = Hot water, steam, air Pos. 4 = Steam, air open (milk froth) Pos. 5 = Steam (hot milk) Pos. -
Page 14: Hot Water (Cm 63X0 Only)
Technical Information 2.2.3 Hot Water (CM 63x0 Only) Figure 001-4: Water Path for Hot Water (CM 63x0) Pump (M7) Flow meter (B3-4) Water tank Heater (R1) Ceramic valve (M29) in pos. 3 = Hot water, steam, air Hot-water spout 12 Drip tray 2.2.4 Hot Milk Figure 001-5: Hot Milk... -
Page 15: Milk Froth
Technical Information 2.2.5 Milk Froth Figure 001-6: Milk Froth Pump (M7) Flow meter (B3-4) Water tank Heater (R1) Ceramic valve (M29) in pos. 4 = Steam, air open (milk froth) Coffee/milk spout Milk container Drip tray 2.2.6 Rinse Figure 001-7: Rinse Pump (M7) Flow meter (B3-4) Water tank... -
Page 16: Brew Unit Drive
Technical Information Coffee/milk spout Drip tray Brew Unit Drive 2.3.1 Microswitch Locations The brew unit is controlled via 4 microswitches (Figure 001-8). After the brew unit has been activated, if one of the two positioning microswitches (Figure 001-8, Item 3 or 4) has not switched within approximately 10 seconds, the following fault is indicated: F73 –... -
Page 17: Figure 001-9: Actuator And Compensation Microswitch
Technical Information 1 Brew unit actuator 2 Grind amount compensation microswitch Figure 001-9: Actuator and Compensation Microswitch Five different settings can be registered: Position Microswitch position Switching process In front of the first cam On the first cam Off, on Between the two cams Off, on, off On the second cam... -
Page 18: Brew Unit Drive, Home Position
Technical Information compensation is ± 1.6 seconds, this adjustment can be repeated up to 8 times. 2.3.4 Brew Unit Drive, Home Position If the brew unit is in the home position, the left cam of the double-cam element activates the top microswitch; the bottom microswitch is not switched (Figure 001-12). -
Page 19: Brew Unit Drive, Drain Position
Technical Information Figure 001-14: Brew Position, Rear View Figure 001-15: Brew Position, Front View 2.3.6 Brew Unit Drive, Drain Position After the coffee is brewed, the drive moves back until the first cam of the double-cam element activates the bottom microswitch and the top microswitch is switched (Figure 001-16). -
Page 20: Machine Response After Power Supply Failure
Technical Information Figure 001-16: Drain Position, Rear View Figure 001-17: Front View Machine Response after Power Supply Failure After a break in the power supply, the machine remains switched off (standby). The fault memory and all settings carried out by the customer remain unchanged. Drip-Tray Sensing 2.5.1 Fill Level... -
Page 21: Fault Repair
Technical Information Figure 001-18: Drip Tray Present Switch It is located on the left side inside the appliance and is actuated by the pin on the drip tray (Figure 001-18, Item 1). The drip tray present switch can be tested in service mode; see Section 001-4.4. Fault Repair F1 - Short Circuit in Heater NTC (R30-14) Symptom:... -
Page 22: F2 - Open Circuit In Heater Ntc (R30-14)
Technical Information F2 - Open Circuit in Heater NTC (R30-14) Symptom: Electronic registering an NTC temperature < -10°C or resistance is > approx. 600kΩ. Cause: Ambient temperature below 10°C for a long period of time. With ambient temperatures less than 10°C, the resistance of the temperature sensor increases to a value that is registered as an open circuit by the electronic module. -
Page 23: F17 - Insufficient Water Flow
Technical Information Figure 001-19: Pressure Pump 3. Insert the full pressure pump into the water tank receptacle. 4. Activate the water pump in service mode (see Section 001-4.4) and use it to push water through the system. Cause: Wiring short-circuited or hoses clogged or kinked. Remedy: 1. -
Page 24: F28 - Too Much Ground Coffee In Brew Unit
Technical Information Remedy: 1. Remove the water tank. 2. Push the pressure pump (mat. no. 07994080) together and fill it with water. See Figure 001-19. 3. Insert the full pressure pump into the water tank receptacle. 4. Activate the water pump in service mode (see Section 001-4.4) and use it to push water through the system. -
Page 25: F40 - Power Electronic Epl Fault (1N1-1, 2N1-1)
Technical Information Cause: The electronics for CM 61x0 and CM 63x0 are not interchangeable. The following combinations are possible: Display/Control electronic Model variant CM 61x0 CM 63x0 CM 61x0 Compatible Not compatible Model variant Power electronic CM 63x0 Not compatible Compatible Remedy: Combine display/control and power electronics correctly. -
Page 26: F74 - Ceramic Valve (M29) Fault
Technical Information 1 “Brew position” switch (S60-1) 2 “Home position” switch (S60-2) Figure 001-20: Brew Unit Switches When the brew unit is activated but one of the switches does not switch on within 10 seconds, fault F 73 will be displayed. Cause: Brew unit blocked. -
Page 27: F76 - Brew Unit Compression Fault
Technical Information Symptom: Ceramic valve (M29) is activated, but its position switch (S60-3) does not detect a new position within 3 seconds. Ceramic valve position switch (S60-3) not activated. Cause: Ceramic valve (M29) or position switch (S60-3) defective. Remedy: 1. Check the ceramic valve and position switch in service mode; see Section 001-4.4. 2. -
Page 28: F82 - Heater (R1) Too Hot
Technical Information Heater NTC (R30-14) defective. Remedy: 1. Check plugs and wires. 2. Replace defective plugs and wires as necessary. 3. Test the NTC in service mode; see Section 001-4.4. Note: NTC resistance values should be 100Ω at 25°C (77°F), ... -
Page 29: F235 - Display/Control Electronic (N1-2) Communication Fault
Technical Information 5. Replace the NTC, if necessary; see Section 001-4.20. Cause: Heater (R1) defective. Remedy: 1. Test the heater in service mode; see Section 001-4.4. 2. Replace the heater, if necessary; see Section 001-4.20. 3.16 F235 - Display/Control Electronic (N1-2) Communication Fault Cause: Display/control electronic communication is faulty. -
Page 30: Coffee Or Espresso Too Cold
Technical Information 3.20 Coffee or Espresso Too Cold Cause: Machine settings. Remedy: Note: Measure the temperature half an inch (1 centimeter) below the dispenser, not in the cup. The temperature should be 187°F (± 3°F). 1. Pre-warm cups. 2. Set the temperature for coffee and espresso to maximum; see Section 001-4.1. 3. -
Page 31: Coffee Grounds Next To The Brew Unit
Technical Information Remedy: Note: The change in grinding grade only takes full effect after several servings have been prepared. 1. Reduce the grinding grade by sliding the lever one to two settings to the right. 2. Reduce the ground quantity; see Section 001-4.1. 3. -
Page 32: Water Pump Does Not Pump
Technical Information 2. To ensure that the ground quantity compensation can set correctly, reset the appliance to standard settings; see Section 001-4.3. 3.25 Water Pump Does Not Pump The water pump does not pump any water. Cause: Appliance has stood for too long. Water pump has run dry. Remedy: 1. -
Page 33: Machine Settings (Customer Programming)
Technical Information Factory Setting Drink Options Notes/Instructions setting Espresso 30 - 250 ml 35 ml Coffee 30 - 250 ml 125 ml Press the OK Milk froth 5 - 60 s 15 s touchpad. The Cappuccino Coffee 30 - 250 ml 60 ml beverage is prepared. - Page 34 Technical Information 2. Press the touchpad until Settings is marked. 3. Press the OK touchpad. Acknowledgement indicator: Settings is displayed. Options: Note: If a selection is not made within 15 seconds, the appliance will automatically go back one menu level. If the language setting is incorrect, follow the symbol to access the language function.
- Page 35 Technical Information Function Setting Belgien nederlands Nederland norsk polski português româna slovencina slovenscina srpski suomi svenska Language türkce griechisch Russland Kasachstan russisch Lettland Litauen Estland ukrainisch China chinesisch Hong Kong japanisch 24 h (time displayed in 24 h clock format) Clock format 12 h (time displayed in 12 h clock Time...
-
Page 36: Table 001-3: Machine Settings (Customer Programming)
Technical Information Function Setting Latte macchiato Long coffee No. of The number of serving cycles carried Caffê Latte drinks out is displayed. Hot milk Milk froth Info Hot water The number of servings until Descaling descaling is required is displayed. Number of The number of servings until brew Degreasing... -
Page 37: Service Programming
Technical Information Save and quit: 1. Press OK. 2. Press the touchpad. The appliance is switched off. Quit without saving: Press the touchpad. The appliance is switched off. Service Programming Initial requirements: Switch the appliance off. Accessing: Note: Accessing must occur within 2 seconds. 1. -
Page 38: Service Mode
Technical Information Function Options Description Clean milk Cleaning counter is reset. The lock is Reset system lifted. No. of portions until “50 portions until Normal Service descale” corresponds to Table C-3. Water flow No. of portions until “50 portions until Halved descale”... - Page 39 Technical Information Function Options Description e.g., ID 03032 V5 Display/control electronic EPB (N1-2) ID number and version Software version e.g., ID 03031 V4 Power electronic EPL (1N1-1, 2N1-1) ID number and version e.g., 5074 All logged faults are shown (F0000 = no faults). Fault memory Delete Cancel...
- Page 40 Technical Information Function Options Description Component (press Activate: Press OK. R39 (cup warmer) OK to start or stop Deactivate: Press OK again. (CM 63x0 only) activation) R30-14 (heater NTC) Heater temperature is displayed Sensor value B3-4 (flow meter) Flow meter pulses per second is displayed.
-
Page 41: Top Cover Removal
Technical Information Function Options Description (Touch-) sensors Sensor 104 pressed (press the Sensor 67 pressed touchpad to be tested; the Operation number of the touchpad sensor is displayed) Leave service mode Exit Cancel Table 001-5: Service Mode To prevent mechanical damage, always initialize as a last step. To prevent mechanical damage, always initialize as a last step. -
Page 42: Figure 001-22: Top Cover Screw, Water Tank Side
Technical Information Figure 001-22: Top Cover Screw, Water Tank Side Figure 001-23: Top Cover Screws, Brew Unit Side 7. Using a lid opener, press in on the six retainers (Figure 001-24, Item 1). 8. Lift up on the back of the top cover, pull the cover back and take it off. -
Page 43: Side Casing Removal
Technical Information Figure 001-24: Top Cover Retainers 9. CM 63x0: Disconnect the cup-warmer plug. Side Casing Removal 1. Remove the top cover; see Section 001-4.5. 2. Remove the 2 T10 screws securing the front of the casing (Figure 001-25, Item 1). Figure 001-25: Front Casing Screws 3. -
Page 44: Cup Warmer (R39) Removal (Cm 63X0 Only)
Technical Information Figure 001-26: Screw Cover 4. Remove the 2 T10 screws (Figure 001-27, Item 1). Figure 001-27: Side Casing Screws at Rear of Appliance 5. Press on the side panels and slide them back to release the locking tabs. 6. -
Page 45: Front Panel Removal
Technical Information Figure 001-28: Cup Warmer Screws 3. Separate the cup warmer from the top cover. Front Panel Removal 1. Remove the top cover; see Section 001-4.5. 2. Remove the 4 T10 screws securing the inside of the front panel (Figure 001-29, Item 1). -
Page 46: Door Contact Switch (S24) Removal
Technical Information Figure 001-30: Display/Control Electronic Cover Retainers 4. Disconnect the display/control electronic wiring harness (Figure 001-31, Item 1). Figure 001-31: Display/Control Electronic Wiring Harness 4.10 Door Contact Switch (S24) Removal 1. Remove the top cover; see Section 001-4.5. 2. Remove the side casing; see Section 001-4.6. 3. -
Page 47: Figure 001-32: Grinder Cover And Power Electronic Screws
Technical Information Figure 001-32: Grinder Cover and Power Electronic Screws 5. Move the power electronic to one side. 6. Remove the T10 screw behind the power electronic (Figure 001-33, Item 1). Figure 001-33: Grinder Cover Screw... -
Page 48: Grinder (M25) Removal
Technical Information 7. Pull the grinder cover forward (Figure 001-34, Items A and B). 8. Remove the door contact switch assembly from the grinder cover (Figure 001-34, Item C). 9. Remove the door contact switch (Figure 001-34, Item 1) from its holder and disconnect the electrical connections. -
Page 49: Figure 001-35: Beans Container Screws
Technical Information Figure 001-35: Beans Container Screws 10. Take off the beans container and the center cover piece. 11. Remove the chute present switch from the ground coffee chute (shown at the top left in Figure 001-36). 12. Remove the T10 screws securing the ground coffee chute (Figure 001-36, Item 1) (number of screws may vary by model). -
Page 50: Figure 001-37: Grinder Screws And Ground Coffee Chute Base Screw
Technical Information Figure 001-37: Grinder Screws and Ground Coffee Chute Base Screw 15. Take out the grinder. 16. Take out the ground coffee chute base. 17. Take off the grinder insulation. 18. Remove the thermostat from the grinder (see Figure 001-38, Item 1). Figure 001-38: Grinder Thermostat 19. -
Page 51: Grinder Thermostat (F3-3) Removal
Technical Information Note: For reassembly: The thermostat connects to the white terminal on the grinder (Figure 001-39). Figure 001-39: Grinder Thermostat Connection 4.12 Grinder Thermostat (F3-3) Removal See Section 001-4.11. 4.13 EPL Power Electronic (1N1-1, 2N1-1) Removal 1. Remove the top cover; see Section 001-4.5. 2. -
Page 52: Chute Present Switch (S87-5) Removal
Technical Information Figure 001-40: Power Electronic Screw 4.14 Chute Present Switch (S87-5) Removal 1. Remove the top cover; see Section 001-4.5. 2. Remove the side casing; see Section 001-4.6. 3. Take out the chute present switch (Figure 001-41, Item 1) and disconnect it from the power electronic. -
Page 53: Flow Meter (B3-4) Removal
Technical Information 3. Disconnect the electrical connections (Figure 001-42, Item 1) at the top of the pump. 4. Release the spring clip and take off the hose connection on the right side of the pump (Figure 001-42, Item 2). 5. Disconnect the pump-flow meter connection hose on the left side of the pump (Figure 001-42, Item 3). -
Page 54: Ceramic Valve (M29) Removal
Technical Information 2. Remove the side casing; see Section 001-4.6. 3. Release the microswitch (Figure 001-43, Item 1) from its mounting bracket. 4. Disconnect all electrical connections from the microswitch. Figure 001-43: Water Tank Sensor and Drip Tray Present Switch 4.19 Ceramic Valve (M29) Removal 1. -
Page 55: Heater (R1)/Fuse (1F8, 2F8)/Ntc (R30-14) Removal
Technical Information Figure 001-44: Ceramic Valve Screw Warning! When re-installing: In order to avoid possible water system faults (e.g., clogging or blocking of valves), grease, oil or other slip lubricants should never be used when assembling and installing water system parts. 4.20 Heater (R1)/Fuse (1F8, 2F8)/NTC (R30-14) Removal 1. -
Page 56: Removing The Brew Unit Drive (M26) And Brew Unit Switches
Technical Information Figure 001-45: Heater Assembly Warning! When re-installing: In order to avoid possible water system faults (e.g., clogging or blocking of valves), grease, oil or other slip lubricants should never be used when assembling and installing water system parts. 4.21 Removing the Brew Unit Drive (M26) and Brew Unit Switches 1. -
Page 57: Figure 001-46: Brew Unit Drive Screws
Technical Information Figure 001-46: Brew Unit Drive Screws 5. From the water tank side, remove the two T10 screws securing the pump/flow meter mounting bracket (Figure 001-47, Item 1). Slide the mounting bracket forward to release it. Figure 001-47: Pump/Flow Meter Mounting-Bracket Screw 6. -
Page 58: Figure 001-48: Water Tank Sensor/Drip Tray Present Switch Mounting-Bracket Screw
Technical Information Figure 001-48: Water Tank Sensor/Drip Tray Present Switch Mounting-Bracket Screw 7. Release the brew unit drive cover (Figure 001-49). Figure 001-49: Brew Unit Drive Cover... -
Page 59: Brew Unit Present Switch (S87-2) Removal
Technical Information 8. Disconnect the electrical connections from the brew unit drive position switches (Figure 001-50, Item 2) and release the switches from the brew unit drive assembly. 9. Remove the last two T10 screws securing the brew unit drive (Figure 001-50, Item 1). Figure 001-50: Brew Unit Drive Position Switches 10. -
Page 60: Figure 001-51: Hose Cover Screws
Technical Information Figure 001-51: Hose Cover Screws 7. Disconnect the three hoses (Figure 001-52, Item 1) and release the spout present switch (Figure 001-52, Item 2) from the dispenser assembly. 8. Remove the two T10 screws securing the dispenser assembly to the dispenser housing (Figure 001-52, Item 3) and separate the assembly from the housing. -
Page 61: Hot-Water Spout Removal
Technical Information Warning! When re-installing: In order to avoid possible water system faults (e.g., clogging or blocking of valves), grease, oil or other slip lubricants should never be used when assembling and installing water system parts. 4.25 Hot-Water Spout Removal 1. -
Page 62: Figure 001-54: Hot-Water Spout Removal
Technical Information Figure 001-54: Hot-Water Spout Removal... -
Page 63: Technical Service Bulletins
Technical Information Technical Service Bulletins CM 6X; F80 Cause and Repair The software ID 3885 is faulty. If the Eco mode is switched off, the overheating protectors may be blown by overheating. The software fault has been remedied. The new software ID 4014 is available from week starting Jan 09, 2017.
Need help?
Do you have a question about the CM6 and is the answer not in the manual?
Questions and answers