Table of Contents
Advertisement
Quick Links
Download this manual
See also:
User Manual
Advertisement
Table of Contents

Summary of Contents for Planet vgw-402
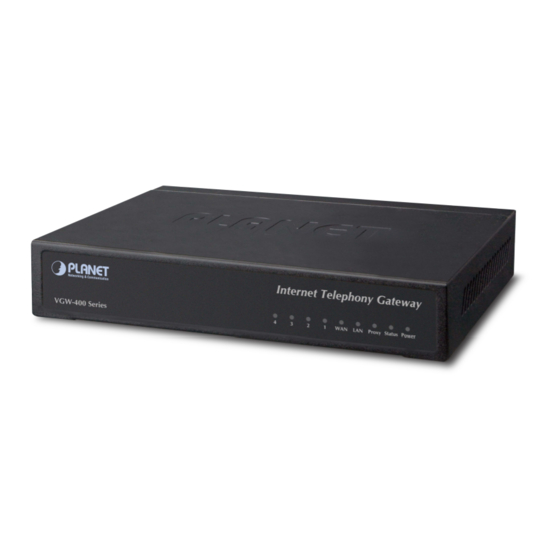
- Page 1 Internet Telephony Gateway VGW-402 / VGW-400FS / VGW-400FO Quick Installation Guide...
-
Page 2: Table Of Contents
Table of Contents 1. Package Contents ..................3 2. Hardware Installation .................. 4 2.1 Safety Instructions ................4 2.2 Physical Introduction ................5 2.3 LED & Button definitions ..............6 2.4 Placement ................... 7 2.5 Physical Connection ................7 3. Basic System Configuration ................. 8 3.1 Web Login .................. -
Page 3: Package Contents
1. Package Contents Thank you for purchasing PLANET Internet Telephony Gateway, VGW-400 Series. This Quick Installation Guide will introduce how to finish the basic setting of connecting the web management interface and the Internet. Open the box of the Internet Telephony Gateway and carefully unpack it. The box should contain the... -
Page 4: Hardware Installation
2. Hardware Installation The following are instructions for setting up PLANET VGW-400 Series. Refer to the illustration and follow the simple steps below to quickly install your Internet Telephony Gateway. 2.1 Safety Instructions The following are the safety instructions for Internet Telephony Gateway system before installing. -
Page 5: Physical Introduction
Internet Telephony Gateway VGW-400 Series WAN LAN Proxy Status Power Front Panel of the VGW-400 Series DC 12V Reset Rear Panel of the VGW-402 DC 12V Reset Rear Panel of the VGW-400FS DC 12V Reset Rear Panel of the VGW-400FO... -
Page 6: Led & Button Definitions
2.3 LED & Button definitions LED definitions Function Description When the power adapter is connected, the LED will light up Power green. Status When system starts up successfully, the LED will light up green. When the gateway is registered successfully to a SIP Proxy, this Proxy will light up green. This LED lights up green when the gateway’s WAN port is physically connected to the public internet. When data is transmitted through this port, it will flash green. This LED lights up green when the gateway’s LAN port is physically connected to a local network (Refer to Rear Panel section). When data is transmitted through this port, it will flash green. The status LEDs for FXO and FXS ports will light up amber orange Port 1 - 4 when connected phone is engaged in a conversation mode (FXO). -
Page 7: Placement
2.4 Placement Make sure the device is placed in a safe environment to avoid equipment failure. DO NOT place anything on top of the device. Excessive weight could damage it. DO NOT obstruct ventilation slots on each side of the VGW-400 Series or expose it to direct sunlight or other heat source. Be sure that there is adequate air flow around the VGW-400 Series. Place the VGW-400 Series on a flat surface to avoid any damage. 2.5 Physical Connection DC 12V Reset Switch Router PSTN SLT Phone Fax Internet Telephone wire 100Base-TX UTP IP PBX Video Phone IP Phone Physical Connection Topology of the VGW-400 Series... -
Page 8: Basic System Configuration
3. Basic System Configuration 3.1 Web Login Step 1. Connect a computer to a LAN port on the VGW-400 Series. Your PC must be set to 192.168.0.X, the same domain as that of the VGW-400 Series. Step 2. Start a web browser. To use the user interface, you need a PC with Internet Explorer (version 6 and higher), Firefox, or Safari (for Mac). Step 3. Enter the default IP address of the VGW-400 Series: 192.168.0.1 into the URL address box. Step 4. Enter the default user name admin and the default password admin, and then click Login to enter Web-based user interface. -
Page 9: Configuring The Network Setting
For security reason, please change and memorize the new pass- word after this first setup. Note 3.2 Configuring the Network Setting Step 1. Go to Device Setting Network Network setting page Step 2. Edit your WAN port IP information. There are three types of IP Support. They are IPV4 only, IPV4, IPV6 and IPV6 only. There are also three types of WAN port connection. They are Static IP, PPPoE (Point-to-Point Protocol over Ethernet) and DHCP. You can find detailed setting process in the user manual. -
Page 10: Changing Ip Address Or Forgotten Admin Password
Selection of IP Support / Network Connection Type 3.3 Changing IP Address or forgotten admin password To reset the IP address to the default IP address “192.168.0.1” (LAN) or reset the login password to default value, press the reset button on the front panel for more than 5 seconds. After the device is rebooted, you can login the management Web interface within the same subnet of 192.168.0.xx. Reset Button Reset After pressing the “Reset” button, all the system data will be reset... -
Page 11: Further Configuration
PLANET support team. PLANET online FAQ : http://www.planet.com.tw/en/support/faq.php Support team mail address : support@planet.com.tw Copyright © PLANET Technology Corp. 2013. Contents are subject to revision without prior notice. PLANET is a registered trademark of PLANET Technology Corp. All other trademarks belong to their respective owners. - Page 12 This page is intentionally left blank...


Need help?
Do you have a question about the vgw-402 and is the answer not in the manual?
Questions and answers