Sign In
Upload
Download
Table of Contents
Contents
Add to my manuals
Delete from my manuals
Share
URL of this page:
HTML Link:
Bookmark this page
Add
Manual will be automatically added to "My Manuals"
Print this page
×
Bookmark added
×
Added to my manuals
Manuals
Brands
MV Agusta Manuals
Motorcycle
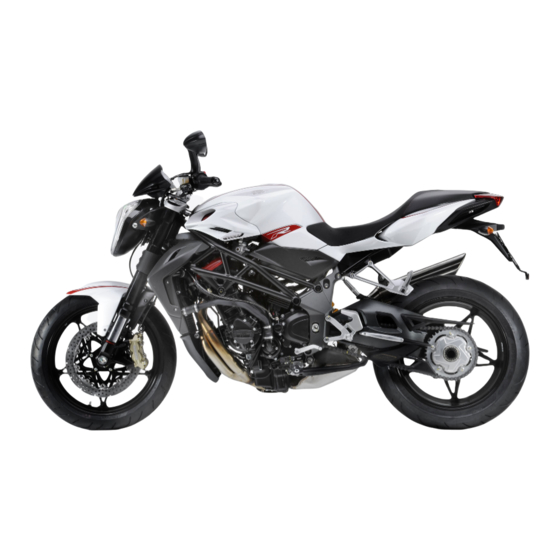
Brutale 990 R
Service manual
MV Agusta Brutale 990 R Service Manual
Hide thumbs
Also See for Brutale 990 R
:
Workshop manual
(402 pages)
1
2
3
4
5
6
7
8
9
10
11
12
13
14
15
16
17
18
19
20
21
22
23
24
25
26
27
28
29
30
31
32
33
34
35
36
37
38
39
40
41
42
43
44
45
46
47
48
49
50
51
52
53
54
55
56
57
58
59
60
61
62
63
64
65
66
67
68
69
70
71
72
73
74
75
76
77
78
79
80
81
82
83
84
85
86
87
88
89
90
91
92
93
94
95
96
97
98
99
100
101
102
103
104
105
106
107
108
109
110
111
112
113
114
115
116
117
118
119
120
121
122
123
124
125
126
127
128
129
130
131
132
133
134
135
136
137
138
139
140
141
142
Table Of Contents
143
page
of
143
Go
/
143
Contents
Table of Contents
Bookmarks
Table of Contents
General Index
General Description
Table of Contents
Order of the Subjects
Display of the Operations
Steering Pin Tightening
Updates
How to Consult this Manual
Glossary and Symbols
Right Hand and Left Hand Standard
Carbon Monoxide
Petrol
Engine Coolant
Safety
Battery
Brake Fluid
Nitrogen - Rear Shock Absorber
Thread-Locking Fluid
Summary of each Chapter
Index
Motorcycle Identification
Operative Technical Specifications
Maintenance
Planned Maintenance Schedule
Programmed Maintenance Schedule
Table of Lubricants and Fluids
Cleaning the Parts
Connections
General Norms for Assembling the Parts
Measuring Compression in the Cylinder
Throttle Body Adjustment and Tuning
Adjustment and Calibration of Throttle Body
Levelling of Induction Manifold Settings
Adjustment of Carbon Monoxide (CO)
Cylinder Kit
Cylinder Head
Removal of Head Group
Distribution Control Unit
Chain Tensioner
Removing the Valve Gear Components
Inspection of the Head Group
Head Assy Assembly
Distribution Gear and Driving Shaft Timing
Camshaft and Driving Shaft Timing
Dismounting Cylinder Head Pieces
Valve Removal
Maintenance of the Valve Slot
Thickness of the Stroke Surface of the Slot
Substitution of the Valve Slot
Removal of the Valve Guide
Valve Guide Check and Maintenance
Guide Valve Installation
Valve
Springs
Valve Reassembly
Valve-Guide Valve Coupling
Regulating Valve Play
Cylinder and Piston Group
Removing Cylinder and Pistons
Cylinder Revision
Piston Revision
Piston Pin Revision
Piston-Cylinder Coupling
Piston-Pin Coupling
Piston-Pin Connecting Rod Foot Coupling
Segment-Cylinder Coupling
Segments
Cylinder and Piston Assembly
Engine Block
Clutch Disassembly (Procedure Standard)
Clutch Overhauling
Clutch Reassembly
Procedure for B4 1090
Gear and Gear Control
Gear Group Disassembling
Gear Control
Gear Interlock Plunger
Shift Drum
Primary and Secondary Shaft
Gear Group Revision
Gear Selection Forks
Replacement of Gear Shafts
Reassembly
Water Pump
Water Pump Removing
Water Pump Reassembly
Starting
Freewheel Starting
Crankcase
Covers
Oil Sump
Remove the Oil Pressure Adjustment Valve (A)
Crankcase Disassembly
Selection Table for Bench Bearings
Assemble the Mainshaft
Mainshaft and Countershaft
Connecting Rod Disassembly
Coupling of Piston Pin-Small End Bush
Crankshaft
Half-Bearings Removal
Coupling Semi Bearings-Connecting Rod Pin
Connecting Rod Pin
Connecting Rod
Assembling Half-Bearings
Counter Shaft
Lubrication
Pompa Olio
Lubrication Components: Oil Radiator
Rimontaggio
Head Delivery Conduit
Lubrication Components:
Oil Tubing Support Plate
Oil Filter Replacement
Electrical Components
Electrical Components
Engine Oil Temperature Sensor
Alternator
Starter Motor
Tightening Torques
Tightening Torques
Tightening Torques Table
Tightening Torques: Conversion Factor
Standard Torques
Service Tools
Analytical Index
Advertisement
Quick Links
1
Table of Contents
2
Maintenance
3
Electrical Components
Download this manual
See also:
Workshop Manual
Table of
Contents
Previous
Page
Next
Page
1
2
3
4
5
Advertisement
Table of Contents
Need help?
Do you have a question about the Brutale 990 R and is the answer not in the manual?
Ask a question
Questions and answers
Related Manuals for MV Agusta Brutale 990 R
Motorcycle MV Agusta Brutale 990 R Workshop Manual
(402 pages)
Motorcycle MV Agusta Brutale Oro-S Workshop Manual
(386 pages)
Motorcycle MV Agusta BRUTALE 910 S Workshop Manual
Engine (113 pages)
Motorcycle MV Agusta BRUTALE 750 S Workshop Manual
(459 pages)
Motorcycle MV Agusta F4 BRUTALE 750 ORO Workshop Manual
(438 pages)
Motorcycle MV Agusta BRUTALE 989 R Workshop Manual
(459 pages)
Motorcycle MV Agusta BRUTALE 800 2017 User Manual
(508 pages)
Motorcycle MV Agusta Brutale R Owner's Manual
Brutale r mv agusta (397 pages)
Motorcycle MV Agusta Brutale 1090 Owner's Manual
Motorcycle (397 pages)
Motorcycle MV Agusta Brutale 675 Workshop Manual
(472 pages)
Motorcycle MV Agusta BRUTALE 800 Maintenance Manual
(80 pages)
Motorcycle MV Agusta Brutale 800 User Manual
(89 pages)
Motorcycle MV Agusta 2012 Brutale 675 Maintenance Manual
(402 pages)
Motorcycle MV Agusta Brutale 800 Owner's Manual
(407 pages)
Motorcycle MV Agusta F4 BRUTALE 1078 RR User Manual
(337 pages)
Motorcycle MV Agusta BRUTALE 800 RR Owner's Manual
(401 pages)
This manual is also suitable for:
Brutale 1090 rr
Table of Contents
Save PDF
Print
Rename the bookmark
Delete bookmark?
Delete from my manuals?
Login
Sign In
OR
Sign in with Facebook
Sign in with Google
Upload manual
Upload from disk
Upload from URL


Need help?
Do you have a question about the Brutale 990 R and is the answer not in the manual?
Questions and answers