
Subscribe to Our Youtube Channel
Related Manuals for Moxa Technologies UC-8112-LX-STK


Summary of Contents for Moxa Technologies UC-8112-LX-STK
- Page 1 UC-8112-LX-STK User’s Manual First Edition, April 2015 www.moxa.com/product © 2015 Moxa Inc. All rights reserved. Reproduction without permission is prohibited.
-
Page 2: Copyright Notice
UC-8112-LX-STK User’s Manual The software described in this manual is furnished under a license agreement and may be used only in accordance with the terms of that agreement. Copyright Notice Copyright ©2015 Moxa Inc. All rights reserved. Reproduction without permission is prohibited. -
Page 3: Table Of Contents
Table of Contents Introduction ............................1-1 Overview ............................1-2 Model Descriptions ..........................1-2 Package Checklist ..........................1-2 Product Features ..........................1-2 Hardware Specifications ........................1-3 Hardware Block Diagram ........................1-4 Hardware Introduction........................2-1 Appearance ............................2-2 LED Indicators ............................ 2-3 Default Programmable Button Operations .................... - Page 4 Wireless Module Settings ........................5-1 Enabling Cellular Module ........................5-2 Configuring the Cellular Module ..................... 5-2 Configuring the Wi-Fi Module ....................... 5-2 Bridging the Cellular to Serial Interface ....................5-4 UDP Server to Serial Device ......................5-4 UDP Client to Serial Device ......................5-4 TCP Server to Serial Device ......................
-
Page 5: Introduction
Introduction Moxa’s UC-8112 Series Starter Kit is an ideal hardware and software package for system evaluation. Containing a UC-8100 computer, optional cellular and Wi-Fi modules, and various software packages, this compact Starter Kit helps users establish their system architecture in no time. The following topics are covered in this chapter: ... -
Page 6: Overview
Model Descriptions The UC-8112-LX-STK series includes the following models: • UC-8112 Starter Kit with LTE-EU: Compatible with LTE, HSPA, GPRS/GSM, GPS •... -
Page 7: Hardware Specifications
UC-8112-LX-STK Manual Introduction Hardware Specifications Computer CPU: ARMv7 Cortex-A8 300/600/1000 MHz USB: USB 2.0 host x 1 (type A connector) DRAM: 256 MB DDR3 SDRAM (512 MB by request) OS (pre-installed): Debian ARM 7 (Kernel 3.2) Storage Storage Expansion: • SDHC/SDXC socket for storing OS and storage expansion •... -
Page 8: Hardware Block Diagram
UC-8112-LX-STK Manual Introduction Power Requirements Input Voltage: 12 to 24 VDC (3-pin terminal block, V+, V-, SG) Power Consumption: 5.4 W (without cellular module and external USB device attached) • 450 mA @ 12 VDC • 225 mA @ 24 VDC Standards and Certifications Safety: UL 60950-1, EN 60950-1, CCC (GB9254, GB17625.1) -
Page 9: Hardware Introduction
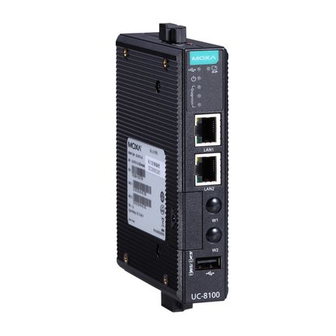
Hardware Introduction The UC-8112 embedded computers are compact and rugged, making them suitable for industrial applications. The LED indicators allow users to monitor performance and identify trouble spots quickly, and the multiple ports can be used to connect a variety of devices. The UC-8112 comes with a reliable and stable hardware platform that lets you devote the bulk of your time to application development. - Page 10 UC-8112-LX-STK Manual Hardware Introduction Appearance Front View Top & Bottom Views Bottom...
- Page 11 UC-8112-LX-STK Manual Hardware Introduction Dimensions units: mm (in) LED Indicators Refer to the following table for information about each LED. LED Name Color Function Green Steady On USB device is connected and working normally USB device is not connected. Green...
-
Page 12: Reset To Default Button
UC-8112-LX-STK Manual Hardware Introduction Default Operations for Programmable LEDs Status of the 3 LEDs Green LED Yellow LED Red LED Status Description SD Card Error – Can’t read from or write to the SD card WAN Ethernet Error – WAN Ethernet controller malfunction LAN Ethernet Error –... -
Page 13: Real Time Clock
UC-8112-LX-STK Manual Hardware Introduction Real Time Clock The UC-8112’s real time clock is powered by a lithium battery. We strongly recommend that you do not replace the lithium battery without help from a qualified Moxa support engineer. If you need to change the battery, contact the Moxa RMA service team. - Page 14 UC-8112-LX-STK Manual Hardware Introduction Another method for wall mounting installation is to use the optional wall mounting kit. Attach two mounting brackets on the side panel of the computer, and fasten with screws. Install the computer on a wall or cabinet by fastening two screws for each bracket.
-
Page 15: Hardware Connection Description
Hardware Connection Description This chapter describes how to connect the UC-8112 to a network and various devices for first time testing purposes. The following topics are covered in this chapter: Wiring Requirements Connecting the Power Grounding the Unit ... -
Page 16: Wiring Requirements
UC-8112-LX-STK Manual Hardware Connection Description Wiring Requirements In this section, we describe how to connect various devices to the embedded computer. You should heed the following common safety precautions before proceeding with the installation of any electronic device: • Use separate paths to route wiring for power and devices. If power wiring and device wiring paths must cross, make sure the wires are perpendicular at the intersection point. -
Page 17: Grounding The Unit
UC-8112-LX-STK Manual Hardware Connection Description Grounding the Unit Grounding and wire routing help limit the effects of noise due to electromagnetic interference (EMI). Run the ground connection from the ground screw to the grounding surface prior to connecting devices. ATTENTION This product is intended to be mounted to a well-grounded mounting surface, such as a metal panel. -
Page 18: Connecting To A Serial Device
UC-8112-LX-STK Manual Hardware Connection Description Signal The LED indicator in the lower right corner glows a solid green color ETx+ when the cable is properly connected to a 100 Mbps Ethernet network. ETx- The LED will flash on and off when Ethernet packets are being ERx+ transmitted or received. -
Page 19: Usb Port
UC-8112-LX-STK Manual Hardware Connection Description USB Port The UC-8112 provides 1 USB 2.0 full speed port (OHCI), type A connector, which supports a keyboard or mouse, as well as an external flash disk for storing large amounts of data. Inserting a Micro SD Card The UC-8112 comes with a micro SD card socket for storage expansion. - Page 20 UC-8112-LX-STK Manual Hardware Connection Description 3. Next, you need to install the antenna cable. There are two antenna connectors on the cellular module. Connect the cable to either connector. 4. Plug the other end of the cable into the connector on the front panel of the UC-8112. Remove the black plastic cover first.
-
Page 21: Installing The Wi-Fi Module
UC-8112-LX-STK Manual Hardware Connection Description Installing the Wi-Fi Module Follow these steps to install the Wi-Fi Module to the UC-8112-LX computer. 1. Remove the screws on the side panel, and take off the cover. 2. Find the location of the PCIe socket. Insert the cellular module into the socket, and then tighten the screws to fasten the socket. - Page 22 UC-8112-LX-STK Manual Hardware Connection Description 4. Install the other end of the cable onto the connector on the front panel of the UC-8112. Remove the black plastic cover first. 5. Install the connector; place the locking washer first, and then tighten the nut.
-
Page 23: Remote Configuration And Management
Remote Configuration and Management This chapter describes how to use the web-based tool, Webmin, to remotely configure and management the UC-8112-LX computer. Webmin is a web-based system configuration tool that helps users to configure various functions, such as user management, disk quota setting, services or configuration files, as well as modify and control open source apps, such as Apache HTTP Server, PHP orMySQL. -
Page 24: Connecting To The Uc-8112 Via Webmin
UC-8112-LX-STK Manual Remote Configuration and Management Connecting to the UC-8112 via Webmin Use an Ethernet cable to connect to your laptop or computer to the LAN1 port of the UC-8112 computer. Use a browser and connect with the following address: https://192.168.3.127:10000... -
Page 25: Change Language And Theme
UC-8112-LX-STK Manual Remote Configuration and Management Change Language and Theme You may change the language from the Personal choice drop-down list, or use the default value, Global language, English as the Webmin UI language. You may also change the theme of the Webmin UI from the Personal choice drop-down list. -
Page 26: Webmin Configuration
UC-8112-LX-STK Manual Remote Configuration and Management Webmin Configuration This option contains various configuration tools that help users to configure the UC-8112 computer. IP Access Control This option helps you configure the IP address control for the UC-8100 computer. You may allow or deny the specific IP addresses. - Page 27 UC-8112-LX-STK Manual Remote Configuration and Management Logging This option allows you to configure the log functions. You may decide to enable or disable logging function. Other functions are also provided. Users may configure all settings on this page. When finished, Click Save. For other configurations, click Return to Webmin configuration.
-
Page 28: User Interface
UC-8112-LX-STK Manual Remote Configuration and Management User Interface This option allows users to configure the user interface settings, such as background color, text color, and link color, etc. When finished, click Save. For other configurations, click Return to Webmin configuration. - Page 29 UC-8112-LX-STK Manual Remote Configuration and Management Operating System and Environment This option allows users to display the operating system and environment detected by Webmin. When necessary, you may update or upgrade the operating system and environment from this option. When finished, click Save.
- Page 30 UC-8112-LX-STK Manual Remote Configuration and Management Index Page Options This option allows users to configure the index page appearance of the Webmin. Select the options from the following figure. When finished, click Save. For other configurations, click Return to Webmin configuration.
- Page 31 UC-8112-LX-STK Manual Remote Configuration and Management Authentication This option allows users to configure the authentication settings. You may configure all settings in this figure. When finished, click Save. For other configurations, click Return to Webmin configuration. Two-Factor Authentication This option allows users to enable the addition device when logging. Select from the drop-down list in Authentication provider.
- Page 32 UC-8112-LX-STK Manual Remote Configuration and Management Reassign Modules This option allows users to configure the category to which each module is assigned. You may reassign these modules to different categories. When finished, click Change Categories. For other configurations, click Return to Webmin configuration.
- Page 33 UC-8112-LX-STK Manual Remote Configuration and Management Module Titles This option allows users to specify additional titles for the modules. Select the module from the Module drop-down list, and then provide a new title in the New title field. When finished, click Save. For other configurations, click Return to Webmin configuration.
- Page 34 UC-8112-LX-STK Manual Remote Configuration and Management Anonymous Module Access This option allows users to grant the access to the specific modules for the clients that do not need to log in. Provide the information for the specific fields. When finished, click Save. For other configurations, click Return to Webmin configuration.
-
Page 35: Advanced Options
UC-8112-LX-STK Manual Remote Configuration and Management Blocked Hosts and Users If you have blocked hosts and users, you may view the list here. For other configurations, click Return to Webmin configuration. Background Status Collection This option allows users to decide if they want to collect the status in the system background. When finished, click Save. - Page 36 UC-8112-LX-STK Manual Remote Configuration and Management Debugging Log Files This option allows users to debug log files. Users may configure the settings to debug log files. When finished, click Save. For other configurations, click Return to Webmin configuration. Web Server Options This option allows users to configure the web server settings.
- Page 37 UC-8112-LX-STK Manual Remote Configuration and Management Sending Email This option allows users to configure the setting for sending emails, and the text for email content. When finished, click Save. If you want to send the email immediately, click Send Email. For other configurations, click Return to Webmin configuration.
-
Page 38: Webmin Users
UC-8112-LX-STK Manual Remote Configuration and Management Certificate Authority This option allows users to configure the certificate authority. All detailed descriptions are displayed on this page. When finished, click Save. For other configurations, click Return to Webmin configuration. Webmin Users This option allows users to check, delete or create a new user for Webmin. In addition, you may create new Webmin Groups for different purposes. - Page 39 UC-8112-LX-STK Manual Remote Configuration and Management Configuring Unix User Synchronization If you have created a new Webmin group, you may check the users on this page. Configuring Unix User Authentication This option allows users to manage user authentication. Users may decide or deny access for specific Unix users.
- Page 40 UC-8112-LX-STK Manual Remote Configuration and Management Two-Factor Authentication If you have enabled two-factor authentication, you may check the status of the two-factor authentication on this page. Setup RBAC This option allows users to set up RBAC. Password Restrictions This option allows users to configure the password settings. When finished, click Save. For other configurations, click Return to Webmin configuration.
-
Page 41: Configuring System
UC-8112-LX-STK Manual Remote Configuration and Management User and Group Database This option allows users to configure the user and group database settings. When finished, click Save. For other configurations, click Return to Webmin configuration. Configuring System When you click System, nine options will be displayed. Click an option to proceed with configuration. -
Page 42: Bootup And Shutdown
UC-8112-LX-STK Manual Remote Configuration and Management Bootup and Shutdown This function allows users to enable specific actions when the system boots up or shuts down. Click a button to perform the associated function. Disk and Network Filesystems This option allows users to mount the system files to the UC-8100 computer. Select the file from the Type drop-down list, and then click Add mount. -
Page 43: Initial System Bootup
UC-8112-LX-STK Manual Remote Configuration and Management Initial System Bootup This option allows users to create or delete the initial process file when the computer is booting up. If you want to delete something, select the ID and click Delete Selected Processes at the bottom of this page. -
Page 44: Running Processes
UC-8112-LX-STK Manual Remote Configuration and Management Running Processes This option allows users to view the current running processes. Click Search to search for a the specific process. You can also terminate or kill a process by clicking the specific buttons. -
Page 45: Scheduled Cron Jobs
UC-8112-LX-STK Manual Remote Configuration and Management Scheduled Cron Jobs This option allows users to view the current scheduled cron jobs, or create a new scheduled cron job. To create a new cron job, click the Create a new scheduled cron job button, and enter the information in the fields as required. -
Page 46: Software Package Updates
UC-8112-LX-STK Manual Remote Configuration and Management If you want to allow some users to access the cron jobs, click the Control user access to cron job button. When finished, click Save. Software Package Updates This option allows users to update the software package on the UC-8100 computer. Select the package, and then click Update Selected Packages. -
Page 47: Software Packages
UC-8112-LX-STK Manual Remote Configuration and Management Software Packages This option allows users to search for installed packages, or install a new package. You may also upgrade all packages on this page. System Documentation This option allows users to search the system documentation. Type key words in the Search for field, and then click Search. -
Page 48: System Log
UC-8112-LX-STK Manual Remote Configuration and Management System Log This option allows users to view and edit the current system log, or create a new system log. Click the system log you want to edit, and then provide the relevant information. Click Save. You may also delete this log by clicking Delete. -
Page 49: Configuring Server
UC-8112-LX-STK Manual Remote Configuration and Management Configuring Server Click Sever. Three options will be displayed. Click the appropriate option to continue the configuration you would like to take care of. Apache Webserver This option allows users to view or delete the current Apache Webservers. You may also create a virtual host on this page. -
Page 50: Dhcp Server
UC-8112-LX-STK Manual Remote Configuration and Management DHCP Server This option allows users to configure the DHCP server settings. Various functions are also provided, including Edit Client Options, Edit TSIG-keys, Manually Edit Configuration, List Active Leases. To edit the subnet settings of the current DHCP server, click the icon and then start configuring. When finished, click Save. -
Page 51: Read User Mail
UC-8112-LX-STK Manual Remote Configuration and Management Read User Mail You can read user’s email here. To configure the email settings, click module configuration. When finished, click Save. Configuring Others Click Others. Two options will be displayed. Click the appropriate option to take further action. -
Page 52: Configuring Networking
UC-8112-LX-STK Manual Remote Configuration and Management Configuring Networking Click Networking. Three options will be displayed. Click the appropriate option to take further action. Bandwidth Monitoring This option allows users to configure the network interface and the bandwidth condition. Select the network interface, and then click Setup Now for additional configuration. When finished, click Save. -
Page 53: Network Configuration
UC-8112-LX-STK Manual Remote Configuration and Management Network Configuration Network Interfaces This option allows users to activate, view, or apply the current network interfaces. Select the functions you wish to use. Routing and Gateways This option allows users to configure the routing and gateways configurations. When finished, click Save. -
Page 54: Hardware
UC-8112-LX-STK Manual Remote Configuration and Management Host Addresses This option allows users to add a new host address or delete the existing one. Hardware Click Hardware. Two options will be displayed. Click the appropriate option to take further action. Partitions and Local Disks This option allows users to edit the disk partitions. -
Page 55: System Time
UC-8112-LX-STK Manual Remote Configuration and Management System Time This option allows users to configure system time and hardware time. When finished, click Apply or Save. Viewing More Options Four more options can be found in the left lower corner of the Webmin window. Click an option for details. -
Page 56: System Information
UC-8112-LX-STK Manual Remote Configuration and Management You may also export the files in CSV format. Select the file and then click Export as CSV. System Information This item allows users to view the current system information. Refresh Modules This item allows users to refresh the current modules on the UC-8112 computer. -
Page 57: Wireless Module Settings
Wireless Module Settings This chapter describes how to configure the Wi-Fi and cellular modules for the UC-8112-LX computer. The following topics are covered in this chapter: Enabling Cellular Module Configuring the Cellular Module Configuring the Wi-Fi Module ... -
Page 58: Enabling Cellular Module
UC-8112-LX-STK Manual Wireless Module Settings Enabling Cellular Module Locate Command Shell in the Others drop-down list. Provide the required commands in the Command Shell field. Configuring the Cellular Module To enable and dial up the cellular module, type the following command:... - Page 59 UC-8112-LX-STK Manual Wireless Module Settings Configuring SSID and Password To configure the SSID and password, edit the following content: ### Open system ### #network={ ssid="Open" key_mgmt=NONE ################### Configuring the WEP SSID and WEP key To configure the WEP SSID and WEP key, edit the following content:...
-
Page 60: Bridging The Cellular To Serial Interface
UC-8112-LX-STK Manual Wireless Module Settings Bridging the Cellular to Serial Interface This section describes how to enable the UC-8112 to communicate with peripheral devices. UDP Server to Serial Device Type the following command in the Command Shell so that the signal between the DUP server and serial device... -
Page 61: Configuring The Ipsec Settings
UC-8112-LX-STK Manual Wireless Module Settings Configuring the IPSec Settings To set up the IP address of the IPSec server, edit the following file: /etc/ipsec-tools.conf ## Flush the SAD and SPD flush; spdflush; ## Some sample SPDs for use racoon spdadd 10.10.10.78 10.10.10.10 any -P out ipsec esp/transport//require;... - Page 62 UC-8112-LX-STK Manual Wireless Module Settings Take the following steps to enable the IPSec function when the system starts up: 2. Locate the Bootup and Shutdown option in Webmin. 3. Click Create a new bootup and shutdown action. 4. Enter the following commands in the Bootup commands field: /etc/init.d/setkey restart...
-
Page 63: Data Acquisition
Data Acquisition This chapter describes how to use the UC-8112 computer to acquire data from an ioLogik E1242 RTU controller. The following topics are covered in this chapter: Acquiring Data... -
Page 64: Acquiring Data
UC-8112-LX-STK Manual Data Acquisition Acquiring Data The UC-8112-LX Start Kit comes with an ioLogik E1242 RTU controller. To acquire data from the controller, use the following commands in the Command Shell field. To read the value from Digital Input 0: Em2240 –d 192.168.31.66 –i 0... -
Page 65: Regulatory Approval Statements
Regulatory Approval Statements This device complies with part 15 of the FCC Rules. Operation is subject to the following two conditions: (1) This device may not cause harmful interference, and (2) this device must accept any interference received, including interference that may cause undesired operation.
Need help?
Do you have a question about the UC-8112-LX-STK and is the answer not in the manual?
Questions and answers