
Subscribe to Our Youtube Channel
Related Manuals for Avdel 07536


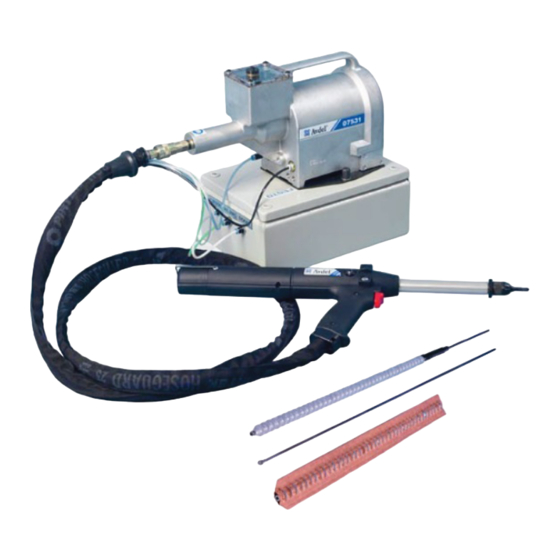
Summary of Contents for Avdel 07536
- Page 1 I n s t r u c t i o n M a n u a l 0 7 5 3 6 H y d ro - P n e u m a t i c P o w e r To o l...
-
Page 3: Table Of Contents
AND REMEDIES. ANY IMPLIED WARRANTY AS TO QUALITY, FITNESS FOR PURPOSE, OR MERCHANTABILITY ARE HEREBY SPECIFICALLY DISCLAIMED AND EXCLUDED BY AVDEL. Avdel UK Limited policy is one of continuous product development and improvement and we reserve the right to change the specification of any product without prior notice. -
Page 4: Safety Rules
Any modification undertaken by the customer to the tool/machine, nose assemblies, accessories or any equipment supplied by Avdel UK Limited. or their representatives, shall be the customer’s entire responsibility. Avdel UK Limited. will be pleased to advise upon any proposed modification. -
Page 5: Specification For 07536 Tool
S p e c i f i c a t i o n s S p e c i f i c a t i o n f o r 0 7 5 3 6 To o l Air Pressure Minimum - Maximum 5-7 bar (70-100 lbf/in Free Air Volume Required... -
Page 6: Intent Of Use
I n t e n t o f U s e The pneumatic 07536 tool is a hand held light weight tool designed to place Avdel ® speed fasteners and ” Avlug ® making it ideal for batch or flow-line assembly in a wide variety of applications throughout all industries. -
Page 7: Tool Dimensions
I n t e n t o f U s e To o l D i m e n s i o n s - 0 7 5 3 6 M o d e l Part Number 07536-02100 Dimensions shown in bold are millimetres. Other dimensions are in inches. -
Page 8: Putting Into Service
P u t t i n g i n t o S e r v i c e A i r S u p p l y All tools are operated with compressed air at an optimum pressure of 5.5 bar. We recommend the use of pressure regulators and automatic oiling/filtering systems on the main air supply. -
Page 9: Air Cursors
18 and 19), this will release the mandrel. NOSE JAWS • Remove the cursor from the mandrel and insert the cursor into the barrel. Item numbers in bold refer to the general assembly and parts list for the 07536-02200 Tool on pages 18-19. -
Page 10: Loading And Reloading The Tool
Open the nose jaws and pull the empty mandrel and mandrel follower spring out of the tool. • •* Reload the tool by following the above instructions, starting at stage Item numbers in bold refer to the general assembly and parts list for the 07536-02200 Tool on pages 18-19. -
Page 11: Operating Procedure
• Remove the tool. • Release the trigger. The next fastener will be automatically presented through the nose jaws, ready for placing. Item numbers in bold refer to the general assembly and parts list for the 07536-02200 on pages 18-19. -
Page 12: Servicing The Tool
Under no circumstances must the pneumatic box be opened. The box is a closed item. The internal adjustments are preset and must not be altered or tampered with. Only Authorised Avdel personnel may dismantle this control box. D a i l y •... -
Page 13: Service Kit
S e r v i c i n g t h e To o l S e r v i c e K i t For all servicing we recommend the use of the service kit (part number 07900-05300). SERVICE KIT ITEM PART Nº... - Page 14 Notes...
-
Page 15: Air Cursor Tool, Intensifier & Control Box Assembly
A i r C u r s o r To o l , I n t e n s i f i e r & C o n t ro l B o x A s s e m b l y 0 7 5 3 6 - 0 2 1 0 0 BLUE PIPE BLACK PIPE... -
Page 16: Dismantling 07536-02200
M a i n t e n a n c e Every 500,000 cycles the tool should be completely dismantled and new components should be used where worn, damaged or when recommended. All ‘O’ rings and seals should be renewed and lubricated with Moly Lithium grease EP 3753 before assembling. I M P O R T A N T Safety Instructions appear on page 4. - Page 17 M a i n t e n a n c e D i s m a n t l i n g 0 7 5 3 6 - 0 2 2 0 0 TRIGGER ASSEMBLY • To dismantle/service assembly, remove covers from the tool as described earlier. •...
-
Page 18: General Assembly And Parts List 07536-02200
G e n e r a l A s s e m b l y o f B a s e To o l 0 7 5 3 6 - 0 2 2 0 0... - Page 19 P a r t s L i s t f o r B a s e To o l 0 7 5 3 6 - 0 2 2 0 0...
-
Page 20: Intensifier 07531-02200 - Maintenance
I n t e n s i f i e r 0 7 5 3 1 - 0 2 2 0 0 - M a i n t e n a n c e D i s m a n t l i n g I n s t r u c t i o n s •... -
Page 21: Parts List
I n t e n s i f i e r 0 7 5 3 1 - 0 2 2 0 0 Note Some units will not include these items (The required link is achieved via internal porting). VIEW ON ARROW 'B' VIEW ON ARROW 'A' VIEW ILLUSTRATING FESTO VALVE VIEW ILLUSTRATING COMPAIR VALVE... -
Page 22: Priming
• With the 07536 pistol unit fitted to the intensifier unit and held below the level of the intensifier unit, unscrew Bleed Screw 64 from Bleed Plug Assembly 43 on the 07536 tool two turns and allow oil to flow out of the tool. -
Page 23: Fault Diagnosis
Incorrect gap between fastener head Set gap to 1.5mm - 3mm ( ” - ”) time and nose jaws when loaded See ‘Loading the Tool’ on page 10-11 Other symptoms or failures should be reported to your local Avdel authorised distributor or repair centre. - Page 24 N o t e s...
- Page 25 D e c l a r a t i o n o f C o n f o r m i t y We, Avdel UK Limited, Watchmead Industrial Estate, Welwyn Garden City, Hertfordshire, AL7 1LY declare under our sole responsibility that the product: Model 07536 Hand Tool Serial No.
- Page 26 Change Note No. Date 05/13 MAR 05 07900-00846 05/294 JUNE 05 06/160 OCT 06 07/044 FEB 07 07/103 MAR 07 07/261 OCT 07 Avdel®, Avdel® SR, Avex®, Aviug®, Avsert®, Avtronic®, Briv®, Chobert®, Grovit®, Rivscrew® are trademarks of Avdel UK Limited. www.avdel-global.com...
Need help?
Do you have a question about the 07536 and is the answer not in the manual?
Questions and answers