Table of Contents
Advertisement
Quick Links
Advertisement
Table of Contents

Related Manuals for Honeywell PM42


Summary of Contents for Honeywell PM42
- Page 1 PM42 Mid-Range Printer User Manual...
- Page 2 Disclaimer Honeywell International Inc. (“HII”) reserves the right to make changes in specifications and other information contained in this document without prior notice, and the reader should in all cases consult HII to determine whether any such changes have been made. The information in this publication does not represent a commitment on the part of HII.
-
Page 3: Table Of Contents
About the PM42 Printer........ - Page 4 How to Set Up a USB Storage Device to Upload Files to the Printer..42 Upload Files from a USB Storage Device ......43 PM42 Mid-Range Printer User Manual...
- Page 5 How to Clean the Exterior of the Printer......65 PM42 Mid-Range Printer User Manual...
- Page 6 Predefined INPrint Label Formats ........95 PM42 Mid-Range Printer User Manual...
-
Page 7: Customer Support
For warranty information, go to www.honeywellaidc.com and click Resources > Warranty. The limited duration of the warranty for the PM42 printer is as follows: • The duration of the limited warranty for printers is one year. • The duration of the limited warranty for the printhead is six months. - Page 8 Caution: Carefully read the warning text on the envelope before using a cleaning card. Caution: To reduce the risk of electric shock or fire, keep the cover closed and turn off the printer when not in use. No user-serviceable parts inside. viii PM42 Mid-Range Printer User Manual...
-
Page 9: About The Printer
About the Printer This chapter introduces the PM42 printer and describes printer features and basic printer operation. -
Page 10: About The Pm42 Printer
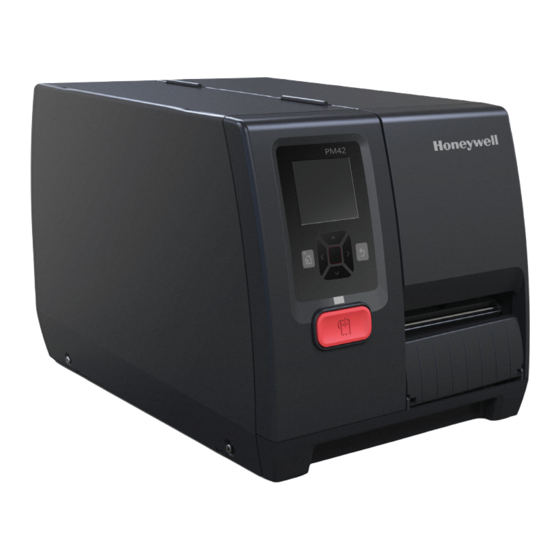
Chapter 1 — About the Printer About the PM42 Printer The PM42 printer is a rugged label printer that include integrated Ethernet, RS-232, and USB interfaces. The printer includes these features: • Print speeds of up to 10 ips (406 dpi printhead) and 12 ips (203 and 300 dpi printhead) •... - Page 11 Edge guide Ribbon supply Ribbon takeup Dancer guide Printhead lever Gap sensor adjustment wheel PM42 Internal View On/off switch Ethernet port RS-232 serial port USB device port USB host port AC Power PM42 Back View PM42 Mid-Range Printer User Manual...
-
Page 12: About The Front Panel
Blinking Printer is not ready for a print job. Printer is turned off, not communicating, or not ready to print. For example, the printer may still be starting up, or a firmware upgrade is underway. PM42 Mid-Range Printer User Manual... -
Page 13: About The Print Button
Press the Enter ( ) button to select the highlighted item or save settings in a menu or list. Back button. Returns to the previous menu or page, or stops a running Fingerprint application. PM42 Mid-Range Printer User Manual... -
Page 14: About The Ready Screen
The status bar at the top of the screen displays information and status icons. Information and Status Icons Icon Description Printer Information. Select this icon to view basic printer information. Connectivity. Blinks when data is moving through a wired connection to the printer. PM42 Mid-Range Printer User Manual... -
Page 15: About The Main Menu
Tools. Lets you print test labels, manage a connected USB storage device, restore printer default settings, save and load printer profiles, and configure menu item shortcuts. Wizards. Lists the wizards you can use to configure printing, communications, and calibration. PM42 Mid-Range Printer User Manual... -
Page 16: About The Onscreen Keypads
When you select a setting that requires you to type characters, an alphanumeric or numeric keypad appears. Alphanumeric Keypad Numeric Keypad To access the extended numeric keypad, select the 123 key on the alphanumeric keypad. Extended Numeric Keypad PM42 Mid-Range Printer User Manual... -
Page 17: About The Printer Wizards
Description Media Calibrates the label stop sensor and displays current print settings. Date & Time Calibrates date and time settings, such as time zone. Lets you set the date and time and specify the format. PM42 Mid-Range Printer User Manual... -
Page 18: About Printer Command Languages
Smart Printing applications. Direct Protocol lets you combine predefined layouts and variable data to create labels, tickets, and tags. If you are using bar code software, like BarTender, select Direct Protocol as your printer command language. PM42 Mid-Range Printer User Manual... -
Page 19: About Ipl
How to Set the Printer Command Language Use one of these methods to change the printer command language: • Main Menu • Printer Web page • PrintSet 5. For help, see “Configure the Printer with PrintSet 5” on page PM42 Mid-Range Printer User Manual... -
Page 20: Set The Command Language From The Main Menu
Enter. The printer web page appears. 4 Click Login. The Login page appears. 5 Type your Username and Password and click Login. The default username is itadmin and the default password is pass 6 Click the Configure tab. PM42 Mid-Range Printer User Manual... -
Page 21: Printer Options And Accessories
Printer Options and Accessories You can use these printer options and accessories (sold and ordered separately) with the PM42 printer. Most options are either installed at the factory or by factory service technicians in the field. Accessories are designed to be installed by the customer. - Page 22 Chapter 1 — About the Printer PM42 Mid-Range Printer User Manual...
-
Page 23: Set Up The Printer
Set Up the Printer This chapter describes how to set up the printer and includes information about how to load media and ribbon, print a test label, and calibrate and adjust the printer. -
Page 24: About Media
Chapter 2 — Set Up the Printer About Media The PM42 can print on labels, tickets, tags, and continuous media stock. About Tear-Off Printing For tear-off printing, you manually tear printed labels, tickets, and other printed media from the front of the printer. You can use these types of media for tear-off printing: •... - Page 25 11 Calibrate the sensors: • From the printer Main Menu select Wizards > Calibration > Media. • From the printer web page select Services > Media Calibration. 12 Configure the start and stop adjust settings. PM42 Mid-Range Printer User Manual...
-
Page 26: Load Media From An External Supply
5 Close the media cover. 6 Press the Print button to advance the media. 7 Configure the printer for the correct media type: media with gaps, black mark, continuous fixed length, or continuous variable length. PM42 Mid-Range Printer User Manual... -
Page 27: About Ribbon
If you see a mark on the paper, your ribbon is wound ink out. = Ink in = Ink out How to Determine if Your Ribbon is Wound Ink In or Ink Out PM42 Mid-Range Printer User Manual... -
Page 28: Load Ribbon
• For ribbon that has the ink wound in, place the ribbon on the supply hub with the ribbon wound counterclockwise. The ribbon in this illustration has the ink wound out. PM42 Mid-Range Printer User Manual... - Page 29 11 Set the print method to ribbon (TTR). 12 Calibrate the sensors: • From the printer Main Menu select Wizards > Calibration > Media. • From the printer web page select Services > Media Calibration. PM42 Mid-Range Printer User Manual...
-
Page 30: Connect The Printer To Power
How to Create and Print Labels Use one of these methods to create and print labels: • Use Honeywell printer software. You can download label design software and printer drivers from http://www.honeywellaidc.com. • Use the Fingerprint or IPL printer command language. For help, see... -
Page 31: Connect The Printer
Connect the Printer You can connect your printer to a PC or network. -
Page 32: About Printer Drivers
Use InterDriver to install printer driver software on your PC. 1 Open a web browser and go to www.honeywellaidc.com. 2 Select Products > Printers and Media > PM42. 3 Click the Software tab. 4 In the Drivers list, click the link to install the latest version of InterDriver. -
Page 33: Connect The Printer With A Serial Cable
2 If necessary, change the PC serial port configuration to match your printer. Connect the Printer with a USB Cable Honeywell recommends that you only connect one printer to your PC, either directly or through a hub. You do not need to set up any parameters for USB communications. -
Page 34: Connect The Printer To An Ethernet Network
Smart Printing application. Bar code Use Honeywell USB bar code scanners for data input scanner with a Smart Printing application. The printer also supports other USB scanners that use a generic keyboard driver. -
Page 35: Connect A Usb Storage Device
FAT16 or FAT32. 2 Connect the device to one of the USB ports. 3 If you connected a USB storage device, from the Main Menu, select Tools > USB Menu for more options. PM42 Mid-Range Printer User Manual... - Page 36 Chapter 3 — Connect the Printer PM42 Mid-Range Printer User Manual...
-
Page 37: Configure The Printer
Configure the Printer This chapter describes the configuration menu on the printer and the different methods you can use to configure the printer. -
Page 38: About The Printer Configuration Menus
Not all configuration items appear in each interface. Serial Ethernet COM1 IPv4 COM2 IP Assignment Method COMn IP Address Subnet Mask Default Router DHCP Response IPv6 IP Assignment Method IP Address Communications Menu PM42 Mid-Range Printer User Manual... - Page 39 Stop Bits Stop Bits Stop Bits Hardware Hardware Hardware ENQ/ACK ENQ/ACK ENQ/ACK XON/XOFF To XON/XOFF To XON/XOFF To XON/XOFF From XON/XOFF From XON/XOFF From New Line Character New Line Character New Line Character Serial Communications Menu PM42 Mid-Range Printer User Manual...
-
Page 40: Printing Menu
Print Speed Print Method Media Sensitivity Media Margin (X) Darkness Media Width Contrast Media Length Clip Default Start Adjust Stop Adjust Media Calibration Mode Length (Slow Mode) Power Up Action Head Down Action Printing Menu PM42 Mid-Range Printer User Manual... -
Page 41: System Settings Menu
Display Language Menu Access SmartSystems Keyboad Input SNMP Time Screen Timeout AM/PM Feed Key Access IKEv2 Date Information Access Command Language Telnet Alert Notification Method Unit of Measure Time Server Zero with Slash System Settings Menu PM42 Mid-Range Printer User Manual... - Page 42 SNMPv3 Username SNMPv3 Traps Status N Authentication Key SNMPv3 Trap Name N Encryption Key Time Server SNMPv3 Trap Address N Authentication Protocol SNMPv3 Trap Port Number N Encryption Protocol Server Address Port Number Network Services Menu PM42 Mid-Range Printer User Manual...
-
Page 43: How To Configure The Printer
Menu or a USB flash drive menu. • Disable: Users cannot access menus from the Main Menu or from a USB flash drive menu. 3 If you select Enable with PIN, type in a PIN. 4 Save your changes. PM42 Mid-Range Printer User Manual... -
Page 44: Configure The Printer From The Web Page
5 Type your Username and Password. The default username is and the default password is itadmin pass 6 Click Login. 7 Click the Configure tab. 8 (Optional) To see a complete list of your printer settings, click Configuration Summary. PM42 Mid-Range Printer User Manual... -
Page 45: Configure The Printer With Printset 5
SETUP GET “MEDIA,MEDIA TYPE,LABEL (W GAPS)” You must log in as an itadmin to perform a SET operation, but you do not need to log in to perform a GET operation. For more information, see the Fingerprint Command Reference. PM42 Mid-Range Printer User Manual... -
Page 46: How To Configure The Printer With Smartsystems
1 Log in to the printer Web page. For help, see “Configure the Printer from the Web Page” on page 2 Click the Configure tab. 3 Select System Settings > General. 4 Click Save As Profile. PM42 Mid-Range Printer User Manual... -
Page 47: Load A Printer Profile From The Web Page
1 From the Main Menu, select Tools > Profiles. 2 Select Load. 3 Select the profile you want to load, and press . When the upload is finished, a “Complete” message appears on the screen. PM42 Mid-Range Printer User Manual... -
Page 48: How To Load A Printer Profile With Programming Commands
Use one of these methods to upload files to the printer: • Printer Web page • USB Storage Device • PrintSet 5. For help, see the user guide that ships with the software. PM42 Mid-Range Printer User Manual... -
Page 49: Upload Files From The Web Page
Use the printer Web page to upload files to the printer and install fonts, images, applications, formats, and Web forms. 1 Log in to the printer Web page. For help, see “Configure the Printer from the Web Page” on page 2 Click the Manage tab. PM42 Mid-Range Printer User Manual... -
Page 50: How To Set Up A Usb Storage Device To Upload Files To The Printer
File Type Directories for the USB Storage Device Directory to Place Installed in this Printer File Type the File Directory Application /apps /home/user/apps Configuration /config Configuration profile /profiles /home/user/profiles Display images /display /home/user/display Fingerprint script /scripts /home/user/scripts PM42 Mid-Range Printer User Manual... -
Page 51: Upload Files From A Usb Storage Device
, and then select the file you want to install and press 5 When the upload is complete, go to the Main Menu and select Tools > USB Menu > Remove USB. 6 Remove the USB storage device. PM42 Mid-Range Printer User Manual... -
Page 52: Export A Configuration File To A Usb Storage Device
When the file is successfully imported, a message appears. 3 To close the message, press 4 From the Main Menu, select Tools > USB Menu > Remove USB. 5 Remove the USB storage device. PM42 Mid-Range Printer User Manual... -
Page 53: Change The Background Image For The Ready Screen
A check mark appears in the box. Or, select individual test labels and press after each selection. A check mark appears in each box. • Select the arrow at the bottom of the screen, and press PM42 Mid-Range Printer User Manual... -
Page 54: Customize The Printer Web Page
1 Copy the default style.css from the printer at http://<printerip>/format/ style.css. 2 Modify the CSS and save your changes. 3 Upload the modified CSS to the printer with this FTP to printer path: /home/user/webpage/style.css. PM42 Mid-Range Printer User Manual... -
Page 55: Troubleshoot The Printer
Troubleshoot the Printer Use this chapter to troubleshoot the printer. -
Page 56: Contact Support
About Printer System Information The System Information tab on the printer Web page contains useful information and statistics about the printer hardware and firmware. You may need to provide this information if you contact Support. PM42 Mid-Range Printer User Manual... -
Page 57: About Printer Statistics
1 Log in to the printer Web page. For help, see “Configure the Printer from the Web Page” on page 2 Click the System Information tab. 3 Select Statistics > System Information. 4 To view more statistics, click another item in the Statistics list. PM42 Mid-Range Printer User Manual... -
Page 58: Check Printhead Usage
Set Error, Warning, and Information Alerts You configure alert settings from the printer Web page. 1 Log in to the printer Web page. For help, see “Configure the Printer from the Web Page” on page 2 Click the Configure tab. PM42 Mid-Range Printer User Manual... -
Page 59: About Maintenance Alerts
2 Enter the values you want to set for each maintenance alert. Set Maintenance Alerts from the Web Page 1 Log in to the printer Web page. For help, see “Configure the Printer from the Web Page” on page 2 Click the Configure tab. PM42 Mid-Range Printer User Manual... -
Page 60: How To Configure Error Alert Notifications
Web Page” on page 2 Click the Configure tab. 3 Select System Settings > General. 4 Select an Alert Notification Method: • Email • SNMP Trap • SNMP Trap+Email 5 When you are finished, click Save. PM42 Mid-Range Printer User Manual... -
Page 61: Maintenance And Error Alerts
Odometer The printhead has reached a limit set in the (Printhead) Odometer (Printhead) setting in Maintenance Alerts for the amount of media to print before being alerted. PM42 Mid-Range Printer User Manual... - Page 62 Started The printer is in the process of starting up. Motor Too Hot The printer motor has reached its maximum operating temperature limit. Let the motor cool down before you resume printing. PM42 Mid-Range Printer User Manual...
-
Page 63: Problems And Possible Solutions
• The printhead voltage may be incorrect or the energy control may be faulty. For help, contact your Intermec representative. There are dark lines along The printhead may be dirty. Clean the the media path. printhead. PM42 Mid-Range Printer User Manual... - Page 64 • Make sure that the ribbon is fitted correctly. Reload the ribbon. • The energy control may be faulty. For help, contact your Intermec Service representative. PM42 Mid-Range Printer User Manual...
- Page 65 “pin-to-pin” cable, not a “crossover” cable. • Make sure your PC is correctly configured for and connected to your network. • Make sure your printer is correctly configured for your network. PM42 Mid-Range Printer User Manual...
-
Page 66: How To Restore Default Settings
5 On your PC, open a Web browser. 6 In the Location or Address bar, type the printer IP address and press Enter. The printer web page appears. 7 Click Login. The Login page appears. PM42 Mid-Range Printer User Manual... -
Page 67: Restore Default Settings With A Hardware-Based Reset
The latest version of the firmware is available from the printer software tab page on www.honeywellaidc.com. Note: After you upgrade the printer firmware, Honeywell recommends that you restore the default settings and calibrate the media sensors. PM42 Mid-Range Printer User Manual... -
Page 68: Download The Printer Firmware Update
Upgrade Firmware from a USB Storage Device You can use a USB storage device to upgrade firmware. Honeywell recommends that you use a blank USB storage device. 1 Copy the firmware upgrade file to the root directory of the USB storage device. - Page 69 4 Restart your printer. A message appears as the upgrade file is loaded into the printer memory. This process may take a few minutes. 5 From the Main Menu, select Tools > USB Menu > Remove USB. 6 Remove the USB storage device. PM42 Mid-Range Printer User Manual...
- Page 70 Chapter 5 — Troubleshoot the Printer PM42 Mid-Range Printer User Manual...
-
Page 71: Maintain The Printer
Maintain the Printer This chapter describes how to clean, adjust, and replace parts of the printer. -
Page 72: How To Clean The Printer
Caution: Use only the cleaning agents specified in this section. Honeywell is not responsible for damage caused by any other cleaning materials used on this printer. Caution: Isopropyl alcohol is a highly flammable, moderately toxic, and mildly irritating substance. -
Page 73: Clean The Media Guides
Keep the exterior of the printer clean to reduce the risk of dust or foreign particles getting inside the printer. Use a soft cloth moistened with water or a mild detergent to clean the exterior of the printer. You should also keep the surface around the printer clean. PM42 Mid-Range Printer User Manual... -
Page 74: Replace The Printhead
4 Turn the printhead lift lever counterclockwise to raise the printhead. 5 Detach the magnetic pressure arm from the printhead bracket and disconnect the two cables from the printhead as you remove it from the printer. PM42 Mid-Range Printer User Manual... -
Page 75: Replace The Platen Roller
1 Turn off the printer and disconnect the printer from power. 2 Open the media cover. 3 Remove the media. 4 Turn the printhead lift lever counterclockwise to raise the printhead. PM42 Mid-Range Printer User Manual... -
Page 76: How To Adjust The Printer
You may need to adjust the printer to improve performance or accommodate your method of printing. You can make these adjustments: • Ribbon tension • Printhead balance • Printhead pressure • Label gap and black mark sensor PM42 Mid-Range Printer User Manual... -
Page 77: Adjust Ribbon Tension
2 Use a large straight-slot screwdriver to adjust the ribbon tension bar: • To decrease the tension, turn the screw clockwise and move the bar backward. • To increase the tension, turn the screw counterclockwise and move the bar forward. PM42 Mid-Range Printer User Manual... -
Page 78: Adjust The Printhead Balance
4 Press down on the blue part of the printhead balance bar and move • outward for wider media. • inward for narrower media. 5 Close the printhead and load the ribbon. 6 Test and readjust the printhead balance if necessary. 7 Close the media cover. PM42 Mid-Range Printer User Manual... -
Page 79: Adjust The Printhead Pressure
To increase the pressure and create a darker print, turn the screw clockwise. • To decrease the pressure and create a lighter print, turn the screw counterclockwise. 3 Test and readjust the printhead pressure if necessary. 4 Close the media cover. PM42 Mid-Range Printer User Manual... -
Page 80: Adjust The Label Gap And Black Mark Sensor
• To move the sensor toward the inside of the printer, turn the sensor adjustment knob clockwise. 3 Test and readjust the printhead pressure if necessary. 4 Close the media cover. PM42 Mid-Range Printer User Manual... -
Page 81: Specifications
Specifications... -
Page 82: Printer Specifications
Appendix A — Specifications Printer Specifications Physical Specifications Dimensions: 483.54 x 283.00 x 291.60 mm (19.04 x 11.14 x 11.40 in) Weight: 15.8 kg (34.9 lbs) 283 mm (11.14 in) PM42 Width PM42 Mid-Range Printer User Manual... - Page 83 100-240 V, 4 A 50/60 Hz Temperature and Humidity Specifications Operating Temperature: 5 °C to 40 °C (41 °F to 104 °F) Storage Temperature: -20 °C to 60 °C (-4 °F to 140 °F) Relative Humidity: 20 to 80% non-condensing PM42 Mid-Range Printer User Manual...
- Page 84 21.59 to 110 mm (0.85 to 4.33 in) Gap and Black Mark Sensor: Adjustable from left edge to 101.6 mm (4.00 in) Memory • 128 MB Flash • 128 MB SDRAM • USB memory device (optional) PM42 Mid-Range Printer User Manual...
- Page 85 DNS client support for IPv4 and IPv6 • LPR (Line Printer Remote Protocol) • Raw TCP (Telnet in/out) • DHCP client for IPv4 and IPv6 network (dual stack) • IPv4 and IPv6 • Ping • IPSEC/IKEv2 over IPv4/IPv6 • PM42 Mid-Range Printer User Manual...
- Page 86 For broader language and character support, you can download fonts to the printer and store them in volatile memory. Honeywell recommends fonts from Monotype Imaging to address global languages. The WTLE (World Type Layout Engine) from Monotype makes it possible to support additional font faces, as well as complex languages and right to left scripting.
- Page 87 USPS 4-State Customer Bar Code Supported Graphic File Types • • • • Windows Drivers • Support for Windows XP, Vista, Windows 7, Windows 8, Server 2003, and Server 2008 • Supports 32-bit and 64-bit editions PM42 Mid-Range Printer User Manual...
-
Page 88: Interface Specifications
1 2 3 4 6 7 8 9 RS-232 Serial Cable DB9 Pins Signal Description External +5 VDC, Max 500 mA Transmit data Receive data Ground Clear to send Request to send PM42 Mid-Range Printer User Manual... -
Page 89: Usb Device Interface
USB Type B Connector To use the USB interface to print from a PC, you need to install the InterDriver printer driver on your PC. Honeywell recommends that you only connect one printer to each USB port on the PC, either directly or through a hub. -
Page 90: Ethernet Interface
RJ-45 cable. The interface supports 10/100 Mbps Fast Ethernet (10BASE-T, 100BASE-T) and is fully compliant with the IEEE 802.3u standard. The network card MAC address is on the back of the printer. MAC Address Label Location PM42 Mid-Range Printer User Manual... -
Page 91: Default Settings
Default Settings... -
Page 92: Default Configuration
Specifies if software flow control (XON/XOFF) is used to Disable manage the rate of data transmission from the host. New Line Defines the characters that the printer echoes to the host CR/LF Character to indicate that it has moved to a new line. PM42 Mid-Range Printer User Manual... -
Page 93: Ethernet Settings
Selects the type of media that is loaded in the Media With Gaps printer. Print Method Selects the method of printing that the printer is Ribbon (TTR) for using. thermal transfer printers, or No Ribbon (DT) for direct thermal printers PM42 Mid-Range Printer User Manual... - Page 94 Sets the width of the printable area measured from Variable the media margin (X) across the printhead. Unit of measurement is defined in the Unit of Measure parameter. *935-044-001* Media width Honeywell 16201 25th Ave W Lynnwood WA 98087 PM42 Mid-Range Printer User Manual...
- Page 95 Mode) prints the media length plus 10 mm. This value sets an additional amount of media to be printed. Unit of measurement is defined in the Unit of Measurement parameter. Range is 0 to 3200. PM42 Mid-Range Printer User Manual...
-
Page 96: Print Quality Settings
Sets the image darkness for media and ribbon. Adjust Variable this parameter with the Media Sensitivity parameter. Range is 1 to 100. Contrast Adjusts the blackness of the printing on the label in 2% increments from -10% to +10%. PM42 Mid-Range Printer User Manual... -
Page 97: General System Settings
Selects the unit of measure that is used to Dots define several printing parameters. Zero with Slash Determines how the zero character is printed Disable and displayed on the screen. Disable (0) or ∅ Enable ( PM42 Mid-Range Printer User Manual... -
Page 98: Display Settings
Menu is accessible. Manage I/O Settings System I/O settings determine which communication methods the printer can use. Manage I/O Settings Setting Description Default Ethernet Determines if the printer is allowed to communicate Enable using Ethernet communications. PM42 Mid-Range Printer User Manual... -
Page 99: Manage Services Settings
Time Server Determines if the printer uses the Network Time Disable Protocol (NTP) to synchronize its time with a network time server. The default Server Address is ntp0.cornell.edu, and the default Port Number is 123. PM42 Mid-Range Printer User Manual... - Page 100 Appendix B — Default Settings PM42 Mid-Range Printer User Manual...
-
Page 101: Print Labels With Inprint
Print Labels with INPrint This section explains how to use the INPrint feature to print labels. -
Page 102: About The Inprint Page
Downloaded and then select the web form in the list. • To use one of the Resident (Intermec-supplied) web forms, click Resident and then select the web form in the list. 7 Type information in the web form as needed. PM42 Mid-Range Printer User Manual... -
Page 103: Predefined Inprint Label Formats
Appendix C — Print Labels with INPrint 8 (Optional) To preview the label on screen, click Preview. 9 To print the label, click Print. Predefined INPrint Label Formats Predefined INPrint Label Formats Format Name Sample 203_returnadd_3x1.lbx 203_demo_4x6.lbx PM42 Mid-Range Printer User Manual... - Page 104 Appendix C — Print Labels with INPrint Predefined INPrint Label Formats (continued) Format Name Sample 203_shipaddr_4x6.lbx 203_packslip_4x6.lbx PM42 Mid-Range Printer User Manual...
- Page 105 Mono compilers and tools. Copyright © http://www.mono-project.com/Main_Page 2001, 2002, 2003, Ximian and contributors. Copyright (C) 2003 WIDE Project. https://fedorahosted.org/dhcpv6/ Copyright (c) 2002-2008 Matt Johnston https://matt.ucc.asn.au/dropbear/dropbear.html Portions copyright (c) 2004 Mihnea Stoenescu Copyright (c) 2004, Jan Kneschke, http://www.lighttpd.org/ incremental PM42 Mid-Range Printer User Manual...
- Page 106 _Kermit: A File Transfer Protocol_, Digital Press, 1986. Copyright (c) 1997 Eric S. Raymond http://giflib.sourceforge.net/ Copyright (C) 1991-1998, Thomas G. http://www.ijg.org/ Lane. Copyright 2006 Richard Wilson http://www.netsurf-browser.org/projects/libnsbmp/ <richard.wilson@netsurf-browser.org> Copyright 2008 Sean Fox <dyntryx@gmail.com> PM42 Mid-Range Printer User Manual...
- Page 107 (including negligence or otherwise) arising in any way out of the use of this software, even if advised of the possiblity of such damage. PM42 Mid-Range Printer User Manual...
- Page 108 Honeywell www.honeywellaidc.com PM42 Mid-Range Printer User Manual *PM42-EN-UM-A* P/N PM42-EN-UM Rev A...
Need help?
Do you have a question about the PM42 and is the answer not in the manual?
Questions and answers