Table of Contents
Advertisement
Installation Manual
Wide Angle Models:
AV1225PMIR-S
AV2225PMIR
AV2225PMIR-S
AV2225PMIR-A
AV2225PMIR-SA
AV2226PMIR
AV2226PMIR-S
AV3225PMIR
AV3225PMIR-S
AV3226PMIR
AV3226PMIR-S
AV3226PMIR-A
AV3226PMIR-SA
AV5225PMIR
AV5225PMIR-S
AV5225PMIR-A
AV5225PMIR-SA
AV10225PMIR
AV10225PMIR-S
Telephoto Models:
AV2225PMTIR
AV2225PMTIR-S
AV2226PMTIR
AV2226PMTIR-S
AV3225PMTIR
AV3225PMTIR-S
AV3226PMTIR
AV3226PMTIR-S
AV5225PMTIR
AV5225PMTIR-S
AV10225PMTIR
AV10225PMTIR-S
Arecont Vision MegaView
Telephoto Model
®
2 Installation Manual
Wide Angle Models
Advertisement
Table of Contents

Related Manuals for Arecont Vision MegaView 2 AV1225PMIR-S


Summary of Contents for Arecont Vision MegaView 2 AV1225PMIR-S
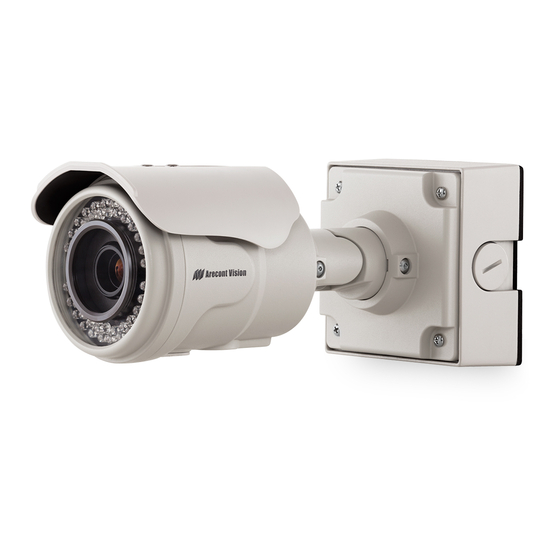
- Page 1 ® Arecont Vision MegaView 2 Installation Manual Installation Manual Wide Angle Models: AV1225PMIR-S AV2225PMIR AV2225PMIR-S AV2225PMIR-A AV2225PMIR-SA AV2226PMIR AV2226PMIR-S AV3225PMIR AV3225PMIR-S AV3226PMIR AV3226PMIR-S AV3226PMIR-A AV3226PMIR-SA AV5225PMIR AV5225PMIR-S AV5225PMIR-A AV5225PMIR-SA AV10225PMIR AV10225PMIR-S Telephoto Model Wide Angle Models Telephoto Models: AV2225PMTIR AV2225PMTIR-S...
-
Page 2: Table Of Contents
® Arecont Vision MegaView 2 Installation Manual MegaView 2 Installation ® Contents Contents ................................... 2 Package Contents ..............................3 Warranty Information .............................. 4 ® Install MegaView 2 Camera ..........................5 SD Card Installation ..............................8 Replacing the IR LED board: ..........................9 Camera Discovery .............................. -
Page 3: Package Contents
Arecont Vision MegaView 2 Installation Manual Package Contents MegaView ® 2 Camera Package: ® A. Arecont Vision MegaView 2 Camera B. Junction box adapter C. Mounting Template for Junction box adapter ® D. Mounting Template for MegaView 2 Camera E. CD with AV100 software and user manuals (license key required for recording) F. -
Page 4: Warranty Information
3 Year Limited Warranty ARECONT VISION warrants to Purchaser (and only Purchaser) (the “Limited Warranty”), that: (a) each Product shall be free from material defects in material and workmanship for a period of thirty-six (36) months from the date of shipment (the “Warranty Period”);... -
Page 5: Install Megaview ® 2 Camera
® Arecont Vision MegaView 2 Installation Manual Install MegaView ® 2 Camera NOTE 1: Water damage from improper Mounting the Camera: installation is not covered by the warranty! 1. Remove camera and hardware from the NOTE 2: Use of silicon on the RJ45 connector box. - Page 6 ® Arecont Vision MegaView 2 Installation Manual NOTE 1: Bracket screws are all security screws that are tamper-resistant. NOTE 2: Bracket with 3 axes enables easy installation in any location, including 360° camera body rotation, 90° tilt, 360° bracket rotation. (Image 7)
- Page 7 ® Arecont Vision MegaView 2 Installation Manual Optional: Connecting Digital I/O: 9. To use digital I/O, connect digital I/O with pigtail cable connector as shown in Image ® NOTE 1: MegaView 2 only supports digital input but no digital output.
-
Page 8: Sd Card Installation
® Arecont Vision MegaView 2 Installation Manual SD Card Installation Use Phillips screwdriver to remove sun shield cover as shown in Image 9 Use Phillips screwdriver to unscrew four screws on the lid, and take off the lid as shown in Image 10 3. -
Page 9: Replacing The Ir Led Board
® Arecont Vision MegaView 2 Installation Manual Replacing the IR LED board: 1. Unscrew glass ring (Image 13) 2. Use Phillips screwdriver to remove IR LED board (Image 14) 3. To replace IR LED board, unplug cable and replace new IR LED board (Image 14-1) -
Page 10: Camera Discovery
® Arecont Vision MegaView 2 Installation Manual After the AV200 is installed, the first time it Camera Discovery is launched the System Setup Wizard will be started. 1. Install the AV200 application manager Anytime you wish to re run the setup wizard Software found on the CD. -
Page 11: Image
® Arecont Vision MegaView 2 Installation Manual An Administrator password must be set and confirmed. The wizard will not allow a blank password for Administrator and setup cannot proceed without setting one. User password can be left blank, allowing standard users to launch the application without a password. -
Page 12: Image
® Arecont Vision MegaView 2 Installation Manual Click “OK” and then next to proceed to selected cameras check the radio button discovery. labeled Force IP renewal. If changes are made to the address, the When the discovery process ends, a list of... -
Page 13: Image
® Arecont Vision MegaView 2 Installation Manual Click yes to continue. Check the cameras listed on this screen to confirm that all cameras connected to the If the option for Do not show info for network have been discovered and individual cameras is selected, the wizard successfully installed. -
Page 14: Web Interface Quick Guide
® Arecont Vision MegaView 2 Installation Manual Web Interface Quick Guide Brightness controls the overall brightness of the camera image and works in conjunction The web interface page is accessed by typing with the exposure controls to maintain the in any web browser:... - Page 15 ® Arecont Vision MegaView 2 Installation Manual Switching Level this slider bar and numeric field control the switching point when the camera switches from “Day” (color) into “Night” (black & white) mode. Higher values cause the camera to stay in “Day” mode at lower illumination levels, lower values will cause the camera to switch to “Night”...
- Page 16 ® Arecont Vision MegaView 2 Installation Manual 3. Video Menu 4. H.264 Menu Show Video type these radio buttons control selection of display mode Disable Video when selected this button the live video won’t show on the screen RTSP Unicast port this numeric field allows...
- Page 17 ® Arecont Vision MegaView 2 Installation Manual compression and result in higher bit rate control. Valid values that can quality images with trade off for be entered are 0 to 65535 kbps larger file sizes. Lower levels Frames per second this slider bar control...
- Page 18 ® Arecont Vision MegaView 2 Installation Manual iii. To automatically adjust focus, choose Default Gateway the gateway IP address for “Full-range Focusing” or “Short-range the local network can be manually Focusing” depending on the image configured in this field clarity...
- Page 19 ® Arecont Vision MegaView 2 Installation Manual Zone Size determines the size of the will make motion detection more sensitive to detection zone grid displayed when motion large changes in the image. detection feature is enabled Note: if the zone size is set too small for...
- Page 20 ® Arecont Vision MegaView 2 Installation Manual Save all settings to flash will save the SD Card Recording current camera configuration as setting Continuous Recording allows the user default enable continuously recording Stop Continuous Recording AND Restore to factory default will restore all...
- Page 21 ® Arecont Vision MegaView 2 Installation Manual Optional: Enable Audio: 1. Connect a mono analog microphone to Microphone In and connect an active speaker with a built-in amplifier via the in- line jack as shown in Image 8, if needed.
-
Page 22: Sd Card Functionality
1. The camera will support class 10 microSD or microSDHC cards up to 32GB Not all SD cards are the same. Arecont Vision highly recommends using SanDisk Extreme Micro SD cards (or an equivalent substitute) as these cards have been fully tested without issue. The SanDisk Extreme line is better suited for demanding applications like constant recording. -
Page 23: Web Interface
® Arecont Vision MegaView 2 Installation Manual Web Interface Access the camera’s web interface by typing in any web browser: http://ip_address http://ip_address/index.html Scroll to the SD Card section To playback recorded video: 1. Input the date and time of the desired video (must be set between the Start and End time). - Page 24 ® Arecont Vision MegaView 2 Installation Manual AV200 To launch the AV200 application click on the desktop icon called “AV200” To enable recording to the SD card select the desired camera and drag it to the workspace to open a view. From the window select the SD card drop down menu.
-
Page 25: Electrical Box Adapter (Sv-Eba) Installation Instructions (Sold Separately)
® Arecont Vision MegaView 2 Installation Manual Electrical Box Adapter (SV-EBA) Installation Instructions (Sold Separately) Inside the box: A. Electrical Box Adapter B. Pack of four (4) machine screws (#8-32 7/16”) ® MegaView Image 17-1 Single gang box Bracket holes... -
Page 26: Pole Mount Adapter (Av-Pma) Installation Instructions (Sold Separately)
® Arecont Vision MegaView 2 Installation Manual Pole Mount Adapter (AV-PMA) Installation Instructions (Sold Separately) Inside the box: Run Ethernet Cable and other cables (if A. Pole Mount Adapter necessary) through the Junction Box B. 2x Small Steel Straps ®... -
Page 27: Corner Mount Adapter (Av-Crma) Installation Instructions (Sold Separately)
® Arecont Vision MegaView 2 Installation Manual Corner Mount Adapter (AV-CRMA) Installation Instructions (Sold Separately) Inside the box: 4. Run Ethernet Cable and other cables (if necessary) through the Junction Box A. Corner Mount Adapter Adapter and connect to Megaview® 2 pigtail B. - Page 28 ® Arecont Vision MegaView 2 Installation Manual Important Note How to correctly install MegaView® 2 on a surface wall Correct Installation: Please connect ¾” NPT conduit pipe to junction How to correctly install MegaDome® 2 on a ROUGH surface wall box adapter as shown in Image 24 and tighten ¾”...
- Page 29 ® Arecont Vision MegaView 2 Installation Manual Inappropriate Installation: Attaching the MegaView® 2 directly onto a wall NOTE: Water damage from improper surface as shown on Image 26, without connecting ¾” NPT Conduit to Junction Box installation is not covered by the warranty! Adapter as shown on Image 27, or without tightening ¾”...
-
Page 30: Installation Best Practices
® Arecont Vision MegaView 2 Installation Manual Installation Best Practices Adding Teflon thread sealing Wind Vinyl electrical Begin Installation tape to all male threads tape on all cables connections Connect ¾” NPT conduit pipe to junction box adapter Does conduit pipe go... -
Page 31: Led Indicators (Camera Signal)
® Arecont Vision MegaView 2 Installation Manual LED Indicators (Camera Signal) NOTE: To see the LED indicators, open the plug on the camera body as shown in Image 37. Plug Image 27 Status Description Yellow Flashing Link has been established. -
Page 32: Support
Swap the “troubled” camera with a known good camera to see if the problem follows the camera or stays at the location. 3. Contact Arecont Vision Technical Support one of three ways: 1. Online Portal : Support.ArecontVision.com 2. Phone : 1.818.937.0700 (option #1) 3. -
Page 33: Mounting Template
® Arecont Vision MegaView 2 Installation Manual Mounting Template Junction Box Adapter Mounting Template Page | 33 support@arecontvision.com...
Need help?
Do you have a question about the MegaView 2 AV1225PMIR-S and is the answer not in the manual?
Questions and answers