Pitney Bowes DA300 Operating Manual
Hide thumbs
Also See for DA300:
- Operator's manual (120 pages) ,
- Quick setup instructions manual (7 pages)
Table of Contents
Advertisement
Quick Links
Advertisement
Table of Contents

Related Manuals for Pitney Bowes DA300


Summary of Contents for Pitney Bowes DA300
- Page 1 Operating Guide Address Printer International English Edition...
-
Page 3: Table Of Contents
Phone Support ..............1-4 Before You Call ..............1-4 The World Wise Web ............1-4 Ordering Supplies ..............1-4 Chapter 2, Setting Up the DA300 Printer Unpacking the Printer ............... 2-2 Package Contents ..............2-3 Setting Up the DA300 ..............2-4 Choosing a Location for Your Printer ........ - Page 4 9. Print a Test Piece ............. 3-15 Chapter 4, Using the DA300 With Your Computer Installing the Printer Driver ............4-2 Selecting the DA300 Printer from a Windows Application ..4-3 Chapter 5, Printer Maintenance Preventive Maintenance ............5-2 Cleaning ..................5-2 Print Quality Problems .............
- Page 5 4. Lines Per Address ............A-24 5. Communications ............A-24 6. Hex Dump Mode ............A-26 7. Language ................A-28 8. Envelope Feed Delay ............A-30 9. Auto Envelope Eject ............A-30 10. ROM Revision Number ..........A-31 Appendix B, Specifications DA300 Specifications ..............B-1...
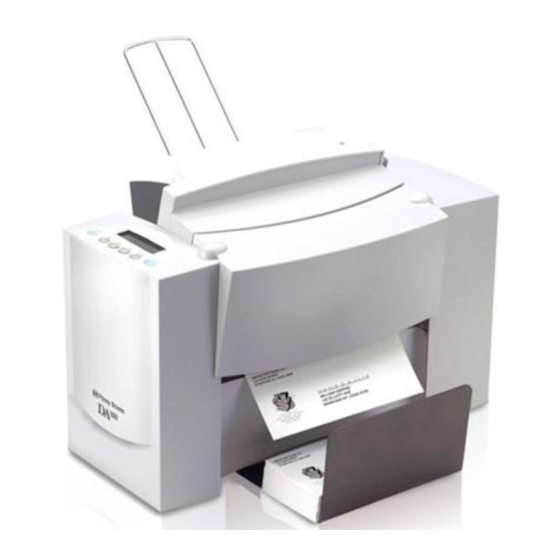
- Page 7 Chapter The DA300 Printer Overview The Pitney Bowes DA300 is a versatile, easy-to-use desktop printer designed for addressing applications. This chapter explains what's in this guide, and tells you how to order supplies and where to get more information about using your DA300.
-
Page 8: Welcome To The Da300
Overview Welcome to The Pitney Bowes DA300 ink jet printer is a desktop printer used to print address and other information on a wide range of material the DA300 of various sizes, construction and composition. With the DA300 you can define the font, placement, print quality and bar code characteristics for your addresses. -
Page 9: System Requirements
Appendix B, Specifications Provides hardware and material specifications. Your printer will run at its best when your material conforms to our specifications. In order to operate the DA300 with your computer, your system System must meet the following requirements: Requirements... -
Page 10: Getting Help
• The steps you've already taken to solve the problem and the results. Ordering To order supplies for your DA300 printer, call the Pitney Bowes Company or Dealer that serves your area. Supplies In the U.K. call Pitney Bowes at:... -
Page 11: Setting Up The
In this chapter: Unpacking the Printer ...... 2-2 Package Contents ......2-3 Setting Up the DA300 ....2-4 Choosing a Location ......2-5 Important Safety Notes ....2-5 Assembling the DA300 ....2-6 Attach the Material Prop ....2-7 Attach the Wire Frame .... -
Page 12: Unpacking The Printer
Setup As you remove the DA300 contents from the box, check the parts Unpacking the against the list on the opposite page. Printer... -
Page 13: Package Contents
Setup Unpacking the Package Contents Printer 1. DA300 Printer 2. Output Stacker 3. Wire Frame (Input Material Stacker) 4. Material Prop with Washer and Retaining Knob 5. Sliding Fence (long) 6. Power Cord 7. Parallel Cable Not Shown: • Sliding Fence (short) •... -
Page 14: Setting Up The Da300
Place the printer on a table or other stable, level surface within the parallel cable's length (3 metres [10 feet] maximum) of your computer. • Allow for adequate space. The DA300 is 370mm (14.7") high, 410mm (16.2") wide and 550mm (21.7") deep, without the wire frame input stacker. •... -
Page 15: Important Safety Notes
Setup Important In some countries the DA300 is supplied with a moulded mains lead and plug. In other countries, or if the supplied lead is not Safety Notes used, the following information applies: 1. An approved mains lead for the country concerned must be used. -
Page 16: Assembling The Da300
Do not remove covers. The machine covers serve to enclose hazardous parts. If the machine has been dropped or has otherwise had the covers stressed in any way, report it to your Pitney Bowes Customer Service Representative. • To reduce the risk of fire and/or electrical shock, do not attempt to disassemble this machine. -
Page 17: Attaching The Material Prop
Setup Assembling the 1. Attach the Material Prop DA300 1. The material prop has three grooves on its back side Place (continued) it on the wire frame so the grooves engage the bars of the frame and the hole for the lock knob is facing up. -
Page 18: Attach The Wireframe To The Printer
Setup 2. Attach the Wire Frame to the Printer. Assembling the DA300 1. Hook the bottom Tabs Lock Lever (continued) edge of the wire frame under the tabs in the frame slide. 2. Rotate the wire frame and insert the curved... -
Page 19: Install The Sliding Fence
Setup Assembling the 3. Install the Sliding Fence The DA300 has two fences—a long one and a short one. Use the DA300 short fence when printing material smaller than a DL size enve- (continued) lope. Use the long fence for larger material. -
Page 20: Position The Output Stacker Tray
5. Connect the Parallel Cable or Serial Cable Connecting the Use the parallel cable supplied to connect the printer to your DA300 to Your computer, or use an approved serial cable. Computer Each end of the parallel cable has a connector. One end is labelled “Printer”... - Page 21 Setup Connecting the DA300 to Your Computer (continued) Serial Port Parallel Port 2. Secure the connector by snapping the two wire clips over the corresponding tabs on the connector. 3. Align the end of the cable connector labelled “Computer” with the printer port on your computer and push the cable connector into the port.
-
Page 22: Connect The Power Cord
Setup Plugging the 6. Connect the Power Cord DA300 In 1. Connect the power cord to the printer at the interface panel, shown below. Power Receptacle Power Switch 2. Plug the power cord into a grounded outlet. Please review the safety information on pages 2-5 and 2-6. -
Page 23: Install The Ink Jet Cartridge
Setup Installing and 7. Install the Ink Jet Cartridge Removing the The printer uses an Ink Jet Cartridge for printing. You must Ink Jet install the cartridge before you can print. To begin: Cartridge 1. With the printer on, press the On Line key until the display reads OFF LINE. - Page 24 Setup 7. Push the cartridge back in the direction of the arrow Installing and until it snaps into place. Removing the Ink Jet Cartridge Removing the Ink Jet Cartridge When you need to remove or replace the ink jet cartridge, follow these steps: 1.
- Page 25 Chapter DA300 Basics In this chapter you'll learn about key features of the DA300 printer and how to adjust it to meet the requirements of your print jobs. In this chapter: Printer Features ....... 3-2 Set the Separator Gap ....3-6 Centre the Wireform ......
-
Page 26: Printer Features
Font Size Font size refers to the size of each typeface. The DA300 uses from 4 to 30 point size for internal or downloaded fonts. Material Thickness Thickness refers to the size of the material that is processed through the printer. -
Page 27: Media Size
Basics Media Size Printer Features The DA300 can print on the following range of material sizes. (continued) Width Height Thickness 12.75" 13.5" 0.062" Maximum (324mm) (343mm) (1.6mm) 5 " 3.5" 0.003" Minimum (127mm) (76mm) (0.08mm) For envelope addressing purposes, the DA300 is compatible with any word processor or database application that can print a mailing label. -
Page 28: Setting Up A Job
Basics Setting up a print job means adjusting the printer to accommo- Setting Up A date the width, height, thickness and weight of your material. There are two things that determine how reliably your printer feeds: the setup adjustments and the quality of your material. A good setup minimizes misfeeds and jams. - Page 29 , position the print carriage and turn the printer on and off line. See Appendix A, Printer Menus, for detailed instructions. If you have the DA300 print driver loaded on your computer, you can easily perform these functions from within your application.
-
Page 30: Set The Separator Gap
Basics Setting Up A 1. Set the Separator Gap Job (continued) Whenever you switch from one material type to another, you need to set the gap between the separators and the feed roller before printing begins. To find the correct spacing, see the figure on the next page and follow the instructions below. - Page 31 Basics Setting Up A 1. Set the Separator Gap Job (continued) H-Block Separator Lock Knob Rear Wall Place a sample piece against the rear wall and between the separator fingers and the feed roller Setup Example Using DL Size Envelopes: When you set the feed gap for a DL size envelope, the width of the envelope will fall completely under the inside and middle H- Blocks, but only half way under the outer H-Block.
-
Page 32: Centre The Wireframe Under The Material
Basics Setting Up A 2. Centre the Wireform under the Material Job (continued) 1. Place a sample piece of material in the feed area, up against the rear wall. 2. Push down on the wireframe lock lever to free the wireframe slide. -
Page 33: Set The Feed Angle
Basics Setting Up A 3. Set the Feed Angle Job (continued) The feed angle of the wireframe input stacker depends on the type of material you're running: Heavy material—adjust to a low angle • Standard material—adjust to the centre (45 degree angle) •... -
Page 34: Position The Feed Fence
Basics Setting Up A 4. Position the Feed Fence Job (continued) Your printer comes with two feed fences—a tall one and a short one. Use the tall fence for DL size envelopes and larger materials. Use the short fence for materials smaller than a DL size envelope. To position the fence: 1. -
Page 35: Load Material
Basics Setting Up A 5. Load Material Job (continued) Once your printer is set up, you can load material and make a test print.. To avoid misfeeds, follow these instructions l. Make sure the input area is free of dust and other matter. 2. -
Page 36: Adjust The Position Of The Material Prop
Basics Setting Up A 6. Adjust the Position of the Material Prop Job (continued) With a stack of material loaded: 1. Loosen the lock knob that holds the prop in position. 2. Lower the prop until its top is even with the top of the stack or the top of the stack reaches the middle of the prop. -
Page 37: Adjust The Media Thickness Lever
A Note about Print Quality The DA300 is designed to feed and print on a range of materials with various finishes and coatings. However the sharpness of the print may vary with different materials, depending on how absorbent the surface is, as well as other qualities. -
Page 38: Adjust The Exit Rollers
Basics Setting Up A 8. Adjust the Exit Rollers Job (continued) Adjust the exit rollers so they overlap the left and right edges of the material by 6.3mm (1/4"). Slide the rollers from side to side to make the adjustment. Exit Rollers IMPORTANT: Make sure the rollers do not touch any printed area of the material. -
Page 39: Print A Test Piece
Basics Setting Up A 9. Print a Test Piece Job (continued) 1. Make sure material is loaded properly. (Or you can use a single test piece if you'd like to check that your setup adjustments are okay.) 2. Turn the printer ON. The On/Off switch is located on the interface panel at the rear of the On Line... - Page 40 Basics 3-16...
-
Page 41: Chapter 4, Using The Da300 With Your Computer
Chapter Using the DA300 With Your Computer This chapter has instructions for installing the DA300 printer driver and selecting the DA300 printer from a computer application. In this chapter: Installing the Printer Driver.... 4-2 Selecting the DA300 from a Windows® Application ..4-3... -
Page 42: Installing The Printer Driver
Your Computer Before you can use your printer with your computer, you must Installing the install the DA300 printer driver. The driver gives your computer Printer Driver information about the printer you're using, and tells the printer about the settings you want to use in your print job. - Page 43 Your Computer The following steps explain how to select the DA300 printer from Selecting the a Windows software application. The steps are similar for most DA300 or applications. You can also refer to your application's W700 Printer documentation for specific instructions on selecting printers.
-
Page 44: Selecting The Da300 Printer From A Windows Application
Your Computer Once you've made this selection, your print jobs will auto- Selecting the matically go to the DA300 printer when you select File/Print. DA300 Printer Remember to change the printer selection back to your regular From a Windows printer for your other printing jobs. - Page 45 Chapter Printer Maintenance This chapter describes the maintenance procedures you should perform on a regular basis to keep your printer running trouble-free. In this chapter: Preventive Maintenance ....5-2 Cleaning ..........5-2 Print Quality Problems ....5-2 Exit Rollers ........5-3 Sensor ..........
-
Page 46: Preventive Maintenance
Maintenance Preventive The Pitney Bowes DA300 Ink Jet Printer is designed for trouble- free service with a minimal amount of care. You should schedule Maintenance regular cleaning of the Feed Rollers, Right Hand Slider, Left Hand Slider and Lower Guide. -
Page 47: Exit Rollers
Maintenance Exit Rollers If the right and left exit rollers are misaligned, that is, contact printed surfaces, they can become contaminated with ink. Use water to dampen a soft cloth and remove the ink from the rollers. Sensor A film and/or dust can build up on the sensors and cause misfeeds of the material. - Page 48 Maintenance...
- Page 49 Chapter Troubleshooting This chapter lists some common printer problems and offers sug- gestions on how to fix them. In this chapter: Problems and Solutions ....6-2 Feed Problems ........6-2 Print Quality Problems ....6-3 Interface Problems ......6-4 Motor Problems ........ 6-5 Other Problems.........6-6...
-
Page 50: Problems And Solutions
Troubleshooting Problems and Before calling our National Diagnostic Centre or your Pitney Bowes Customer Service Representative, look for your problem Solutions below. If you can solve the problem yourself, you will be able to resume printing sooner. Feed Problems Problem Intermittent Feed Reason: Material prop not used. -
Page 51: Print Quality Problems
Troubleshooting Print Quality Problem No Print Problems Reason: Ink cartridge problem. Solution: Purge ink cartridge. Clean cartridge with soft cotton cloth and water. Change to a new cartridge. Problem Gray or Light Print Reason: Ink supply is low. Solution: Check adjustment of the media thickness lever (page 3-13). -
Page 52: Interface Problems
No Communications; Printer Does Not Respond Problems Reason: Incorrect print driver, bad cable, bad printer controller board. Solution: Use DA300 print driver; replace cable. Make sure cable connections are tight. If the problem still persists, call Pitney Bowes for service. -
Page 53: Motor Problems
Troubleshooting Problem Motor Turning but no Feed Roller Movement Motor Problems Reason: Mechanical problem. Solution: Call Pitney Bowes for Service. Other Problems Problem Paper Out or Paper Jam Reason: Input area is empty. Solution: Refill the input area. Reason: H-Block separators not adjusted correctly. -
Page 54: Troubleshooting
Troubleshooting Problem Shuttle Jam Other Problems (continued) Reason: Envelope thickness lever is set too low for material. Solution: Open the back of the printer, and adjust the media thickness lever. See page 3-13. Reason: Lower rail shaft dirty. Solution: Wipe lower rail shaft clean. Problem Memory Card Error Reason:... -
Page 55: Panel Menus
Appendix Using the Control Panel Menus The printer menus are used to control how your printed material looks. This chapter describes each menu and its options. In this Appendix: Using the Control Panel ....A-2 Using the Menus ....... A-3 Main Menu .......... -
Page 56: Using The Control Panel
Panel carriage and turn the printer on line and off line. If you’ve installed the DA300 printer driver on your computer, you’ll normally perform these actions from within the applica- tion you’re using to set up your envelope layout. -
Page 57: Using The Menus
Prints a test envelope. This is very Test Env. useful when you set up a print job. Using the Menus The DA300 has two menus, both displayed on the LCD: • The Main Menu controls how your printed material looks. - Page 58 Menus To select an option: Using the Menus (continued) 1. Press the On Line button until the LCD message displays “OFF LINE”. 2. To access the MAIN MENU, press the Menu button. 3. To access the SETUP MENU, press and hold the Menu button for four (4) seconds.
-
Page 59: Using The Main Menu
Menus The Main Menu options are: Using the Main Menu 1. Address Layout 2. Print Quality 3. Font 4. Barcode 5. Address Recovery 6. Clear Counter 7. Job Settings NOTE: The settings you define in a software application override any settings you choose in the printer menus. -
Page 60: Main Menu Diagram
Menus Using the Main Main Menu Menu Options Menu (continued) A. DISTANCE TO RIGHT* 1. ADDRESS LAYOUT B. DISTANCE TO BOTTOM* C. LINE SPACING D. ORIENTATION E. ORIENTATION CONTROL 2. PRINT QUALITY DRAFT EXECUTIVE LETTER 3. FONT A. NAME B. SIZE C. -
Page 61: Address Layout
Menus Use the Address Layout option to set up the way an address 1. Address Layout appears on the printed material. The printable width is limited to 9.4” from the right side of the mail piece. The printable height is 13.5” measured from the bottom edge of the mail piece. - Page 62 Menus 1. Address Layout B. Distance to Bottom (Bottom Margin) Use this option to set the distance from the top address line to (continued) the bottom of the envelope. For #10 envelopes this should be about two inches. Press the + or – buttons to increase or decrease the Distance to Bottom, (+ MORE or –...
- Page 63 Menus 1. Address Layout E. Orientation Control The choices are Automatic and Manual. When Orientation (continued) Control is set to Automatic, the printer acknowledges the orientation commands sent from the computer. Setting Orientation to Manual notifies the printer to use the menu settings for orientation.
-
Page 64: Print Quality
Menus Use the print quality option to select the resolution of the 2. Print Quality printed addresses—Executive, Letter or Draft. A. Executive Quality (600 x 300 DPI) This is the darkest of the three print qualities. It prints at the slowest speed, uses the most ink and delivers the best quality printout. - Page 65 Menus 2. Print Quality 5. Press the + or – buttons to scroll through the Print Quality options, until the desired option (Executive, (continued) Letter or Draft) is displayed on the LCD panel. 6. Press the Enter button to select the desired option. 7.
-
Page 66: Font Selection
Menus The DA300 has 5 available fonts (typefaces): Courier, Sans 3. Font Selection Serif, Roman, OCR-A and OCR-B. All fonts are scalable from 4 to 30 point size, and can be printed in regular, bold, italic and outline style. The DA300 also supports downloaded fonts. - Page 67 Menus E. Italic 3. Font Selection Italic characters have decreased stroke weight, print at an (continued) oblique angle and print somwhat lighter than standard or bold typefaces. Use italic to provide emphasis and add flair to adress text that requires a finished, polished appearance. F.
-
Page 68: Barcode (Usa Only
A below. Use this option, if it is acceptable in your country, to include a barcode on your mailpieces. The DA300 can print a 5- or 11- digit barcode. If you select Off, it means that if the computer sends a 5-digit ZIP Code, it won’t print a barcode;... - Page 69 Menus 4. Barcode 4. Press the Enter button to select an option. Use this option to define where the U.S. Postal Service (continued) POSTNET™ Barcode will print. 5. Press the Enter button at the 5-digit barcode prompt and use + or – to turn the option ON or OFF. 6.
-
Page 70: Address Recovery
Menus Use this option to direct the printer’s memory to go back a 5. Address certain number of addresses when an error occurs in order to Recovery reprint the address. The options on this menu are A. Get Ad- dresses and B. Clear Memory. A. - Page 71 Menus 4. Press the Enter button to select the desired option. 5. Address Recovery 5. After you’ve made your selection, press the Menu (continued) button several times to back out of the Menu, until the printer displays OFF LINE. Then, press the On Line button to enable the printer.
-
Page 72: Clear Counter
7. Job Settings The DA300 Printer can hold eight job presets in memory. This eliminates the need for changes to the printer setup when you change print jobs. The options on this menu are A. LOAD and B. - Page 73 Menus 7. Job Settings To use this option to direct the printer to Load or Save the Job Setting as a certain number: (continued) 1. Press the + or – buttons to scroll through the Main Menu options until the 7. JOB SETTINGS option appears on the LCD panel.
-
Page 74: Using The Setup Menu
Menus Using the Setup To access the Setup Menu, the printer must be OFF LINE. (The LCD display toggles between ON LINE and OFF LINE). If the Menu printer is ON LINE, press the On Line button once so the LCD displays OFF LINE. -
Page 75: Setup Menu Diagram
Menus Using the Setup Setup Menu Menu Options Menu (continued) 1. HEAVY MEDIA MODE 2. TEST PRINT HEAD 3. PURGE PRINT HEAD 4. LINES PER ADDRESS A. BAUD RATE 5. COMMUNICATIONS B. PARITY C. WORD LENGTH D. LINE TERMINATION 6. HEX DUMP MODE A. -
Page 76: Heavy Media Mode
Menus The only time you need to turn this mode on is when you are 1. Heavy Media using long, heavy envelopes. This option increases motor Mode torque. This option is normally OFF. To use this option: 1. Press the + or – buttons to scroll through the Setup Menu options until the 1. -
Page 77: Test Print Head
Menus 2. Test Print Head 3. Press + for Yes to print the test pattern, or press – for No to cancel. (continued) If you press +, “Please wait...Test pattern is printing” displays. The printer prints a diagonal line across the material. -
Page 78: Lines Per Address
When the computer uses the printer’s parallel interface no communication settings are required. When the serial interface is used the DA300 Communications menu settings must be configured to match the computer settings. Configure the computer to use either the XON/XOFF or DTR handshaking settings to communicate with the DA300. - Page 79 Menus 5. Communications A. Baud Rate The Baud Rate choices are (1200), (2400), (4800), (9600) and (continued) (19200). B. Parity Parity is used to determine the integrity of data that is sent. The choices are (ODD), (EVEN) and (NONE). C. Word Length The choices are (7 DATA BITS) and (8 DATA BITS).
-
Page 80: Hex Dump Mode
Menus The information provided here is for those of our customers 6. Hex Dump Mode who are technically inclined. The Hex Dump Mode option causes the printer to print all commands and data it receives from the computer in a hexa- decimal format. - Page 81 Menus EXAMPLE: 6. Hex Dump Mode (continued) The capital letter A is a HEX41. Find the letter A on the above chart, and look towards the top of the chart (MSB) and locate the HEX number 4. Then look to the left side of the chart (LSB) and locate the HEX number 1.
-
Page 82: Language
Menus 7. Language The DA300 has several language sets installed. The options on the language menu are: A. Symbol Set, B. Inch / Millimetre, C. Menu Language. A. Symbol Set The symbol set contains the International Standards Organiza- tion (ISO) character set substitution tables. They include the... - Page 83 Menus 7. Language B. Inch / Millimeter (continued) This option selects the printer Measurement system—Inch or Millimetre. C. Menu Languages This option changes the LCD control panel menu to the language you want. Supported languages are English, German, French, Italian, Spanish, Dutch and Polish. To use this option: 1.
-
Page 84: Envelope Feed Delay
Menus Use this option to feed very glossy material or if extra ink drying 8. Envelope Feed time is needed. This option slightly reduces the overall through- Delay put of the printer. To use this option: 1. Press the + or – buttons to scroll through the Setup Menu options until 7. -
Page 85: Rom Revision Number
Menus This option is extremely useful whenever it is necessary to 10. ROM Revision verify the Firmware Revision installed in the printer. It is also Number useful to determine if your printer requires an upgrade. The Maintenance Count, which is the total number of print cycles accumulated, is also displayed. - Page 86 Menus A-32...
-
Page 87: Appendix B, Specifications
Appendix DA300 Specifications This Appendix contains detailed hardware and material specifications for the DA300 printer. -
Page 88: Specifications
Pitney Bowes certifies that the address printer complies with the Low Voltage Directive 73/23/EEC and the EMC Directive 89/336/EEC. The product was tested in a typical configuration. Interface Centronics Parallel. See facing page for pin assignments. The DA300 has no serial port. Control Language PCL5, modified Driver Compatibility... - Page 89 Specifications Centronics Parallel Pin Assignments Signal Direction Description Strobe A low pulse greater than 1µs causes the printer to read one byte of data. DATA0 Data Bit 0 DATA1 Data Bit 1 DATA2 Data Bit 2 DATA3 Data Bit 3 DATA4 Data Bit 4 DATA5...
- Page 90 Not required. Fonts are downloaded with addresses. Barcode Printing The DA300 can print a 5- or 11-digit USPS NAIC-certified POSTNET barcode in one of three positions: the lower right of the envelope; above the address block; and below the address block.
- Page 91 Specifications Equipment Printhead/InkJet Cartridge Cartridge: User-replaceable ink jet Specifications (continued) Print Position Accuracy For a DL size envelope : Horizontal: within +/- 1.5mm Vertical: within +/- 1.5mm Skew: within +/- 1 degree For other media: Horizontal: within +/- 3.0mm Vertical: within +/- 3.0mm Skew: within +/- 2-1/2 degrees Environmental Limits Operating Conditions...
- Page 92 (continued) Operator position: no more than 65 dBa referenced to 20 µpa. Recommended Usage Pitney Bowes has tested this machine under many different conditions and recommends that you do not exceed the usage levels specified below: • Monthly usage is 25,000 pieces •...
- Page 93 Specifications Approved Media Material The paper types listed below are approved for use with the DA300 Printer. Please note Specifications that the dimensional limits above apply in all cases, and that all media (flats, envelopes, postcards, catalog envelopes, etc.) must be without windows, unstuffed and unsealed.
- Page 94 Specifications Envelope Sizes Name Style Dimensions (Inch) Dimensions (Metric) Height x Width Height x Width #6-1/4 3-1/2 x 6" 89 x 152 mm #6-1/2 Square 6-1/2 x 6-1/2" 165 x 165 #6-3/4 Commercial 3-5/8 x 6-1/2" 216 x 165 #8-1/2 Square 8-1/2 x 8-1/2"...
- Page 96 FOR SERVICE AND SUPPLIES: The Pinnacles, Harlow. Essex, CM19 5BD, U.K. PB Form SDC550 Rev A (6-03) © Pitney Bowes Limited, 2003 Printed in England...
Need help?
Do you have a question about the DA300 and is the answer not in the manual?
Questions and answers