Table of Contents
Advertisement
Advertisement
Table of Contents

Related Manuals for AEG 49176V-MN


Summary of Contents for AEG 49176V-MN
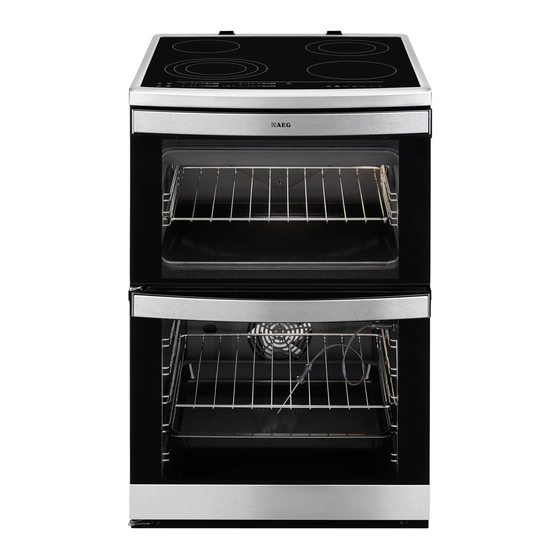
- Page 1 User Manual 49176V-MN Cooker...
-
Page 2: Table Of Contents
13. INSTALLATION......................35 FOR PERFECT RESULTS Thank you for choosing this AEG product. We have created it to give you impeccable performance for many years, with innovative technologies that help make life simpler features you might not find on ordinary appliances. Please spend a few minutes reading to get the very best from it. -
Page 3: Safety Information
ENGLISH SAFETY INFORMATION Before the installation and use of the appliance, carefully read the supplied instructions. The manufacturer is not responsible if an incorrect installation and use causes injuries and damages. Always keep the instructions with the appliance for future reference. - Page 4 Never try to extinguish a fire with water, but switch off • the appliance and then cover flame e.g. with a lid or a fire blanket. Do not store items on the cooking surfaces. • Do not use a steam cleaner to clean the appliance.
-
Page 5: Safety Instructions
ENGLISH 2. SAFETY INSTRUCTIONS 2.1 Installation with the power supply. If not, contact an electrician. WARNING! • Always use a correctly installed Only a qualified person must shockproof socket. install this appliance. • Do not use multi-plug adapters and extension cables. •... - Page 6 • Be careful when you open the • Do not let cookware boil dry. appliance door while the appliance is • Be careful not to let objects or in operation. Hot air can release. cookware fall on the appliance. The •...
-
Page 7: Product Description
ENGLISH 2.5 Internal light 2.6 Disposal • The type of light bulb or halogen WARNING! lamp used for this appliance is only Risk of injury or suffocation. for household appliances. Do not use it for house lighting. • Disconnect the appliance from the mains supply. -
Page 8: Cooking Surface Layout
3.2 Cooking surface layout Cooking zone 1200 W Steam outlet - number and position depend on the model 145 mm 120/180 mm Cooking zone 700 / 1700 W Cooking zone 1800 W Control panel 120/175/210 mm 180 mm Cooking zone 800 / 1600 / 2300 W 3.3 Accessories... -
Page 9: Hob - Daily Use
ENGLISH 4. Let the appliance operate for 15 Preheat the two ovens. Heat minutes. up one oven at a time. 5. Set the function and the Set the functions listed maximum temperature. below, if applicable. 6. Let the appliance operate for 15 minutes. - Page 10 Sensor Function Comment field To select the cooking zone. To increase or decrease the time. Automatic Heat Up To activate and deactivate the function. Control bar To set a heat setting. 5.2 Heat setting displays Display Description The cooking zone is deactivated.
- Page 11 ENGLISH The relation between the heat setting When you activate the zone and the time after which the hob but do not activate the outer deactivates: ring the light that comes out from the zone may cover the Heat setting The hob deacti- outer ring.
- Page 12 5.10 STOP+GO To deactivate the function: set the cooking zone with and touch . The This function sets all cooking zones that remaining time counts back to 00. The operate to the lowest heat setting. indicator of the cooking zone goes out.
-
Page 13: Hob - Hints And Tips
ENGLISH 5.13 Power management • The heat setting display of the reduced zones changes between two function levels. • All cooking zones are connected as on the illustration. • The hob and both ovens are connected to one phase. • The phase has a maximum electricity load. -
Page 14: Hob - Care And Cleaning
Heat setting Use to: Time Hints (min) 3 - 5 Simmer rice and milkbased 25 - 50 Add the minimum twice as dishes, heating up ready- much liquid as rice, mix milk cooked meals. dishes part procedure through. 5 - 7 Steam vegetables, fish, meat. - Page 15 ENGLISH 8.1 Oven Control Panel Use the sensor fields to operate the appliance Sensor Function Comment field – Display Shows the current settings of the appliance. ON / OFF To activate or deactivate the oven. Oven selection To move between top and main oven. Down key To move in the menu and to set an oven function or programme...
- Page 16 Name Description Oven function indica- Shows the function which is active. Lamp / Defrost indica- Shows that the Lamp / Defrost function is active. Heat-up and residual Shows that the Heat-up / residual heat is active. heat indicator Temperature / Clock Shows the temperature and the time in minutes.
- Page 17 ENGLISH Symbol Oven function Application Conventional To bake and roast food on 1 shelf position. Cooking Pie/Pizza To bake food on 1 shelf position for a more in- tensive browning and a crispy bottom. Set the temperature 20 - 40 °C lower than for Conven- tional Cooking.
-
Page 18: Residual Heat Indicator
8.10 Residual heat indicator 2. Put the plug of the core temperature sensor into the socket on the side of When you deactivate the oven, the the appliance. display shows the residual heat. 8.11 Cooling fan When the appliance operates, the cooling fan activates automatically to keep the surfaces of the appliance cool. - Page 19 ENGLISH 8.15 Trivet and Grill- / WARNING! Roasting pan Be careful when you remove the tip and plug of the core WARNING! temperature sensor. The Be careful when you remove core temperature sensor is the accessories from a hot hot. There is a risk of burns. appliance.
-
Page 20: Oven - Clock Functions
9. OVEN - CLOCK FUNCTIONS 9.1 Clock functions table Clock function Application Time of day To set, change or check the time of day. Minute Minder To set countdown time. This function has no effect on the op- eration of the appliance. -
Page 21: Top Oven
ENGLISH (temperature, cooking times) and The temperature and baking shelf positions to the values in the times in the tables are tables. guidelines only. They • The manufacturer recommends that depend on the recipes and you use the lower temperature the the quality and quantity of first time. - Page 22 Baking results Possible cause Remedy The cake browns unevenly. The oven temperature is too Set a lower oven tempera- high and the baking time is ture and a longer baking too short. time. The cake browns unevenly. The mixture is unevenly dis- Spread the mixture evenly tributed.
- Page 23 ENGLISH Food Temperature (°C) Time (min) Shelf posi- tion Pastry: Choux 180 - 190 30 - 40 Pastry: Eclairs, Profiteroles 180 - 190 30 - 40 Pastry: Flaky / Puff Pies 210 - 220 30 - 40 Shortcrusts: Mince Pies 190 - 200 15 - 20 Shortcrusts: Meat Pies...
- Page 24 Food Temperature Time (min) Shelf posi- (°C) tion Pastry: Choux 180 - 190 30 - 40 Pastry: Shortcrust 190 - 200 25 - 35 Pastry: Flaky 190 - 210 30 - 40 Choux Pastry 30 - 35 Pastry: Puff Follow manufacturer`s instructions.
- Page 25 ENGLISH Food Temperature (°C) Time (min) Shelf posi- tion Milk Puddings 140 - 160 60 - 90 Pastry: Choux 180 - 190 30 - 40 Pastry: Shortcrust 180 - 190 25 - 35 Pastry: Flaky 180 - 190 30 - 40 Pastry: Puff Follow manufacturer`s instructions.
- Page 26 10.10 Thermaflow® or Conventional Cooking - Main Oven Roasting Food Temperature (°C) Time (min) Beef / Beef boned 170 - 190 20 - 35 minutes per 0.5 kb (1 lb) and 20 - 30 mi- nutes over Mutton / Lamb 170 - 190 20 - 35 minutes per 0.5 kb (1 lb) and 25 - 35 mi-...
- Page 27 ENGLISH Food Time (min) Shelf position Fish - Whole / Trout / Makarel 10 - 12 Fillets - Plaice / Cod 4 - 6 Kebabs 12 - 18 2 - 3 Kidneys - Lamb / Pig 6 - 10 2 - 3 Sausages 20 - 30 Steaks: Rare...
- Page 28 Food Quantity (kg) Temperature Time (min) Shelf posi- (°C) tion Poultry 1 - 1.5 190 - 210 45 - 75 Half Chicken 0.5 - 1 190 - 210 35 - 50 Duck 1.5 - 2 180 - 200 75 - 105 Goose 3.5 - 5...
- Page 29 ENGLISH Poultry Food Food core temperature Shelf position (°C) Turkey breast 75 - 80 2 - 3 10.15 Low temperature 1. Sear the meat in the deep pan (if present) in a very high heat. cooking 2. Put the meat in a roasting tin or directly on the wire shelf.
-
Page 30: Oven - Care And Cleaning
Food Quantity Defrosting Further de- Comments time (min) frosting time (min) Chicken 1 kg 100 - 140 20 - 30 Put the chicken on an up- turned saucer in a big plate. Turn halfway through. Meat 1 kg 100 - 140 20 - 30 Turn halfway through. -
Page 31: Removing The Oven Door
ENGLISH WARNING! Keep children away when you clean the oven at a high temperature. The oven surface becomes very hot and there is a risk of burns. CAUTION! Always turn the oven light on while using the catalytic cleaning (if applicable). Install the shelf supports in the opposite sequence. - Page 32 To install the door follow the procedure in reverse. Press down until the assembly spring clicks into the position. 11.6 Removing and cleaning the door glasses - top oven The door glass in your product can be different in...
-
Page 33: Troubleshooting
ENGLISH 12. TROUBLESHOOTING WARNING! Refer to Safety chapters. 12.1 What to do if... Problem Possible cause Remedy You cannot activate the ap- The appliance is not connec- Check if the appliance is cor- pliance. ted to an electrical supply or rectly connected to the elec- it is connected incorrectly. - Page 34 Problem Possible cause Remedy Automatic Switch Off oper- Deactivate the hob and acti- comes on the hob dis- ates. vate it again. play. The Child Safety Device or Refer to "Hob - Daily use" comes on the hob dis- the Lock function operates.
-
Page 35: Installation
ENGLISH We recommend that you write the data here: Product number (PNC) ......... Serial number (S.N.) ......... 13. INSTALLATION 13.3 Levelling of the appliance WARNING! Refer to Safety chapters. 13.1 Technical data Dimensions Height 894 - 912 mm Width 596 mm Depth 600 mm Top oven capacity... -
Page 36: Electrical Installation
This appliance is supplied without a main plug or a main cable. 13.6 Covering terminal board 1. Install the anti-tilt protection (A) on the wall. Make sure that the wall is made of a • The recommended cross-section area solid material. -
Page 37: Environment Concerns
ENGLISH 14. ENVIRONMENT CONCERNS marked with the symbol with the Recycle the materials with the symbol household waste. Return the product to Put the packaging in applicable your local recycling facility or contact containers to recycle it. Help protect the your municipal office. - Page 38 www.aeg.com...
- Page 39 ENGLISH...
- Page 40 www.aeg.com/shop...
Need help?
Do you have a question about the 49176V-MN and is the answer not in the manual?
Questions and answers