Table of Contents
Advertisement
Advertisement
Table of Contents

Related Manuals for XYZ Printing da Vinci 1.1 Plus


Summary of Contents for XYZ Printing da Vinci 1.1 Plus
- Page 1 Vinci 1.1 Plus User Manual V1.2...
- Page 2 It contains the operating instructions, maintenance information and application skills of the da Vinci 1.1 Plus 3D printer. To learn more about the latest news of the da Vinci 1.1 Plus 3D printer, please contact local dealers or visit the official website of XYZprinting: http://www.xyzprinting.com Trademarks All trademarks and registered trademarks are the property of their respective owners.
-
Page 3: Table Of Contents
Table of Content Chapter 1 Important Safety Instruction ....................4 Chapter 2 Unpacking and Setup......................5 Chapter 3 Product Overview / Accessory Checklist................6 Chapter 4 Connect the Cable ........................7 Chapter 5 Opening Settings ........................8 Chapter 6 Home Menu Display and Change Cartridge................9 Home Menu......................9 Load Filament....................10 Unload Filament......................11... -
Page 4: Chapter 1 Important Safety Instruction
Chapter 1 Important Safety Instruction Please read this manual carefully before operating the printer. The following warnings and attention notices are a best effort attempt to cover all scenarios; unfortunately it is not possible to do so. In the case of performing maintenance procedures that are not described in this manual the burden of safety falls to the customer side. -
Page 5: Chapter 2 Unpacking And Setup
Chapter 2 Unpacking and Setup Note: All packaging materials should be removed before powering up the printer. Open the box Open the box and remove Take out the printer by the Remove plastic bag and the accessories and the grip holds. all tapes. -
Page 6: Chapter 3 Product Overview / Accessory Checklist
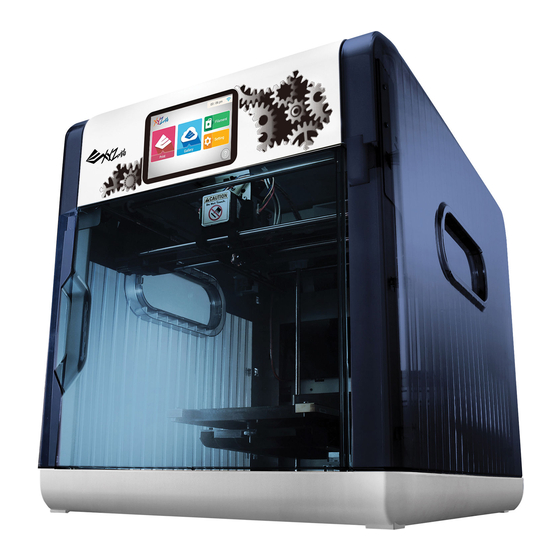
Chapter 3 Product Overview / Accessory Checklist Cartridge Slot Product Overview Control Panel Remove the packaging supports Extruder Module Z-Axis LAN Port Front Door USB Port Print Bed Power Switch USB Flash Disk Slot Power Connector Remove the print bed fixing screws and printing module fixers Control Panel: used to operate functions in the printer. -
Page 7: Chapter 4 Connect The Cable
Chapter 4 Connect the Cable A. LAN Port: Make sure the printer is connected with Internet and plug the cable tightly. Please use RJ-45 Network cable. B. USB Port: Make sure USB cable is connected with computer. C. Power Outlet: Make sure power cord is properly connected. -
Page 8: Chapter 5 Opening Settings
Chapter 5 Opening Settings Complete the basic settings of the printer after turning it on for the first time and follow the prompts on the screen to set the printer. After choosing the language, display language on the screen will switch to the language you selected. Follow the prompts on the screen and complete the settings of the printer name, date, time and Wi-Fi*. -
Page 9: Chapter 6 Home Menu Display And Change Cartridge
Chapter 6 Home Menu Display and Change Cartridge Home Menu Filament Network Status Load, unload filament and view the Display online status of Wi-Fi information about the filament. or Ethernet network. Browse the file for Print from the cloud Settings Function printing gallery... -
Page 10: Load Filament
Load Filament Remove the filament Install the new filament cartridge Place and push to click the cartridge. stopper and tape. into the empty slot. Select "Filament" > "Cartridge " > "Load". Insert filament into the guide hole until the printer starts to load filament. -
Page 11: Unload Filament
Note: Always "UNLOAD FILAMENT" as described below Unload filament before changing the cartridge. Do not cut the filament off. Select "Filament" > "Cartridge" > "Unload" on the screen Filament is unloaded from When filament is pulled out, Remove cartridge locker extruder automatically. -
Page 12: Chapter 7 Print Menu Display
Chapter 7 Print Menu Display Choose the file for Choose the files for Choose the file for printing from My printing from Sample that printing from the USB Gallery. come with the printer. flash drive. Basic operation Remove the USB Log out from the flash drive securely. -
Page 13: Print From Usb
USB flash drive: Choose .3w files from the USB flash drive The .3w file is generated by XYZware and contains slicing information. Before choosing the file from the USB flash drive, you must use XYZware to save as a 3D file. Browse the content in the USB flash drive and choose the file to be printed. -
Page 14: My Gallery
My Gallery: Choose 3D models from private XYZprinting gallery You may register an account on the XYZprinting official website and upload your 3D creations. After uploading your works, you may download it for printing directly on the printer. Choosing Steps: Enter your e-mail address and password to log in My Gallery. -
Page 15: Print Sample
Sample: Print from the built in samples There are 3 single color 3D model stored in the printer. You can start printing without the need to select any settings. To select a sample: Browse the sample in Build Sample. Select a sample to print, and tap to print. -
Page 16: Cloud Gallery
Cloud Gallery: Print from cloud gallery XYZprinting provides a wealth of free 3D models in the cloud gallery. You can download and print through the Internet directly without logging in. Downloading Steps: Once the printer is connected to the Internet, select "Gallery" to go to XYZprinting cloud gallery. -
Page 17: Print From A Mobile Application
Print From A Mobile Application 1.The mobile device needs to support wireless printing. 2.Install XYZprinting App from Android or iOS system. User Category Information Gallery My Upload Printer About Main screen Upload the To remote Printer item and control information printable file printer and copyright... - Page 18 O p e n t h e P l a y S t o r e f r o m y o u r A n d r o i d Please register an account at XYZprinting official browser or App store of iOS system to search website before logging in.
-
Page 19: Chapter 8 Printing Steps
Chapter 8 Printing Steps After choosing the files from the USB flash drive, My Gallery, Sample or Cloud Gallery, or transmitting the files to the printer from XYZware… Apply glue stick gently and evenly to the Press to print or press print bed base on the size of the printing change filament. -
Page 20: Auto Feed Gear Cleaning Instruction
Auto Feed Gear Cleaning Instruction When the machine’s auto-feeder / ejector has encountered any abnormal situations, use the gear cleaning brush to clear away the remained filament and particles from the gears. Preparation of Tools: Cleaning brush that comes with the printer. Note: The cleaning brush shall only be used to clean the specified parts of the machine and should not be used for the cleaning of other parts to prevent damaging the machine. -
Page 21: Chapter 9 Settings
Chapter 9 Settings Setting Menu Check the temperature of the printer and the information of the filament cartridge. Change the printer settings and operate the printer maintenance functions. Change the settings of the network, LCD display, sound, language, date and time, and check the system information. -
Page 22: Jog Mode
Jog Mode When manually adjusting the location of the printing module and the print bed is needed or the print head needs to be returned to its original position, use this function to manually adjust the location of the X, Y and Z axes. To adjust the location of the X-axis, Y-axis and Z-axis: Click... -
Page 23: Print Bed Calibration
This print bed has been calibrated by our professional technician before shipment. Do not adjust the platform yourself unless necessary, or contact the customer service center. Print Bed Calibration 1.Check for firmware update In XYZware, select “About” > “Firmware Update”. 2.Activate Calibration Select "Setting">"Printer Settings">... -
Page 24: Specifications
• 3 values should be no more than ±0.2 from each other. When finishing the adjustment, repeat the calibration from step 2 until it shows "Calibration Completed". Specifications Model Name da Vinci 1.1 Plus 3D Printer Nozzle Diameter 0.4mm Print Technology Fused Filament Fabrication(FFF) 100-127V~ 4.0A 50/60Hz... -
Page 25: System Setting Menu
System Setting Menu The operation system of the printer can be setup manually if necessary. Follow the instructions on the screen to change the settings of the network, display, sound, and language. Then check the printer information and return to the default value. P 25 V1.2... -
Page 26: About
About Check the information about the connection of the printer to the network and its operation time. Check the model number. Check the serial number. The version information of the underlying operation system. The version information of the on-screen applications. The function of the "firmware"... -
Page 27: Chapter 10 Support Details
Chapter 10 Support Details The troubleshooting instruction may guide you to fix the problem. If any error persists, please contact customer service center for support. Customer Support Center:http://support.xyzprinting.com Technical Support (US):supportus@xyzprinting.com Technical Support (EU):supporteu@xyzprinting.com Other Region:support@xyzprinting.com Service Service Symptom Action Symptom Action Code...
Need help?
Do you have a question about the da Vinci 1.1 Plus and is the answer not in the manual?
Questions and answers