
Subscribe to Our Youtube Channel
Related Manuals for Ariston A-MW07-EX


Summary of Contents for Ariston A-MW07-EX
- Page 1 Climatizzatore d’aria Air conditioner Climatiseur Klimagerät Climatizador Condicionador de ar Airconditioning A-MW07-EX A-MW09-EX A-MW12-EX Instruction Manual...
- Page 2 Egregio Signore, desideriamo ringraziarLa per aver preferito nel suo acquisto un nostro condizionatore. Siamo certi di averLe fornito un prodotto tecni- camente valido. Questo libretto è stato preparato per informarLa, con avvertenze e consigli, sul suo uso corretto e la sua manutenzione per poterne apprezzare tutte le qualità.
- Page 3 Prezado Cliente, Ao fazer esta compra, desejamos agradecê-lo por ter dado preferência a um condicionador. Estamos certos de ter-lhe fornecido um produto tec- nicamente válido. Este manual, que contém advertências e sugestões, foi preparado com o objetivo de informá-lo sobre o uso correto e a manutenção do apa- relho para que você...
- Page 4 Questo prodotto è conforme alla Direttiva EU 2002/96/EC Il simbolo del cestino barrato riportato sull’apparecchio indica che il prodotto, alla fine della propria vita utile, dovendo essere trattato separatamente dai rifiuti domestici, deve essere conferito in un centro di raccolta differenziata per apparecchiature elettriche ed elettroniche oppure riconsegnato al rivenditore al momento dell’acquisto di una nuova apparecchiatura equivalente.
-
Page 5: Table Of Contents
INDICE: NORME DI SICUREZZA ............MODELLO A PARETE . -
Page 6: Norme Di Sicurezza
NORME DI SICUREZZA: CONSERVARE E CONSULTARE ATTENTAMENTE IL PRESENTE LIBRETTO IN QUANTO TUTTE LE AVVERTENZE FORNISCONO INDICAZIONI IMPORTANTI PER LA SICUREZZA NELLE FASI DI INSTALLAZIONE, USO E MANUTENZIONE. NORMA RISCHIO Non effettuare operazioni che implichino l’a- Folgorazione per presenza di componenti sotto tensione pertura dell’apparecchio. -
Page 7: Modello A Parete
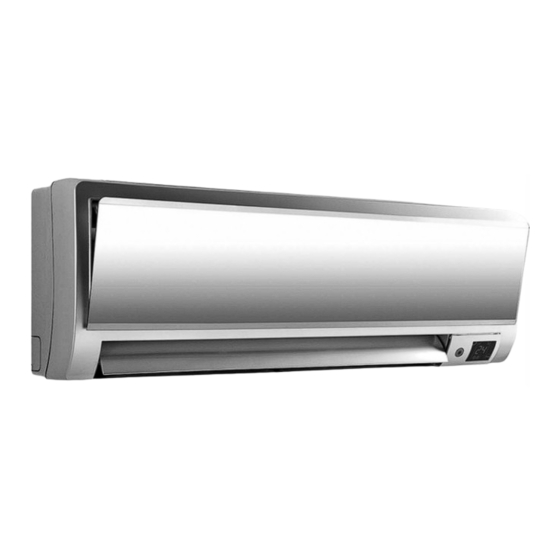
MODELLO A PARETE Il climatizzatore è costituito da due unità collegate tra loro da tubazioni in rame (opportunamente isolate) e da un cavo UNITA’ INTERNA elettrico di alimentazione. L’Unità Interna va installata su una parete dell’ambiente da griglia di entrata climatizzare. - Page 8 DISPLAY Il climatizzatore è dotato di un display che permette la visualizzazione di alcuni parametri di funzionamento (vedi figura). A. Indica che la macchina è accesa. B. Indica il funzionamento in modalità AUTO. C. Indica che il TIMER è attivo D.
- Page 9 TELECOMANDO - TASTI E FUNZIONI PRINCIPALI 1. ON/OFF Si utilizza per accendere e spegnere il climatiz- zatore. 2. ADJUST Si utilizza per impostare la temperatura deside- rata fra 17°C e 30°C. La temperatura aumenta o diminuisce premendo rispettivamente 3. FAN SPEED Si utilizza per selezionare la velocità...
-
Page 10: Modalità Di Funzionamento
MODALITÀ DI FUNZIONAMENTO AUTO AUTOMATICA Premere il tasto ON-OFF sul telecomando. Premere il tasto MODE per selezionare la modalità AUTO. Nel funzionamento “AUTO” il controllo elettronico seleziona automaticamente la modalità di funzionamento a secon- da della temperatura ambiente (rilevata dalla sonda incorporata nell’Unità Interna): - Se la temperatura della stanza è... -
Page 11: Auto Clean
ANTIBATTERI Dopo il funzionamento del climatizzatore nelle modalità COOL, HEAT, DRY o AUTO, premendo il tasto ON/OFF non si ha l’arresto immediato dell’apparecchio, perchè questo continuerà a funzionare alla bassa velocità per circa 10 minuti. Questo permetterà il dissolversi della condensa formatasi durante il funzionamento e quindi l’abbatti- mento degli eventuali batteri. -
Page 12: Regolazione Della Direzione Del Flusso Dell'aria
REGOLAZIONE DELLA DIREZIONE DEL FLUSSO DELL’ARIA Tenendo premuto per 2 sec. il tasto SWING si attiva il movimento oscillante delle alette “Flap”, il flusso dell’aria viene diretto alternativamente dall’alto verso il basso (e viceversa) per avere una diffusione uniforme dell’aria nell’ambiente. Premendo il tasto SWING il movimento oscillante delle alette si arresta nella posizione desiderata e il flusso dell’aria viene diretto in un’unica direzione: - in modalità... -
Page 13: Piccola Manutenzione
PICCOLA MANUTENZIONE ATTENZIONE: - Prima di qualsiasi operazione staccare la spina o l’interruttore dedicato (rischio di lesioni personali per folgorazione) - Non toccare il condizionatore con mani bagnate (rischio di lesioni personali per folgorazione). Nel caso di pulizia non salire su un tavolo o una sedia instabile (rischio di lesioni personali per caduta dall’alto). -
Page 14: Manutenzione Di Fine Stagione
DIRECTION RUNNING SWING TIMER ON CLOCK CANCEL TIMER OFF TIME ADJUST SOSTITUZIONE DELLE BATTERIE Size AAA 1,5V Quando: - dall’Unità Interna non si riceve alcun Bip di conferma - il display a cristalli liquidi non si attiva Come: - sfilare verso il basso il coperchietto come da disegno - sistemare le nuove batterie rispettando i simboli + e - N.B. -
Page 15: Dati Tecnici
DATI TECNICI E' importante considerare che le caratteristiche e i dati tecnici dichiarati dal costruttore fanno riferimento alla macchina alimentata alla tensione nominale di rete specificata: 230V 50Hz. Modello 7000 9000 12000 Potenza raffreddamento frig/h 1797 2287 3104 Potenza raffreddamentor 2090 2660 3610... - Page 16 SAFETY NORMS: READ THIS MANUAL THOROUGHLY AND KEEP IT IN A SAFE PLACE, AS IT CONTAINS IMPORTANT INFORMATION FOR THE SAFE INSTALLA- TION, USE AND MAINTENANCE OF YOUR NEW APPLIANCE. NORM RISK Do not perform operations that involve ope- Electrocution from live components. ning the appliance.
- Page 17 WALL-HUNG MODEL INTERNAL UNIT air inlet grille The air conditioning unit is made up of two separate units linked up to one another by copper piping (suitably insula- ted) and a power supply cable. The Internal Unit should be installed on a wall of the room to be air conditioned. The External Unit can be free standing on the floor or installed on a wall, on special supporting brackets.
- Page 18 DISPLAY The air conditioning unit is provided with a display which enables seve- ral operation parameters to be visualised (see figure). A. Indicates that the machine is switched on. B. Operating in AUTO CLEAN mode. C. Indicates that the TIMER is active. D.
- Page 19 REMOTE CONTROL - BUTTONS AND MAIN FUNCTIONS 1. ON/OFF Press it to turn the air conditioning unit on and off. 2. ADJUST Use these buttons to set the desired temperatu- re to between 17°C and 30°C. The temperature increases or decreases as you press respecti- vely.
-
Page 20: Operating Modes
OPERATING MODES AUTO AUTOMATIC Press the ON-OFF button on the remote control. Press the MODE button to select the AUTO mode. In “AUTO” mode, the electronic control automatically selects the operating mode according to the room temperature (measu- red by the sensor incorporated into the Internal Unit): - If the temperature of the room exceeds the temperature set using the remote control by two degrees, the applian- ce operates in cooling mode with the fan operating at low speed. -
Page 21: Fan Speed Setting
ANTI-BACTERIAL After the air conditioning unit has been operating in the COOL, HEAT, DRY and AUTO modes, the appliance will not stop immediately if the ON/OFF button is pressed; instead it will continue to operate at low speed for approxi- mately 10 minutes. - Page 22 ADJUSTING THE DIRECTION OF THE AIR FLOW When you press the SWING button for 2 sec., the oscillating movement of the directional flaps is enabled and the air flow is directed alternately downwards and upwards to ensure the uniform diffusion of air throughout the room. Press the SWING button again and the oscillating movement of the flaps stops in the desired position and the air flow is directed in one direction only: - we recommend you direct them upwards in cooling mode...
-
Page 23: Cleaning The Filters
SIMPLE MAINTENANCE ATTENTION: - Unplug the appliance or switch off the dedicated switch before performing any operations (risk of personal injury from electrocution). - Do not touch the air conditioning unit with wet hands (risk of personal injury from electrocution). - When cleaning the appliance, do not climb onto a table or unstable chair (risk of personal injury from falling from a height). - Page 24 ECONOMIC DIRECTION RUNNING SWING TIMER ON CLOCK CANCEL TIMER OFF REPLACING THE BATTERIES TIME ADJUST Size AAA 1,5V When: - the Internal Unit does not emit a confirmation Beep - the liquid crystal display does not come on How: - remove the cover by pulling it gently downwards as illustrated - replace the batteries, respecting the + and - symbols N.B.
- Page 25 TECHNICAL DATA It is important to consider that the characteristics and technical data stated by the manufacturer refer to the appliance supplied at the specified mains rated power: 230V 50Hz. Model 7000 9000 12000 Cooling power frig/h 1797 2287 3104 Cooling power 2090 2660...
- Page 26 NORMES DE SECURITE : CONSULTEZ ATTENTIVEMENT CE MANUEL ET CONSERVEZ-LE CAR IL CONTIENT DES INSTRUCTIONS IMPORTANTES CONCERNANT LA SECURITE D'INSTALLATION, D'EMPLOI ET D'ENTRETIEN DE L'APPAREIL. REGLEMENTATION RISQUE N'effectuez aucune opération exigeant l'ou- Electrocution par contact avec des composants sous tension verture de l'appareil Lésions sous forme de brûlures dues à...
- Page 27 MODELE MURAL grille UNITE INTERNE d’entrée Le climatiseur se compose de deux unités reliées de l’air entre elles par des tuyaux en cuivre (dûment iso- lés) et par un câble électrique d'alimentation. L'Unité Interne doit être installée sur un mur de la pièce devant être climatisée.
- Page 28 AFFICHEUR Le climatiseur est équipé d’un écran pour afficher certains paramètres de fonc- tionnement (voir figure). A. Il indique que l'appareil est allumé. B. Fonctionnement en mode AUTO . C. Il indique que le TIMER est activé D. Il indique la vitesse de fonctionnement du ventilateur dans la séquence : HIGH E.
- Page 29 TELECOMMANDE - TOUCHES ET FONCTIONS PRINCIPALES 1. ON/OFF A utiliser pour mettre en marche ou arrêter le cli- matiseur. 2. ADJUST Pour sélectionner la température souhaitée entre 17 et 30°C. Pour augmenter ou diminuer la température, appuyez respectivement sur ou Adjust.
- Page 30 MODE DE FONCTIONNEMENT AUTO AUTOMATIQUE Appuyez sur la touche ON-OFF de la télécommande. Appuyez sur la touche MODE pour choisir le mode de fonc- tionnement automatique AUTO. En fonctionnement “AUTO” le contrôle électronique sélectionne automatiquement le mode de fonctionnement en fonction de la température ambiante (détectée par la sonde comprise dans l'Unité Interne).
- Page 31 ANTIBACTERIEN Lorsque le climatiseur fonctionne en mode COOL, HEAT, DRY ou AUTO, toute pression sur la touche ON/OFF ne stoppe pas immédiatement l'appareil, ce dernier continue à fonctionner à basse vitesse pendant à peu près 10 minutes. Ceci permet d'éliminer la buée qui se forme en cours de fonctionnement et entraîne par conséquent la destruction de toute bactérie.
- Page 32 REGLAGE DIRECTION DU FLUX D'AIR Appuyez sur la touche SWING pour 2 sec. activer le mouvement oscillant des ailettes "Flap", le flux d'air est dirigé alternativement de haut en bas (et vice versa) pour obtenir une diffusion uniforme de l'air dans la pièce. Appuyez à...
- Page 33 ENTRETIEN COURANT ATTENTION : - Avant toute opération, débranchez la fiche ou l'interrupteur dédié. (risque de lésion par électrocution). - Ne touchez pas au climatiseur les mains mouillées (risque d'électrocution). - Pour procéder au nettoyage, ne grimpez pas sur une table ou une chaise insta- ble (risque de lésions personnelles par suite de chute d'une hauteur élevée) - Lorsque vous démontez les filtres, attention à...
- Page 34 ECONOMIC DIRECTION RUNNING SWING TIMER ON CLOCK CANCEL TIMER OFF TIME ADJUST REMPLACEMENT DES PILES Size AAA 1,5V Quand : - aucun bip de confirmation n'arrive de l'Unité Intérieure - l'écran aux cristaux liquides ne s'allume pas Comment : - tirez le couvercle vers le bas comme illustré (voir dessin) - installez les nouvelles piles en faisant attention aux symboles + et - N.B.
- Page 35 DONNEES TECHNIQUES Ne pas oublier que les caractéristiques et les données techniques déclarées par le fabricant correspondent à un appareil dûment alimenté à la tension nominale de réseau indiquée. 230V 50Hz. Model 7000 9000 12000 Puissance refroidissement frig/h 1797 2287 3104 Puissance refroidissement 2090...
- Page 36 SICHERHEITSVORSCHRIFTEN: LESEN SIE BITTE VORLIEGENDE BETRIEBS- UND WARTUNGSANLEITUNG AUFMERKSAM DURCH UND BEWAHREN SIE DIESE SORGFÄLTIG AUF. SIE ENTHÄLT WICHTIGE ANGABEN HINSICHTLICH DER SICHERHEIT BEI DER INSTALLATION, DEM GEBRAUCH UND DER WARTUNG. VORSCHRIFT GEFAHR Keine Arbeiten ausführen, für die das Gerät Stromschlag aufgrund unter Spannung stehender Teile.
- Page 37 MODELL ZUR WANDMONTAGE RAUMGERÄT Das Klimagerät besteht aus 2 Einheiten (dem Außen- Lufteintrittsgitter und dem Raumgerät), die durch (zweckmäßig isolierte) Kupferrohre untereinander verbunden sind, und einem Versorgungskabel. Das Raumgerät wird an der Wand des zu klimatisieren- den Raumes installiert. Das Außengerät kann als Stand- oder auf entsprechen- den Bügeln als Wandgerät installiert werden.
- Page 38 DISPLAY Das Klimagerät ist mit einem Display bestückt, das das Einblenden einiger Funktionsparameter ermöglicht (siehe Abbildung). A. Zeigt an, dass das Gerät in Betrieb ist. B. Funktion AUTO CLEAN C. Zeigt an, dass der TIMER aktiv ist. D. Zeigt die Gebläsestufen des Ventilators an: HIGH E.
- Page 39 FERNBEDIENUNG /TASTEN UND HAUPTFUNKTIONEN 1. ON/OFF Über diese Taste wird das Klimagerät ein- und ausgeschaltet. 2. ADJUST Si utilizza per impostare la temperatura deside- rata fra 17°C e 30°C. La temperatura aumenta o diminuisce premendo rispettivamente 3. FAN SPEED Einstellung der Gebläsestufen in folgender Reihenfolge: (niedrig) (mittel)
- Page 40 FUNKTIONSMODALITÄTEN AUTO AUTOMATIKBETRIEB Drücken Sie die ON-OFF-Taste der Fernbedienung. Drücken Sie die MODE-Taste. Während der Betriebsweise “AUTO” wird über die elektronische Steuerung automatisch die der jeweiligen Raumtemperatur (ermittelt durch den im Raumgerät integrierten Fühler) angepasste Betriebsmodalität gewählt: - Liegt die Raumtemperatur zwei Grade über der mittels der Fernbedienung eingestellten Temperatur funktioniert das Gerät auf Kühlbetrieb und niedriger Leistung des Ventilators.
- Page 41 ANTI-BAKTERIEN Nachdem das Klimagerät in den Funktionen COOL, HEAT, DRY oder AUTO gearbeitet hat, schaltet sich das Gerät bei Betätigung der Taste ON/OFF nicht sofort aus, sondern funktioniert für etwa 10 Minuten auf niedriger Geschwindigkeit weiter. Dies erlaubt das Verdunsten des Kondenswassers, welches sich während des Betriebs gebildet hat, und so den Abbau von etwaigen Bakterien.
- Page 42 STEUERUNG DES LUFTSTROMES Über die Taste SWING werden 2 sec. die Richtungs-„Flaps“ (oszillierende Bewegungen) in Betrieb gesetzt; der Luftstrom wird so abwechselnd von oben nach unten (und umgekehrt) geleitet, was eine optimale Luftverteilung im Raum gewährleistet. Wird die Taste SWING erneut gedrückt, stoppt das Gerät die oszillierenden Bewegungen der Richtungs-„Flaps“...
- Page 43 EINFACHE WARTUNGSARBEITEN ZUR BEACHTUNG: - Ziehen Sie vor jedem Eingriff den Stecker aus der Steckdose oder schalten den entsprechenden Schalter aus. (Gefahr: Personenschaden durch Stromschlag). - Berühren Sie das Klimagerät nicht mit nassen Händen. (Gefahr: Personenschaden durch Stromschlag). - Steigen Sie zur Reinigung des Gerätes nicht auf einen Tisch oder einen Stuhl. (Gefahr: Personenschaden durch Sturz.) - Achten Sie bei Abnahme des Filters darauf, keine Metallteile zu berühren, ach- ten Sie auch auf den Wärmetauscher des Raumgerätes.
- Page 44 ECONOMIC DIRECTION RUNNING SWING TIMER ON CLOCK CANCEL TIMER OFF TIME ADJUST AUSTAUSCH DER BATTERIEN Size AAA 1,5V Wann? - Wenn vom Raumgerät kein Bestätigungs-Tonsignal gegeben wird. - Wenn sich das Flüssigkristall-Display nicht einschaltet. Wie? - Den kleinen Deckel nach unten hin abziehen (siehe Abbildung). - Die neuen Batterien unter Beachtung der Symbole + und - einlegen.
- Page 45 TECHNISCHE DATEN Wichtig: Bitte berücksichtigen Sie, dass sich die vom Hersteller deklarierten technischen Eigenschaften und Daten auf ein mit der angegebenen Netznennspannung gespeistes Gerät beziehen: 230V 50Hz.. Model 7000 9000 12000 Kühlleistung frig/h 1797 2287 3104 2090 2660 3610 Kühlleistung Kühlleistung BTU/h 7126...
- Page 46 NORMAS DE SEGURIDAD: CONSERVE Y CONSULTE ATENTAMENTE EL PRESENTE MANUAL YA QUE TODAS LAS ADVERTENCIAS QUE CONTIENE SUMINISTRAN INDI- CACIONES IMPORTANTES PARA LA SEGURIDAD EN LAS FASES DE INSTALACIÓN, USO Y MANTENIMIENTO. NORMA RIESGOS No realice operaciones que impliquen la aper- Fulguración por la presencia de componentes bajo tensión tura del aparato Lesiones personales como quemaduras debido a la presen-...
- Page 47 MODELO DE PARED EN LA UNIDAD INTERNA El climatizador se compone de dos unidades que comunican entre sí mediante tubos de cobre (debi- rejilla para la entrada del aire damente aislados) y de un cable para la alimenta- ción eléctrica. La Unidad Interna debe instalarse sobre una de las paredes del ambiente que se quiere climatizar.
- Page 48 DISPLAY El climatizador posee un display que permite la visualización de algu- nos parámetros de funcionamiento (ver la figura). A. Indica que la máquina está encendida. B. Funcionamiento en la modalidad AUTO CLEAN. C. Indica que el TEMPORIZADOR está funcionando D.
- Page 49 CONTROL REMOTO – BOTONES Y FUNCIONES PRINCIPALES 1. ON/OFF Se utiliza para encender y apagar el climatiza- dor. 2. ADJUST Sirven para fijar la temperatura deseada entre 16°C y 30°C. La temperatura aumenta o dimi- nuye pulsando Temp, respectivamente. 3. FAN SPEED Se utiliza para seleccionar la velocidad del ven- tilador de acuerdo con las siguientes modalida- des:...
- Page 50 MODALIDAD DE FUNCIONAMIENTO AUTO AUTOMATICA Pulse la tecla ON-OFF del control remoto. Pulse la tecla MODE para elegir la modalidad AUTO. En el funcionamiento “AUTO”, el control electrónico selecciona automáticamente la modalidad de funcionamiento según la temperatura del ambiente (registrada por la sonda incorporada a la unidad interna). - Si la temperatura de la habitación es mayor que la temperatura fijada con el control remoto, en dos grados, la máquina funciona en la modalidad enfriamiento con el ventilador a baja velocidad.
- Page 51 ANTIBACTERIAS Si después del funcionamiento del climatizador en las modalidades COOL, HEAT, DRY o AUTO, se presiona el botón ON/OFF, el aparato no se detiene inmediatamente sino que continuará funcionando a baja velocidad duran- te 10 minutos aproximadamente. Esto permitirá que se disuelva el condensado que se ha formado durante el fun- cionamiento y también, la eliminación de las posibles bacterias.
- Page 52 REGULACIÓN DE LA DIRECCIÓN DEL FLUJO DE AIRE Pulsando la tecla SWING per 2 sec., se activa el movimiento oscilante de las aletas “Flap” y el flujo de aire se dirige alternativamente desde arriba hacia abajo (y viceversa) para obtener una difusión uniforme del aire en el ambiente. Pulsando nuevamente la tecla SWING, el movimiento oscilante de las aletas se detiene en la posición deseada y el flujo de aire se dirige en una única dirección: - en la modalidad enfriamiento se aconseja orientarlas hacia arriba...
- Page 53 MANTENIMIENTO RUTINARIO ATENCIÓN: - Antes de realizar cualquier operación, desenchufe el aparato o desconecte el interruptor correspondiente (riesgo de lesiones personales por fulguración) - No toque el acondicionador con las manos mojadas (riesgo de fulguración). - Cuando deba realizar la limpieza del aparato no se suba sobre una mesa o una silla inestable (riesgo de lesiones personales por caída desde lo alto).
- Page 54 DIRECTION RUNNING SWING TIMER ON CLOCK CANCEL TIMER OFF TIME ADJUST SUSTITUCIÓN DE LAS PILAS Size AAA 1,5V Cuándo: - cuando no se recibe alguna señal o señal acústica de con- firmación desde la Unidad Interna; - cuando el display a cristales líquidos no se activa Cómo: - sfilare verso il basso il coperchietto come da disegno - sistemare le nuove batterie rispettando i simboli + e -...
- Page 55 DATOS TÉCNICOS Es importante tener en cuenta que las características y los datos técnicos declarados por el fabricante, se refieren al aparato alimentado a la tensión nominal de red especificada: 230V 50Hz. 7000 9000 12000 Model Potencia de enfriamiento frig/h 1797 2287 3104...
- Page 56 REGRAS DE SEGURANÇA: GUARDE E CONSULTE COM ATENÇÃO O PRESENTE LIBRETO PORQUE TODAS AS ADVERTÊNCIAS FORNECEM INDICAÇÕES IMPORTAN- TES PARA A SEGURANÇA NAS FASES DE INSTALAÇÃO, UTILIZAÇÃO E MANUTENÇÃO. REGRA RISCO Fulguração por causa da presença de componentes sob ten- Não realize operações que impliquem abertu- são.
- Page 57 MODELO DE PAREDE O aparelho de ar condicionado é constituído por APARELHO INTERIOR grelha de aspi- duas unidades ligadas uma à outra por encana- ração do ar mentos em cobre (oportunamente isolados) e por um cabo eléctrico de alimentação. O aparelho interior deve ser instalado numa da sala a ser condicionada.
- Page 58 DISPLAY O aparelho de ar condicionado é dotado de um display que permite visualizar alguns parâmetros de funcionamento (veja figura). Indica que o aparelho está ligado. B. Funcionamento em modalidade AUTO CLEAN. C. Indica que o TIMER está activo. D. Indica a velocidade de funcionamento do ventilador na sequência: HIGH E.
- Page 59 CONTROLO REMOTO - TECLAS E FUNÇÕES PRINCIPAIS 1. ON/OFF Utiliza-se para ligar e desligar o aparelho de ar condicionado 2. ADJUST Servem para definir a temperatura que desejar entre 17°C e 30°C. A temperatura aumenta ou diminui se carregar respectivamente em 3.
- Page 60 MODOS DE FUNCIONAMENTO AUTO AUTOMATICA Carregue na tecla ON-OFF do controlo remoto. Carregue na tecla MODE para seleccionar o modo AUTO. No fun- cionamento “AUTO” o controlo electrónico selecciona automaticamente o modo de funcionamento em função de temperatura da sala (medida pela sonda incorporada no aparelho interior). - Se a temperatura do ambiente estiver dois graus acima da temperatura definida mediante controlo remoto, a máquina funcionará...
- Page 61 ANTIBACTÉRIAS Após o funcionamento do climatizador nas modalidades COOL, HEAT, DRY ou AUTO, carregando na tecla ON/OFF não haverá a paragem imediata do aparelho, porque o mesmo continuará a funcionar com baixa veloci- dade por aproximadamente 10 minutos. Isto consentirá a dissolução da condensação formada durante o funcio- namento e portanto a eliminação de eventuais bactérias.
- Page 62 REGULAÇÃO DA DIRECÇÃO DO FLUXO DE AR Mediante a tecla SWING per 2 sec (oscilação) activa-se o movimento de osci- lação das lâminas "Flap" e o fluxo de ar será dirigido alternativamente de cima para baixo (e vice-versa), para obter uma difusão uniforme do ar na sala. Se carregar outra vez na tecla SWING, o movimento oscilante das lâminas pára na posição desejada e o fluxo é...
- Page 63 PEQUENA MANUTENÇÃO ATENÇÃO: - Antes de realizar quaisquer operações, desligue a ficha eléctrica ou o interrup- tor dedicado. (risco de lesões pessoais mediante fulguração) - Não toque o aparelho de ar condicionado com as mãos molhadas (risco lesões pessoais por causa de fulguração). - Quando for limpar, não suba sobre uma mesa, nem numa cadeira instável (risco de lesões pessoais por causa de quedas do alto).
- Page 64 DIRECTION RUNNING SWING TIMER ON CLOCK CANCEL TIMER OFF TIME ADJUST TROCA DAS PILHAS Size AAA 1,5V Quando: - do aparelho interior não se receber o bip de confirmação. - o visor de cristais líquidos não se activar. Como: - tire para baixo a tampa da maneira mostrada na ilustração. - disponha as novas pilhas a respeitar os símbolos + e -.
- Page 65 DADOS TÉCNICOS É importante considerar que as características e os dados técnicos declarados referem-se à máquina ali- mentada com a tensão nominal de rede especificada: 230 V. 50 Hz. Model 7000 9000 12000 Potência de refrigeração frig/h 1797 2287 3104 Potência de refrigeração 2090 2660...
- Page 66 VEILIGHEIDSVOORSCHRIFTEN: BEWAAR EN RAADPLEEG DIT BOEKJE ZORGVULDIG, DAAR ALLE WAARSCHUWINGEN BELANGRIJKE INFORMA- TIE BEVATTEN VOOR DE VEILIGHEID TIJDENS INSTALLATIE, GEBRUIK EN ONDERHOUD. VOORSCHRIFT RISICO Niets uitvoeren waarvoor men het apparaat Electrische schokken van onderdelen die onder spanning moet openen. staan Persoonlijk letsel door hete onderdelen of snijwonden door scherpe randen of uitstekende delen.
- Page 67 MUURMODEL De airconditioner bestaat uit twee eenheden, die met rooster INTERNE EENHEID elkaar verbonden zijn door middel van goed geiso- inkomende leerde koperen leidingen en een electrische voeding- lucht. skabel. De interne eenheid moet worden geïnstalleerd op een muur in het lokaal waarvan men het klimaat wenst te regelen.
- Page 68 DISPLAY De airconditioner beschikt over een display waarmee u enkele bedrijf- sparameters kunt visualiseren (zie afbeelding). A. Geeft aan dat het apparaat aan is. B. Werking in AUTO CLEAN modus. C. Geeft aan dat de TIMER actief is D. Geeft de werkingssnelheid van de ventilator aan in de sequentie: HIGH E.
- Page 69 AFSTANDSBEDIENING - VOORNAAMSTE TOETSEN EN FUNCTIES 1. ON/OFF Deze dient om de airconditioner aan en uit te zet- ten. 2. ADJUST Deze dienen om de gewenste temperatuur (tus- sen 17°C en 30°C) te kiezen. De temperatuur kan worden verhoogd of verlaagd door respectievelijk te drukken.
- Page 70 BEDRIJFSMODI AUTO AUTOAUTOMATISCH Druk op de toets ON-OFF op de afstandsbediening. Druk op de toets MODE voor het selecteren van de bedrijfsmodus AUTO. In de bedrijfsmodus “AUTO” selecteert de electronische besturing automatisch de bedrijfsmodus op basis van de omgevingstemperatuur (gemeten door de ingebouwde sonde in de interne eenheid): - ls de temperatuur van de kamer meer dan twee graden boven de op de afstandsbediening ingestelde temperatuur, dan werkt de machine in de bedrijfsmodus koeling met de ventilator op lage snelheid.
- Page 71 ANTI-BACTERIËN Als de airconditioner in de modus COOL, HEAT, DRY of AUTO heeft gewerkt en u drukt op de ON/OFF toets gaat het apparaat niet onmiddellijk uit. Het zal circa 10 minuten lang op lage snelheid werken. Dit zal ervoor zorgen dat de condens die zich tijdens de werking heeft gevormd verdwijnt, waardoor eventuele bacteriën worden gedood.
- Page 72 REGELING VAN DE RICHTING VAN DE LUCHTSTROOM Drukt men op de toets 2 sec SWING dan zullen de “flappen” automatisch van boven naar beneden en terug gaan zodat de uitgaande lucht uniform in het lokaal wordt geblazen. Drukt men opnieuw op de toets SWING dan zal de oscillerende beweging van de flappen ophouden en de luchtstroom zal in de richting worden geblazen waarin de flappen tot stilstand kwamen: - in bedrijfsmodus koeling is het raadzaam om de luchtstroom naar boven te...
- Page 73 EENVOUDIG ONDERHOUD OPGELET: - Voordat men een willekeurige ingreep op het apparaat uitvoert moet men eerst de stekker eruit trekken of de (eigen) schakelaar afschakelen. (risico van persoonlijk letsel door electrische schokken) - Niet de airconditioner met natte handen aanraken (risico electrische schokken). - In het geval dat men het apparaat moet reinigen moet men niet op instabiele stoelen of tafels klimmen (risico van persoonlijk letsel door vallen).
- Page 74 ECONOMIC DIRECTION RUNNING SWING TIMER ON CLOCK CANCEL TIMER OFF VERVANGING VAN DE BATTERIJEN TIME ADJUST Size AAA 1,5V Wanneer: - de interne eenheid geen bevestigingsbiep meer laat horen - de display met vloeibare kristallen het niet meer doet Wat men moet doen: - het dekseltje van het batterijvak naar beneden schuiven, zoals op de tekening - de nieuwe batterijen erin doen met de juiste polariteit (zie...
- Page 75 TECHNISCHE GEGEVENS Het is belangrijk te onthouden dat de eigenschappen en technische gegevens van de fabrikant betrekking hebben op de machine die bij de volgende netspanning werkt: 230V 50Hz. Model 7000 9000 12000 Koelvermogen frig/h 1797 2287 3104 2090 2660 3610 Koelvermogen Koelvermogen...
-
Page 76: Viale Aristide Merloni
Merloni TermoSanitari SpA Viale Aristide Merloni, 45 60044 Fabriano/Italia Telefono 0732 6011 Telex 560160 - Fax 0732 602000 www.mtsgroup.com 420010021700...
Need help?
Do you have a question about the A-MW07-EX and is the answer not in the manual?
Questions and answers