
Related Manuals for Ariston KIOS BS NET R32


Summary of Contents for Ariston KIOS BS NET R32
- Page 1 KIOS BS NET R32 CLIMATIZZATORE D’ARIA AIR CONDITIONER / CLIMATISEUR / APARAT DE AER CONDIȚIONAT USER AND INSTALLATION MANUAL MANUAL DE INSTALARE ȘI UTILIZARE IT - EN - FR - AR - RO...
- Page 3 DIRECTORY It alian o ............1-28 Englis h............29-56 48-75............. ﺓﻱﺏ ﺭﻉﻝﺍ Franç...
- Page 9 Indicatore per timer, temperatura e codici di errore. Si accende durante il funzionamento del timer. Modalita risparmio Il simbolo compare all'accensione dell'unita e scompare quando l'unita e spenta. Il simbolo compare all'accensione.
- Page 18 18-24K...
-
Page 33: Table Of Contents
CONTENTS CONTENTS SAFETY PRECAUTIONS ........................3 NAME OF PARTS ..........................3 ......................3 OPERATION INSTRUCTIONS ....................3 INSTRUCTION FOR SERVICING(R32) ......................4 INSTALLATION PRECAUTIONS ......................4 INDOOR UNIT INSTALLATION ......................OUTDOOR UNIT INSTALLATION ..........................5 TEST OPERATION ..........................5 MAINTENANCE ........................5 TROUBLESHOOTING * The design and specifications are subject to change without prior notice for product improvement. Consult with the sales agency or manufacturer for details. -
Page 34: Safety Precautions
SAFETY PRECAUTIONS SAFETY RULES AND RECOMMENDATIONS FOR THE INSTALLER ead this guide before installing and using the appliance. uring the installation of the indoor and outdoor units the access to the working area should be forbidden to children. Unforeseeable accidents could happen. ake sure that the base of the outdoor unit is firmly fixed. - Page 35 SAFETY PRECAUTIONS SAFETY RULES AND RECOMMENDATIONS FOR THE INSTALLER o not try to install the conditioner alone, always contact specialized technical personnel. leaning and maintenance must be carried out by specialized technical personnel. In any case disconnect the appliance from the mains electricity supply before carrying out any cleaning or maintenance.
- Page 36 SAFETY PRECAUTIONS SAFETY RULES AND PROHIBITIONS o not bend, tug or compress the power cord since this could damage it. Electrical shocks or fire are probably due to a damaged power cord. Specialized technical personnel only must replace a damaged power cord. o not use extensions or gang modules.
-
Page 37: Name Of Parts
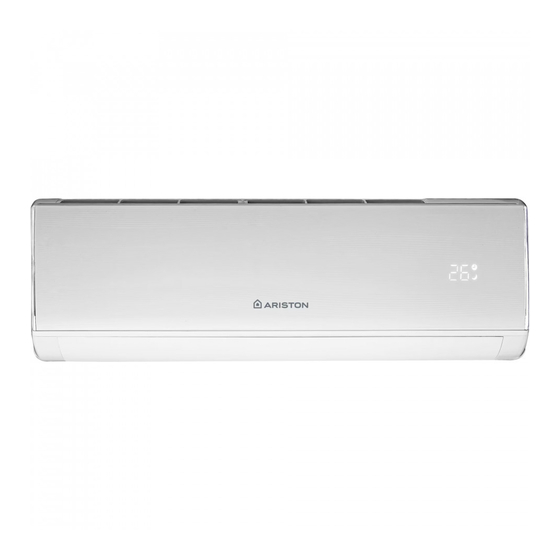
NAME OF PARTS Indoor Unit Mounting plate Front panel Emergency button Air filter Air outlet Air deflector and flap Refrigerant connecting pipe Outdoor Unit Air inlet Wiring cover Air outlet Drainage pipe Connection wiring Valve protective cover Gas valve (Low pressure valve) Liquid valve (High pressure valve) With the protective cover removed... - Page 38 NAME OF PARTS Indoor Display Indicator for Timer, temperature and Error codes. Lights up during Timer operation. SLEEP mode The symbol appears when the unit is turned on, and disappear when the unit is turned off. The symbol appears when power on. The shape and position of switches and indicators may be different according to the model, but their function is the same.
-
Page 39: Operation Instructions
OPERATION INSTRUCTIONS Attempt to use the air conditioner under the temperature beyond the specified range may cause the air conditioner protection device to start and the air conditioner may fail to operate. Therefore, try to use the air conditioner in the following temperature conditions. Inverter air conditioner: MODE Heating... -
Page 40: Instruction For Servicing(R32)
INSTRUCTION FOR SERVICING(R32) 1. Check the information in this manual to find out the dimensions of space needed for proper installation of the device, including the minimum distances allowed compared to adjacent structures. 2. Appliance shall be installed, operated and stored in a room with a floor area larger than 4m . 3. - Page 41 INSTRUCTION FOR SERVICING(R32) a) Become familiar with the equipment and its operation. b) Isolate system electrically. c) Before attempting the procedure, ensure that: . mechanical handling equipment is available, if required, for handling refrigerant cylinders; . all personal protective equipment is available and being used correctly; .
- Page 42 INSTRUCTION FOR SERVICING(R32) The following checks shall be applied to installations using flammable refrigerants: -- The charge size is in accordance with the room size within which the refrigerant containing parts are installed; -- The ventilation machinery and outlets are operating adequately and are not obstructed; -- If an indirect refrigerating circuit is being used, the secondary circuit shall be checked for the presence of refrigerant;...
- Page 43 INSTRUCTION FOR SERVICING(R32) 19. Cabling Check that cabling will not be subject to wear, corrosion, excessive pressure, vibration, sharp edges or any other adverse environmental effects. The check shall also take into account the effects of aging or continual vibration from sources such as compressors or fans. 20.
- Page 44 INSTRUCTION FOR SERVICING(R32) a) Become familiar with the equipment and its operation. b) Isolate system electrically. c) Before attempting the procedure, ensure that: . mechanical handling equipment is available, if required, for handling refrigerant cylinders; . all personal protective equipment is available and being used correctly; .
- Page 45 INSTALLATION PRECAUTIONS(R32) Important Considerations 1. The air conditioner must be installed by professional personnel and the Installation manual is used only for the professional installation personnel! The installation specifications should be subject to our after-sale service regulations. 2. When filling the combustible refrigerant, any of your rude operations may cause serious injury or injuries to human body and objects.
- Page 46 INSTALLATION PRECAUTIONS(R32) 3. Installation Safety Refrigerant Leak Detector Appropriate Installation Location The left picture is the schematic diagram of a refrigerant leak detector. Please note that: 1. The installation site should be well-ventilated. 2. The sites for installing and maintaining an air conditioner using Refrigerant R32 should be free from open fire or welding, smoking, drying oven or any other heat source higher than 548 which easily produces open fire.
-
Page 47: Installation Precautions
INSTALLATION PRECAUTIONS Pipe Length and Additional Refrigerant Inverter Models Capacity (Btu/h) 9K-12K 18K-24K Lenght of pipe with standard charge Maximum distance between indoor and outdoor unit Additional refrigerant charge 15g/m 25g/m Max. diff. in level between indoor and outdoor unit Type of refrigerant Torque Parameters Newton... -
Page 48: Indoor Unit Installation
INDOOR UNIT INSTALLATION Step1: Select Installation location 1.1 Ensure the installation complies with the installation minimum dimensions (defined below) and meets the minimum and maximum connecting piping length and maximum change in elevation as defined in the System Requirements section. 1.2 Air inlet and outlet will be clear of obstructions, ensuring proper airflow throughout the room. - Page 49 INDOOR UNIT INSTALLATION Step2: Install Mounting Plate 2.1 Take the mounting plate from the back of indoor unit. 2.2 Ensure to meet the minimum installation dimension requirements as step 1, according to the size of mounting plate, determine the position and stick the mounting plate close to the wall. 2.3 Adjust the mounting plate to a horizontal state with a spirit level, then mark out the screw hole positions on the wall.
- Page 50 INDOOR UNIT INSTALLATION Step4: Connecting Refrigerant Pipe 4.1 According to the wall hole position, select the appropriate piping mode. There are three optional piping modes for indoor units as shown in the figure below: In Piping Mode 1 or Piping Mode 3, a notch should be made by using scissors to cut the plastic sheet of piping outlet and cable outlet on the corresponding side of the indoor unit.
- Page 51 INDOOR UNIT INSTALLATION Step5: Connect Drainage Hose 5.1 Adjust the drainage hose(if applicable) In some model, both sides of the indoor unit are provided with drainage ports, you can choose one of them to attache the drainage hose. And plug the unused drain port with the rubber attached in one of the ports.
- Page 52 INDOOR UNIT INSTALLATION Step7: Wrap Piping and Cable After the refrigerant pipes, connecting wires and drainage hose are all installed, in order to save space, protect and insulate them, it must be bundle with insulating tape before passing them through the wall hole.
-
Page 53: Outdoor Unit Installation
OUTDOOR UNIT INSTALLATION Step1: Select Installation Location Select a site that allows for the following: 1.1 Do not install the outdoor unit near sources of heat, steam or flammable gas. 1.2 Do not install the unit in too windy or dusty places. 1.3 Do not install the unit where people often pass. - Page 54 OUTDOOR UNIT INSTALLATION Step4: Install Wiring 4.1 Use a phillips screwdriver to unscrew wiring cover , grasp and press it down gently to take it down. 4.2 Unscrew the cable clamp and take it down. 4.3 According to the wiring diagram pasted inside the wiring cover , connect the connecting wires to the corresponding terminals, and ensure all connections are firmly and securely .
- Page 55 OUTDOOR UNIT INSTALLATION Step6: Vacuum Pumping 6.1 Use a spanner to take down the protective caps from the service port, low pressure valve and high pressure valve of the outdoor unit. 6.2 Connect the pressure hose of manifold gauge to the service port on the outdoor unit low pressure valve.
-
Page 56: Test Operation
TEST OPERATION Inspections Before Test Run Do the following checks before test run. Description Inspection method Check whether the power supply voltage complies with specification. Electrical Check whether there is any wrong or missing connection between the safety inspection power lines, signal line and earth wires. Check whether the earth resistance and insulation resistance comply with requirements. - Page 57 TEST OPERATION Test Run Instruction 1. Turn on the power supply. 2. Press the ON/OFF button on the remote controller to turn on the air conditioner. 3. Press the Mode button to switch the mode COOL and HEAT. In each mode set as below: COOL-Set the lowest temperature HEAT-Set the highest temperature 4.
-
Page 58: Maintenance
MAINTENANCE When cleaning, you must shut down the machine and cut off the power supply for more than 5 minutes. Under no circumstances should the air conditioner be flushed with water. Volatile liquid (e.g. thinner or gasoline) will damage the air conditioner, so only use soft dry cloth or wet cloth dipped with neutral detergent to clean the air conditioner. -
Page 59: Troubleshooting
TROUBLESHOOTING POSSIBLE CAUSES MALFUNCTION Power failure/plug pulled out. Damaged indoor/outdoor unit fan motor. Faulty compressor thermomagnetic circuit breaker. Faulty protective device or fuses. The appliance does Loose connections or plug pulled out. not operate It sometimes stops operating to protect the appliance. Voltage higher or lower than the voltage range. - Page 60 TROUBLESHOOTING ERROR CODE ON THE DISPLAY In case of error, the display on the indoor unit shown the following error codes: Display Description of the trouble Indoor room temperature sensor fault Indoor pipe temperature sensor fault Outdoor pipe temperature sensor fault Refrigerant system leakage or fault Malfunction of indoor fan motor Outdoor ambient temperature sensor fault...
- Page 61 محتويات ..........................احتياطات السالمة ..........................اسماء األجزاء 6 ..........................تعليمات التشغيل 6 ........................)R32( تعليمات الخدمة ....73......................احتياطات التركيب ....74......................تركيب الوحدة الداخلية ...... 9....................تركيب الوحدة الخارجية ........80................... اختبار التشغيل ............................الصيانة 83 ....................... استكشاف األخطاء وإصالحها .* يخضع...
- Page 62 احتياطات السالمة قواعد وتوصيات السالمة للقائم بعملية التركيب قم .بقراءة هذا الدليل جيدا قبل البدء في تثبيت واستخدام هذا الجهاز يتم .منع األطفال من الوصول الى منطقة العمل عند تركيب الوحدات الداخلية والخارجية. فربما قد تحدث حوادث غير متوقعة تأكد .من...
- Page 63 احتياطات السالمة قواعد وتوصيات السالمة للقائم بعملية التركيب ال .تحاول تركيب المكيف بمفردك؛ قم دائ م ًا باالتصال بالفنيين المتخصصين يجب أن يتم التنظيف والصيانة بواسطة كوادر فنية متخصصة في كل األحوال، افصل الجهاز عن مصدر التيار الكهربائي .الرئيسي قبل إجراء أي عملية تنظيف أو صيانة تأكد...
- Page 64 احتياطات السالمة قواعد السالمة والحظر ال تقم بثني سلك الطاقة أو سحبه أو ضغطه ألن ذلك قد يؤدي إلى إتالفه. قد تكون الصدمات الكهربائية أو الحريق بسبب تلف .سلك الطاقة. في حالة تلف سلك الطاقة، يجب استبداله من قبل األشخاص المؤهلين فقط لتفادي التعرض للخطر ال...
- Page 65 اسماء األجزاء الوحدة الداخلية لوح التثبيت اللوحة األمامية زر الطوارئ فلتر الهواء عاكس ومرفرف الهواء. مخرج الهواء أنبوب الربط للمبرد الوحدة الخارجية مدخل الهواء غطاء األسالك مخرج الهواء أنبوب التصريف أسالك التوصيل الغطاء الواقي للصمام صمام الغاز )(صمام الضغط المنخفض صمام...
- Page 66 اسماء األجزاء شاشة داخلية الوظيفة الرقم .مؤشر رموز المؤقت ودرجة الحرارة واألخطاء .يضيء أثناء تشغيل المؤقت وضع النوم .يظهر الرمز عند تشغيل الوحدة ويختفي عند إيقاف تشغيل الوحدة .يظهر الرمز عند التشغيل .قد يختلف شكل وموضع المفاتيح والمؤشرات وف ق ً ا للطراز، ولكن وظيفتها هي نفسها...
- Page 67 تعليمات التشغيل قد تؤدي محاولة استخدام مكيف الهواء في درجة حرارة أعلى من النطاق المحدد إلى بدء تشغيل جهاز حماية مكيف الهواء وقد .يفشل تشغيل مكيف الهواء. لذلك، حاول استخدام مكيف الهواء في ظروف درجة الحرارة التالية :تكييف الهواء العاكس وضع...
- Page 68 )R32( تعليمات الخدمة 1. راجع المعلومات الواردة في هذا الدليل لمعرفة أبعاد المساحة المطلوبة للتركيب الصحيح للجهاز، بما في ذلك الحد األدنى .للمسافات المسموح بها مقارنة بالبنى المجاورة .22. يجب تركيب المكيف وتشغيله وتخزينه في غرفة بمساحة أكبر من 4 م .3.
- Page 69 )R32( تعليمات الخدمة :61. معلومات حول الخدمة 1) التحقق من المنطقة قبل بدء العمل على األنظمة التي تحتوي على سوائل تبريد قابلة لالشتعال، يلزم إجراء فحوصات السالمة لضمان تقليل .خطر اإلشعال إلى أدنى الحدود. إلصالح نظام التبريد، يجب االلتزام باالحتياطات التالية قبل إجراء أي أعمال على النظام 2) إجراءات...
- Page 70 )R32( تعليمات الخدمة :يجب إجراء الفحوصات التالية على التركيبات التي تتضمن استخدام مواد تبريد قابلة لالشتعال -- حجم الشحن يتوافق مع حجم الغرفة التي يتم تركيب مادة التبريد (المبرد) التي تحتوي على أجزاء فيها؛ -- آالت ومنافذ التهوية تعمل بصورة جيدة وال توجد أي عوائق؛ -- في...
- Page 71 )R32( تعليمات الخدمة 91. توصيل األسالك تحقق من عدم تعرض االسالك للتآكل أو الضغط المفرط أو االهتزازات أو الحواف الحادة أو أي عوامل بيئية سلبية أخرى. يجب .كذلك أن يضع الفحص في الحسبان عوامل العمر أو االهتزاز المستمر من مصادر مثل ضاغط الهواء أو المراوح 02.
- Page 72 )R32( تعليمات الخدمة .أ) التعرف على الجهاز وتشغيله .ب) عزل النظام كهربائيا :ج) قبل محاولة اإلجراء، تأكد مما يلي ● تتوفر معدات المناولة الميكانيكية، عند الحاجة، للتعامل مع أسطوانات المبرد؛ ● جميع معدات الوقاية الشخصية متاحة ويجري استخدامها على نحو سليم؛ ●...
- Page 73 )R32( احتياطات التركيب اعتبارات هامة !1. ينبغي أن يتم تركيب مكيف الهواء من قبل فنيين متخصصين وال يتم استخدام دليل التثبيت إال من قبل فني التركيب المتخصصين .يجب أن تخضع مواصفات التركيب للوائح خدمة ما بعد البيع .2. عند ملء المبرد القابل لالحتراق ، قد تتسبب أي من عملياتك الخشنة في إصابات بدنية خطيرة و تلف أشياء 3.
- Page 74 )R32( احتياطات التركيب 3. سالمة التركيب ● كاشف تسرب المبردات ● موقع التركيب المناسب .الصورة اليسرى هي الرسم التخطيطي للكشف عن تسرب المبردات :يرجى مالحظة .1. يجب أن يكون موقع التركيب جيد التهوية خالية من ألسنة اللهب المكشوفة، أو اللحام أوR 32 2. يجب أن تكون مواقع تركيب مكيف الهواء وصيانته باستخدام سائل التبريد .التدخين...
- Page 75 احتياطات التركيب طول األنابيب والمبردات اإلضافية 18K-24K 9K-12K )Btu/h( القدرات لنماذج المحول 5 م 5 م طول األنبوب بشحنة قياسية 52 م 52 م المسافة القصوى بين وحدة داخلية وخارجية 52 جم / م 51 جم / م شحنة إضافية من مواد التبريد 01سم...
- Page 76 تركيب وحدة داخلية الخطوة 1: تحديد موقع التركيب تأكد من أن التركيب يتوافق مع الحد األدنى ألبعاد التركيب (المحددة أدناه) ويفي بالحد األدنى والحد األقصى لطول أنابيب .التوصيل والحد األقصى للتغيير في االرتفاع كما هو محدد في قسم متطلبات النظام .مدخل...
- Page 77 تركيب وحدة داخلية الخطوة 2: تركيب لوحة التركيب .خذ لوحة التركيب من الجهة الخلفية للوحدة الداخلية تأكد من اإليفاء بالحد األدنى من متطلبات أبعاد التركيب في الخطوة 1، وفقا لحجم لوحة التركيب، حدد موضع لوح التركيب .وألصقها بالقرب من الحائط .اضبط...
- Page 78 تركيب وحدة داخلية الخطوة 4: توصيل أنابيب التبريد .وفقا لموضع فتحة الحائط، حدد وضع األنابيب المناسب :هناك ثالثة نماذج األنابيب االختيارية للوحدات الداخلية كما هو موضح في الشكل أدناه في نموذج األنابيب 1 أو نموذج األنابيب 3، ينبغي عمل الشق باستخدام مقص لقطع ورقة بالستيكية من مخرج األنابيب ومأخذ .الكابل...
- Page 79 تركيب وحدة داخلية الخطوة 5: توصيل خرطوم الصرف الصحي )1.5 اضبط خرطوم التصريف (إن وجد .في بعض الطرازات، يتم تزويد كال جانبي الوحدة الداخلية بمنافذ تصريف، يمكنك اختيار أحدهما لتوصيل خرطوم التصريف .وقم بتوصيل منفذ التصريف غير المستخدم مع المطاط المتصل بأحد المنافذ منافذ...
- Page 80 تركيب وحدة داخلية .الخطوة 7: تغليف األنابيب واألسالك بعد يتم تركيب أنابيب التبريد أسالك االتصال وخرطوم الصرف الصحي كلهم، من أجل توفير مساحة، وحماية وعزلهم، يجب أن .تحزم مع الشريط العازلة قبل تمريرها من خالل ثقب الجدار .1.7 رتب األنابيب والكابالت وخرطوم التصريف باإلضافة إلى الصورة التالية توصيل...
- Page 81 تركيب الوحدة الخارجية الخطوة 1: اختر موقع التركيب :حدد موق ع ًا يسمح بما يلي .1.1 ال تقم بتركيب الوحدة الخارجية بالقرب من مصادر الحرارة أو البخار أو الغازات القابلة لالشتعال .2.1 ال تقم بتركيب الوحدة في أماكن شديدة الرياح أو بها أتربة شديدة .3.1 ال...
- Page 82 تركيب الوحدة الخارجية الخطوة 4: تركيب األسالك .1.4 استخدم مفك فيليبس لفك غطاء األسالك، ثم اضغط عليه ألسفل برفق لرفعه ألسفل .2.4 فك مشبك الكابل وخذه إلى األسفل 3.4 وفقا لمخطط األسالك الملصق داخل غطاء األسالك، قم بتوصيل أسالك التوصيل باألطراف المقابلة، وتأكد من أن جميع .التوصيالت...
- Page 83 تركيب الوحدة الخارجية الخطوة 6: مضخة الفراغ استخدم مفتاح البراغي إلنزال أغطية واقية من منفذ الخدمة، صمام الضغط المنخفض وصمام الضغط العالي للوحدة .الخارجية .قم بتوصيل خرطوم الضغط من مقياس المشعب إلى منفذ الخدمة على صمام الضغط المنخفض للوحدة الخارجية .قم...
- Page 84 عملية االختبار التفتيشات قبل تشغيل االختبار .قم بالتحققات التالية قبل تشغيل االختبار طريقة التفتيش الوصف .● تحقق مما إذا كانت فولطية مورد الطاقة تتوافق مع المواصفات أم ال ● تحقق مما إذا كان هناك أي اتصال خاطئ أو مفقود بين خطوط الطاقة وخط اإلشارة واألسالك فحص...
- Page 85 عملية االختبار اختبار تعليم التشغيل .1. قم بتشغيل مصدر الطاقة . (التشغيل /إيقاف التشغيل) الموجود على جهاز التحكم عن بعد لتشغيل مكيف الهواءON/OFF 2. اضغط على زر .3. اضغط على زر النمط للتبديل بين النمط التبريد والتسخين :في كل نمط اضبط على النحو التالي ...
- Page 86 اعمال صيانة .● عند التنظيف، يجب إيقاف تشغيل الماكينة وقطع مصدر الطاقة ألكثر من 5 دقائق .● ال ينبغي تحت أي ظرف غسل مكيف الهواء بالماء ● سيتسبب السائل المتطاير (مثل الثنر أو البنزين) في تلف مكيف الهواء، لذا استخدم فقط قطعة قماش ناعمة .وجافة...
- Page 87 استكشاف األخطاء وإصالحها األسباب المحتملة عطل .انقطاع التيار الكهربائي/ تم سحب التوصيل .محرك مروحة الوحدة الداخلية / الخارجية متضرر .خطأ في قاطع الدائرة المغناطيسية الحرارية الضاغط .خطأ في جهاز الحماية أو الصمامات . فك االتصاالت أو التوصيالت المسحوبة الجهاز ال يعمل .في...
- Page 88 استكشاف األخطاء وإصالحها رمز الخطأ على الشاشة :في حالة الخطأ، تظهر الشاشة على الوحدة الداخلية رموز الخطأ التالية وصف للمتاعب الشاشة خطأ في مستشعر درجة حرارة الغرفة الداخلية خطأ في مستشعر درجة حرارة األنابيب الداخلية خطأ في مستشعر درجة حرارة األنابيب الخارجية تسرب...
- Page 94 Indicateur pour la minuterie, la temperature et les codes d'erreur. S'allume pendant le fonctionnement de la minuterie. Mode veille Le symbole apparait lorsque l'appareil est allume et disparait lorsque l'appareil est eteint. The symbol appears when power on.
- Page 95 0 ~30 -20 ~30 -15 ~53...
- Page 103 9K-12K 18K-24K 15g/m 25g/m 1/4 ( 6.35) 18 - 20 24.4 - 27.1 2.4 - 2.7 3/8 ( 9.52) 30 - 35 40.6 - 47.4 4.1 - 4.8 1/2 ( 12) 45 - 50 61.0 - 67.7 6.2 - 6.9 5/8 ( 15.88) 60 - 65 81.3 - 88.1...
- Page 110 ext rieur Alimentation lectrique int rieur...
- Page 115 <40 <40...
- Page 118 CUPRINS MĂSURI DE SIGURANȚĂ ........................... 115 DENUMIREA COMPONENTELOR ........................118 INSTRUCȚIUNI DE UTILIZARE ........................... 120 INSTRUCȚIUNI PENTRU LUCRĂRILE DE SERVICE (R32) ..................121 MĂSURI DE PRECAUȚIE LA INSTALARE......................126 INSTALAREA UNITĂȚII INTERIOARE ........................129 INSTALAREA UNITĂȚII EXTERIOARE ......................... 134 TESTAREA FUNCȚIONĂRII ..........................137 ÎNTREȚINERE ..............................
-
Page 119: Măsuri De Siguranță
MĂSURI DE SIGURANȚĂ REGULI DE SIGURANȚĂ ȘI RECOMANDĂRI PENTRU INSTALATOR itiți acest ghid înainte de a instala și de a utiliza aparatul. Î n timpul instalării unităților interioare și exterioare, accesul la zona de lucru ar trebui să fie interzis copiilor. Se pot întâmpla accidente neprevăzute. - Page 120 MĂSURI DE SIGURANȚĂ REGULI DE SIGURANȚĂ ȘI RECOMANDĂRI PENTRU INSTALATOR u încercați să instalați singur aparatul; contactați întotdeauna personalul tehnic specializat. urățarea și întreținerea trebuie efectuate de personal tehnic specializat. Deconectați întotdeauna aparatul de la rețeaua electrică înainte de a efectua orice operațiune de curățare sau întreținere. sigurați-vă...
- Page 121 MĂSURI DE SIGURANȚĂ NORME DE SIGURANȚĂ SI INTERDICȚII u îndoiți, trageți sau comprimați cablul de alimentare, deoarece acest lucru l-ar putea deteriora. Un cablu de alimentare deteriorat poate cauza șocuri electrice sau incendiu. Doar personalul tehnic specializat trebuie să înlocuiască un cablu de alimentare deteriorat. u folosiți extensii sau module de bandă.
-
Page 122: Denumirea Componentelor
DENUMIREA COMPONENTELOR Unitate interioară Placă de montare Panou frontal Buton de oprire în caz de urgență Filtru de aer Orificiu de Deflector evacuare a și clapetă aerului de aer Conducta de conectare a agentului frigorific Unitate interioară Grilă de intrare a aerului Grilă... - Page 123 DENUMIREA COMPONENTELOR Afișajul din interior Funcție crt. Indicator pentru temporizator, temperatură și coduri de eroare. Se aprinde în timpul funcționării temporizatorului. Modul hibernare Simbolul apare când unitatea este în funcțiune și dispare când e oprită. Simbolul apare atunci când este pornită. Forma și poziția întrerupătorilor și indicatorilor pot fi diferite în funcție de model, dar funcția lor este aceeași.
-
Page 124: Instrucțiuni De Utilizare
INSTRUCȚIUNI DE UTILIZARE Încercarea de a folosi aparatul de aer condiționat sub o temperatură peste intervalul specificat poate provoca pornirea dispozitivului de protecție a aparatului de aer condiționat, iar aparatul de aer condiționat poate să nu funcționeze. Prin urmare, încercați să utilizați aparatul de aer condiționat în următoarele condiții de temperatură. -
Page 125: Instrucțiuni Pentru Lucrările De Service (R32)
INSTRUCȚIUNI PENTRU LUCRĂRILE DE SERVICE (R32) 1. Verificați informațiile din acest manual pentru a afla dimensiunile spațiului necesar pentru instalarea corectă a dispozitivului, inclusiv distanțele minime permise față de structurile adiacente. 2. Aparatul trebuie instalat, utilizat și depozitat într-o încăpere cu o suprafață mai mare de 4 m 3. - Page 126 INSTRUCȚIUNI PENTRU LUCRĂRILE DE SERVICE (R32) a) Familiarizați-vă cu echipamentul și modul de funcționare al acestuia. b) Izolați sistemul din punct de vedere electric. c) Înainte de realizarea procedurii, asigurați-vă că: - sunt disponibile echipamente mecanice de manipulare, dacă este necesar, pentru manipularea recipientelor cu agent frigorific;...
- Page 127 INSTRUCȚIUNI PENTRU LUCRĂRILE DE SERVICE (R32) trebuie utilizat doar sistemul electric de încălzire a carcasei compresorului. După golirea uleiului din sistem, acesta trebuie să fie eliminat în condiții de siguranță. Următoarele verificări sunt valabile pentru toate instalațiile care folosesc agenți frigorifici inflamabili: - Sarcina este în concordanță...
- Page 128 INSTRUCȚIUNI PENTRU LUCRĂRILE DE SERVICE (R32) Cablare Verificați dacă cablajele nu au fost supuse uzurii, coroziunii, presiunii excesive, vibrațiilor, muchiilor ascuțite sau altor factori dăunători de mediu. Verificările trebuie să țină cont și de efectele îmbătrânirii sau a vibrațiilor continue generate de surse precum compresoarele sau ventilatoarele. Detectarea agentilor frigorifici inflamabili Este interzisă...
- Page 129 INSTRUCȚIUNI PENTRU LUCRĂRILE DE SERVICE (R32) a) Familiarizați-vă cu echipamentul și modul de funcționare al acestuia. b) Izolați sistemul din punct de vedere electric. c) Înainte de realizarea procedurii, asigurați-vă că: - sunt disponibile echipamente mecanice de manipulare, dacă este necesar, pentru manipularea recipientelor cu agent frigorific;...
-
Page 130: Măsuri De Precauție La Instalare
MĂSURI DE PRECAUȚIE LA INSTALARE (R32) Considerații importante 1. Aparatul de aer condiționat trebuie să fie instalat de către personal profesionist, iar manualul de instalare este conceput pentru a fi folosit numai de către personalul responsabil de instalare profesionist! Specificațiile de instalare fac obiectul reglementărilor noastre de service post-vânzare. - Page 131 MĂSURI DE PRECAUȚIE LA INSTALARE (R32) Măsuri de siguranță la instalare • Detector de scurgeri ale agentului frigorific • Locația de instalare să fie corespunzătoare Imaginea din stânga este schema unui detector de scurgere a agentului frigorific. Vă rugăm să aveți în vedere că: 1.
- Page 132 MĂSURI DE PRECAUȚIE LA INSTALARE Lungimea țevii și agent frigorific suplimentar Capacitatea modelelor invertorului (BTU/h) 9K-12K 18K-24K Lungimea conductei cu sarcină standard Distanța maximă dintre unitatea interioară și cea exterioară Încărcare suplimentară cu agent frigorific 15g/m 25g/m Diferența maximă de nivel dintre unitatea interioară și cea exterioară Tipul de agent frigorific Parametrii cuplului Dimensiunea ȚEVII...
-
Page 133: Instalarea Unității Interioare
INSTALAREA UNITĂȚII INTERIOARE Pasul 1: Selectați locul instalării 1.1 Asigurați-vă că instalarea respectă dimensiunile minime ale instalării (definite mai jos) și îndeplinește lungimea minimă și maximă a conductei de conectare și modificarea maximă a altitudinii, astfel cum este definită în secțiunea Cerințe de sistem. - Page 134 INSTALAREA UNITĂȚII INTERIOARE Pasul 2: Instalați placa de montare 2.1 Luați placa de montare din spatele unității interioare. 2.2 Asigurați-vă că îndepliniți cerințele minime de instalare ca la pasul 1, în funcție de dimensiunea plăcii de montare, determinați poziția și poziționați placa de montare cât mai aproape de perete. 2.3 Reglați placa de montare într-o poziție orizontală...
- Page 135 INSTALAREA UNITĂȚII INTERIOARE Pasul 4: Conectarea conductei de agent frigorific În funcție de poziția găurii din perete, selectați modul adecvat de conectare a conductelor. Există trei moduri opționale de conectare a conductelor pentru unitățile interioare, așa cum este indicat în figura de mai jos: În modul de conectare 1 sau modul de conectare 3, trebuie realizată...
- Page 136 INSTALAREA UNITĂȚII INTERIOARE Pasul 5: Conectați furtunul de scurgere 5.1 Reglați furtunul de scurgere (dacă este cazul) La unele modele, ambele părți ale unității interioare sunt prevăzute cu orificii de scurgere, puteți alege unul dintre ele pentru a atașa furtunul de scurgere. Și astupați orificiul de scurgere neutilizat cu dopul de cauciuc fixat într-unul dintre orificii.
- Page 137 INSTALAREA UNITĂȚII INTERIOARE Pasul 7: Înfășurați conductele și cablul După instalarea conductelor de agent frigorific, a cablului de conectare și a furtunului de scurgere, pentru a economisi spațiu, a le proteja și a le izola, acestea trebuie să fie învelite cu bandă izolatoare înainte de a le trece prin gaura din perete.
-
Page 138: Instalarea Unității Exterioare
INSTALAREA UNITĂȚII EXTERIOARE Pasul 1: Selectați locația de instalare Selectați o locație care permite următoarele: 1.1 Nu instalați unitatea exterioară în apropierea unei surse de căldură, aburi sau gaze inflamabile. 1.2 Nu instalați unitatea în locuri cu vânt puternic sau praf. 1.3 Nu instalați unitatea în locuri frecventate des de oameni. - Page 139 INSTALAREA UNITĂȚII EXTERIOARE Pasul 4: Montarea cablajelor 4.1 Folosiți o șurubelniță Phillips pentru a deșuruba capacul cablajului, apucați-l și apăsați-l ușor pentru a-l scoate. 4.2 Deșurubați clema cablului și înlăturați-o. 4.3 Conform schemei de cablare lipite în interiorul capacului de conectare, conectați firele de conectare la bornele corespunzătoare și asigurați-vă...
- Page 140 INSTALAREA UNITĂȚII EXTERIOARE Pasul 6: Vidarea instalației 6.1 Utilizați o cheie pentru a scoate capacele de protecție din orificiul de service al supapei de joasă presiune și supapei de înaltă presiune a unității exterioare. 6.2 Conectați furtunul de presiune al manometrului colectorului la orificiul de service al supapei de joasă presiune a unității exterioare.
-
Page 141: Testarea Funcționării
TESTAREA FUNCȚIONĂRII Inspecții înainte de pornirea de testare Efectuați următoarele verificări înainte de funcționarea de test. Descriere Metoda de inspecție • Verificați dacă tensiunea de alimentare este conformă cu specificațiile. Inspecția siguranței • Verificați să nu existe vreo conexiune greșită sau lipsă între liniile de alimentare, firul electrice de semnal și firele de împământare. - Page 142 TESTAREA FUNCȚIONĂRII Instrucțiuni pentru funcționarea de probă 1. Porniți sursa de alimentare. 2. Apăsați butonul ON/ OFF de pe telecomandă pentru a porni aparatul de aer condiționat. 3. Apăsați butonul Mode pentru a comuta între modul RĂCIRE și ÎNCĂLZIRE. În fiecare mod efectuați setările după cum urmează: COOL - Setați cea mai scăzută...
-
Page 143: Întreținere
ÎNTREȚINERE • Înainte de curățare, trebuie să opriți mașina și să întrerupeți alimentarea cu energie electrică mai mult de 5 minute. • În nici un caz, aparatul de aer condiționat nu trebuie spălat cu apă. • Lichidul volatil (de ex. diluant sau benzină) va deteriora aparatul de aer condiționat, așa că... -
Page 144: Depanare
DEPANARE DEFECȚIUNI CAUZE POSIBILE Întrerupere curent electric / ștecher scos din priză. Motorul ventilatorului unității interioare/ exterioare deteriorat. Întrerupător termomagnetic al compresorului defect. Dispozitiv de protecție sau siguranțe defecte. Conexiuni slăbite sau mufă scoasă. Aparatul nu funcționează Uneori se oprește din funcționare pentru a proteja aparatul. Tensiune mai mare sau mai mică... - Page 145 DEPANARE COD DE EROARE PE ECRAN În caz de eroare, afișajul de pe unitatea interioară arată următoarele coduri de eroare: Afișare Descrierea erorii Defecțiunea senzorului de temperatură interioare Defecțiunea senzorului de temperatură a conductei interioare Defecțiunea senzorului de temperatură a conductei exterioare Scurgeri sau defecte ale sistemului frigorific Defecțiune a motorului ventilatorului interior Defecțiunea senzorului de temperatură...
- Page 146 Wiring diagram MODEL: KIOS BS R32 25 MD0-O/KIOS BS NET R32 25 UD0-I INDOOR UNIT OUTDOOR UNIT θ θ θ...
- Page 147 Wiring diagram MODEL: KIOS BS R32 35 MD0-O/KIOS BS NET R32 35 UD0-I INDOOR UNIT OUTDOOR UNIT θ θ θ...
- Page 148 Wiring diagram MODEL: KIOS BS R32 50 MD0-O/KIOS BS NET R32 50 UD0-I INDOOR UNIT OUTDOOR UNIT θ θ θ...
- Page 149 MODEL: KIOS BS R32 70 MD0-O/KIOS BS NET R32 70 UD0-I INDOOR UNIT OUTDOOR UNIT...
- Page 152 Schemă electrică MODEL: KIOS BS R32 25 MD0-O/KIOS BS NET R32 25 UD0-I UNITATE INTERIOARĂ SENZOR INFRAROȘU ÎNCĂLZITOR (OPȚIONAL) (OPȚIONAL) AUDIO (OPȚIONAL) TRANSFORMATOR WIFI (OPȚIONAL) (OPȚIONAL) DETECȚIE PERSOANE (OPȚIONAL) LUMINĂ UV (OPȚIONAL) SENZOR DE UMIDITATE (OPȚIONAL) GENERATOR (OPȚIONAL) AFIȘAJ MOTOR OSCILANT GENERATOR (OPȚIONAL)
- Page 153 Schemă electrică MODEL: KIOS BS R32 35 MD0-O/KIOS BS NET R32 35 UD0-I UNITATE INTERIOARĂ SENZOR INFRAROȘU ÎNCĂLZITOR (OPȚIONAL) (OPȚIONAL) AUDIO (OPȚIONAL) TRANSFORMATOR WIFI (OPȚIONAL) (OPȚIONAL) DETECȚIE PERSOANE (OPȚIONAL) LUMINĂ UV (OPȚIONAL) SENZOR DE UMIDITATE (OPȚIONAL) GENERATOR (OPȚIONAL) AFIȘAJ MOTOR OSCILANT GENERATOR (OPȚIONAL)
- Page 154 Schemă electrică MODEL: KIOS BS R32 50 MD0-O/KIOS BS NET R32 50 UD0-I UNITATE INTERIOARĂ SENZOR INFRAROȘU ÎNCĂLZITOR (OPȚIONAL) (OPȚIONAL) AUDIO (OPȚIONAL) TRANSFORMATOR WIFI (OPȚIONAL) (OPȚIONAL) DETECȚIE PERSOANE (OPȚIONAL) LUMINĂ UV (OPȚIONAL) SENZOR DE UMIDITATE (OPȚIONAL) GENERATOR (OPȚIONAL) AFIȘAJ MOTOR OSCILANT GENERATOR (OPȚIONAL)
- Page 155 MODEL: KIOS BS R32 70 MD0-O/KIOS BS NET R32 70 UD0-I UNITATE INTERIOARĂ SCHEMA ELECTRICĂ INTERIOARĂ UNITATE (NUMAI PENTRU NUMAI PENTRU UNELE MODELE) UNELE MODELE EXTERIOARĂ ÎNCĂLZITOR DETECȚIE PERSOANE COMANDĂ (NUMAI ANUMITE MODELE) PRINCIPALĂ SENZOR DE GENERATOR UMIDITATE (COMPONENTĂ (NUMAI ANUMITE OPȚIONALĂ)
- Page 156 OBIECT: Declarație de conformitate UE Prezenta declarație de conformitate este emisă pe răspunderea exclusivă a societății Ariston Thermo S.p.A. Ariston Thermo S.p.A. (viale A. Merloni 45, 60044 - Fabriano (AN), ITALIA), prin prezenta, declară APARATE DE AER CONDIȚIONAT că produsul:...
- Page 157 Documentație tehnică pentru evaluarea produselor electrice și electronice cu respectarea restricției substanțelor periculoase EN 50581:2012 Notă: Documentele de testare și dosarele tehnice sunt păstrate de Ariston Thermo S.p.A. în Fabriano (AN, ITALIA). Data: 19.01.2022 Numele reprezentantului legal al societății: ANGELO MANCINI Semnătura reprezentantului...
- Page 162 Ariston S.p.A. Viale Aristide Merloni, 45 60044 Fabriano (AN) - ITALY ariston.com 420011221500 - 0922...
Need help?
Do you have a question about the KIOS BS NET R32 and is the answer not in the manual?
Questions and answers