
Related Manuals for Kapture KPT-900


Summary of Contents for Kapture KPT-900
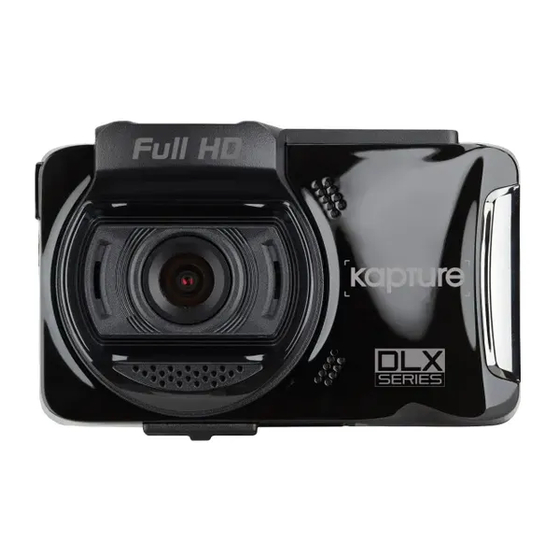
- Page 1 Y O U R W I T N E S S O N T H E R O A D IN-CAR DASH CAM with GPS | ADAS KPT-900 User Manual...
-
Page 3: Table Of Contents
Caution ..................................5 Battery warning ................................5 Notes on Installation ..............................5 Introduction ................................6 1.1 Features ................................6 1.2 Package Contents .............................. 6 1.3 Product Overview ............................... 6 Getting Started ................................. 7 2.1 Inserting the Memory Card..........................7 2.2 Installing in Vehicles ............................7 2.2.1 Mount to Windshield .......................... - Page 4 3.2 Driving Safety ..............................14 3.2.1 Lane Departure Warning System (LDWS) ....................14 3.2.2 Forward Collision Warning System (FCWS) ................... 15 3.2.3 Front Car Movement Detection (FMCD) ....................16 3.2.4 Headlight Warning ..........................17 3.2.5 Speed Cam Alert........................... 18 3.2.6 Speed Limit Alert ..........................18-19 3.2.7 Driver Fatigue Alert ..........................
-
Page 5: Caution
Caution • Ensure you are using your Car DVR within your countries’ road laws. Please make sure you are familiar with your local road legislation before use. • Avoid leaving your Car DVR in direct sunlight for extended periods of time in an unventilated space. •... -
Page 6: Introduction
1. Introduction Thank you for purchasing a Kapture Car DVR. Please read through these instructions before attempting to install or use this product. 1.1 Features • Recording 1080P footage at 30 frames per second • 2.7” LCD colour touch screen •... -
Page 7: Getting Started
2. Getting Started 2.1 Inserting Memory Card With the Screen facing upward, insert memory card with the pins facing upward as illustrated. Push the memory card in until a click sound is heard, indicating the card is in position. Note: 1. -
Page 8: Connecting To Power
Connecting to Power Use only the included charger to power the device and charge the built-in battery. 1. It is advised that the Car DVR is installed near the rear 2. Plug the other end of the car adapter to the cigarette view mirror, at the top centre of the windshield for optimal lighter socket of your vehicle. -
Page 9: Led Indicator
2.4 LED Indicator STATUS EXPLANATION LED INDICATOR COLOUR Power off, battery charging Power off, battery fully charged LED light off Power on, battery charging Power on, battery fully charged Green Standby / Standby with screen off Green Recording / Recording with screen off Flashing red Powering the Device On / Off 2.5.1 Auto Power On/Off... -
Page 10: Initial Settings
Initial Settings Before using the Car DVR, we recommend you enable the Automatic Record function and set the correct Date and Time. 2.6.1 Set Automatic Record The default setting for the Automatic Record function is enabled. The Car DVR will automatically start recording when the Car DVR receives power from the power cable. -
Page 11: Using The Car Recorder
3. Select to enter Date / Time menu. Touch to select each value; touch to select previous or next field; Confirm by touching to complete setting. Note: 1. If GPS is enabled the Car DVR clock will be synchronised with the satellite clock signal based on the time zone specified in the Set Timezone menu. -
Page 12: The Recording Screen
2. Touch again, to halt the recording. Note: 1. If the Collision Detection function is enabled and a collision is detected, the device will automatically trigger the emergency recording and protect the current video file. Please refer to Collision Detection (4.2). 2. -
Page 13: Add Speed Point
3.1.4 Add speed point You can manually add speed cam positions in this Car DVR. 1. Press to add new Speed Camera Position during recording. 2. Up to 200 speed camera points can be saved. 3. This product has a capacity of 200 speed cam positions. In case you are trying to add more than that the system prompts with message “Speed Position is full”. -
Page 14: Driving Safety
The following driver safety functions are for reference only. Drivers are advised to exercise discretion based on actual road conditions. 3.2 Driving Safety Note: 1. Driving Safety (ADAS - Advanced Driver Assistance Systems) functions are limited to triggering no more than two alerts at the one time. -
Page 15: Forward Collision Warning System (Fcws)
Note: 1. LDWS is only active when satellite positioning is available. Make sure GPS settings on your Car DVR is activated 2. The Driving Safety functions such as LDWS, FCWS, FCMD, Headlight Warning, Speed Cam Alert, Speed Limit Alert, Driver Fatigue Alert and ACC/DEC Alert will be disabled if the product doesn’t connect with the external power supply. -
Page 16: Front Car Movement Detection (Fmcd)
Note: 1. FCWS is only active when satellite positioning is available. Make sure GPS settings on your Car DVR is activated. 2. The Driving Safety functions such as LDWS, FCWS, Headlight Warning, Speed Cam Alert, and Driver Fatigue Alert will be disabled if the product isn’t connected to the external power supply. -
Page 17: Headlight Warning
Note: 1. FCMD is only active when satellite positioning is available. Make sure GPS setting on your Car DVR is activated. 2. The Driving Safety functions such as LDWS, FCWS, Headlight Warning, Speed Cam Alert, and Driver Fatigue Alert will be disabled if the product isn’t connected to the external power supply. -
Page 18: Speed Cam Alert
3.2.5 Speed Cam Alert Once your car’s location is determined by GPS and is approaching a manually saved speed camera location the Car DVR produces voice and on screen alerts. To enable or disable Speed Cam Alert please follow the instructions below: 1. -
Page 19: Driver Fatigue Alert
6. If a Speed Limit Alert is set, the Car DVR will give a voice alert once your car’s location is determined by GPS and its speed exceeds the set limit. Note: 1. Speed Limit Alert is only active when satellite positioning is available. Make sure GPS settings on your Car DVR is activated. -
Page 20: Parking Mode
5. By touching the Vibration Detection icon you can activate the G-Sensor to trigger recording if your vehicle experiences an impact while it is parked and powered off 6. Parking mode can be disabled by touching the Off icon. 7. Touch to return to record screen. -
Page 21: Acc/Dec Alert
3.2.10 Accelerate / Decelerate Alert (ACC/DEC) When ACC/DEC Alert function is enabled The Car DVR will produce voice and on screen alerts if the car accelerates 20 km/h in one second when driving at speeds over 80 km/h or decelerates 30 km/h in one second when driving at speeds under 50 km/h after position is determined by GPS. -
Page 22: Playing Videos And Viewing Pictures
3.3 Playing Videos and Viewing Pictures 3.3.1 Playing Videos and Emergency Recordings Playback video files as follows: 1. Touch to enter Main Menu 2. Touch to switch over to File / Position menu. 3. Touch to enter the Video/ Emergency function menu. 4. -
Page 23: The Playback Screen
3.3.3 The Playback Screen ICON ITEM DESCRIPTION File Name Indicates name of current video or picture file. Current Duration / Video Duration Indicates time code and duration of current video file. Menu Touch to enter File Deletion menu. • Touch when video or picture is not in playback to switch over to the Fast Rewind / Previous File previous file. -
Page 24: Adjusting The Settings
4. Touch to browse for required video or picture file; touch selected preview image to enter Video/Picture Playback Mode. 5. Touch to enter File Deletion menu, select to delete one file or all files; touch to confirm or cancel the selection. ITEM DESCRIPTION Delete One... -
Page 25: Menu Items
4.2 Menu Items Refer to the below table for details of main menu and function list. MAIN FUNCTION DESCRIPTION AVAILABLE OPTION MENU LIST Date/Time: Set the date and time. Set Timezone: Set the time zone you are in. UTC -12:00 ~ UTC +12:00 Time Sync: When enabled, the Car DVR clock will be calibrated On / Off automatically based on satellite clock of the set time zone. - Page 26 MAIN FUNCTION DESCRIPTION AVAILABLE OPTION MENU LIST LDWS: Once your car’s location is determined by GPS and the LDWS function is enabled, this product produces voice and screen message On/Off alerts when you drive off of or change lanes at speeds over 50 km/h FCWS: When FCWS is activated after satellite positioning, device will issue a voice and on screen alert when the vehicle speed is above 60 On / Off...
- Page 27 MAIN FUNCTION DESCRIPTION AVAILABLE OPTION MENU LIST FHD (1080P/30fps) / Resolution: Setting of video resolution. HD30 (720P/30fps) / HD60 (720P/60fps) EV: Set the exposure compensation. +2.0 ~ -2.0 Automatic Record: Setting for enabling Automatic Record after On / Off device power on. RECORD Video Duration: Set the length of video loop recording.
-
Page 28: Installing The Software
5. Installing the Software You can customise the general settings via the on-screen display (OSD) menus. 1. Place the included CD ROM into the CD player of your computer. 2. If the CD does not execute automatically, please use Windows File Manager to execute the Install_CD.exe file in the CD. -
Page 29: Specifications
7. Specifications FUNCTION LIST DESCRIPTION Image sensor 1/2.7” CMOS sensor Effective pixels 1920 (H) x 1080 (V) Storage media Supports Micro SDHC Class 6, max. up to 32GB 2.7” LCD colour TFT touch screen LCD display Wide Angle Fixed Focus lens Lens F2.0, f=3.4mm Focus range... -
Page 30: About This Guide
About this Guide The content in this document is for information purpose and is subject to change without prior notice. We made every effort to ensure that this User Guide is accurate and complete. However, no liability is assumed for any errors and omissions that may have occurred. The manufacturer reserves the right to change the technical specifications without prior notice. -
Page 31: Warranty
Warranty Terms & Conditions Our goods come with guarantees that cannot be excluded under the Australian & New Zealand Consumer Law. You are entitled to a replacement or refund for a major failure and for compensation for any other reasonably foreseeable loss or damage. You are also entitled to have the goods repaired or replaced if the goods fail to be of acceptable quality and the failure does not amount to a major failure. - Page 32 www.kapturecam.com.au www.directed.com.au www.kapturecam.co.nz www.directed.co.nz...
Need help?
Do you have a question about the KPT-900 and is the answer not in the manual?
Questions and answers