Table of Contents
Advertisement
S S U U N N S S T T A A R R M M A A C C H H I I N N E E R R Y Y C C O O . . , , L L T T D D . .
User's
Manual
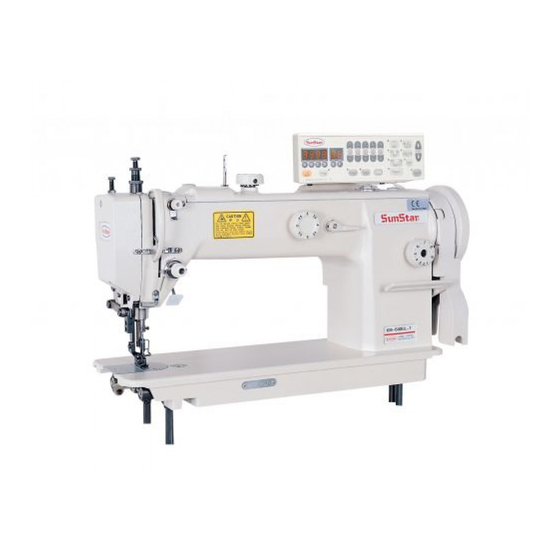
KM-640BL-7
Long arm type, one-needle,
upper & lower feed lock stitch
machine with automatic thread
trimmer with large hook
KM-640BL
Long arm type, one-needle,
upper & lower feed lock stitch
machine with large hook
1) For proper use of the machine, thoroughly
read this manual before use.
2) Keep this manual in a safe place for future
reference in case the machine breaks down.
M M M M E E - - 0 0 5 5 0 0 6 6 2 2 9 9
Advertisement
Table of Contents

Related Manuals for SunStar KM-640BL-7


Summary of Contents for SunStar KM-640BL-7
- Page 1 User’s Manual KM-640BL-7 Long arm type, one-needle, upper & lower feed lock stitch machine with automatic thread trimmer with large hook KM-640BL Long arm type, one-needle, upper & lower feed lock stitch machine with large hook 1) For proper use of the machine, thoroughly read this manual before use.
- Page 2 1. Thank you for purchasing our product. Based on the rich expertise and experience accumulated in industrial sewing machine production, SUNSTAR will manufacture industrial sewing machines, which deliver more diverse functions, high performance, powerful operation, enhanced durability, and more sophisticated design to meet a number of user’s needs.
-
Page 3: Table Of Contents
20) Adjusting thread release ............................27 21) Adjusting remaining amount of upper thread ....................... 27 4. Causes of Troubles and Troubleshooting ..................... 28 1) Sewing machine troubleshooting ..........................28 5. Table drawing ................................ 29 1) KM-640BL ................................29 2) KM-640BL-7 ................................30... -
Page 4: Safety Rules For Machines
Safety Rules for Machines Safety labels in the manual are categorized into danger, warning and caution. Failure to follow the safety rules may result in physical injuries or mechanical damages. The safety labels and symbols are defined as follows. [The meaning of the safety labels] Danger Instructions here shall be observed strictly. - Page 5 1-3) Troubleshooting If in need of troubleshooting, call a trained A/S engineer who has been educated by Sunstar. ⓐ Be sure to turn the power off before cleaning and repair. And wait for about 4 minutes until the machine discharges completely.
- Page 6 1-4) Machine The KM-640BL Series are manufactured for industrial use to sew textiles and other Operation similar material. When running the machine, users should observe the following things. ⓐ Read the manual before operation of the machine to fully understand the details about its operation.
- Page 7 1-6) Position of “Caution” is attached to the machine for safety. Caution Mark In case of starting to run the machine, read the directions of “Cautions” carefully. [Position of Caution Mark] CAUTION 경 고 Do not operate without finger guard and safety devices.
-
Page 8: Specification
Specification 1) Sewing machine KM-640BL-7: Long arm type, one-needle, upper & lower feed lock stitch machine with automatic thread trimmer with large hook KM-640BL: Long arm type, one-needle, upper & lower feed lock stitch machine with large hook Model Name... -
Page 9: 470 Motor
4) 470 motor controller MODEL VOLT MODEL SUB CLASS 5) Clutch motor MODEL VOLT WATT HERTZ HEC-1701 1 Phase 220V 250W 50/60 Hz HEC-1703 3 Phase 220V/380V 250W 50/60 Hz HEC-1705 3 Phase 220V 400W 50/60 Hz HEC-1706 1 Phase 220V 400W 50/60 Hz 6) Peripheral automation devices (optional) -
Page 10: Installation
Installation Warning ▶ Installation of the machine should be performed by a trained engineer. ▶ Any electrical wiring must be performed by a qualified technician or agent. ▶ The machine weighs over 43kg. At least 2 persons should carry out the installing work. ▶... -
Page 11: Lubrication
Fill the lubricant to “HIGH” position. (Refer to Figure 4) b) Please use SUNSTAR lubricant exclusive for industrial sewing machine or SHELL’ s TELLUS C10. c) When the lubricant in use is at LOW position, fill it immediately to HIGH position. -
Page 12: Installation Of Program Unit (For Automatic Trimming Type)
5) Installation of program unit (for automatic trimming type) Fix the bracket② onto the program unit①, using 4 fixing nuts③. Then, use 2 fixing bolts④ to tightly fix the bracket②, where the program unit ① has been adjusted, along with the back cover. -
Page 13: Check For Machine Stop Position (For Automatic Trimming Type)
Installing on the 470 motor Assemble the parts in numerical order as shown in Figure 10. Later, adjust the synchro shaft by moving it horizontally so that the photo film is located at the center of the photo interrupt. Then, fasten tightly with the two fixing bolts using a hexagonal wrench. -
Page 14: Reverse Button Function
9) Reverse button function Pressing the reverse button during forward sewing will start reverse sewing immediately. When you stop the machine and restart it by stepping down on the pedal with the reverse button already pressed down, you can perform reverse sewing from the beginning. -
Page 15: Machine Adjustment
Machine Adjustment Caution ▶ Always turn off the power when mounting a needle. ▶ If the operator mistakenly steps on the pedal while the power is on, the machine will start automatically and can result in physical injuries. ▶ When using clutch motor, be aware that the motor will continue to rotate for a while even after the power is switched off due to inertia. -
Page 16: Adjusting Lubrication Of Thread Take-Up Spring Part
4) Adjusting lubrication of thread take-up spring part As in the figure 22, the more the point② of the control plate of oil flow① goes close to the center of hole of thread take- up crank shaft, the more oil comes. On the other hand, the more the point goes close to the corner⑤... -
Page 17: Winding And Adjusting Lower Thread
Caution ▶ Turn off the power when adjusting the lower thread tension. ▶ If the operator mistakenly steps down on the pedal while switched on, the machine will start automatically and can cause physical injuries. ▶ When using the clutch motor, be aware that the motor will continue to rotate for a while after the power is switched off. -
Page 18: Routing Upper Thread
Caution ▶ Turn off the power switch when routing the upper thread. ▶ If the operator mistakenly presses down on the pedal while switched on, the machine will start automatically and can cause physical injuries. ▶ When using the clutch motor, be aware that the motor will continue to rotate for a while after the power is switched off. -
Page 19: Adjusting Presser Foot Pressure
Caution ▶ After disassembling and adjusting a safety device, always place it back to the original position and check whether it functions as intended. ▶ Use both hands when pushing the machine backward or returning it to the original position. Due to the weight of the machine, your hand can get stuck in the machine if you should slip. -
Page 20: Adjusting Feed Dog Height And Inclination
12) Adjusting feed dog height and inclination Adjust the height of the feed dog③ by loosening the clamp screw② of the leverage crank(front) and moving the leverage crank(front)①. The adequate height from the upper side of needle plate to the end of feed dog is from 1.0mm to 1.2mm when the feed dog is in the highest point with the stitch is put to the maximum level. -
Page 21: Adjusting Feeding Amount Of Auxiliary Presser Foot
■ In case of running the auxiliary presser foot and the upper feed presser foot at different heights Adjusting the auxiliary presser foot - Loosen the presser bar pressure adjustment screw① and the bracket fixing screw②. - Adjust vertically the bracket fixing screw② so that the auxiliary presser foot④ goes up by 8mm from the upper side of the needle plate when the presser bar lifter③... -
Page 22: Adjusting Feed Cam
15) Adjusting feed cam The timing of the feed dog and the needle is determined by moving vertically the feed cam④. First, turn the pulley with hands to fix the needle bar to the highest point. The standard position will be when the center of the No. 1 fixing bolt② of the presser foot vertical move cam①... - Page 23 Adjusting fixing blade and movable knife a) Like in Figure 36, the standard position is where the cut part of the movable knife is aligned with the center of the fixed blade. movable knife b) When partⓐ becomes bigger in Figure 36, three pieces of threads are to be produced, causing the thread missing after the trimming.
- Page 24 b) Adjusting the thread trimming solenoid ① First, loosen the solenoid link pin fixing screw. Later, fix the solenoid base clamp screw where the clutch lever moves smoothly. Then, attach the slide arm to the right side. Fix the thread trimming solenoid link pin fixing screw where the solenoid stopper is attached to the solenoid.
- Page 25 (Caution) The standard position of the thread trimming cam following crank before its operation is shown in Figure 42. If the position of the roller is changed, adjust it with stopper and perform the adjustment describe above in a~b. [Figure 42] Adjusting the position of blade a) Adjusting the position of the movable knife and the fixed blade...
-
Page 26: Adjusting Blade Pressure
17) Adjusting blade pressure As in Figure 45, the standard is when the contact between the movable knife and the fixed blade begins. movable knife In particular, when the cutting quality gets worse by using a thick thread, strengthen a little bit the tension of the fixed blade. -
Page 27: Adjusting Thread Release
In case that the thread is cut or the cut part of the thread is not neat, please confirm the cutting part of fixed blade the fixed blade. If the bottom of the fixed blade is worn, sharpen the end of the blade using an oil whetstone. -
Page 28: Causes Of Troubles And Troubleshooting
Causes of Troubles and Troubleshooting 1) Sewing machine troubleshooting Symptom Checkpoints Root cause Corrective action Direction and height of Needle is inserted into wrong position Reinsert the needle correctly needle Needle Needle is bent Change the needle Timing of feed dog Bad timing of feed dog Adjust the timing of feed dog Needle breaks... -
Page 29: Table Drawing
Table Drawing 1) KM-640BL... -
Page 30: Km-640Bl-7
2) KM-640BL-7...
Need help?
Do you have a question about the KM-640BL-7 and is the answer not in the manual?
Questions and answers