
Subscribe to Our Youtube Channel
Related Manuals for Infinova V1772N-18T0H


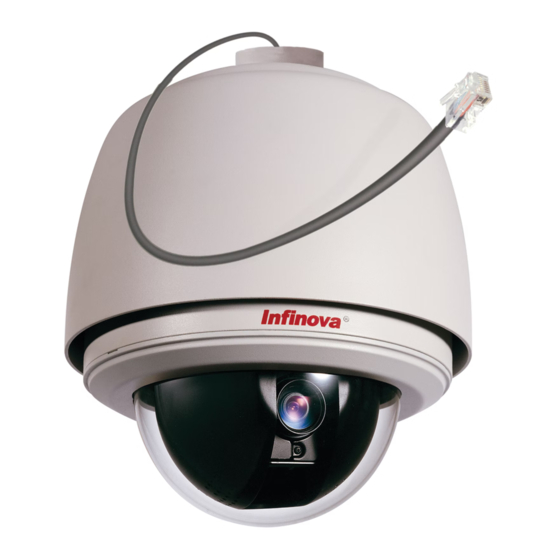
Summary of Contents for Infinova V1772N-18T0H
- Page 1 V1772N-T Series Megapixel Network PTZ Dome Operation Manual This manual mainly introduces the operation and programming of Infinova V1772N-T series Megapixel network PTZ domes.
-
Page 3: Copyright Statement
Infinova. Infinova reserves the right to change this manual and the specifications without prior notice. The most recent product specifications and user documentation for all Infinova products are available on our web site www.infinova.com. - Page 4 Read this manual carefully before installation. This manual should be saved for future use. Important Safety Instructions and Warnings: Electronic devices must be kept away from water, fire or high magnetic radiation. Clean with a dry cloth. Provide adequate ventilation. Unplug the power supply when the device is not to be used for an extended period of time.
-
Page 5: Table Of Contents
Table of Contents Chapter I System Introduction ............1 3.4.3 V1772N-30T2S Camera Settings ....... 12 1.1 Product Description .............. 1 3.4.4 V1772N-18T0H Camera Settings ......13 1.2 Product Features ..............1 3.4.5 V1772N-30T0H Camera Settings ......13 1.3 Product Models ..............1 3.4.6 V1772N-30T2H Camera Settings ...... -
Page 7: Chapter I System Introduction
H.264 high profile/M-JPEG dual-stream compression 1.1 Product Description Onvif Profile S compliant Remote PTZ control via network Infinova's V1772N-T series IP PTZ dome provide users a Support IP filter high-definition, high frame rate and high SNR real-time images Support RS485 control acquisition system. -
Page 8: Product Specifications
Color mode: 1.4 Product Specifications 0.4 lux @ F1.4 (1/30s, 350mV equiv., AGC-Gain: 48dB) Models Sensitivity 0.1 lux @ F1.4 (1/8s, 350mV equiv., AGC-Gain: 48dB) V1772N-18T0H, V1772N-20T2H, V1772N-20T2L, V1772N-20T2T, (30T2H) B/W mode: V1772N-30T0H, V1772N-30T2S, V1772N-30T2H 0.01 lux @ F1.4 (1/8s, 350mV equiv., AGC-Gain:... - Page 9 Image Freeze Yes (20T2H, 20T2T, 30T0H, 30T2S, 30T2H) Outdoor bracket: 18T0H: / 11.5" × 9.4" (292mm × 240mm) 20T2H: Off/Manu/Auto (1~3 levels adjustable) Package Dimension 19.09" × 11.02" × 11.81" 20T2L: OFF/(1~7 levels adjustable) (L×W×H) (485mm × 280mm × 300mm) 20T2T: Off/Manu/Auto (1~3 levels adjustable) Motor Stepping motor...
-
Page 10: Chapter Ii Ie Browser Setting
Chapter II IE Browser Setting The user must set the IE browser and system before attempting to view the video. When set the IE browser, pay attention that the dome supports IE browser version at Internet Explorer 6.0 or later. Before attempting to view the image, make sure the system have installed InfiH264.cab controls and supports Directx 9.0c image view software. -
Page 11: Chapter Iii System Setting
Chapter III System Setting select H.264 minor stream, M-JPEG etc. formats in the drop-down list to view the video. In the H.264 major stream, minor stream This chapter mainly introduces the system setting for Megapixel view interface, users can conduct recording, snapshot, audio Network PTZ Domes. -
Page 12: System
network settings, camera settings, audio and video settings, PTZ 3.2.3 Advanced Settings functions, time functions, alarm settings, record, user management (add/delete user, change password), and view the system log etc. operations. The chapter will mainly introduce the system settings and the operation methods for the Super User. -
Page 13: Network Settings
Factory Settings V1772N-T series domes provide online reset function, which greatly facilitates reset adjustment. Click “Reset” button and the system will pop up a message to confirm factory reset. Figure 3-9 Network settings Figure 3-7 There are 13 tabs for settings: Network, FTP, SMTP, HTTPS, Click “OK”, all the parameters excluding IP address will be reset to 802.1X, QOS, IGMP, SIP, MDA, DDNS, UPnP, Huning and IP the factory default settings. -
Page 14: Ftp
Password: Set sender’s password. Note: When the Network setting is successful, the system indicator If user selects “mail” in “Alarm Settings” interface, system will will flash about 5 seconds. send mails according to SMTP settings. PPPoE function can be enabled/disabled in the interface. When the PPPoE function is enabled, the dialing user name and password are to be set in the interface. -
Page 15: Igmp
3.3.7 IGMP Position Information Longitude: longitude of the installation position; Latitude: latitude of the installation position. Fluid Control You can turn On or Off the Fluid Control function. And if you select On you can set the maximum bandwidth. Figure 3-16 IGMP settings 3.3.9 MDA V1772N-T series domes support multicast function. -
Page 16: Upnp Setting
3.3.11 UPnP Setting Click the icon and you can add an IP address on the pop-up interface. Figure 3-24 IP Add an IP Figure 3-20 UPnP Setting IP address format: xxx.yyy.yyy.zzz/www. Build up a mapping relation between a private network and an Note: For xxx you can select from 1~233 except 127;... -
Page 17: V1772N-20T2L Camera Settings
Zoom: Set the zoom speed, perform zoom in/out operations. better saturation degree; and in low illumination environment, the picture mode 2 is with better lucidness, and the mode 3 and 4 are Iris: Set iris mode, available of M/A (manual priority), Auto, and with better brightness than mode 1 and 2. -
Page 18: V1772N-30T2S Camera Settings
DSS (Digital Slow Shutter): The digital slow shutter slows the picture frame rate and enhances the camera’s sensitivity in poor light environments. When Exposure mode becomes Auto mode, DSS is settable in X2, X4, X8, X16, X32, or Off. WDR mode: On, OFF. Day/Night BWC mode: Auto, manual. -
Page 19: V1772N-18T0H Camera Settings
3.4.4 V1772N-18T0H Camera Settings Note: In Auto Exposure mode (Auto (day), Auto (night)), the For V1772N-18T0H series PTZ domes, click “Camera” tab to exposure is automatically, but the BWC switch can be controlled display the interface shown as below. The configuration items manually. -
Page 20: V1772N-30T2H Camera Settings
Color level: when the lucidness function is enabled, the color Focus: The following parameters can be set; level can be set in 0~128. Mode: M/A (manual priority) / Auto, and Manual. Focus limit: 10cm, 30cm, 1m, and 3m. 3.4.6 V1772N-30T2H Camera Settings White Balance For V1772N-30T2H series PTZ domes, click “Camera”... -
Page 21: V1772N-20T2T Camera Settings
DSS is settable in 1/60~1/2, 6 levels. WDR mode: WDR, AD WDR. Stabilize: On, Off. Day/Night The BWC mode and BWC sens will change along with the exposure mode. When the Exposure mode is selected as “Shutter” or “Exposure”, the BWC mode is displayed as “Manual”, and then the BWC settings can be set in the “Manual”... -
Page 22: Audio Video
Special Functions: Mirror mode: Off, H-mirror, V-mirror, HV-mirror. H.264 minor stream: 1024×576, 720×576, 720×480, 640×480, Freeze: On, Off, Freeze Preset (Pst). 352×288, 352×240 and close. Sharpness: Auto, Manual. In auto mode, it will auto adjust the sharpness as per the video; in manual mode, the horizontal and MJPEG stream: For 2.0 megapixel HD IP domes, resolution is vertical sharpness can be adjust between 0~63. -
Page 23: Osd
3.5.2 OSD 3.5.3 Motion Detection Figure 3-34 Motion detection settings Figure 3-33 OSD Motion detection function is supported for the series. Use mouse to OSD include: Titles, PTZ info and Date OSD. set the motion detect zones (4 areas). Select the zone number to be set. If the zone is already set as a Click the ON buttons and you can set the device title as well as its motion detection zone, then a blue line frame (the motion detection location, PTZ information and date OSD. -
Page 24: Audio Setting
The default photo saving path is: C:\InfiPlayerAX\Picture. (7) Press “Delete” button to delete the selected preset; The default video saving path is: C:\InfiPlayerAX\Video. (8) Press “Delete all” button to delete all the presets. The photo format and video format can also be set here. The default photo format is: .jpg. -
Page 25: Home Return
3.6.5 Normal Tour Figure 3-39 Pattern (1) Select the desired pattern number (1~4); (2) Set the pattern title. The title supports lowercase/uppercase letters, numeric, space and underline with maximum16 characters. Then press “Set” button to save the title; (3) Click “Start” button to start pattern setting; Figure 3-41 Normal Tour (4) Click the direction keys and zoom keys to perform a series of pan, tilt and zoom operation;... -
Page 26: Ptz Special Functions
Step 2: Set the color and area number of the privacy mask area, and 3.7 Time Function enable the state display function; Note: If the privacy mask zone is already set, the corresponding privacy mask zone will be displayed on the screen. Step 3: Click the “Reset”... -
Page 27: Record
alarm time period is set upon 24 hours format (hour: minute). The end time must be larger than the start time. 3.9 Record Click the Record button on the navigation bar to display the interface shown as below: Figure 3-45 Alarm settings Alarm configuration The dome supports 2 alarm inputs (I/O In 1 and I/O In 2) and 1 Figure 3-46 Record Settings... -
Page 28: Replay
3.9.2 Replay Figure 3-48 User information Add User (1) Click “ ” to enter the interface as shown in the figure below: Figure 3-47 Search Record Search Record: set the record start time and end time. Click the Figure 3-49 Add New User Search button the start the searching. -
Page 29: System Log
Chapter IV PTZ Control and Call Up 4.1 PTZ Control In live view interface, click “PTZ control” tab to expand the PTZ control interface as shown below: Figure 3-52 Input the old password, enter your desired new password for twice and then click “OK”... -
Page 30: Ptz Function
4.2 PTZ Function Figure 4-2 PTZ function Click “PTZ Function” button, and the interface is shown as below. Users could set or call up the preset, autopan, pattern, normal tour, Figure 4-5 Selected area zoom and centered autoscan and auto flip function in this interface. Refer to Section 3.6.1 to 3.6.5 for the settings of preset, autopan, When the option “Turn On PTZ”... - Page 31 Figure 4-7 Drag your mouse on the video image and the framed image can be zoomed in as shown below: Figure 4-8...
- Page 32 Infinova 51 Stouts Lane, Monmouth Junction, NJ 08852, U.S.A. Tel: 1-888-685-2002 (USA only) 1-732-355-9100 Fax: 1-732-355-9101 sales@infinova.com V2.0 1506...
Need help?
Do you have a question about the V1772N-18T0H and is the answer not in the manual?
Questions and answers