Table of Contents
Advertisement
Quick Links
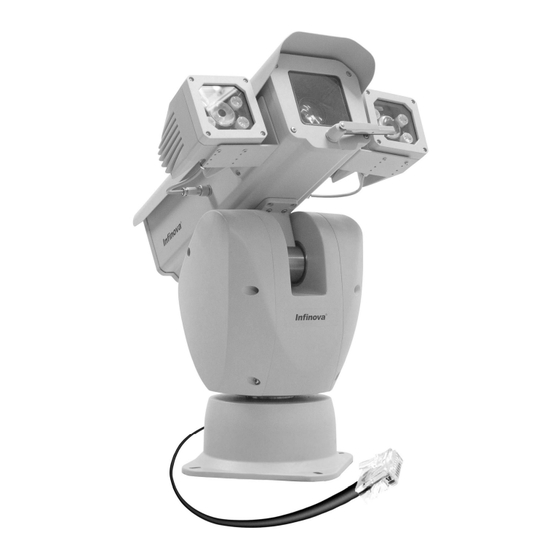
V1492MR-T Series
HD 1MP and 2MP Integrated IP PTZ Camera with IR
Illuminators
Operation/Programming Manual
This manual mainly addresses how to operate and use Infinova's V1492MR-T series HD 1MP and 2MP Integrated IP
PTZ Camera with IR Illuminators. Based on the network technology, this camera system can be very convenient for
you to realize network transmission and control of digital videos and provide you with professional remote video
service, which is highly reliable and economical for various applications.
Advertisement
Table of Contents

Related Manuals for Infinova V1492MR-20TH


Summary of Contents for Infinova V1492MR-20TH
- Page 1 Illuminators Operation/Programming Manual This manual mainly addresses how to operate and use Infinova’s V1492MR-T series HD 1MP and 2MP Integrated IP PTZ Camera with IR Illuminators. Based on the network technology, this camera system can be very convenient for you to realize network transmission and control of digital videos and provide you with professional remote video...
-
Page 2: Copyright Statement
This manual may not be reproduced in any form or by any means to create any derivative such as translation, transformation, or adaptation without the prior written permission of Infinova. Infinova reserves the right to change this manual and the specifications without prior notice. The most recent product specifications and user documentation for all Infinova products are available on our website www.infinova.com. - Page 3 Read this manual carefully before installation. This manual should be saved for future use. Important Safety Instructions and Warnings Electronic devices must be kept away from water, fire or high magnetic radiation. Clean with a dry cloth. Provide adequate ventilation. ...
-
Page 4: Table Of Contents
Table of Contents Chapter I System Overview............1 4.4.1 V1492MR-20TH Camera Settings ......13 1.1 Product Description ............1 4.4.2 V1492MR-18TH Camera Settings ......13 1.2 Product Features ............... 1 4.5 Audio & Video Settings ..........14 1.3 Product Model ..............1 4.5.1 Video Settings ............14 1.4 Product Specifications ............ -
Page 5: Chapter I System Overview
Chapter I System Overview Alarm function (2 alarm inputs and 1 relay output) Bi-directional audio, G.711 High strength aluminum-alloy casting, heat and corrosion 1.1 Product Description resistant V1492MR-T series HD 1MP and 2MP Integrated IP PTZ Camera Window wiper, built-in heater and window defroster ... -
Page 6: Product Specifications
1.4 Product Specifications Model V1492MR-20TH V1492MR-18TH Optical Zoom Aperture/Focal F1.6~F3.5, f=4.7~94mm F1.6~F2.8, f=4.7~84.6mm Length Lens Angle of View (H) 55.2° (Wide) ~ 2.9° (Tele) 59.7° (Wide) ~ 3.6° (Tele) Min. Work Distance 0.01m (Wide)~ 1.0m (Tele) 0.01m (Wide)~ 1.0m (Tele) Image Sensor 1/2.8"... -
Page 7: Notice
Model V1492MR-20TH V1492MR-18TH Port 1 input (Linear level, resistance: 1000 Ohm); 1 output (Linear level, resistance: 600 Ohm) Compression H.264 High profile/M-JPEG Max. Resolution 1920×1080@30fps 1280×720@30fps Video Data Rate Variable bit rate (vbr); Constant bit rate (cbr): 256Kbps~10Mbps Network Delay <300ms... -
Page 8: Chapter Ii Installation
Chapter II Installation Notes: V1492MR-T series PTZ camera support storage to SD card. The SD card is properly installed to the camera before delivery. Please do not disassemble the camera and remove the SD card. 2.1 Dimensions Four ways to mount PTZ: desktop mount, wall mount, pole mount and corner mount. -
Page 9: Wall Mount
Shown as below: Wall Mount Bracket Structure Cable dragged out from the base 2.3 Wall Mount Wall mount is to fix the PTZ camera on the erect or slanting plane by means of some specific auxiliary mounting components. Bracket Dimension: 2.4 Pole Mount Pole side mount is to install the PTZ camera to the cylinder via To mount the PTZ camera:... -
Page 10: Corner Mount
To mount the PTZ camera: Bracket Dimension: Fit the corner-mounting adapter to a corner in a proper position; Fix the mounting bracket to the adapter with six screws; Thread the cable through the brackets; Connect the cable connector with the base plug and slightly rotate them for a tight connection. -
Page 11: Chapter Iii Ie Browser Setting
Chapter III IE Browser Setting To view videos and images, you need to adjust the IE browser for the monitor or other video devices and set the corresponding system functions as per the prompts on the interface. Make sure the system has a browser in the version of Internet Explorer 6.0, 7.0, 8.0 or 9.0. -
Page 12: Chapter Iv System Settings
storage path. Default: C:\InfiPlayerAX\Picture. Chapter IV System Settings This chapter mainly introduces the system setting for V1492MR-T V1492MR-T series supports local recording. Click the recording megapixel IP PTZ camera system. button to start recording; when the button changes to , click it to stop recording. -
Page 13: System
4.2.3 Advanced Settings 4.2 System Click the navigation bar [System] and it displays the following three option tabs: System, Time and Advanced, as shown in Figure 4-3. 4.2.1 System Information The initial interface of System Settings displays related system information, such as basic information, network settings, alarm settings, NTP settings, H.264/MJPEG video settings. -
Page 14: Network Settings
Fig. 4-8 Fig. 4-12 After successful update, reboot the system which may take 90 seconds. Count-down interface appears during rebooting, as shown Click OK to restart the system which may take about 90 seconds. below: Then, it goes to a new webpage. Fig. -
Page 15: Ftp Settings
Authentication: Enable or disable authentication function. This function should be set according to authentication requirements of mail server. User name: Sender’s name, it can be set according user’s needs. Password: Set sender’s password. After setting, click “Set” Save to take effect. If user selects “mail”... -
Page 16: Igmp Settings
4.3.7 IGMP Settings 4.3.9 MDA Settings Fig. 4-21 IGMP Settings Fig. 4-23 MDA settings V1492MR-T series PTZ camera supports multicast function. In the In the MDA interface, users can set the server IP and the Port No. IGMP interface, users can select the stream type and set the state, multicast IP address and RTP port. -
Page 17: Camera Settings
4.4.1 V1492MR-20TH Camera Settings automatically adjusted as per the videos; in the Manual mode, For V1492MR-20TH series PTZ cameras, click “Camera” option horizontal and vertical sharpness can be adjusted to 0~63. tab to show the following interface. Camera parameters including ... -
Page 18: Audio & Video Settings
Special Functions and Comeback default can be set. virtual focus which brought by the infrared light. On/Off/Auto optional. 4.5 Audio & Video Settings Click the button “Audio Video” in the navigation bar to display the following interface. Fig. 4-28 Camera Settings Zoom: Set the Zoom speed, and Zoom in or out. -
Page 19: Osd
selected under H.264 major stream, the minor stream settings are OSD include: Titles, PTZ info and Date OSD. not available, and MJPEG can only set to 9fps. Please follow the Click the ON buttons and you can set the device title as well as its webpage prompt for settings. -
Page 20: Saving Path
Tick the box before Zone number. Click the button Draw with the including a~z, A~Z, 0~9, space and underline Then click “Set” mouse, and hold down the left mouse button and drag on the button to save the title. screen till a blue frame displays. Then, click the button “Save” Change the PTZ and lens position by clicking the direction with the left mouse button and the blue frame changes into green keys and lens function keys (iris, focus and zoom);... -
Page 21: Patterns
4.6.3 Patterns 4.6.5 Normal Tour Fig. 4-36 Patterns Select “Pattern” as shown in the figure above. Fig. 4-38 Normal Tour Select the pattern number required to be set (1~4); Click button to start pattern setting. Tour is a combination of different actions like Preset 1~32, Pattern Click the direction keys and zoom keys to perform a series of 1~4 and Autopan 1~4. -
Page 22: Ir Lamp
Power Set: Adjusting the power can change the IR lamp brightness prompts to confirm the center of privacy area. for different digital zoom level. When the ambient light is proper, Notice: the vertical angle shall be less than 70°. and with small digital zoom level, the power can be set at a low Step 4: get the PTZ camera to pan and tilt to set the area size. -
Page 23: Alarm Settings
setting completed, click “Save” button to take effect. Act Mode: Close/Once/Everyday/User-defined. Act Time: if the action mode is set to User-defined, you can set the Alarm Schedule period, such as Monday which indicates the action is performed V1492MR-T series can set the effective alarm schedule. Select the every Monday. -
Page 24: Replay
Add a User 4.9.2 Replay (1) Click “ ”, enter the interface of “Add a User”. Fig. 4-49 Add a User (2) Enter the desired User Name and Password (Note: User name and password shall include letter, number and underline only. No special character is allowed. -
Page 25: System Log
Chapter V PTZ Control & Functions 5.1 PTZ Control Click “PTZ Control” button to enter the PTZ control interface, as shown in Figure 5-1. Fig. 4-53 4.11 System Log Click “System Log” button, date, time and log information will appear on the right of the screen. Fig. -
Page 26: Ptz Function
5.2 PTZ Function Fig. 5-4 Dragging a Frame with Left Mouse Button Fig. 5-2 PTZ Function Click the option “PTZ Function” to enter the interface as shown in Fig. 5-2. You can call up the Preset, Autopan, Pattern and Normal Tour as well as AutoScan and normal tour. - Page 27 Fig. 5-6 In the state of “Area Zoom” and “Vector Dragging”, move the mouse wheel forward to zoom in the video and backward to zoom out. After the option “Turn On PTZ” ticked, click “Full Screen” for full screen display; to restore the video, uncheck the “Full Screen”. After unchecking “Turn On PTZ”, you can double click the left mouse button to display the video in the full-screen mode.
-
Page 28: Appendix I Dip Settings
Appendix I DIP Settings Camera ID and baud rate can be set via DIP switch. 254 address IDs can be set for PELCO-P/D and INFINOVA protocols. For DIP settings, Address ID = Value of DIP switch + 1 (OFF=0 ON=1). -
Page 29: Camera Id Setting
1. Camera ID Setting I=On, O=Off I=On, O=Off Switch Positions Switch Positions Camera ID Camera ID... -
Page 31: Baud Rate Settings
2. Baud Rate Settings Baud rate of the PTZ camera can be set via the 2 and 3 switches of the 8-pin DIP Switch S2; the 5 and 6 switches of S2 can be used for hardware resetting. Refer to the following table for specific setting: Pin of S2 DIP Switch Baud Rate 2400 BPS... -
Page 32: Appendix Ii Cable Diameter Calculation And Lightning & Surge Protection
Appendix II Cable Diameter Calculation and Lightning & Surge Protection Relation between 24VAC Cable Diameter and Transmission Distance In general, the maximum allowable voltage loss rate is 10% for AC-powered devices. The table below shows the relationship between transmission power and maximum transmission distance under a certain specified cable diameter, on condition that the 24VAC voltage loss rate is below 10%. - Page 33 Lightning & Surge Protection The product adopts multi-level anti-lightning and anti-surge technology integrated with gas discharge tube, power resistor and TVS tube. The powerful lightning and surge protection barrier effectively avoids product damage caused by various pulse signals with power below 4kV, including instantaneous lightning, surge and static. However, for complicated outdoor environment, refer to instruction below for lightning and surge protection: The product features with dedicated earth wire, which must be firmly grounded.
- Page 34 Infinova 51 Stouts Lane, Monmouth Junction, NJ 08852, U.S.A. Tel: 1-888-685-2002 (USA only) 1-732-355-9100 Fax: 1-732-355-9101 sales@infinova.com V1.4 1409...
Need help?
Do you have a question about the V1492MR-20TH and is the answer not in the manual?
Questions and answers