Advertisement
Quick Links
Advertisement

Related Manuals for D-MAX DCC-520D series


Summary of Contents for D-MAX DCC-520D series
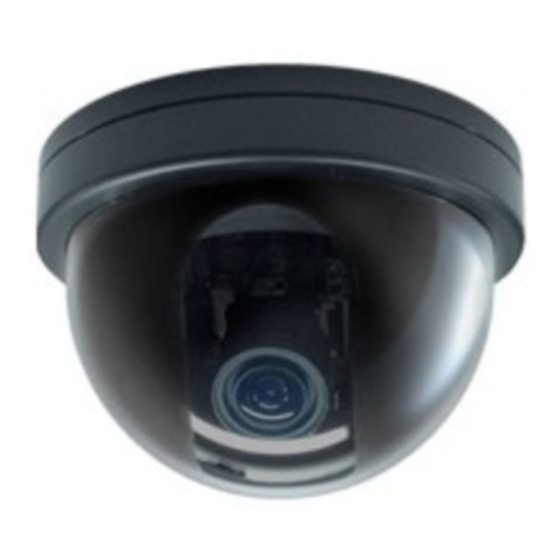
- Page 1 Color Dome Camera MANUAL 650 TVL...
- Page 2 The lightning flash with an arrowhead symbol, within an equilateral triangle is intended to alert the user to the presence of uninsulated dangerous voltage within the product's enclosure that may be of sufficient magnitude to constitute a risk of electric shock to persons. The exclamation point within an equilateral triangle is intended to alert the user to the presence of important operating and maintenance (servicing) instructions in the literature accompanying the appliance.
- Page 3 ■ Warning The camera needs periodic inspection. Contact an authorized technician for inspection. Stop using your camera when you find a malfunction. If you use your camera around smoke or unusual heat for a long time, fire may be caused. Do not Install the camera on a surface that can not support it.
- Page 4 ■ Precautions Only use the camera under conditions It can cause the image quality to be where temperatures are between poor. -10°C and +50°C. Be especially careful to provide ventilation when operating under high temperatures Severe lighting change or flicker can It is one of the most important parts of cause the camera to work improperly.
-
Page 5: Table Of Contents
■ Contents --------------------------------- 6 1.Features --------------------------------- 7 2. Cable Connection & OSD Control --------------------------------- 8 3. Setup Menu Operation --------------------------------- 18 4. Troubleshooting --------------------------------- 19 5. Dimensions --------------------------------- 20 6. Specifications... -
Page 6: Features
1. Features ☺Ultra High Resolution 650 TV Lines Clear image quality has been achieved by employing a SONY CCD with 410,000(effective) pixels, which provides a horizontal resolution of 620 TV lines. ☺Excellent Sensitivity The built-in high sensitivity COLOR CCD enable a clear image even in 0.1Lux (color), 0.00001Lux (Sens-Up) or lower illumination. -
Page 7: Cable Connection & Osd Control
2. Cable Connection & OSD Control 1) Cable Connection 2) OSD Control ① 3AXIS BRACKET - Please loosen screws and fix tilted and panned position. ③ LENS : Vari-Focal Auto Iris Lens ③ OSD PCB SETUP button : Used for the menu display. This button can be used to confirm settings after changing the value of the selected function or current conditions. -
Page 8: Setup Menu Operation
3. Setup Menu Operation 5. Setup Menu Operation •Please press the SETUP button to set OSD menu. The SETUP menu is displayed like under the picture on the monitor. SETUP LENS EXPOSURE WHITE BAL BACKLIGHT DAY& NIGHT COLOR SPECIAL RESET EXIT •... - Page 9 When the SETUP menu screen is displayed, select EXPOSURE by using the Up and Down buttons so that the indicates EXPOSURE. Select a desired mode using the UP and DOWN buttons. ① SHUTTER You can select either auto or manual shutter. •...
-
Page 10: White Balance
WHITE BALANCE SETUP LENS EXPOSURE WHITE BAL BACKLIGHT DAY& NIGHT COLOR SPECIAL RESET EXIT The screen color can be adjusted by using the WHITE BALANCE function. Please select the mode you wish to operate by pressing the LEFT or RIGHT button. ①ATW1: This automatically finds white color from color temperature between 2000~18,000°K. - Page 11 SETUP LENS EXPOSURE WHITE BAL BACKLIGHT DAY& NIGHT COLOR SPECIAL RESET EXIT ①OFF: Not being used ②BLC You have to select desired area from a picture to run BLC function in advance and then can see the area more clearly. •...
- Page 12 DAY & NIGHT SETUP LENS EXPOSURE WHITE BAL BACKLIGHT DAY &NIGHT COLOR SPECIAL RESET EXIT You can display pictures in color or black and white. When the SETUP menu screen is displayed, select ‘DAY/NIGHT’ by using the UP and DOWN buttons so that the arrow indicates “DAY NIGHT”. Please select the mode you wish to operate by pressing the LEFT or RIGHT button.
- Page 13 BURST IR SMART IR LEVEL RETURN • burst: If it cannot be synchronizing video on the monitor in the BW mode of camera, it turns on. (When the camera in B/W mode, the WHITE BALANCE is deactivated.) If DAY NIGHT mode is AUTO, the AGC is fixed HIGH. •IR SMART When the IR camera uses, this function can suppresses saturation of the picture that happens in the short distance from object.
- Page 14 SPECIAL Select ‘FUNCTION’ key from SETUP menu and press Set key to change ‘FUNCTION’ setup. SETUP LENS SPECIAL EXPOSURE CAM TITLE WHITE BAL MOTION BACKLIGHT PRIVACY DAY& NIGHT COLOR PARK LINE IMAGE ADJ. ↙ VERSION SPECIAL RETURN RESET EXIT ①CAM TITLE SETUP CAM TITLE MOTION...
- Page 15 • Please position the cursor above the letter you wish to correct, and then move the cursor on to the letter you wish to choose and press the SETUP button. - When a name has been chosen, please select a position for the name display. ▪...
- Page 16 ▶ ON: If ‘MOTION’ function is active, character of person is flickering on right above position when motion is detected on selected area. MOTION DETECTION Setting •AREA SEL: Select the programmed area. •AREA STATE: Turn on and off the programmed motion area. •...
- Page 17 ④IMAGE IMAGE ADJ. SPECIAL LENS SHAD CAM TITLE 2D DNR MOTION MIRROR PRIVACY FONT COLOR → PARK LINE CONTRAST IMAGE ADJ. ↙ SHARPNESS VERSION DISPLAY RETURN NEG. IMAGE RETURN - LENS SHAD. User ought to control lens shading at the areas of operating AGC because each lens has difference brightness.
- Page 18 ⑥RETURN Press this button to reverse previous screen RESET Be careful when this button press. If you press this button, all saved memory will be delete. EXIT Use this button to be out of menu and all you changed will be save automatically.
-
Page 19: Troubleshooting
Troubleshooting If there are problems in operation, please refer to the items below. If the problem persists, please contact the agent you purchased this product from Problems Troubleshooting • Please check the power connection. Nothing appears on the screen. • Please check the video signal line connection. •... -
Page 20: Dimensions
5. Dimensions... -
Page 21: Specifications
6. Specifications ▪ GENERAL Signal system NTSC Image Sensor 1/3” Sony HAD CCD Total Pixels 811(H)X508(V) 795(H)X596(V) Effective Pixels 768(H)X494(V) 752(H)X582(V) Resolution 650 TV lines (B/W : 700 TV Lines with ICR) Scanning Frequency 15.734KHz(H), 60(V) 15.625KHz(H), 50(V) Shutter Speed 1/60~1/100,000 sec 1/50~1/100,000 sec Min. - Page 22 Dome Type Install Type Indoor Indoor Indoor Outdoor(IP66) Outdoor(IP66) Dimension φ100(Bubble) x φ120(Bubble) x φ100(Bubble) x φ100(Bubble) x φ100(Bubble)x 76(H)mm 95(H)mm 103(H)mm 103(H)mm 107.5(H)mm 3 Axis 2 Axis 2 Axis 3Axis 3 Axis 3 Axis Material Plastic Body & Plastic Body & PC Bubble &...
Need help?
Do you have a question about the DCC-520D series and is the answer not in the manual?
Questions and answers