
Related Manuals for D-MAX DCC-520DV


Summary of Contents for D-MAX DCC-520DV
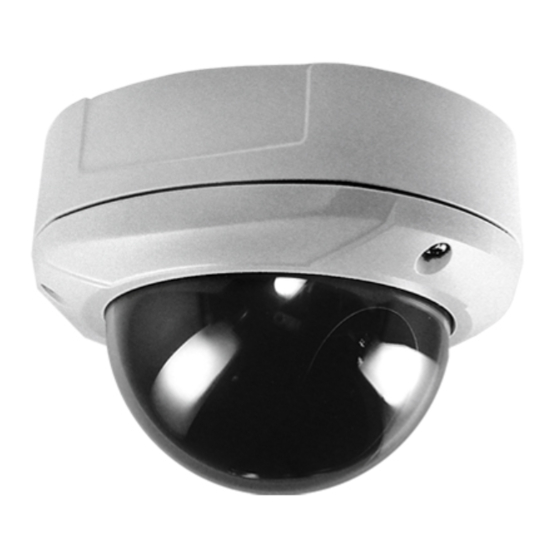
- Page 1 Digital Day & Night COLOR DOME CAMERA USER MANUAL DISTRIBUTED BY...
- Page 2 CAUTION RISK OF ELECTRIC SHOCK DO NOT OPEN CAUTION : TO REDUCE THE RISK OF ELECTRIC SHOCK, DO NOT REMOVE COVER(OR BACK), NO USER SERVICEABLE PARTS INSIDE. REFER WERVICING TO QUALIFIED SERVICE PERSONNEL. The lightning flash with an arrowhead symbol, within an equilateral triangle is intended to alert the user to the presence of uninsulated dangerous voltage within the product's enclosure that may be of sufficient magnitude to constitute a risk of electric shock to persons.
- Page 3 Warning The camera needs periodic inspection. Contact an authorized technician for inspection. Stop using your camera when you find a malfunction. If you use your camera around smoke or unusual heat for a long time, fire may be caused. Do not Install the camera on a surface that can not support it. Unless the surface is suitable, it could cause falling or other hazards.
- Page 4 Precautions Do not install or use the camera in Do not install the camera in an environment where the humidity extreme temperature conditions. is high Only use the camera under conditions where temperatures are between -10 It can cause the irnage quality to be and 50 .
- Page 5 Do not drop the camera or subject it Never keep the camera face to strong to physical shocks. light directly. It can cause malfunctions to occur. It can damage the CCD. Do not expose the camera to rain or Do not expose the camera to spill beverage on it.
-
Page 6: Table Of Contents
Contents 1. Features 2. Components & Cable Connection 3. Names and functions of parts 4. Installation & Dimension 5. Setup Menu Operation 6. Troubleshooting 7. Specification... -
Page 7: Features
1. Features Horizontal Resolution 520 TVLines Clear image quality has been achieved by employing a SONY CCD with 410,000 (effective) pixels, which provides a horizontal resolution of 520 TV lines. DAY & NIGHT This camera has a function that automatically selects the mode that is appropriate for daytime or night-time conditions. - Page 8 High Sensitivity The built-in high sensitivity SONY COLOR CCD enables a clear image even in 0.3Lux Controlled by OSD Menu The camera can be controlled by selecting text displayed on the monitor screen. Additional Functions MOTION DETECTION, MIRROR, SHARPNESS and SYNC (INT/LL) functions are also available.
-
Page 9: Components & Cable Connection
2. Components & Cable Connection 1) Components 1) COLOR DOME CAMERA 2) SCREWS 3) WRENCH 4) MANUAL 5) EXTRA PORT CABLE 2) Cable Connection POWER VIDEO D C only D C 12V D C I N D C I N... -
Page 10: Names And Functions Of Parts
3. Names and Functions of Parts 1) Names 2) Functions 3AXIS BRACKET - Please loosen screws and fix tilted and panned position. LENS : Vari-Focal Auto Iris Lens ( 4.0mm ~ 9.0mm / F1.5 ) OSD PCB - SETUP button : Used for the menu display. This button can be used to confirm settings after changing the value of the selected function or current conditions. -
Page 11: Installation & Dimension
4. Installation & Dimension 1) Installation RU BB ER BO TO TOM BASE BO LT H O U SING MO U NT N o.8-32 U N C DECOR ATI O N RING M 4*10 DOME COVER 2) Dimension 83.5 145. 0 (unit :... -
Page 12: Setup Menu Operation
5. Setup Menu Operation Please press the SETUP button Settings can now be made. The SETUP menu is displayed on the monitor. Green letter means, it has been selected. You may move up/down to another function by up/down buttons and change the status by pressing left/right buttons. Please select 'EXIT' and then press the SETUP button to finish the setting. - Page 13 Note If ' ' appears at the mode you wish to operate, it means that there is a sub-menu which can be selected by pressing the SETUP button. 1) LENS This function is used to adjust the brightness of the screen. Move to 'LENS' section of SETUP menu by up/down buttons.
- Page 14 MANUAL : Manual lens selection Please press the SETUP button if you wish to return to the previous menu Note 2) SHUTTER You can set up shutter speed here. Move to SHUTTER of the SETUP menu to change the setting by left/right key. Please select the SHUTTER FIXED mode by pressing the LEFT or RIGHT button.
- Page 15 MANUAL : Shutter Speed can be set more accurately from0~255 steps. If the value of SHUTTER M.' is larger, the shutter speed will get faster and slower if the value of 'SHUTTER M' is little. FLK : Please select 'FLK' mode when flickering occurs on the screen, due to an imbalance between illumination and frequency.
- Page 16 Please select the mode you wish to operate by pressing the LEFT or RIGHT button. - ATW(Auto Tracking White Balance) : This automatically finds white color from color temperature between 2000~18,000 K. - AWB(Auto White Balance Control) : The white balance is automatically adjusted in a specific environment.
- Page 17 and press the SETUP button. Please set the appropriate color temperature, and then increase or decrease the red and blue color values while monitoring the color changes on the object. Note 4) BLC (Back Light Compensation) When there is a strong backlight behind the object, clear images of the background as well as the object can still be obtained by using the BLC function.
- Page 18 Move and select to 'BLC' by up/down key. ON : BLC ratio can be set and you can have the camera BLC functioned only for the area of your desire. - BLC AREA : You can compensate backlight of areas you selectively want. Press SET key from 'BLC AREA' and selected screen will disappear.
- Page 19 ALL CLEAR : Cancel all selected area ALL SET : Select All area RETURN : Go back to setup page of BLC AREA EXIT : Save & Exit - BLC RATIO : Compensates Backlight at BLC ratio (0~63). OFF : BACKLIGHT function does not operate. BACKLIGHT ON BACKLIGHT OFF 5) AGC (Auto Gain Control)
- Page 20 As the level of gain increases, the screen gets brighter and the level of noise also increases. - ON : If 'ON' is selected you may regulate GAIN value manually. Note 6) FUNCTION Select 'FUNCTION' key from SETUP menu and press Set key to change 'FUNCTION' setup.
- Page 21 - Choose 'ON' from CAMERA ID' and press SET button to move to ID SETUP menu. (1) Press SET button in 'CAMERA ID' to change CAMERA ID. (2) If it changes into ID setup status, the character with cursor can be altered. - Press up/down button for change of characters, left/right to move to.
- Page 22 button. (3) POSITION - If you press SET button on 'POSITION' section you can set the place on the screen for CAMERA ID(with up/down, left/right key). (4) If the position of CAMERA ID is completed, press SETUP key to move to previous menu.
- Page 23 COLOR : Color mode. AUTO : This camera has a function which automatically changes to the appropriate mode for daytime or night-time. The COLOR mode is operated for daytime, and it converts to B/W mode for night-time. DELAY : In case color mode changes into B/W mode or the opposite, you can set the DELAY time(seconds) which automatically converts.
- Page 24 GAMMA GAMMA level can be set by using left/right key at 'GAMMA' section. Range : User, 0.05~1 MOTION Motion detection function allows more effective observation. When any movement is detected, signal is generated. Select 'MOTION' from SETUP menu by pressing up/down key and it can be turned ON/OFF with left/right button.
- Page 25 AREA : If SET button is pressed in 'AREA' section, you can select area that will detect motion. How to set up& cancel motion detected area is the same as on page No. 20 MOTION TH : Motion sensitivity from selected area can be set up by adjusting level of MOTION THRESHOLD.
- Page 26 AREA SEL: Choose one among 0~3 from 'AREA SEL' and you can set up ON/OFF status, size, color from below section. AREA STATE: Select ON/OFF by using left/right button and let selected 'AREA' above activate or disable. Adjust Size: With 'LEFT, RIGHT, TOP, BOTTOM' on the screen you can adjust size of 'AREA SEL'.
- Page 27 ON : Sets a horizontal image inversion / OFF : Cancels the inversion. LANGUAGE: English, Korean, Chinese1, Chinese2, Japanese are supported. RESET : Status of setup value would be all RESET(default value). Press SET button at RESET section and RESET menu will appear on the screen. - YES : Status of the camera will return to default value.
- Page 28 Note RETURN : Saves the FUNCTION menu and returns to the SETUP menu. 7) ADJUST If you select 'ADJUST' you can adjust Contrast, Sharpness, Color. - CONTRAST : You can adjust brightness contrast here. - SHARPNESS : Sharpness (distinction) of video can be adjusted. - CB_CR_GAIN : By adjusting CB_GAIN, CR_GAIN you can also adjust Color Saturation.
-
Page 29: Troubleshooting
7. Troubleshooting If there are problems in operation, please refer to the items below. If the problem persists, please contact the agent you purchased this product from. Problems Troubleshooting Please check the power connection. Nothing appears on the Please check the video signal line connection. screen. - Page 30 Problems Troubleshooting Please check if the camera is facing directly the sunlight or fluorescent light. The screen is flickering. Please check if an auto iris lens is being used. Please check the connection of the lens connector cable. COLOR mode is not Please check if the AGC menu is set to the OFF position.
-
Page 31: Specification
8. Specifications SIGNAL SYSTEM NTSC TOTAL / EFFECTIVE PIXEL 410K / 380K Pixels 470K / 440K Pixels IMAGE SENSOR 1/3" SONY interline transfer CCD HORIZONTAL RESOLUTION 540 TV Line MINIMUM ILLUMINATION 0.3 Lux /F 1.2 DAY & NIGHT ON / AUTO Available 2.9 ~ 10mm LENS...
Need help?
Do you have a question about the DCC-520DV and is the answer not in the manual?
Questions and answers