Table of Contents
Advertisement
Quick Links
Download this manual
See also:
Repair Manual
SPORTSART
TABLE OF CONTENTS
1. INTRODUCTION....................................................................................................
2. IMPORTANT SAFETY PRECAUTIONS ...............................................................
List of Parts............................................................................................................
Step-by-step Instructions.......................................................................................
Display Features.....................................................................................................
Display Functions...................................................................................................
Button Functions.....................................................................................................
Quick Start.............................................................................................................
Workout Setup.......................................................................................................
Cool Down.............................................................................................................
Manual ..................................................................................................................
Random.................................................................................................................
Interval (1:1, 1:2, 2:2)............................................................................................
Fat Burn................................................................................................................
Plateau..................................................................................................................
Wt Loss/Cardio/Custom HR..................................................................................
Fit Test ..................................................................................................................
7. USER PARAMETER SETTING............................................................................
8. AUTOMATIC CHANNEL SCAN............................................................................
9. MAINTAINING THE BIKE.......................................................................................
How long should I exercise .................................................................................
How often should I exercise.................................................................................
11. TROUBLESHOOTING.........................................................................................
12. Wiring Schematic..................................................................................................
C580R COMMERCIAL BIKE
1
2
4
6
23
23
25
27
27
28
29
29
29
29
29
30
30
31
31
32
32
32
33
34
Advertisement
Table of Contents

Related Manuals for SportsArt Fitness C580R


Summary of Contents for SportsArt Fitness C580R
-
Page 1: Table Of Contents
SPORTSART C580R COMMERCIAL BIKE TABLE OF CONTENTS 1. INTRODUCTION....................2. IMPORTANT SAFETY PRECAUTIONS ............... 3. ASSEMBLING YOUR BIKE List of Parts......................Step-by-step Instructions..................4. UNDERSTANDING THE DISPLAY CONSOLE Display Features..................... Display Functions....................Button Functions..................... 5. HOW TO OPERATE YOUR BIKE Quick Start...................... -
Page 2: Introduction
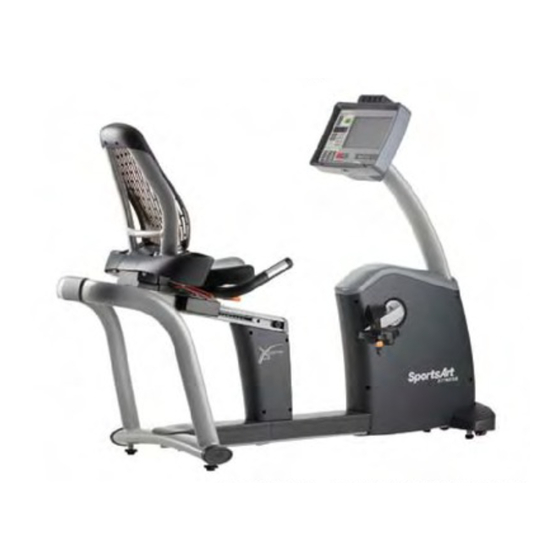
Congratulations on purchasing one of the finest pieces of commercial grade exercise equipment on the market today, the SportsArt C580R Recumbent Bike. Constructed of high quality materials and designed for years of trouble-free usage, the C580R will be an integral part of your fitness regimen. -
Page 3: Important Safety Precautions
Your SportsArt bike was designed and built for optimum safety. However, certain precautions apply whenever you use your bike. Please read the entire manual before assembly and operation. Also, please note the following safety precautions: IMPORTANT SAFETY PRECAUTIONS Please read and observe the following safety guidelines: Keep this owner's manual for future use and reference. - Page 4 •The weight limit for this bike is 150 kgs (330 lbs). CAUTION Before beginning any exercise program, you should consult with your doctor. It is recommended that you undergo a complete physical examination.
-
Page 5: Assembling Your Bike
ASSEMBLING YOUR BIKE INSTALLATION REQUIREMENTS: Thank you for purchasing our product. Even though we go to great efforts to ensure the quality of each product, occasional errors and/or omissions do occur. Please contact your dealer if you find this product to be defective or missing a part. Please read this owner's manual and follow the instructions. - Page 6 Please see the part illustrations below: 1. Main Frame 2. Rear Frame 3. Seat Tube 4. Handlebar 5. Seat 6. Seat Back 7. Electronic Display & Post 8. Pedals 9. Rear Frame Cover 10. Seat Post Cover (Right) 11. Seat Post Cover (Left) 12.
-
Page 7: Step-By-Step Instructions
STEP-BY-STEP INSTRUCTIONS Rear Frame Seat Tube Main Frame 60 mm Card Board Before assembling the Rear Frame and the Seat Tube, find two pieces of card boards from the packaging material and stack them together. Place the card boards underneath the Main Frame so that it leaves a 60mm space to the ground. - Page 8 FRAME ASSEMBLY Rear Frame Main Prame STEP 1. Remove screws and washers from the main frame. Assemble the rear frame (part #2) onto the main frame (part #1). See Fig. 1. Fig.1 STEP 2. Loosely secure the screws and washers as shown in Fig. 2. At this moment, do NOT tighten this hardware fully.
- Page 9 SEAT TUBE ASSEMBLY Seat Tube Rear Frame Main Frame STEP 1. Assemble the Seat Tube (part #3) onto the Rear Frame (part #2). See Fig. Fig.3 STEP 2. Four sets of screws and washers are provided to secure the seat tube to the rear frame.
- Page 10 STEP 3. Place the Seat Tube on the Seat Post. Lightly secure screws and washers as illustrated below. Do NOT fully tighten the hardware. Leave it somewhat loose. See Fig. 5. Fig.5 STEP 4. When screws at A, B, and C locations are in place loosely, pull the rear frame (part #2) backward away from the front of the bike.
- Page 11 STEP 5. Plug the power cord connector into the socket as shown in Fig. 7. Fig.7...
- Page 12 HANDLEBAR ASSEMBLY Handlebar Main Frame STEP 1. Place the Handlebar (part #4) on the Seat Tube (part #3). When the four screw holes align, secure them in the order shown in part A of Fig. 8. screw spring washer flat washer Fig.8...
- Page 13 STEP 2. Pull the cable plugs through the gap and connect them into the sockets on the frame. Fig.9 STEP 3. Connect cables as shown in Fig. 10. Fig.10...
- Page 14 SEAT ASSEMBLY Seat Seat Tube Main Frame Place the Seat (part #5) on top of the Seat Tube (part #3). When the four screw holes align, tighten the four sets of screws and washers from the bottom upward as shown in Fig. 11. Fig.11...
- Page 15 SEAT BACK ASSEMBLY Seat Back Seat Tube Main Frame STEP 1. Turn the screw covers (shown as A) aside and place the Seat Back (part #6) above the Seat Tube (part #3). When the four screw holes align, secure the four sets of screws and washers.
- Page 16 STEP 2. Turn screw covers back in place to cover the screws. See Fig. 13. Fig.13...
- Page 17 ELECTRONIC DISPLAY & PEDESTAL ASSEMBLY Electronic Display & Pedestal Main Frame STEP 1. Connect all data cables in the pedestal (part #7) as shown in Fig. 14. Fig.14...
- Page 18 STEP 2. Assemble the Display Pedestal (part #7) onto the Main Frame. Loosely secure screw B in place but do not fully tighten it; Loosely secure screws C in place but do not fully tighten them yet. Finally, tighten all screws (first B, then C) to secure the Display Pedestal.
- Page 19 PEDAL ASSEMBLY Assemble both pedals onto cranks and tighten them with the wrench provided. See Fig. 16. Note that pedals are side-specific. The left pedal threads counterclockwise. The right pedal threads clockwise. Right and left are defined as the exerciser's right and left sides.
- Page 20 COVER INSTALLATION Rear Frame Cover Post cover L Post cover R Main Frame STEP 1. Assemble the Rear Frame Cover (part #9) onto the Main Frame (part #1) as shown in Fig. 17. Fig.17...
- Page 21 Secure them with screws in both sides as shown in Fig. 18. Fig.18 STEP 2. Assemble the Right Seat Post Cover (part #10) and Left Seat Post Cover (part #11) onto the Main Frame. See Fig. 19. Fig.19 Secure both covers with the four screws provided. Screw in from the right hand side. See Fig.
- Page 22 Determine the type of Cable TV system used in your area. An NTSC system socket is built into SportsArt products. For areas where a PAL or a SECAM System is used, please find the "NTSC to PAL/SECAM Adapter" in the Tool Kit.
- Page 23 To operate Cardio Theater, connect cardio theater devices to the RJ45 socket on the left side of the display. See Fig. 23. Cardio Theater Fig.23 CSAFE CONNECTION Connect CSAFE applications to the RJ45 sockets shown in Fig. 21. The C580R Bike is now assembled and ready for use.
-
Page 24: Understanding The Display Console
UNDERSTANDING THE C580R DISPLAY CONSOLE Display Features Setting Panel Information Feedback / Video Programs Multimedia Buttons Display Functions: 1. WORK LEVEL (level of resistance): 1 to 20 2. TIME (total time accumulated): 0:00 to 99:59 3. DISTANCE (total distance accumulated): 0.01 to 9999 Km or Miles 4. - Page 25 8. WT LOSS TRAINING ZONE: this value is automatically calculated and depends on the age input. 9. CARDIO TRAINING ZONE: this value is automatically calculated and depends on the age input. 10. RPM (revolutions per minute): 0 to 250 11. WATTS (total watts already worked out): 0 to 9999 12.
-
Page 26: Button Functions
Button Functions: 1. QUICK START: press Quick Start to bypass User, Age, Weight inputs, and Program selection. Time will count up. 2. TIME: press this button to establish a workout goal based on time. 3. DISTANCE: press this button to establish a workout goal based on distance. 4. - Page 27 13. FAN: press this button to adjust the FAN to one of three different speeds. 14. SOURCE: press SOURCE to switch to different screens (WORKOUT/Cable TV/AV). 15. FULL/ SPLIT: (1) When a Cable TV program is showing, press this button to choose between seeing a full or a divided screen with embedded workout information.
-
Page 28: How To Operate Your Bike
HOW TO OPERATE YOUR C580R BIKE Once you power up the bike, QUICKSTART and all PROGRAM LEDS will blink. You can select a PROGRAM or press QUICKSTART to start your workout. QUICK START If you begin a workout via QUICK START, the bike will start at resistance level one. -
Page 29: Cool Down
You have now established user settings. Start pedaling to begin your workout. You may change your selection of programs anytime during the workout. The new program will be used to achieve the remaining Workout Goal. The goal value remains on the control panel for reference during the workout. COOL DOWN Once a workout goal is completed, a message "ACCU DATA"... -
Page 30: Programs
OVERVIEW OF PROGRAMS MANUAL This program allows you to adjust the level of resistance manually by pressing WORKOUT LEVEL keys. ▲ ▼ RANDOM Random program has an infinite number of programs. Continue to press this button until you find your preferred course. INTERVAL (1:1, 1:2, 2:2) The INTERVAL program provides three sets of time and resistance level combinations: 1:1, 1:2, and 2:2. -
Page 31: Wt Loss/Cardio/Custom Hr
WT LOSS / CARDIO / CUSTOM HR These programs change the resistance level to achieve desired heart rate targets: 1. Target Heart Rates: WT LOSS: 65% Heartrate Control = (220 AGE)* 65 % CARDIO: 80% Heartrate Control = (220 AGE)* 80 %... -
Page 32: User Parameter Setting
USER PARAMETER SETTING To check system default settings, at initial setting stage (select PROGRAM or QUICK START) press the "Source" key to see the Information Feedback panel on the screen. Hold the ENTER key for 3 seconds: 1) Unit of Speed (MPH or KPH): press keys to change the setting. -
Page 33: Maintaining The Bike
MAINTAINING THE C580R BIKE The Sports Art C580R requires little maintenance but regular cleaning is recommended to keep your bike at peak performance. Before your workout, use a dry cloth to clean the surface of the display. NOTE: NEVER POUR LIQUIDS ON THE DISPLAY. -
Page 34: Troubleshooting
TROUBLESHOOTING 1. Video programs do not appear on the screen: (1) Please check if a video device is well connected according to page 21 and 22. For Cable TV connection, the connecter on our product is built to NTSC system specifications. -
Page 35: Wiring Schematic
Appendix: Wiring Schematic: TV Signal AV Signal Board Cardio Board C580 CTL Board 10.2" TFT Panel Driver Board Board HeadPhone Magnet Power Transformer Speed C580 DRV Board Sensor Power Fuse Power Socket Holder Switch Bridge HandTouch (L) AC INPUT Board HandTouch (R) Your Authorized SPORTS ART Distributor...
Need help?
Do you have a question about the C580R and is the answer not in the manual?
Questions and answers