Table of Contents
Advertisement
Advertisement
Table of Contents

Subscribe to Our Youtube Channel
Related Manuals for SportsArt Fitness C53u


Summary of Contents for SportsArt Fitness C53u
- Page 1 PDF created with FinePrint pdfFactory Pro trial version http://www.pdffactory.com...
-
Page 2: Table Of Contents
SPORTSART C53U UPRIGHT CYCLE TABLE OF CONTENTS A. SAFETY GUIDELINES..................B. INTRODUCTION....................C. ASSEMBLING YOUR CYCLE................Installation requirements..................List of parts......................Step-by-step instructions..................Floor level adjustment..................Seat adjustment....................D. EXERCISING ON YOUR CYCLE ................ Understanding the electronics package............... Electronic display.................... -
Page 3: Safety Guidelines
PDF created with pdfFactory trial version www.pdffactory.com... -
Page 4: Introduction
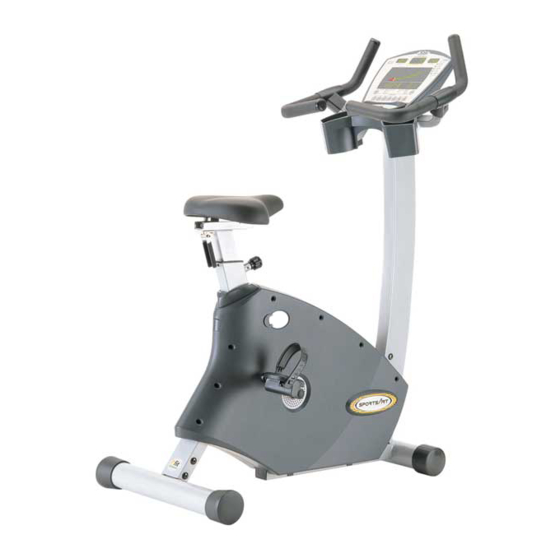
Congratulations on the purchase of one of the finest pieces of exercise equipment on the market, the SportsArt C53U. Constructed of high quality materials and designed for years of trouble free usage, the C53U will be an integral part of your fitness regimen. -
Page 5: Assembling Your Cycle
C. ASSEMBLING YOUR CYCLE INSTALLATION REQUIREMENTS: Read this owner's manual and follow the instructions contained herein. Important: The packaging for this unit was designed to protect it during shipment. Please store the original packaging in a safe place in case you need to ship the unit in the future. -
Page 6: Step-By-Step Instructions
STEP-BY-STEP INSTRUCTIONS: When you remove the cycle from its box, first check to make sure all of the parts are present. Then, read the assembly instructions thoroughly before you begin. 1. Take out the cycle frame and make sure all packing materials are removed from the unit. - Page 7 5. Attach the rear cross frame to the main frame, and fasten the bolts. (See Fig. 3) Fig.3 6. Connect the ribbon cable into the socket, and fasten the upright post with its bolts. (See Fig. 4) Fig.4 Note: 1. When connecting upright post to main frame, please make sure that ribbon cable is free from it.
- Page 8 7. Note that pedals are marked "R" for right and "L" for left. (The bike's right side is your right side as you sit riding the unit.) Pedals should be installed on the crank arms. Install pedals on the correct side of the bike. Tighten the left pedal by turning counterclockwise.
-
Page 9: Floor Level Adjustment
FLOOR LEVEL ADJUSTMENT: Adjust the rear adjustment wheels to steady the bike. (See Fig. 7) Fig.7 PDF created with pdfFactory trial version www.pdffactory.com • •... -
Page 10: Seat Adjustment
SEAT ADJUSTMENT: Raise seat position: Turn height adjustment knob (A) counterclockwise until it is loose, then raise seat height to the desired position. Tighten the knob into position to secure the seat. (See Fig. 8) Fig.8 Lower seat position: Turn height adjustment knob (A) counterclockwise until it is loose, then pull out the knob to lower seat height to the desired position. - Page 11 Raise seat position adjustment lever to loosen the seat. Adjust seat to the desired position; then press down the lever to fix the seat. (See Fig. 10) Fig.10 Your C53U cycle is assembled and ready to use. PDF created with pdfFactory trial version www.pdffactory.com...
-
Page 12: Exercising On Your Cycle
D. EXERCISING ON YOUR CYCLE Understanding the Electronics Package ELECTRONIC DISPLAY: PDF created with pdfFactory trial version www.pdffactory.com • •... -
Page 13: Terminology
1. Weight Loss (65% HR Target): Using age as a factor, the Personal Cardio Advisor automatically calculates your optimal heart rate for weight loss. The optimal weight loss target heart rate is 65% of the maximum workout heart rate for your age. -
Page 14: Display Function
F. RPM: Revolutions per minute. – G. SCAN left: Displays TIME, RESISTANCE LEVEL, WATTS in a 4 seconds interval. – H. SCAN right: Displays DISTANCE, CAL, SPEED, RPM in a 4 seconds interval. Display Function – A. MODE left side button: Press to choose information modes: TIME, RESISTANCE LEVEL, METS, WATTS, SCAN. -
Page 15: Basic Operation
Basic Operation 1. Power up the bike: Turn on the unit by pressing START or by pedaling (speed must be over 30RPM). The "C53" banner message appears, then "USER" appears within 1 second. 2. Select USER: 2-1: The USER indicator flashes and a starting number "1" (means USER 1) ▲... - Page 16 3-2: Select the second letter or number: The chosen first letter or number moves to the left, and again letters A~Z and number 0~9 appear. Choose the second letter or number as indicated in 3-1. Note: USER ID settings consist of 2 figures only. 4.
- Page 17 7. Select PROGRAM: 7-1: All PROGRAM indicators flash. The message "SELECT PROGRAM OR PRESS START" scrolls across the dot matrix display window. (1) Press the desired program to begin your workout. (2) Or Press START to return the "Select USER" section. 7-2: If you press QUICK START, the unit assumes you are a new user.
-
Page 18: System Default Setting
SYSTEM DEFAULT SETTING 1. Display Accumulated Distance: ▼ ▲ In the USER section (before pressing any key), press + ENTER simultaneously for 3 seconds, Window 1 & 2 display the total accumulated distance, a 6-digit figure. The DISTANCE indicator eights up. After that if you press ENTER, the TIME indicator lights up. -
Page 19: Programs
E. PROGRAMS 1. MANUAL Program: 1-1: Press MANUAL to enter this mode. The dot matrix window shows the following: USER AGE □ □ □ □ □ □ □ □ □ □ □ □ □ □ □ □ □ □ □ □ □... -
Page 20: Custom Program
▲▼ 1-3: Press RESISTANCE LEVEL to adjust resistance at anytime during the workout. The height of the dots represents the resistance level: The higher the dots, the greater the resistance. The height of the dots automatically changes when resistance settings are changed. 1-4: The Orange dot(s) flashes and lasts for 20 seconds, then moves to the left as the workout progresses. -
Page 21: Hill Program
3. HILL Program: 3-1: There are 3 different HILL workouts. Press HILL to select the desired workout → → pattern: HILL 1 HILL 2` HILL 3. 3-2: The resistance level profiles of HILL patterns follow: HILL 1: 2_4_6_8_6_4_2_4_6_8_6_4 HILL 2: 2_8_4_8_6_8_6_8_4_8_2_8 HILL 3: 2_4_6_8_10_12_14_12_10_8_6_4 ▲▼... -
Page 22: Int2 Program
5-2: Press INT 1. The dot matrix window displays the following: USER □ □ □ □ □ □ □ □ □ □ □ □ □ □ □ □ □ □ □ □ □ □ □ □ □ □ □ □ □ □ □ □ □ □ □ □... -
Page 23: Plateau Program
6-2: Press INT 2. The dot matrix window displays the following: USER □ □ □ □ □ □ □ □ □ □ □ □ □ □ □ □ □ □ □ □ □ □ □ □ □ □ □ □ □ □ □ □ □ □ □ □... -
Page 24: Wt Loss (Hrc 65%) / Cardio (Hrc 80%) Programs
PDF created with pdfFactory trial version www.pdffactory.com... -
Page 25: Cool Down Mode
2. Suggested RPM (red flashing dot): represents user's suggested revolutions per minute. 3. Current RPM: represents user's current revolutions per minute. 4. Target Heart Rate: represents user's target heart rate. (b) If the MODIFY setting is "YES", the figure of the target heart rate will ▲... -
Page 26: Power Standby Mode
9-2: "GOING TO COOL DOWN" appears once on the dot matrix window, then the unit reverts to RESISTANCE LEVEL mode. The resistance decreases one level every 10 seconds. 9-3: When COOL DOWN mode ends, the display beeps once and "SELECT PROGRAM OR PRESS START"... -
Page 27: Importance Notice
IMPORTANT NOTICE 1. This cycle can record user settings for 4 users. Recorded settings include USER ID, accumulated distance, age, weight, INT1, INT2, and last workout program. (No data enters memory in QUICK START mode.) The settings ranges follow: (a) USER ID: 2 figures (b) Accumulative distance: 4 figures (c) Age: 2 figures (d) Weight: 3 figures... -
Page 28: Maintaining C53U Cycle
The SportsArt C53U cycle requires little maintenance, but smooth operation requires that the unit be kept as clean as possible. Regular cleaning is recommended to keep your C53U at peak performance. Before your workout, use a dry cloth to clean the surface of the electronics package.
Need help?
Do you have a question about the C53u and is the answer not in the manual?
Questions and answers