Table of Contents
Advertisement
Advertisement
Table of Contents

Subscribe to Our Youtube Channel
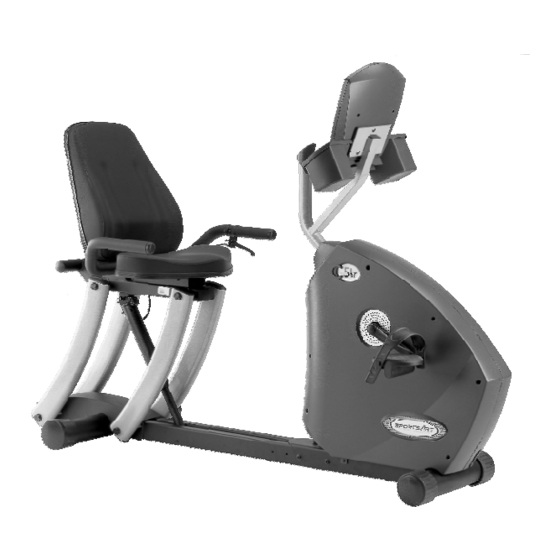
Summary of Contents for SportsArt Fitness C51r
- Page 1 PDF created with FinePrint pdfFactory Pro trial version http://www.pdffactory.com...
-
Page 2: Table Of Contents
SPORTSART C51R RECUMBENT BIKE TABLE OF CONTENTS A. SAFETY GUIDELINES..................B. INTRODUCTION....................C. ASSEMBLING YOUR CYCLE................Installation requirements..................List of parts......................Step-by-step instructions..................Product length adjustment.................. Floor level adjustment..................Seat movement....................D. EXERCISING ON YOUR CYCLE................ Understanding the electronics package............... -
Page 3: Safety Guidelines
A. SAFETY GUIDELINES Please read and observe the following safety guidelines: • Keep this owner's manual for future use and reference. • Read this owner's manual and follow the instructions. • Assemble and operate the bike on a solid, level surface. •... -
Page 4: Introduction
SportsArt C51R. Constructed of high quality materials and designed for years of trouble free usage, the C51R will be an integral part of your fitness regimen. Before using your C51R cycle, we recommend that you familiarize yourself with this Owner's Manual. -
Page 5: Assembling Your Cycle
C. ASSEMBLING YOUR CYCLE INSTALLATION REQUIREMENTS: Read this owner's manual and follow the instructions contained herein. Important: The packaging for this unit was designed to protect it during shipment. Please store the original packaging in a safe place in case you need to ship the unit in the future. -
Page 6: Step-By-Step Instructions
STEP-BY-STEP INSTRUCTIONS: When you remove the bike from its box, first check to make sure all of the parts are present. Then, read the assembly instructions thoroughly before you begin. 1. Take out the cycle frame and make sure all packing materials are removed from the unit. - Page 7 5. Connect the ribbon cables. (See Fig.3) FIG.3 There are there screws to fix the electronic display post. Please secure the middle screw first that is on the top of the electronic display post. Please align the upright post before you tighten this middle screw. Then secure other two side screws. This step will help center the upright post.
- Page 8 There is a small hole on the top of the big cover. Click the electronics display post cap onto the big cover. (See Fig.5) FIG.5 6. Insert seat back support tube into seat bracket, then fasten with 4 sets of washers and screws.
- Page 9 Place seat back onto support tube and use 4 sets of washers and screws to secure the seat back. (See Fig.7) FIG.7 7. Place handlebars onto seat base support frame. Use 3 sets of washers and screws to tighten handlebars. (See Fig. 8) FIG.8 PDF created with pdfFactory trial version www.pdffactory.com...
- Page 10 Attach seat base in the position shown below, then tighten the seat with the 4 sets of washers and screws. (See Fig.9) FIG.9 8. Attach the seat adjustment handle to the left side of handlebars, then tighten it down using by 2 screws turned clockwise direction. (See Fig. 10) FIG.10 PDF created with pdfFactory trial version www.pdffactory.com...
-
Page 11: Product Length Adjustment
PDF created with pdfFactory trial version www.pdffactory.com... - Page 12 4. Adjust the front unit forward or backward to the appropriate screw hole to meet your body size. Move in direction A for a longer stride length. Move in direction B for a shorter length. Note: This product is shipped at the shortest stride length location. (See Fig.14) FIG.14 5.
-
Page 13: Floor Level Adjustment
Move to the back: One hand presses on the seat adjustment handle and push the seat slides back. (See Fig.18) FIG.18 Your C51R cycle is assembled and ready to use. PDF created with pdfFactory trial version www.pdffactory.com •... -
Page 14: Exercising On Your Cycle
D. EXERCISING ON YOUR CYCLE: Understanding the Electronics Package Electronic Display (See Fig. 19) FIG.19 1. Dot matrix display: Provides information & program status. 2. Display information windows: Left window - TIME, RESISTANCE LEVEL, WATTS, HR (optional). Right window - DISTANCE, CAL, SPEED, RPM. -
Page 15: Display Function
Terminology A. TIME: Displays total time accumulated or time remaining in a preprogrammed workout. B. HR: Displays heart rate (Optional). C. WATTS: Measures exertion level in WATTS. D. DISTANCE: Displays total miles or kilometers. E. CAL: Displays overall Calories burnt during workout. F. -
Page 16: Basic Operation
F. PAUSE/RESET: (1) Pause: Press the button and stop pedaling to hold any program and information. The dot matrix display will stop flashing and all accumulative data will remain displayed. (2) Reset: Press and hold the button for 6 seconds. All data will reset and the display will return to Banner mode. -
Page 17: Programs
Note 2: Electronic display will provide the last record of same user's weight, workout time and workout mode once user number is selected. 3-2: Press ENTER to select desired USER ID. 4. Select WEIGHT ▲▼ button to select your weight and press ENTER to input your data. 5. -
Page 18: Random Program
PDF created with pdfFactory trial version www.pdffactory.com... -
Page 19: Int2 Program
INT 2 Program There are two sections within this program, one minute for first section and two minutes for second section. Each of these segments is preset at a particular resistance level. However you retain the ability to adjust the resistance at anytime. Press the INT 2 button to select this program. -
Page 20: Maintaining C51R Cycle
The SportsArt C51R cycle requires little maintenance, but smooth operation requires that the unit be kept as clean as possible. Regular cleaning is recommended to keep your C51R at peak performance. Before your workout, use a dry cloth to clean the surface of the electronics package.


Need help?
Do you have a question about the C51r and is the answer not in the manual?
Questions and answers